 Unity短片Sherman:高级动画与实时毛发技术


 Sherman是一部展示最先进实时毛皮技术的Unity短片,由Baymax Dreams团队创作。文章探讨了使用Alembic进行高级动画、线性内容的照明策略、实时毛发处理和电影级运动模糊。团队还面临文件大小、附加对象和材料管理的挑战。此外,介绍了Unity的渲染窗口和录音机功能,以支持高质量的动画制作。

bfgs sherman
Created by the Emmy-winning team that brought you Baymax Dreams, Sherman is a new real time Unity short that delivers the most advanced real time fur ever!
Sherman由艾美奖获奖团队创建,为您带来了Baymax Dreams,是一款新型实时Unity短裤,可提供有史以来最先进的实时毛皮!
My name is Mike Wuetherick, and I am the Head of Tech for Unity’s Media and Entertainment Innovation Group. Shortly after joining Unity 3 years ago, I helped found an Innovation team dedicated to pushing Unity’s capabilities for CG Animation and Film. Since then, our team has had the pleasure of collaborating with Neill Blomkamp’s Oats Studios (Adam Episode 2 & 3), with Neth Nom on Sonder, and most recently the Baymax Dreams shorts with Disney Television & Animation.
我叫Mike Wuetherick,我是Unity媒体与娱乐创新小组的技术主管。 3年前加入Unity之后不久,我帮助成立了一个创新团队,致力于推动Unity在CG动画和电影方面的能力。 从那时起,我们的团队一直很高兴与Neill Blomkamp的Oats Studios(亚当第2和第3集),Neth Nom在Sonder上进行合作,最近与Baymax Dreams短裤与迪士尼电视动画公司合作。
This is the second part of our blog series about Sherman. Make sure to check out Part 1, where we talk about the creation, animation blocking, lookdev and camera layout for the short.
这是我们有关谢尔曼的博客系列的第二部分。 确保检查一下第1部分 ,在该部分中我们讨论了短片的创建,动画阻止,lookdev和摄影机布局。
目录,第2部分 (Table of Contents, Part 2)
7. Advanced animation with Alembic 8. Lighting strategies for Linear Content 9. Fur & VFX 10. Filmic Motion Blur / Super Sampling 11. Unity Recorder
7.使用Alembic制作的高级动画8.线性内容的照明策略9. Fur和VFX 10.电影运动模糊/超级采样11. Unity记录器
Alembic的高级动画 (Advanced animation with Alembic)
For the Baymax Dreams shorts, the team used the FBX file format as the primary format for transferring assets from Maya into Unity. Transferring data between DCC packages is always a challenge – exporting your content from a source format (say, Maya) to an external format is a lossy one by its very nature – however, there are advantages and disadvantages of working with the formats that are available.
对于Baymax Dreams短裤,团队使用FBX文件格式作为将资产从Maya传输到Unity的主要格式。 在DCC软件包之间传输数据始终是一个挑战-从其本质上将内容从源格式(例如Maya)导出到外部格式是有损的-但是,使用可用格式存在优缺点。
FBX is the typical format used by most projects in Unity, with a well-defined, optimized workflow. Using traditional bone-based animation with FBX is how animation in the vast majority of Unity projects is created, however, there are also limitations to this technique.
FBX是Unity中大多数项目使用的典型格式,具有定义明确的优化工作流程。 如何在FBX中使用传统的基于骨骼的动画来创建动画,这是绝大多数Unity项目中动画的创建方式,但是,此技术也有局限性。
Bone skin weighting limitation (prior to Unity 2019.1)
骨骼皮肤权重限制(Unity 2019.1之前)
Scale Compensation (for squash & stretch)
比例补偿(壁球和拉伸)
Skin Weighting
皮肤加权
In Unity 2018.3 (and prior), Unity can weight each vertex with up to 4 bones, which makes advanced skin weighting much more complicated and problematic. This limitation has been removed in Unity 2019.1 (which supports up to 256 bones per vertex), however, 19.1 was still in early Alpha during the development of the short, so we made the decision to stick with the 18.3 version for the Sherman production.
在Unity 2018.3(及更低版本)中,Unity最多可以为每个顶点分配4条骨骼的权重,这使得高级蒙皮权重变得更加复杂和成问题。 Unity 2019.1中已取消了此限制(每个顶点最多支持256个骨骼),但是在short的开发过程中,19.1仍处于Alpha早期,因此我们决定继续使用18.3版本的Sherman产品。
Scale Compensation (Squash & Stretch)
比例补偿(压扁和拉伸)
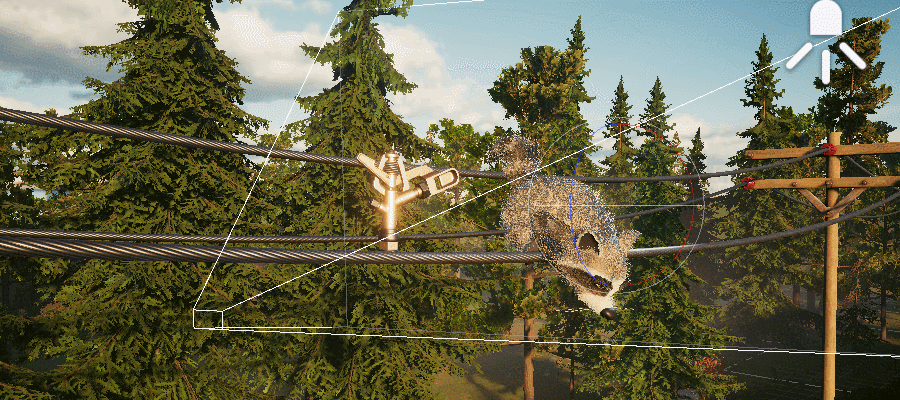
One of the first things you learn as an animator is Squash & Stretch (it is considered ‘by far the most important’ of the 12 principles of animation according to Wikipedia). The video below demonstrates Squash & Stretch in an early animation test for the Raccoon in the Sherman short. This video was created to test how the early fur implementation would work with the character’s animation & rig.
作为动画师,您要学习的第一件事是Squash&Stretch( 根据Wikipedia, 它被认为 是动画12条原则中的 “ 迄今为止最重要的 ”)。 以下视频在Sherman短片中的Raccoon的早期动画测试中演示了Squash&Stretch。 该视频的创建是为了测试早期皮草实现如何与角色的动画和装备配合使用。
In order to achieve true squash & stretch animation, a technique called ‘Scale Compensation’ is used. During the Baymax Dreams project we achieved this with some rigging tricks (by flattening the rig hierarchy), but for Sherman, we wanted to try another approach – Alembic!
为了实现真正的挤压和拉伸动画,使用了一种称为“比例补偿”的技术。 在Baymax Dreams项目期间,我们通过一些绑定技巧(通过平化了绑定层次结构)实现了这一目标,但是对于Sherman,我们想尝试另一种方法-Alembic!
解决方案:Alembic (Solution: Alembic )
Alembic (www.alembic.io) is a file format used commonly in VFX & Animation productions. It gained popularity as an interchange format to allow studios to migrate content from different software packages in a studio pipeline. Unlike FBX, which uses skinned meshes and bones to translate & deform meshes, Alembic assets are baked vertex representations of the source model, and allow you to get ‘what you see is what you get’ copies of the source asset into any package that supports Alembic files.
Alembic( www.alembic.io )是VFX和动画产品中常用的文件格式。 它以一种可互换的格式而流行,允许工作室从工作室管道中的不同软件包中迁移内容。 与使用蒙皮的网格物体和骨骼平移和变形网格物体的FBX不同,Alembic资产是源模型的烘焙顶点表示,并允许您将“所见即所得”的源资产副本复制到任何支持的包中Alembic文件。
The first implementation of Alembic for Unity traces back to the collaboration between Marza Animation Planet and Unity Japan for their short ‘The Gift’. Alembic was used to drive the giant ‘ball pit’ wave animation near the end of the short. Additional features were added during the Adam Episode 2 & 3 projects when we were working with Oats Studios on the shorts as well.
Alembic for Unity的第一个实现可追溯到Marza Animation Planet和Unity Japan为其简称“ The Gift”的合作。 Alembic在短片快结束时被用来推动巨大的“球坑”波浪动画。 当我们与Oats Studios合作制作短裤时 ,在Adam Episode 2&3 项目中 还添加了 其他 功能 。
Alembic Package out of Preview
Alembic软件包退出预览
In Unity 2019.1, the Alembic package for Unity is out of preview – meaning that it’s a fully supported format going forward. This is great news for anyone working on Cg Animation – being able to work with the format that you already know and use in your existing pipelines is a great benefit. Check the Package documentation for more information about the features that Alembic for Unity supports and how to get started with it in your own projects.
在Unity 2019.1中,Unity 的Alembic软件包 已过 预览 -这意味着它将是完全受支持的格式。 对于从事Cg Animation的任何人来说,这都是一个好消息-能够使用您已经知道并在现有管道中使用的格式是一个很大的好处。 请查看 软件包文档 ,以获取有关Alembic for Unity支持的功能以及如何在您自己的项目中开始使用它的更多信息。
Alembic Challenges
Alembic挑战
Alembic is a fantastic format for many reasons – it’s WYSIWYG ability to transfer content from one package to another makes it ideal for baking animation from Maya for example – without worrying about special rigging or animation constraints that are imposed by FBX or other formats.
出于多种原因,Alembic是一种出色的格式-它具有所见即所得的功能,可以将内容从一个包传输到另一个包,使其成为从Maya烘焙动画的理想选择-无需担心FBX或其他格式施加的特殊装配或动画约束。
However, Alembic adds a number of challenges as well:
但是,Alembic也带来了许多挑战:
File Size
文件大小
Attaching objects
附加物件
Material management
物资管理
File Size
文件大小
Each frame of animation in an Alembic file is a baked snapshot of the vertex positions for the model at that frame. This results in a fairly large amount of data that you are caching, and the higher-poly the mesh or longer the animation, the larger the resulting alembic file.
Alembic文件中的每个动画帧都是该帧模型的顶点位置的烘焙快照。 这将导致您缓存的数据量很大,并且网格的多边形越多或动画的时间越长,生成的Alembic文件越大。
For Sherman, we ended up with a total of 7 ‘beats’ or sequences for the short. For each sequence, we output a corresponding alembic file for each of the ‘characters’ in the scene (including the sprinkler, hose, gnome, etc). The resulting animation files in Alembic format are almost 7Gb of animation data. This is significantly larger than the same length of animation would be in the FBX format for example. The overhead of streaming this amount of data at real-time framerates is not insignificant, so this is something to be taken into account.
对于谢尔曼,我们最终得到了7个“节拍”或短片序列。 对于每个序列,我们为场景中的每个“字符”(包括洒水器,软管,地精等)输出一个对应的alembic文件。 生成的Alembic格式的动画文件几乎是7Gb的动画数据。 例如,这远大于FBX格式的相同动画长度。 以实时帧速率流式传输此数据量的开销并不是微不足道的,因此需要考虑这一点。
For example, we used Alembic to stream elements of the characters in the Adam episode 2 & 3 shorts (cloth, face animation), however the real-time constraint (wanting to play the animation back at 30 fps) required that we managed the detail level for the alembic in the scene in order to achieve this.
例如,我们使用Alembic播放了Adam第2和3集短裤(衣服,面部动画)中的角色元素,但是实时约束(想要以30 fps播放动画)需要我们管理细节为了实现这一目标,在场景中使用了淡啤酒。
Attach points
附加点
Attaching elements like Lights or Reflection probes to animated objects in a scene is fairly common. With skeletal animation, this is a fairly trivial task, simply by embedding the attached object as a child in the scene hierarchy. Cinemachine also depends on these local reference transforms to control where cameras are focused and targeted as well.
在场景中将诸如“光”或“反射”探针之类的元素附加到动画对象上是相当普遍的。 对于骨骼动画,这只是相当简单的任务,只需将附加的对象作为子对象嵌入场景层次中即可。 Cinemachine 还依赖于这些本地参考变换来控制相机的聚焦和瞄准位置。
When exporting to Alembic, however, the skeleton of the character isn’t included by default when you export the animation (exported as ‘Renderable only’). we need to figure out a different approach in order to attach items in the proper position while the Alembic animation is playing. Luckily, Maya’s Alembic exporter provides a few other options that we can use to get more than just the renderable mesh data out.
但是,导出到Alembic时,导出动画时默认不包括角色的骨架(导出为“仅可渲染”)。 我们需要找出一种不同的方法,以便在播放Alembic动画时将项目附加到适当的位置。 幸运的是,Maya的Alembic导出器提供了一些其他选项,我们可以使用这些选项获得更多信息,而不仅仅是可渲染的网格数据。

Maya Alembic export options.
Maya Alembic导出选项。
By simply unchecking ‘renderable only’, Maya also exported the full IK rig & skeleton/bone positions for the characters in addition to the rendered meshes, which allows us to use these positions to attach lights, reflection probes and VFX to the appropriate nodes.
通过简单地取消选中“仅可渲染”,Maya除了导出了网格物体外,还导出了角色的完整IK装备和骨架/骨骼位置,这使我们可以使用这些位置将灯光,反射探针和VFX附加到适当的节点。
Material Management
物资管理
Another downside to Alembic is that the format does not store any material definitions in the format. Where FBX and most other formats include a definition of which textures are applied to which material, with Alembic, this information does not come across from the DCC (Maya for example) into Unity. This meant that every time an animation was re-exported to Alembic, we would need to remap materials for the particular animation. It was time consuming to keep dozens of alembic clips sync’d with their appropriate materials throughout the production.
Alembic的另一个缺点是该格式不存储该格式中的任何材料定义。 在FBX和大多数其他格式包括定义将哪种纹理应用于哪种材质(使用Alembic)的定义的情况下,此信息不会从DCC(例如,Maya)传递到Unity中。 这意味着每次将动画重新导出到Alembic时,我们都需要为特定动画重新映射材质。 在整个生产过程中,要使数十个Alembic剪辑与其适当的材料保持同步是很费时间的。
We wrote several tools during Sherman to help simplify material mapping for Alembic files. Two of them are available in the new Film/TV Toolbox package that is available on Github, or as a package on Unity’s Package repository.
我们在Sherman期间编写了一些工具来帮助简化Alembic文件的材质映射。 在Github上提供的新Film / TV Toolbox包中或在Unity的Package存储库中的包中 ,可以找到其中的两个。

The Film / TV Toolbox package in Unity’s Package Manager.
Unity的“包管理器”中的“电影/电视工具箱”包。
For more info:
有关更多信息:
USD & the Future
美元与未来
There have been some very promising developments in this area that are showing remarkable promise. Pixar’s open-source USD format has been gaining traction over the past few years, and recently, Unity released the first version of our support for USD via the Package Manager.
在这一领域已经出现了一些非常有希望的发展,这些发展显示出了惊人的希望。 Pixar的开源USD格式在过去几年中一直受到关注,最近, Unity 通过Package Manager 发布了我们对USD的第一版支持 。
The team is very excited about the possibilities that USD offers, and we’ll definitely be keeping an eye on this format for future productions.
团队对USD提供的可能性感到非常兴奋,我们一定会在将来的生产中密切注意这种格式。
线性内容的照明策略 (Lighting strategies for Linear Content)
Lighting in real time is very different than using a traditional offline renderer. While the basics are the same (you place lights in a scene etc), the technical approaches vary quite significantly.
实时照明与使用传统的脱机渲染器非常不同。 尽管基本原理相同(将灯光放置在场景中等),但技术方法却有很大差异。
Real-time lighting in a short like Sherman is achieved through a combination of techniques, including light probes, reflection probes (both planar and cubic), cascade shadow maps and baked global illumination.
像Sherman这样的短时实时照明是通过多种技术组合实现的,包括光探测器,反射探测器(平面和立方),级联阴影图和烘焙的全局照明。
When approaching the lighting for a project like Sherman, we look to our lighting supervisor, Jean-Philippe (JP) Leroux.
在为Sherman这样的项目寻求照明时,我们请照明主管Jean-Philippe(JP)Leroux。
First to achieve real-time, certain aspect of the lighting solution required to be pre-calculated. To do so, sets require a bit of upfront preparation.
首先要获得实时的照明解决方案的某些方面需要预先计算。 为此,布景需要一些前期准备。
Global illumination
整体照明
Indirect lighting needs to precalculate to achieve high quality localized ambient lighting. All large static objects are marked for contribution to the solution and are lightmapped. We did this using the progressive lightmapper Baked Indirect mode.
间接照明需要预先计算以实现高质量的局部环境照明。 将所有大型静态对象标记为有助于解决方案,并对其进行了灯光映射。 我们使用渐进式光照贴图器“烘焙间接”模式进行了此操作。

All small objects and dynamic one will be lit by a probe array. Larger objects not suitable for lightmapping will benefit from a more refined probe lighting through the use of proxy volumes.
所有小物体和动态物体都将被一个探针阵列照亮。 通过使用代理体积,更精致的探针照明将使不适合进行灯光映射的较大物体受益。

To be clear, we didn’t bake the lights, only the contribution of the sky and the bounce of our directional.
需要明确的是,我们没有烘烤光,只有天空的贡献和定向的反弹。
Reflections
感言
You also need to set up a good coverage of your set for baked localized reflections, using Reflection Probes.
您还需要使用反射探针为烘烤的局部反射建立良好的覆盖范围。
Placing your capture point mostly at camera level. Since our sky with his sun close to the horizon has a very strong directionality, we had to take an extra step to correctly cover the shadowed area.
将捕获点主要放置在相机级别。 由于我们的天空(他的太阳靠近地平线)具有很强的指向性,因此我们不得不采取额外的步骤来正确覆盖阴影区域。

Some highly reflective objects greatly benefit from real-time reflections. In our case, the metallic food bowl and the very shiny bubbled hose pipe: The first used a spherical real-time reflection probe, the second used a planar reflection.
某些高度反射的对象会极大地受益于实时反射。 在我们的案例中,是金属食物碗和非常有光泽的泡沫软管:第一个使用球形实时反射探针,第二个使用平面反射。

Lights
灯火
From this point, all lights are purely dynamic, their properties can be authored and they can be moved around with instant feedback. One workflow trick we have is the use of a pivot object for light placement. Your pivot act as your target. Once positioned, it allows you to easily orbit around your subject by switching between local and global orientation using the “x” key.
从这一点来看,所有灯光都是纯动态的,可以创作它们的属性,并且可以即时反馈来移动它们。 我们拥有的一种工作流程技巧是使用枢轴对象进行灯光放置。 您的枢纽充当目标。 定位后,您可以使用“ x”键在局部和全局方向之间切换,轻松地围绕被摄体旋转。
It is also important to say that all lights were casting shadows.
同样重要的是,所有的灯光都在投射阴影。
Working with prefabs has many advantages.
使用预制件有很多优势。
It allows you to work on a single object without holding on to the scene, letting others works in it at the same time
它使您可以在不握住场景的情况下处理单个对象,而让其他对象同时在其中工作
It allows you to rapidly propagate changes through your sequence\project
它允许您通过序列\项目快速传播更改
It allows you to quickly revert overridden value
它使您可以快速还原覆盖的值

For Sherman, we created a master prefab per beat and nested prefabs for:
对于Sherman,我们为每个节拍创建了一个主预制件,并为以下对象嵌套了预制件:
The sun
太阳
Fill sun
充满阳光
Fill sky
填满天空
Rim sun
外缘太阳
Rim Sky
环天
Catchlight
手电筒
Our master prefabs is structured per shot and we use activation tracks in Timeline to trigger them.
我们的主预制件按镜头构造,我们使用时间轴中的激活轨迹来触发它们。
Inside of them, you will find many things like shots specific lights, Volumes that override certain global lighting property, density volumes to drive atmospheric lighting, shadow objects.
在它们内部,您会发现许多东西,例如特定于镜头的照明,覆盖某些全局照明属性的体积,用于驱动大气照明的密度体积,阴影对象。

Other properties like post-processing are tweaked via Cinemachine Post Processing clips and also via the timeline. Things like the grading, the camera effects and other optimization like the camera culling.
其他属性(如后期处理)可通过Cinemachine后期处理剪辑以及时间线进行调整。 诸如评分,相机效果和其他优化(例如相机剔除)之类的事情。

Custom Post Profiles for each shot, applied with the CinemachinePostProcessing component to individual Virtual Cameras.
CinemachinePostProcessing组件将每个镜头的自定义帖子配置文件应用到单个虚拟摄像机。
皮草和特效 (Fur & VFX)
With the Animatic in hand, we quickly identified several key elements that would be critical to the success of the short:
有了Animatic,我们很快确定了对短片成功至关重要的几个关键要素:
Water VFX
水视觉特效
Fur for the Raccoon
浣熊皮毛
As the sprinkler plays a fairly ‘hero’ role in the short, one of the early challenges was figuring out how we wanted to tackle the fluid simulation. There are a number of traditional methods of handling fluid simulation for animation, including Houdini, or the fluid systems available natively in Maya. Steven made a few early tests using Maya for the fluid effects, but as he isn’t super familiar with the Maya fluid system or Houdini, we were concerned that the amount of work involved might not achieve the results we were after.
由于喷头在短时间内扮演着相当“英雄”的角色,因此早期的挑战之一就是弄清楚我们如何应对流体模拟。 有许多传统的处理动画流体仿真的方法,包括Houdini或Maya本地提供的流体系统。 史蒂文(Steven)使用Maya对流体效果进行了一些早期测试,但是由于他对Maya流体系统或Houdini不太熟悉,我们担心所涉及的工作量可能无法达到我们想要的结果。
Around the same time, Unity released the new Visual Effect Graph, a new node-based GPU-accelerated effects system. While it looked promising, we did not have any experience with it, or how we might be able to achieve the results that we were looking for. Luckily for us, Vlad Neykov (Lead Graphics Test Engineer based in Brighton) was able to jump in and achieve some amazing results.
大约在同一时间,Unity发布了新的视觉效果图,这是一个新的基于节点的GPU加速效果系统。 尽管它看起来很有希望,但是我们没有任何经验,也没有我们如何能够获得想要的结果。 对我们来说幸运的是,弗拉德·内科夫(Vlad Neykov)(位于布莱顿的首席图形测试工程师)得以加入并取得了一些惊人的成绩。
Dynamic Effects with the Visual Effect Graph
视觉效果图的动态效果
With 2018.3 the new Visual Effect Graph was released in preview for HDRP. For the Baymax Dreams shorts, the team used the legacy particle system combined with real-time physics (for destruction). While none of our team had ever used this before, we knew that in order to achieve the advanced water simulation and visuals that we wanted, we would require the advanced particle features and HDRP integration that the new Visual Effect Graph provides.
随着2018.3,新的视觉效果图在HDRP预览版中发布。 对于Baymax Dreams短裤,该团队使用了遗留粒子系统和实时物理技术(用于破坏)。 尽管我们的团队以前都没有使用过此功能,但我们知道,要实现所需的高级水模拟和视觉效果,我们将需要新的视觉效果图提供的高级粒子功能和HDRP集成。
The team asked around within Unity for anyone with experience using the Visual Effect Graph, and were lucky to be able to borrow the talents of Vlad Neykov to tackle the gorgeous water & other effects seen in the short.
团队在Unity内向有经验使用视觉效果图的人询问,很幸运能够借用弗拉德·内科夫(Vlad Neykov)的才华来解决短片中出现的华丽水景和其他效果。
All of the VFX were managed in their own Timeline sequence, which allowed Vlad to iterate on the timing and animations separately, and used a combination of the custom ‘Visual Effect Activation Track’ that ships with the Visual FX Graph and traditional animation tracks to animate properties of the graph.
所有VFX都按照自己的时间轴顺序进行管理,这使Vlad可以分别在时间和动画上进行迭代,并结合使用了Visual FX Graph附带的自定义“ Visual Effect Activation Track”和传统动画轨迹进行动画处理图的属性。
For the sprinkler effect, Vlad started with the idea of one water effect to rule them all but slowly kept expanding it to include new cases (first shot, water comes from the camera side, have to add control to it. Another shot, water bounces off the food bowl, have to add collision for it but hide it in the other shots. Another shot, depth collision didn’t collide close enough, replaced with sphere collision, etc). In the end, almost every shot in the production has a separate water effect to handle the specific situations.
对于洒水效果,弗拉德(Vlad)从一个水效果的想法开始就统治了所有人,但慢慢地将其扩展到包括新的情况(第一张照片,水来自相机一侧,必须对其进行控制。另一张照片,水反弹)离开食物碗时,必须为其添加碰撞,但将其隐藏在其他镜头中。另一镜头,深度碰撞没有足够近地碰撞,被球形碰撞等代替)。 最后,生产中几乎每一个镜头都有单独的水效果来处理特定情况。
Vlad initially handled the water collision using screenspace depth tests, but after testing the various situations, he replaced them with simple plane/sphere collision representations for the various collision volumes.
弗拉德最初使用屏幕空间深度测试来处理水碰撞,但是在测试了各种情况之后,他用简单的平面/球体碰撞表示替换了各种碰撞体积。
Initially, our main concern was how to achieve the dynamic water effect for the sprinkler, but Vlad ended up tackling all of the FX for the short, including small details like the leaves falling from the hedge, dust clouds for footsteps, the dirt explosions and electricity zaps. The project was a great real-world test case for the VFX Graph and generated a ton of feedback for the team as they continue to develop the VFX Graph.
最初,我们主要关注的是如何实现洒水器的动态水效果,但弗拉德最终解决了所有FX的问题,包括一些细微的细节,例如树叶从树篱上掉下来,尘土飞扬,尘土爆炸和电击。 该项目是VFX Graph的一个很好的真实测试案例,在团队继续开发VFX Graph时为团队带来了大量反馈。
Overall, we are very excited about the potential that the VFX Graph brings to Unity, and are grateful to Vlad for going above and beyond to support the project.
总体而言,我们对VFX Graph带给Unity的潜力感到非常兴奋,并感谢Vlad超越并支持该项目。
处理实时毛发(和羽毛) (Tackling Real-time Fur (and feathers))
We had a few technical goals that we wanted to solve while producing the short, but one of (if not the) biggest that we chose to tackle for this production is a topic that comes up frequently when talking to studios about using Real-time engines for animation – Fur.
在制作短片时,我们有一些技术目标需要解决,但我们选择要解决的最大(或者不是最大)目标之一就是在与工作室讨论使用实时引擎时经常提到的一个话题。用于动画–毛皮。
Initially, we were hesitant to tackle Fur rendering. While we had full confidence in John’s ability as a graphics engineer, achieving good ‘offline quality’ Fur in Real time is a significant challenge.
最初,我们不愿处理Fur渲染。 尽管我们对John担任图形工程师的能力充满信心,但要实时获得良好的“离线质量” Fur是一个巨大的挑战。
When discussing Hair or Fur in any engine, there are 4 key elements that make up the solution:
在任何引擎中讨论Hair或Fur时,解决方案都有4个关键要素:
Geometry generation
几何生成
Shading
底纹
Dynamics
动力学
Authoring
创作
For the fur on Sherman, we tackled the first 2 (geometry generation & shading), and did some experimentation with Dynamics (physics) but ultimately decided not to use this for the final short. The final key aspect is the actual Authoring of the fur – providing a way for artists to get hands-on with the fur is critical to its final appearance.
对于谢尔曼(Sherman)上的毛皮,我们处理了前2个(几何图形生成和着色),并且对动力学(物理)进行了一些实验,但最终决定在最后的短片中不使用它。 最后一个关键方面是实际的皮草创作-为艺术家提供动手操作皮草的方法对于其最终外观至关重要。
The first thing that the team did is evaluate what existing work had been done with Fur rendering. One of the first ‘fur’ rendering implementations in Unity was created by Marza Animation Planet, for their short ‘The Gift’.
团队要做的第一件事是评估Fur渲染已完成的现有工作。 Marza Animation Planet为他们的简称“ The Gift”创建了Unity中最早的“毛皮”渲染实现之一。
Every year Unity holds a company-wide ‘Hack Week’, where most of the engineering team at Unity get together to collaborate on new & interesting projects, trying out experimental ideas and otherwise ‘hacking’. Last year, one of the team’s sought to continue the work that was done on the Gift short and see what other possibilities there might be for Real-time fur in Unity. The team ported the Marza fur to HDRP (among other things), and provided the foundation for the work that the Sherman team used to build our fur solution.
每年,Unity都会在全公司范围内举办“黑客周”活动,在该活动中,Unity的大多数工程团队会聚在一起,共同开展新的有趣项目,尝试实验性想法,否则就会“骇客”。 去年,一个团队的成员试图继续进行在“礼物”短片上所做的工作,并了解Unity中实时毛皮的其他可能性。 团队将Marza皮草移植到HDRP(除其他外),并为谢尔曼团队用来构建我们的皮草解决方案的工作奠定了基础。
From the base implementation that the Hack Week project provided, John and Steven started work on the workflow for authoring the Fur.
从Hack Week项目提供的基本实现中,John和Steven开始了创作Fur的工作流程。
I’m not going to get into too much technical detail about the specifics (I won’t do it justice), however, there are a few interesting elements to the approach that the team took that I’d like to cover.
我不会在细节上涉及过多的技术细节(我不会公平对待),但是,我想介绍团队采用的一些有趣的方法。
源毛网/ SDF (Source Fur Mesh / SDF)
One of the first things that Steven did for the fur is actually model a patch of the fur, as individual hair strands. This was baked into an SDF (signed distance field), which was used as the source for the fur geometry volume itself. By having this high-resolution source for the fur, the fidelity of the fur is much higher than a pure hull based approach. For example, the normals can be calculated per-strand, resulting in much better lighting than most existing real-time fur implementations. As we progressed with the implementation, a second analytical SDF was incorporated for the fur ‘overcoat’ allowing us to blend the two.
史蒂文(Steven)对皮草所做的第一件事实际上是对皮草的模型进行建模,作为单个发束。 将其烘焙到SDF(有符号距离场)中,该SDF用作毛发几何体本身的源。 通过使用这种高分辨率的毛发源,毛发的保真度比基于纯船体的方法要高得多。 例如,可以按每条线计算法线,与大多数现有的实时毛发实现相比,照明效果要好得多。 随着实施的进行,我们为毛皮“大衣”添加了第二个分析SDF,使我们能够将两者融合。

Source Fur Mesh (used to generate the SDF).
源毛发网格物体(用于生成SDF)。
The undercoat uses the baked SDF, and the overcoat uses the analytical SDF, so there is an option of picking the sdf that suits your needs. The analytical sdf’s give you unlimited resolution and in the future the ability to modify the strand profiles/properties directly inside of Unity. Baked SDF’s allow you to bake more complex geometry (eg feather geometry/fur styles that are impractical or difficult to achieve analytically and give you the predictability of replicating what you make in your DCC app of choice.
底涂层使用烘烤的SDF,而底涂层使用分析性SDF,因此可以选择适合您需要的sdf。 分析性sdf可为您提供无限的分辨率,并且将来可以直接在Unity内部修改线轮廓/属性。 烘焙的SDF可让您烘焙更复杂的几何图形(例如,无法通过解析实现或难以实现的羽毛几何图形/毛发样式,并使您可以复制在所选DCC应用程序中制作的内容。
新郎图/高度图 (Groom Maps / Height Map)
Fur by itself is great, however, animals like Raccoons don’t have perfectly straight fur sticking out of their body from all points. Additionally, fur isn’t typically the same length uniformly across their entire body.
皮草本身就很棒,但是,像浣熊这样的动物并没有从各个角度都将完美的笔直的皮毛从它们的身上伸出来。 此外,毛皮在整个身体上的长度通常不相同。
To achieve a good result, having the ability to author groom maps that can be applied to modify the fur normals and geometry was very important. Steven used Mari to generate the Groom maps, and also generated Height maps to control the length of the fur for the different areas of the Raccoon’s body.
为了获得良好的结果,具有编写可用于修改毛发法线和几何图形的修饰贴图的能力非常重要。 史蒂文(Steven)使用马里(Mari)生成了新郎图,还生成了高度图(Height map)以控制浣熊身体不同区域的皮毛长度。

电影运动模糊/超级采样 (Filmic Motion Blur / Super Sampling)
The team created a large number of custom tools during the Sherman production. Most are simple in concept but provide significant workflow and time savings for the team. One of the critical pieces of tech that was developed is a system that we’ve dubbed ‘Filmic Motion Blur’.
该团队在谢尔曼(Sherman)生产期间创建了许多自定义工具。 大多数工具的概念都很简单,但可以为团队节省大量工作流程和时间。 开发的关键技术之一是我们称为“ Filmic Motion Blur”的系统。
During the Baymax Dreams project, one of the major technical challenges that we needed to solve was motion blur. The current ‘real time’ state of the art for motion blur looks great at high frame rates when playing a game, however for an offline render (like what we required for broadcast TV at 24fps), created artifacts, which were found to be unacceptable for broadcast.
在Baymax Dreams项目期间,我们需要解决的主要技术挑战之一是运动模糊。 在玩游戏时,当前的“实时”运动模糊技术在高帧频下看起来不错,但是对于脱机渲染(如我们以24fps的速度播放电视所需要的),会产生伪影,这是不可接受的广播。
In order to pass Disney’s quality standards, John Parsaie developed the Filmic Motion Blur system. At its core, Filmic Motion Blur is an accumulation-based renderer. Instead of rendering at 24 fps, the timeline sequence is rendered at 960 fps and the intermediate buffers are accumulated into the actual frame that is finally written to disk. Since the effect is simply combining the results of existing render buffers, it works with any materials or shaders without modification.
为了通过迪士尼的质量标准,约翰·帕萨(John Parsaie)开发了电影运动模糊系统。 Filmic Motion Blur的核心是基于累积的渲染器。 代替以24 fps渲染,时间轴序列以960 fps渲染,并且中间缓冲区被累积到最终写入磁盘的实际帧中。 由于效果只是将现有渲染缓冲区的结果组合在一起,因此无需修改即可与任何材质或着色器一起使用。
For Sherman, this same technique is used to converge the fur samples into the final frames as well. In the future, we’re investigating ways to use this same technique to create high-end cinematic depth of field and other super-sampled effects.
对于谢尔曼(Sherman),也使用相同的技术将毛皮样本收敛到最终帧中。 将来,我们正在研究使用相同技术创建高端电影景深和其他超级采样效果的方法。
This approach to rendering the frames is not without tradeoffs, the biggest being that it does not run at real-time FPS. In fact, at 4k with full detail & fur, we’re starting to talk in the ‘frames per minute’ range to outputting the final frames, but this is still exponentially faster than existing offline CPU and GPU renderers that can take hours to render a final frame.
这种渲染帧的方法并非没有取舍,最大的是它不能以实时FPS运行。 实际上,在具有完整细节和毛发的4k条件下,我们开始在“每分钟帧数”范围内讨论输出最终帧,但这仍然比现有的脱机CPU和GPU渲染器快得多,后者需要花费数小时才能渲染最后一帧。
渲染窗口 (Render Window)
The Filmic Motion Blur really boosts the final image quality significantly, it was a huge win. The biggest downside is that in order to see the final result with all of the super sampling & convergence, the team had to render the sequence or shot that they were working on.
电影运动模糊确实极大地提高了最终图像质量,这是一个巨大的胜利。 最大的缺点是,为了在所有超级采样和融合中看到最终结果,团队不得不渲染他们正在研究的序列或镜头。
In order to solve this problem, we created the Render Window, a custom editor window that anyone on the team can use to output a final quality render on demand. This allowed Steven to tune Groom maps and tweak the fur as needed while still being able to quickly see the final result.
为了解决这个问题,我们创建了“渲染窗口”,这是一个自定义编辑器窗口,团队中的任何人都可以使用它来按需输出最终质量的渲染。 这样一来,史蒂文(Steven)就可以根据需要调整Groom地图并调整毛发,同时仍然能够快速查看最终结果。

Side by side of the alpha dithered fur and the final converged frame.
并排排列的alpha抖动毛皮和最终收敛的框架。
录音机 (Recorder)
Working on projects like Sherman is different than a typical Unity project. The end result is sequenced frames that are output from the editor that we make up the final animation. For this, we used Unity’s Recorder package to render the final images out of the editor. The Filmic Motion blur feature described above hooks into the Recorder’s Timeline integration to allow us to converge the fur, and create the super-sampled motion blur for the final frames.
在Sherman之类的项目上工作与典型的Unity项目不同。 最终结果是排序的帧,这些帧是我们组成最终动画的编辑器输出的。 为此,我们使用 Unity的Recorder程序包 从编辑器中渲染最终图像。 上面描述的电影运动模糊功能与记录器的时间轴集成挂钩,使我们可以收敛毛发,并为最终帧创建超采样运动模糊。

Unity’s Recorder Track & Clip settings
Unity的记录器“跟踪和剪辑”设置
The final frames were rendered at 4k on 3 dedicated PC’s that the team used as a mini-render farm (so they didn’t need to use their main workstations to render). Every night we would render a new ‘daily’ at final quality of the progress for the team to review.
最终的帧是在3台专用PC上以4k渲染的,该团队用作微型渲染场(因此,他们不需要使用主工作站进行渲染)。 每天晚上,我们都会以进度的最终质量渲染一个新的“每日”,供团队审查。
摘要 (Summary)
This wraps the second part of our blog series on Sherman. I hope that you enjoyed hearing about the production and the techniques and tricks that our team used to bring the project to life. Check out Part 1 for a deep dive into how we used Alembic for the character animations, and to learn more about the Fur implementation that we created for Sherman as well as some of the additional tools that the Innovation Group created to help team’s working on Linear Animation with Unity!
这是有关谢尔曼博客系列的第二部分。 希望您喜欢我们的团队所制作的产品以及制作该产品的技巧和窍门。 查阅第1部分 ,深入了解我们如何将Alembic用于角色动画,并更多地了解我们为Sherman创建的Fur实施以及创新小组为帮助团队进行线性工作而创建的一些其他工具。 Unity动画!
We are very excited about Sherman, and look forward to hearing more about how you are using Unity for Animation! Oh, and one final note: Sherman isn’t the Raccoon, he’s actually the cute fluffy Bird!
我们对Sherman感到非常兴奋,并期待听到更多关于您如何使用Unity for Animation的信息! 哦,还有最后一点:谢尔曼不是浣熊,他实际上是可爱的蓬松小鸟!
If you are interested in learning more about how Unity can be used for your animation projects, Unity’s EDU team can provide private on-site training workshops that can be fully customized for your or your team’s needs. Each workshop is led by a Unity Certified Instructor and features hands-on projects that teach Unity skills as well as best practices for implementation. You can also jump into our forums to discuss this blog post here.
如果您想了解有关Unity如何用于动画项目的更多信息,Unity的EDU团队可以提供私人现场培训讲习班,可以完全根据您或您团队的需要进行定制。 每个研讨会均由Unity认证讲师主持,并设有动手实践项目,这些项目教授Unity技能以及实施的最佳实践。 您也可以进入我们的论坛以在此处讨论此博客文章。
New to animation? Check out our beginner tutorials. If you’re an experienced animator, check out our intermediate and advanced content on the Unity Learn Premium platform.
动画新手? 查看我们的 初学者教程 。 如果您是经验丰富的动画师,请 在Unity Learn Premium平台上 查看我们的 中级和高级内容 。
For more information about Sherman, including access to the full project, go to our Film Solutions page, and get in touch to discuss how Unity and the Innovation Group can help bring your projects to life!
有关Sherman的更多信息(包括访问整个项目的信息),请访问我们的 电影解决方案页面 ,并与 我们 联系 ,讨论Unity和Innovation Group如何使您的项目栩栩如生!
翻译自: https://blogs.unity3d.com/2019/06/11/introducing-sherman-part-2/
bfgs sherman


 770
770

 被折叠的 条评论
为什么被折叠?
被折叠的 条评论
为什么被折叠?
 到【灌水乐园】发言


