


ROS2通信编程
一、话题
话题是ROS2中最常用的通信方式之一,话题通信采取的是订阅发布模型与MQTT协议类似。
1、订阅发布模型
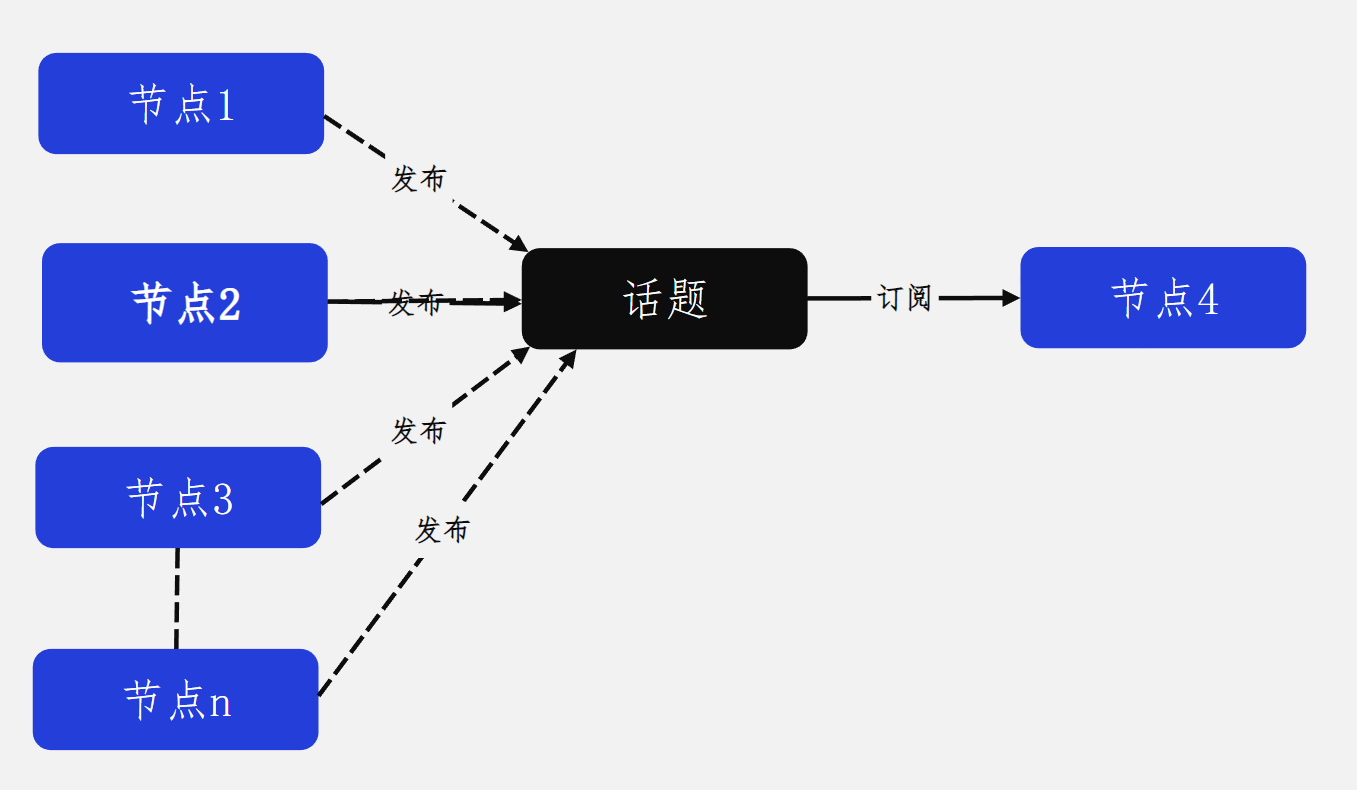
一个节点发布数据到某个话题上,另外一个节点就可以通过订阅话题拿到数据。

模型类似我们订阅报纸或关注微博,换成下图也许更好理解。

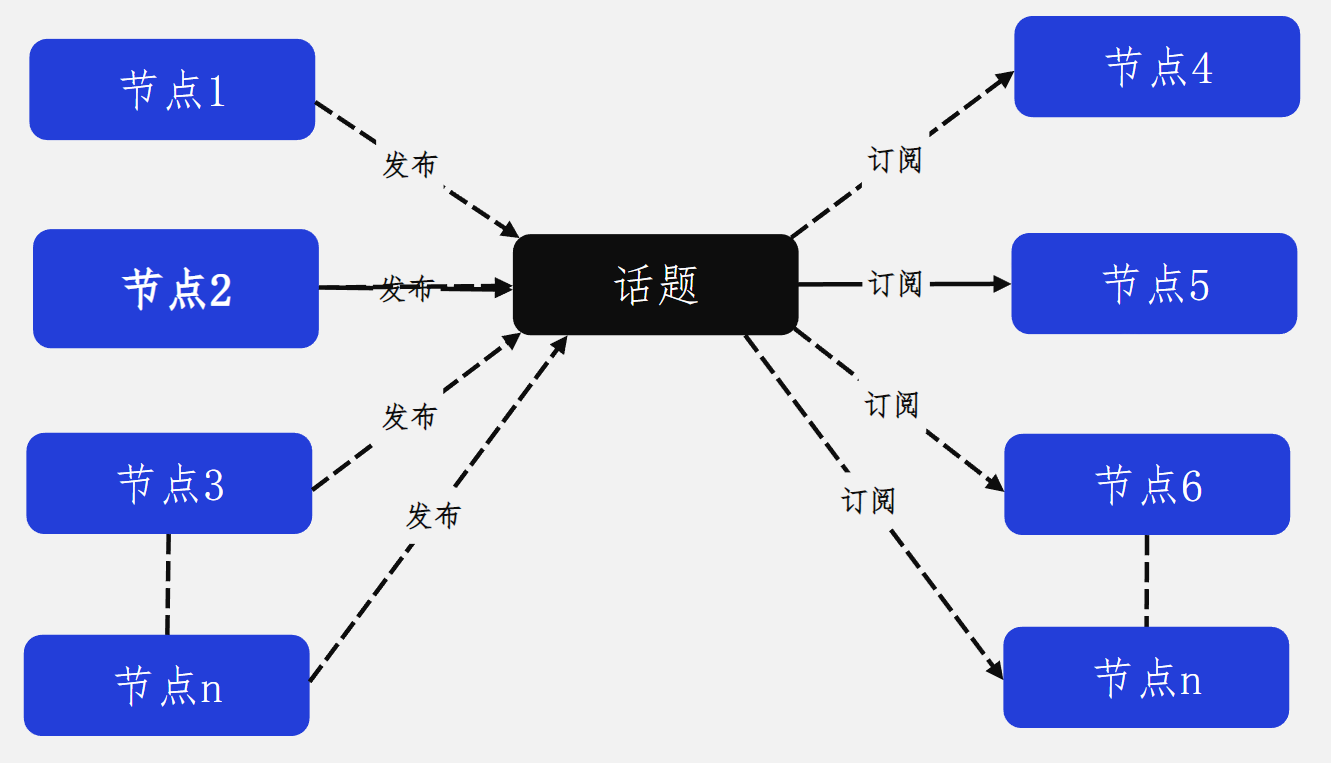
除了上述这种一个节点发布,一个节点接受的形式外,ROS2话题通信其实还可以是1对n,n对1,n对n的。
- 1对n

- n对1
-
n对n
2、消息接口
为了方便发送者和接收者进行数据的交换,ROS2帮我们在数据传递时做好了消息的序列化和反序列化,而且ROS2的消息序列化与反序列化通信是可以做到跨编程语言、跨平台和跨设备之间的。ROS2要求同一个话题,所有的发布者和接收者必须使用相同消息接口,以此做到跨编程语言、跨平台和跨设备之间的数据收发。
3、ROS2话题工具
3.1 RQT工具
依次打开三个终端并输入如下三条命令
ros2 run demo_nodes_py listener
ros2 run demo_nodes_cpp talker
rqt_graph
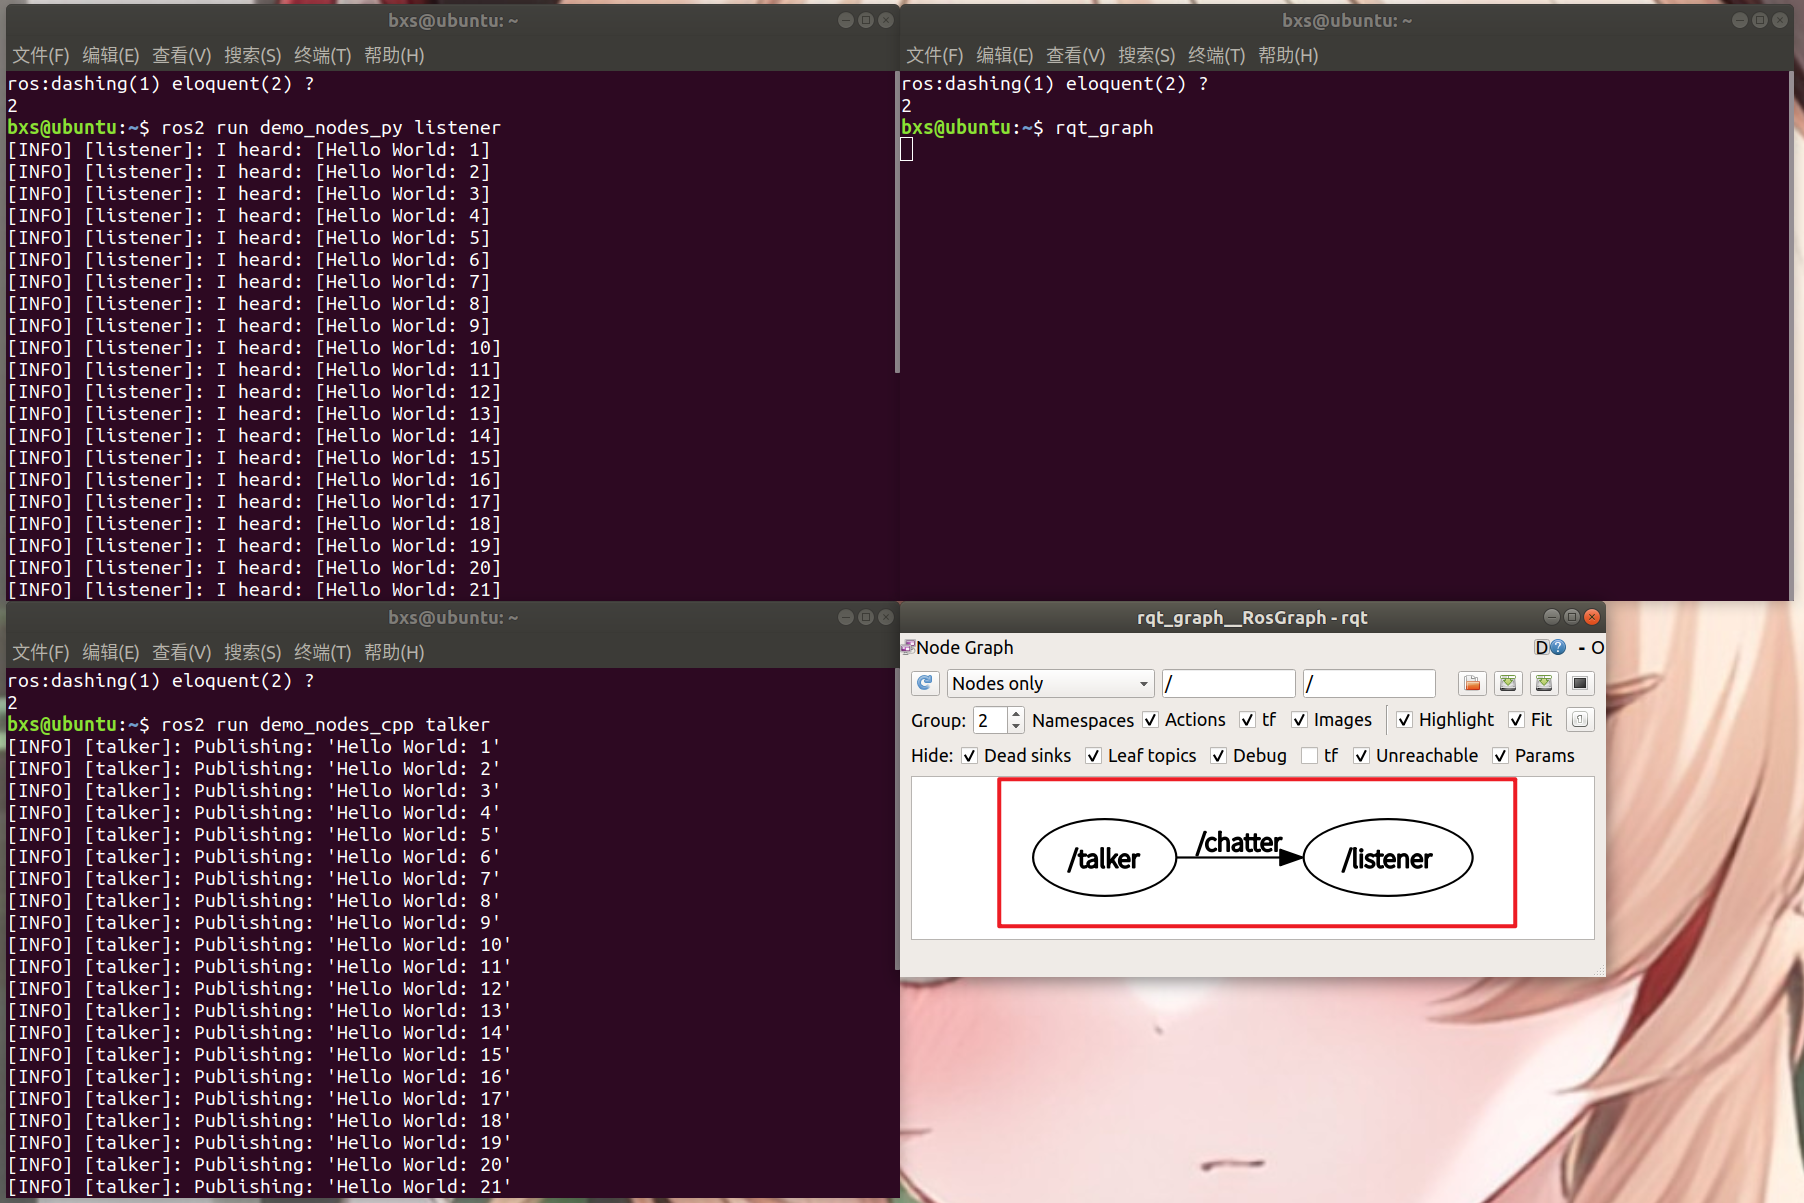
可以看到RQT工具就是一种GUI工具,它帮助我们了解各节点、话题之间的关系,并画出系统逻辑图。
3.2 CLI工具
CLI 是 command line interface 的简称,也就是命令行界面。用户可在提示符下键入可执行指令,然后计算机执行,它通常不支持鼠标。
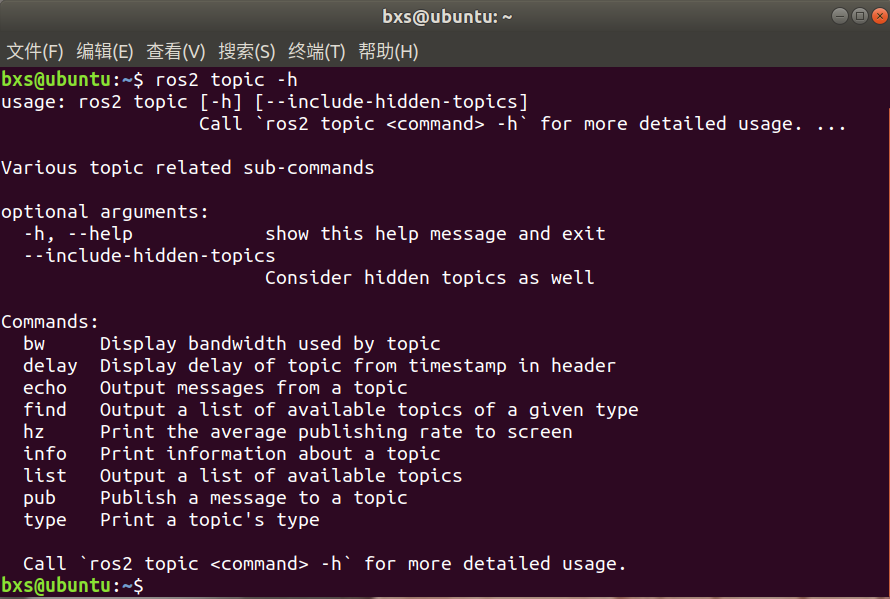
- ros2支持很多强大的topic指令,可以使用下面的指令查看。
ros2 topic -h
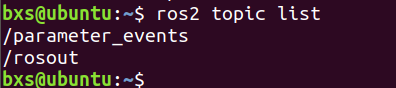
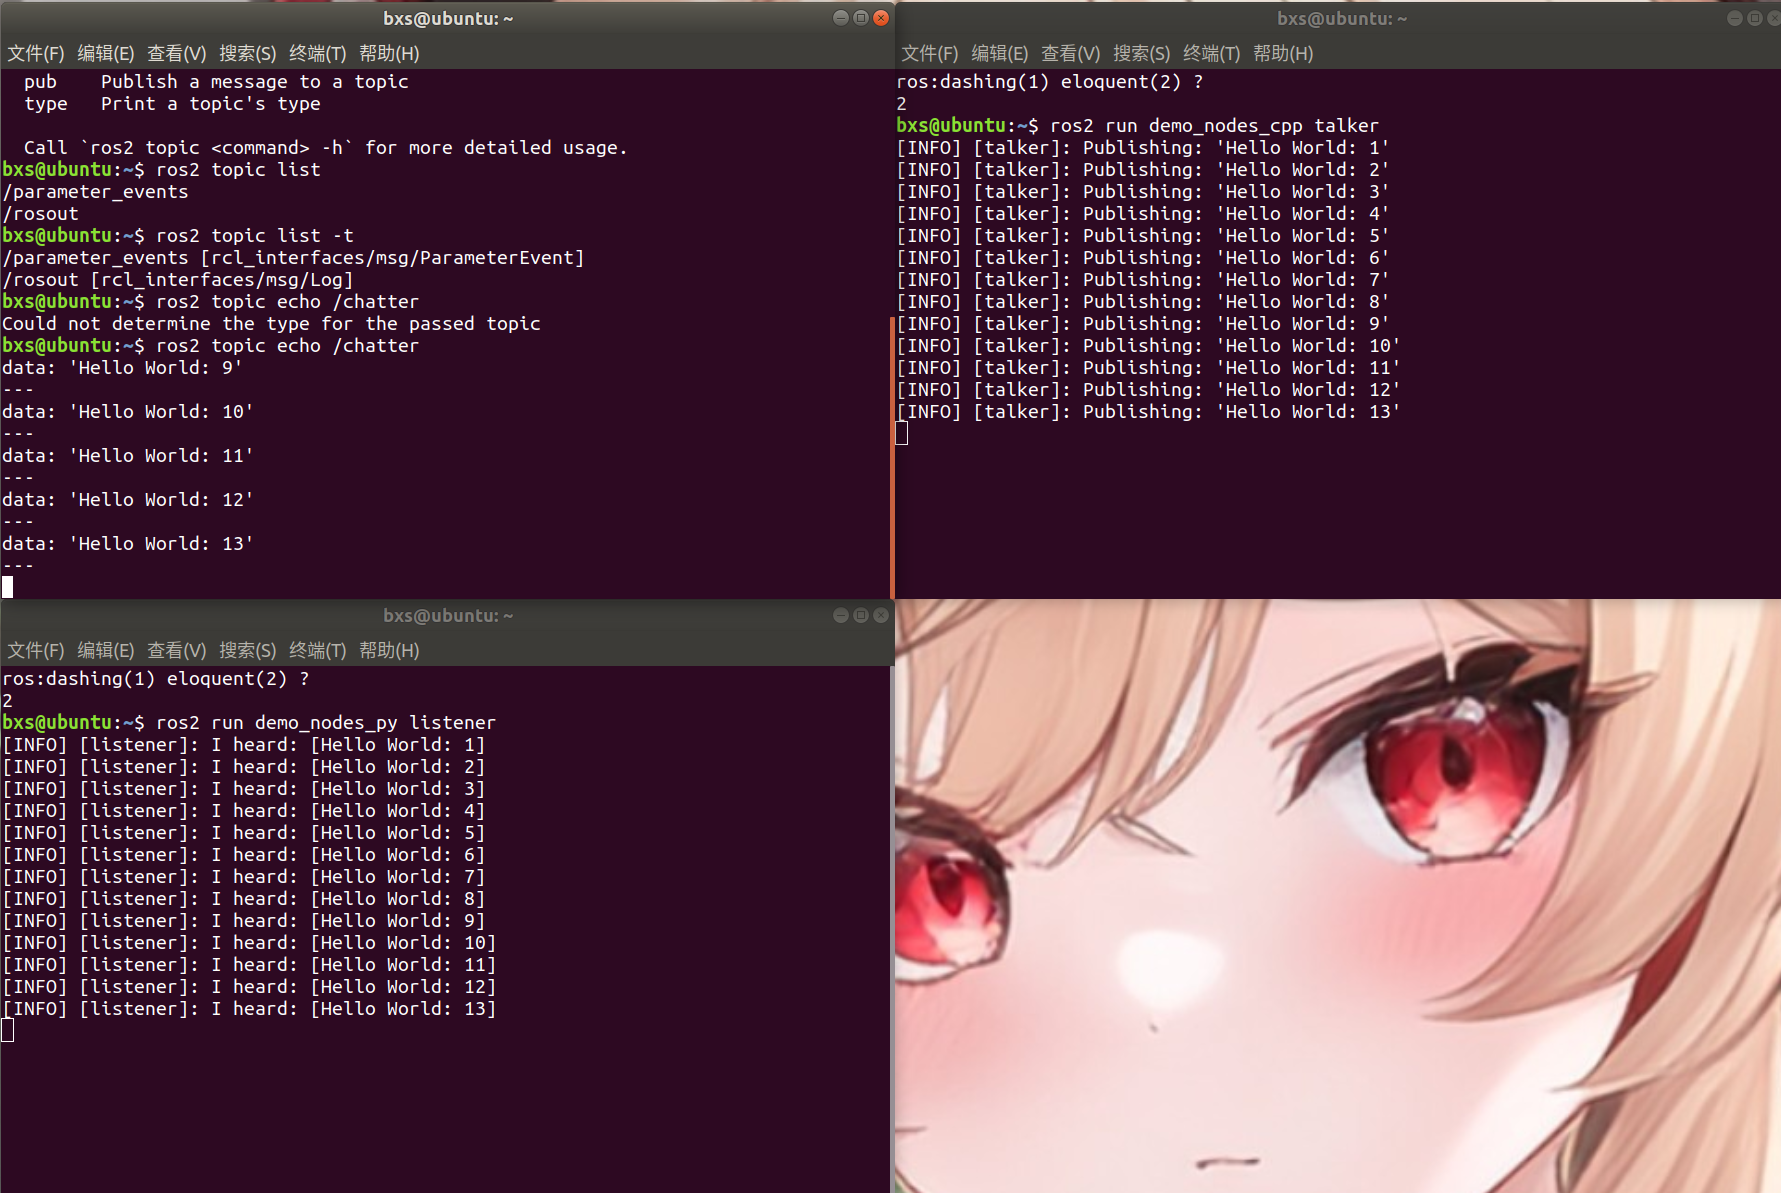
- 返回系统中当前活动的所有主题的列表
ros2 topic list
- 增加消息类型
ros2 topic list -t

- 打印实时话题内容
ros2 topic echo /chatter
- 查看主题信息
ros2 topic info /chatter

- 查看消息类型
ros2 interface show std_msgs/msg/String
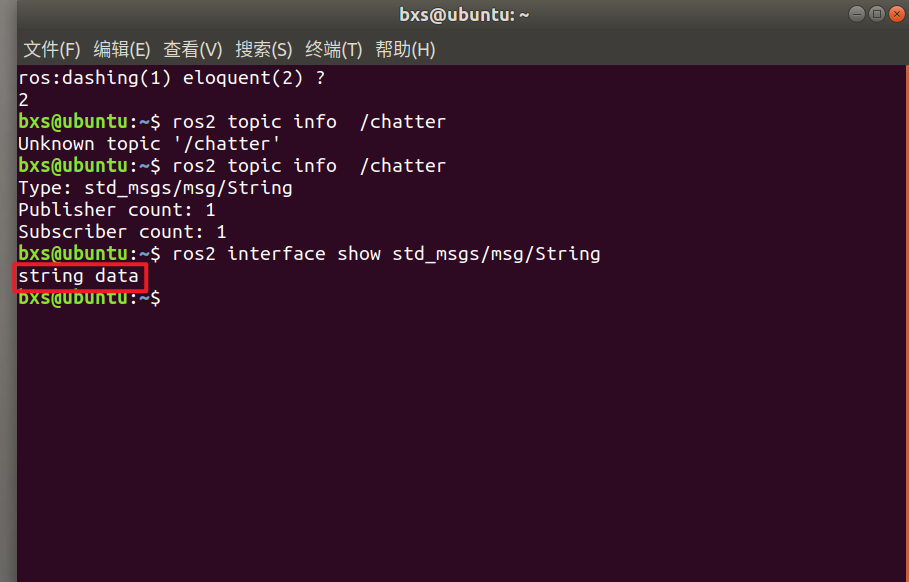
发布订阅的数据正是string类型
- 手动发布命令
ros2 topic pub /chatter std_msgs/msg/String 'data: "123"'
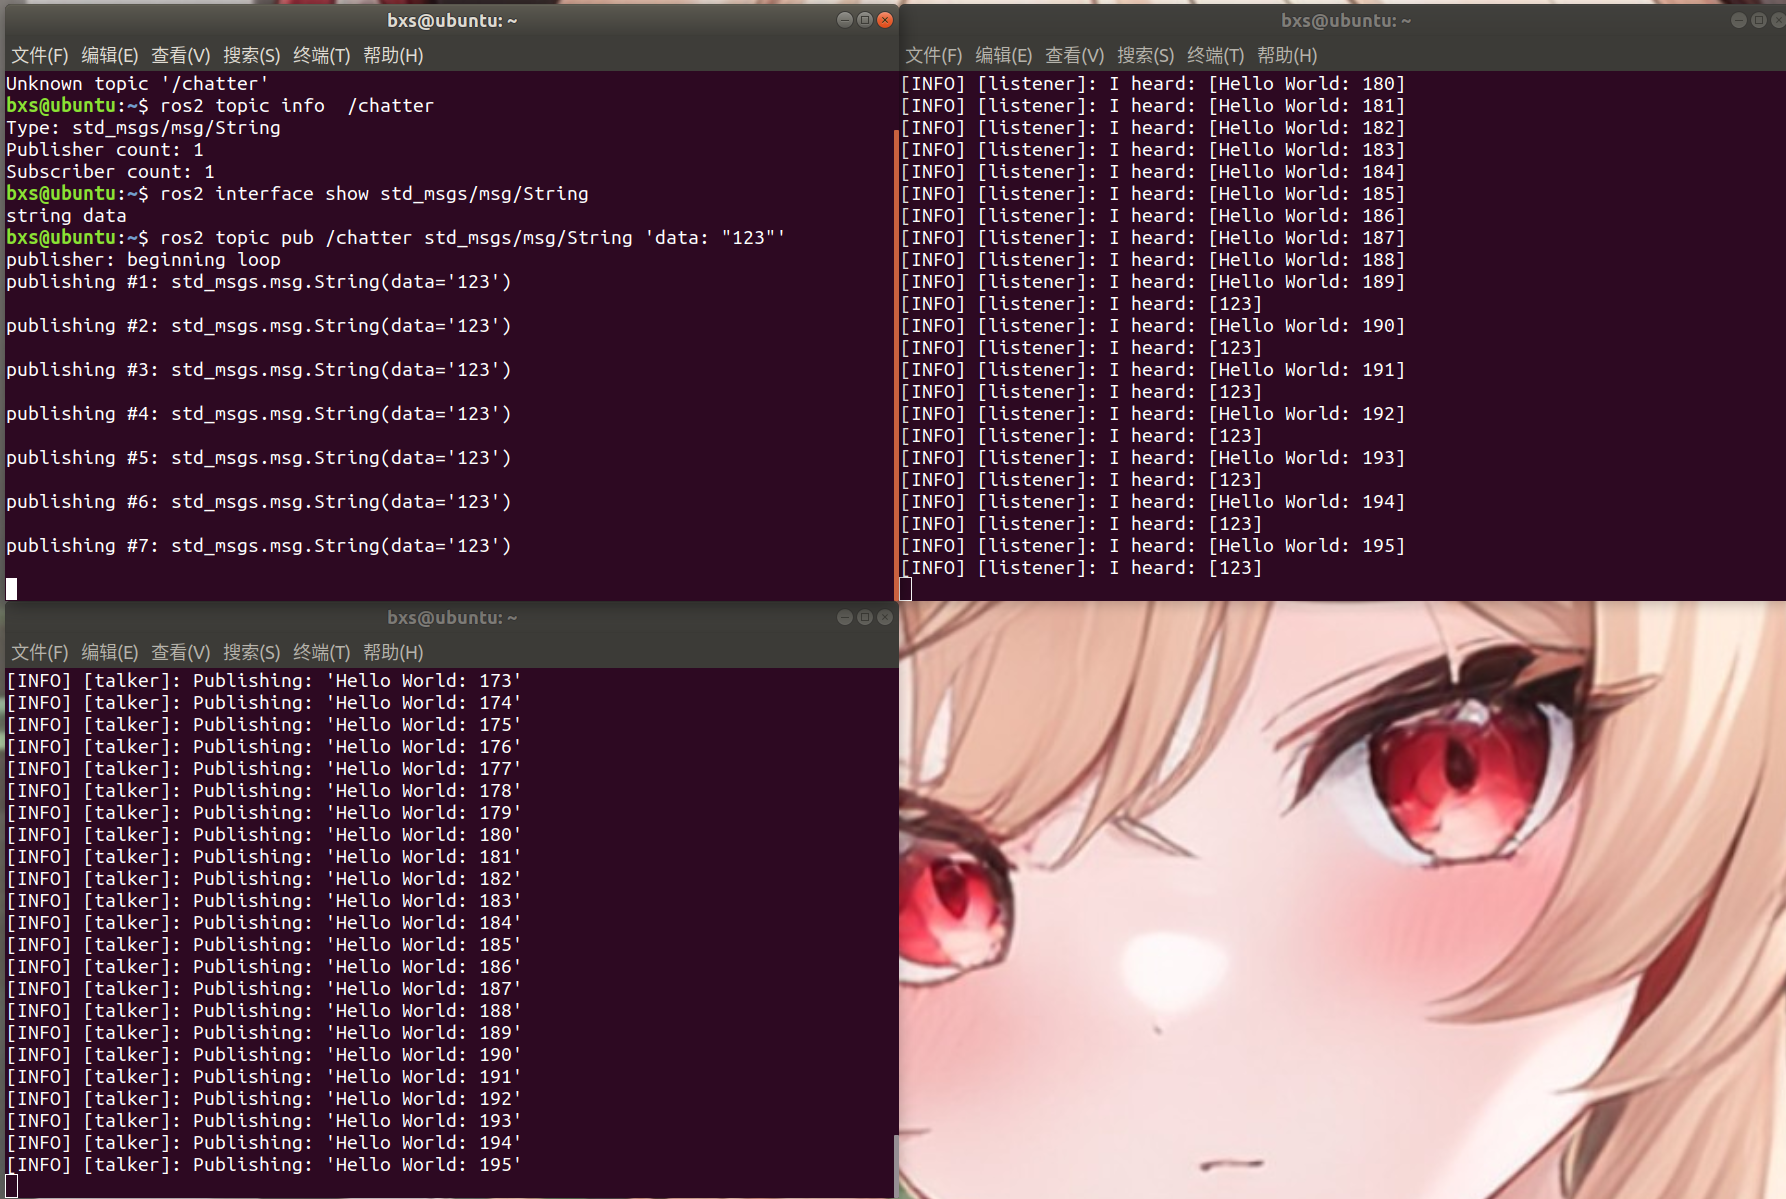
加入了一个话题发布者,对应前面的n对1订阅发布模型
4、话题RCLCPP实现
4.1创建节点
- 创建一个控制节点和一个被控节点。
控制节点创建一个话题发布者,发布控制命令(command)话题,接口类型为字符串(string),控制接点通过发布者发布控制命令(前进、后退、左转、右转、停止)。
被控节点创建一个订阅者,订阅控制命令,收到控制命令后根据命令内容打印对应指令出来。

依次输入下面的命令,创建workspace工作空间、example_topic_rclcpp功能包和topic_publisher_01.cpp
cd d2lros2/
mkdir -p RCLCPP/workspace/src
cd RCLCPP/workspace/src
ros2 pkg create example_topic_rclcpp --build-type ament_cmake --dependencies rclcpp
touch example_topic_rclcpp/src/topic_publisher_01.cpp
linux显示文件分支结构的目录树
ls -r
使用ls -r目录结构混乱,这里我们使用另一个工具tree,下载工具命令,并使用tree命令查看目录结构
sudo apt-get install tree
cd d2lros2/RCLCPP/
tree

tree --help
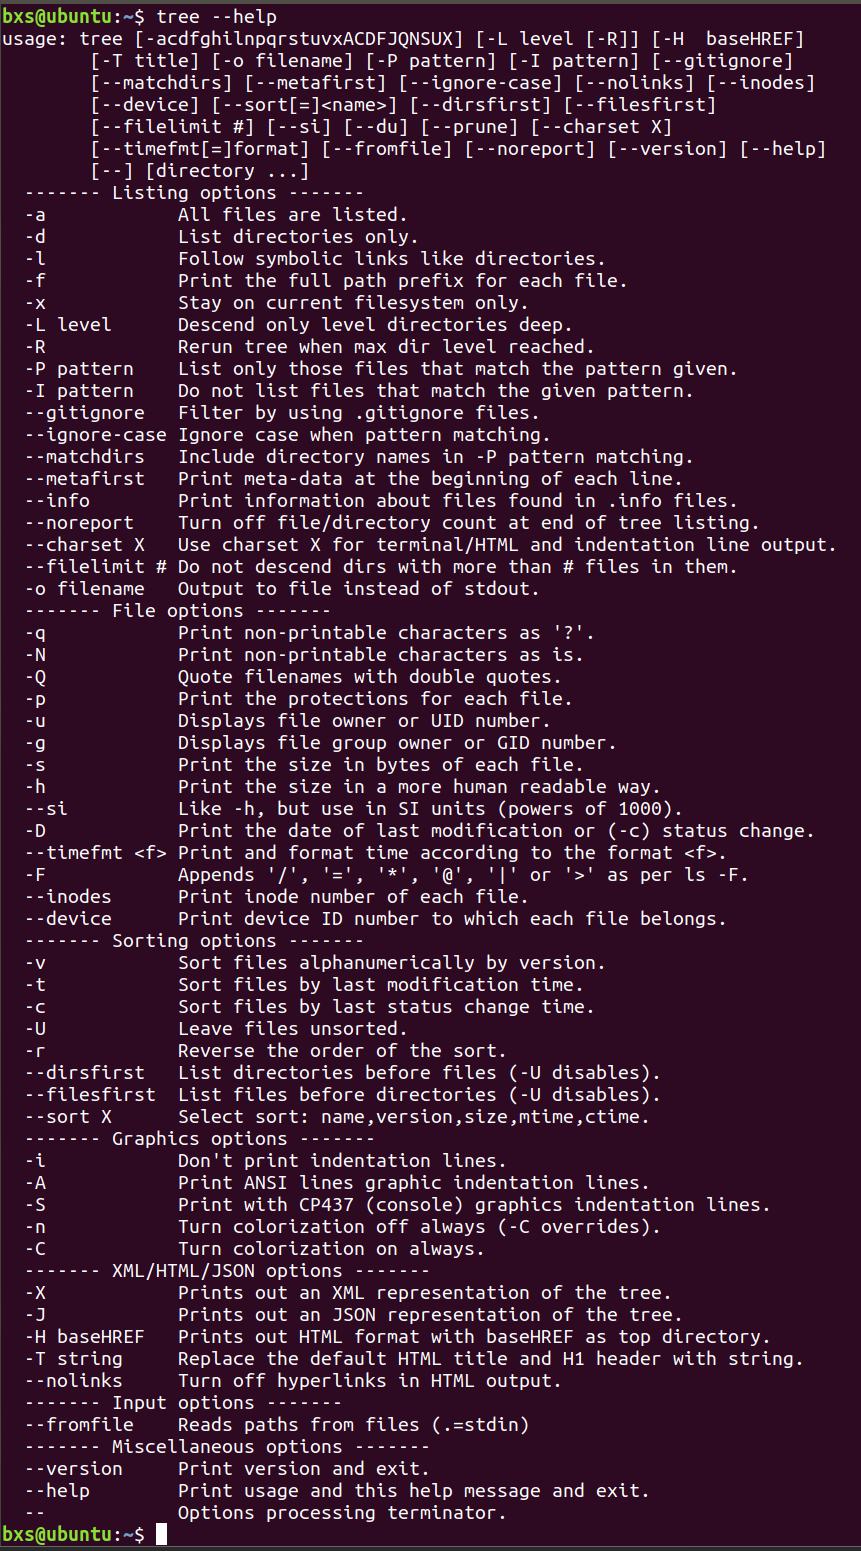
tree常用命令
tree -a  #显示所有目录及文件
 tree -d  #仅显示目录
tree -L n  #n表示要显示n层目录
tree -f  #显示文件完整路径
- 采用面向对象方式写一个节点
#include "rclcpp/rclcpp.hpp"

class TopicPublisher01 : public rclcpp::Node
{
public:
    // 构造函数,有一个参数为节点名称
    TopicPublisher01(std::string name) : Node(name)
    {
        RCLCPP_INFO(this->get_logger(), "%s节点已经启动.", name.c_str());
    }

private:
    // 声明节点
};

int main(int argc, char **argv)
{
    rclcpp::init(argc, argv);
    /*创建对应节点的共享指针对象*/
    auto node = std::make_shared<TopicPublisher01>("topic_publisher_01");
    /* 运行节点,并检测退出信号*/
    rclcpp::spin(node);
    rclcpp::shutdown();
    return 0;
}
- 修改CMakeLists.txt
add_executable(topic_publisher_01 src/topic_publisher_01.cpp)
ament_target_dependencies(topic_publisher_01 rclcpp)

install(TARGETS
  topic_publisher_01
  DESTINATION lib/${PROJECT_NAME}
)
- 安装colcon编译工具
sudo apt-get install python3-colcon-common-extensions
- 接着可以编译测试下,注意运行colcon的目录。
cd d2lros2/RCLCPP/workspace/
colcon build --packages-select example_topic_rclcpp
source install/setup.bash
ros2 run example_topic_rclcpp topic_publisher_01
4.2 编写发布者
- 导入消息接口
消息接口是ROS2通信时必须的一部分,通过消息接口ROS2才能完成消息的序列化和反序列化。ROS2为我们定义好了常用的消息接口,并生成了C++和Python的依赖文件,我们可以直接在程序中进行导入。
ament_cmake类型功能包导入消息接口分为三步:
- 在
CMakeLists.txt中导入,具体是先find_packages再ament_target_dependencies。 - 在
packages.xml中导入,具体是添加depend标签并将消息接口写入。 - 在代码中导入,C++中是
#include"消息功能包/xxx/xxx.hpp"。
我们依次做完这三步后文件内容如下:
CMakeLists.txt
find_package(rclcpp REQUIRED)
find_package(std_msgs REQUIRED)

add_executable(topic_publisher_01 src/topic_publisher_01.cpp)
ament_target_dependencies(topic_publisher_01 rclcpp std_msgs)
packages.xml
  <buildtool_depend>ament_cmake</buildtool_depend>

  <depend>rclcpp</depend>
  <depend>std_msgs</depend>

  <test_depend>ament_lint_auto</test_depend>
  <test_depend>ament_lint_common</test_depend>
代码文件topic_publisher_01.cpp
#include "rclcpp/rclcpp.hpp"
#include "std_msgs/msg/string.hpp"

class TopicPublisher01 : public rclcpp::Node
- 消息接口上面我们已经导入了,是
std_msgs/msg/string.h。 - 话题名称(topic_name),我们就用
control_command。 - Qos,Qos支持直接指定一个数字,这个数字对应的是
KeepLast队列长度。一般设置成10,即如果一次性有100条消息,默认保留最新的10个,其余的都扔掉。
接着我们可以编写发布者的代码了。
#include "rclcpp/rclcpp.hpp"
#include "std_msgs/msg/string.hpp"

class TopicPublisher01 : public rclcpp::Node
{
public:
    // 构造函数,有一个参数为节点名称
    TopicPublisher01(std::string name) : Node(name)
    {
        RCLCPP_INFO(this->get_logger(), "大家好,我是%s.", name.c_str());
        // 创建发布者
        command_publisher_ = this->create_publisher<std_msgs::msg::String>("command", 10);
    }

private:
    // 声明话题发布者
    rclcpp::Publisher<std_msgs::msg::String>::SharedPtr command_publisher_;
};
4.3 使用定时器定时发布数据
需要通过ROS2中的定时器来设置指定的周期调用回调函数,在回调函数里实现发布数据功能。
代码
#include "rclcpp/rclcpp.hpp"
#include "std_msgs/msg/string.hpp"

class TopicPublisher01 : public rclcpp::Node
{
public:
    // 构造函数,有一个参数为节点名称
    TopicPublisher01(std::string name) : Node(name)
    {
        RCLCPP_INFO(this->get_logger(), "大家好,我是%s.", name.c_str());
        // 创建发布者
        command_publisher_ = this->create_publisher<std_msgs::msg::String>("command", 10);
        // 创建定时器,500ms为周期,定时发布
        timer_ = this->create_wall_timer(std::chrono::milliseconds(500), std::bind(&TopicPublisher01::timer_callback, this));
    }

private:
    void timer_callback()
    {
        // 创建消息
        std_msgs::msg::String message;
        message.data = "forward";
        // 日志打印
        RCLCPP_INFO(this->get_logger(), "Publishing: '%s'", message.data.c_str());
        // 发布消息
        command_publisher_->publish(message);
    }
    // 声名定时器指针
    rclcpp::TimerBase::SharedPtr timer_;
    // 声明话题发布者指针
    rclcpp::Publisher<std_msgs::msg::String>::SharedPtr command_publisher_;
};
- 编译运行
cd chapt3/chapt3_ws/
colcon build --packages-select example_topic_rclcpp
source install/setup.bash
ros2 run example_topic_rclcpp topic_publisher_01
--packages-select,仅生成单个包(或选定的包)
- 测试
# 查看列表
ros2 topic list
# 输出内容
ros2 topic echo /command
4.4 编写订阅者
- 创建订阅节点
cd chapt3_ws/src/example_topic_rclcpp
touch src/topic_subscribe_01.cpp
- 代码
#include "rclcpp/rclcpp.hpp"

class TopicSubscribe01 : public rclcpp::Node
{
public:
    // 构造函数,有一个参数为节点名称
    TopicSubscribe01(std::string name) : Node(name)
    {
        RCLCPP_INFO(this->get_logger(), "大家好,我是%s.", name.c_str());
    }

private:
    // 声明节点
};

int main(int argc, char **argv)
{
    rclcpp::init(argc, argv);
    /*创建对应节点的共享指针对象*/
    auto node = std::make_shared<TopicSubscribe01>("topic_subscribe_01");
    /* 运行节点,并检测退出信号*/
    rclcpp::spin(node);
    rclcpp::shutdown();
    return 0;
}
- CMakeLists.txt
add_executable(topic_subscribe_01 src/topic_subscribe_01.cpp)
ament_target_dependencies(topic_subscribe_01 rclcpp)

install(TARGETS
topic_subscribe_01
  DESTINATION lib/${PROJECT_NAME}
)
- 编译测试
cd chapt3/chapt3_ws/
colcon build --packages-select example_topic_rclcpp
source install/setup.bash
ros2 run example_topic_rclcpp topic_subscribe_01
- 订阅者代码
#include "rclcpp/rclcpp.hpp"
#include "std_msgs/msg/string.hpp"

class TopicSubscribe01 : public rclcpp::Node
{
public:
    TopicSubscribe01(std::string name) : Node(name)
    {
        RCLCPP_INFO(this->get_logger(), "大家好,我是%s.", name.c_str());
          // 创建一个订阅者订阅话题
        command_subscribe_ = this->create_subscription<std_msgs::msg::String>("command", 10, std::bind(&TopicSubscribe01::command_callback, this, std::placeholders::_1));
    }

private:
     // 声明一个订阅者
    rclcpp::Subscription<std_msgs::msg::String>::SharedPtr command_subscribe_;
     // 收到话题数据的回调函数
    void command_callback(const std_msgs::msg::String::SharedPtr msg)
    {
        double speed = 0.0f;
        if(msg->data == "forward")
        {
            speed = 0.2f;
        }
        RCLCPP_INFO(this->get_logger(), "收到[%s]指令,发送速度 %f", msg->data.c_str(),speed);
    }
};
依然的需要在CMakeLists.txt添加下std_msgs依赖
ament_target_dependencies(topic_subscribe_01 rclcpp std_msgs)
5、话题RCLPY实现
5.1创建功能包和节点
cd r2lros2/
mkdir -p RCLPY/workspace/src
ros2 pkg create example_service_rclpy --build-type ament_python --dependencies rclpy example_interfaces  --node-name service_server_02
只支持一个节点文件,所以我们还需要手动创建一个。
cd example_service_rclpy/example_service_rclpy/
touch service_client_02.py
- setup.py
    entry_points={
        'console_scripts': [
            "service_client_02 = example_service_rclpy.service_client_02:main",
            "service_server_02 = example_service_rclpy.service_server_02:main"
        ],
    },
- service_server_02
#!/usr/bin/env python3
import rclpy
from rclpy.node import Node

class ServiceServer02(Node):
    def __init__(self,name):
        super().__init__(name)
        self.get_logger().info("节点已启动:%s!" % name)

def main(args=None):
    rclpy.init(args=args) # 初始化rclpy
    node = ServiceServer02("service_server_02")  # 新建一个节点
    rclpy.spin(node) # 保持节点运行,检测是否收到退出指令(Ctrl+C)
    rclpy.shutdown() # 关闭rclpy
5.2测试
colcon build --packages-select example_service_rclpy
source install/setup.bash
ros2 run example_service_rclpy service_server_02
- 打开终端
ros2 service call /add_two_ints_srv example_interfaces/srv/AddTwoInts "{a: 5,b: 10}"
二、服务
服务分为客户端和服务端,平时我们用的手机APP都可以成为客户端,而APP服务器对于软件来说就是服务端。
客户端发送请求给服务端,服务端可以根据客户端的请求做一些处理,然后返回结果给客户端。
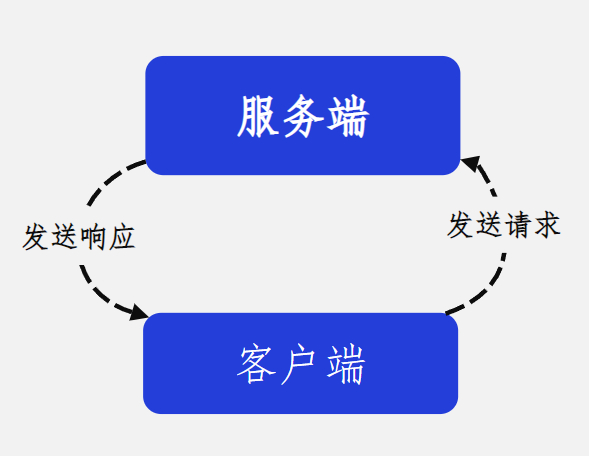
所以服务-客户端模型,也可以成为请求-响应模型。
不知道你有没有感觉到服务和话题的不同之处,话题是没有返回的,适用于单向或大量的数据传递。而服务是双向的,客户端发送请求,服务端响应请求。
同时服务还是有一些注意事项:
- 同一个服务(名称相同)有且只能有一个节点来提供
- 同一个服务可以被多个客户端调用
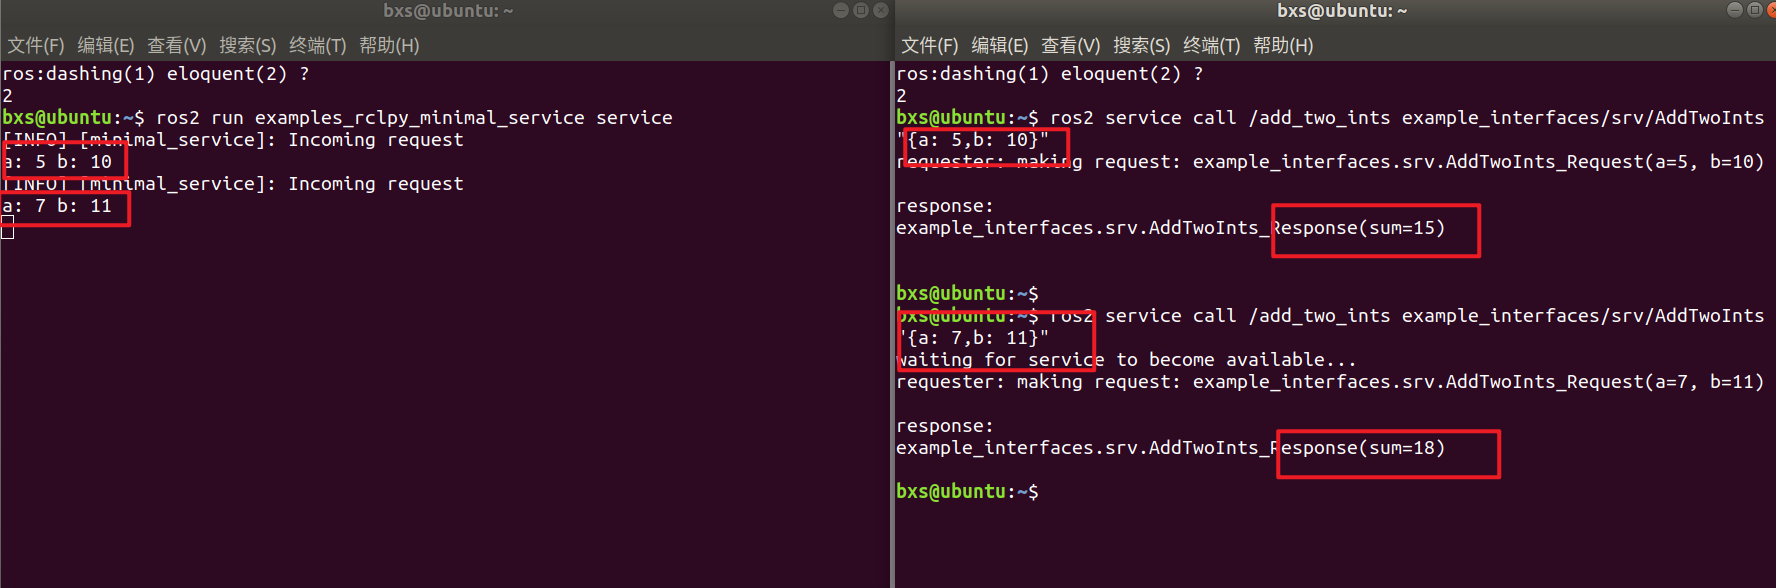
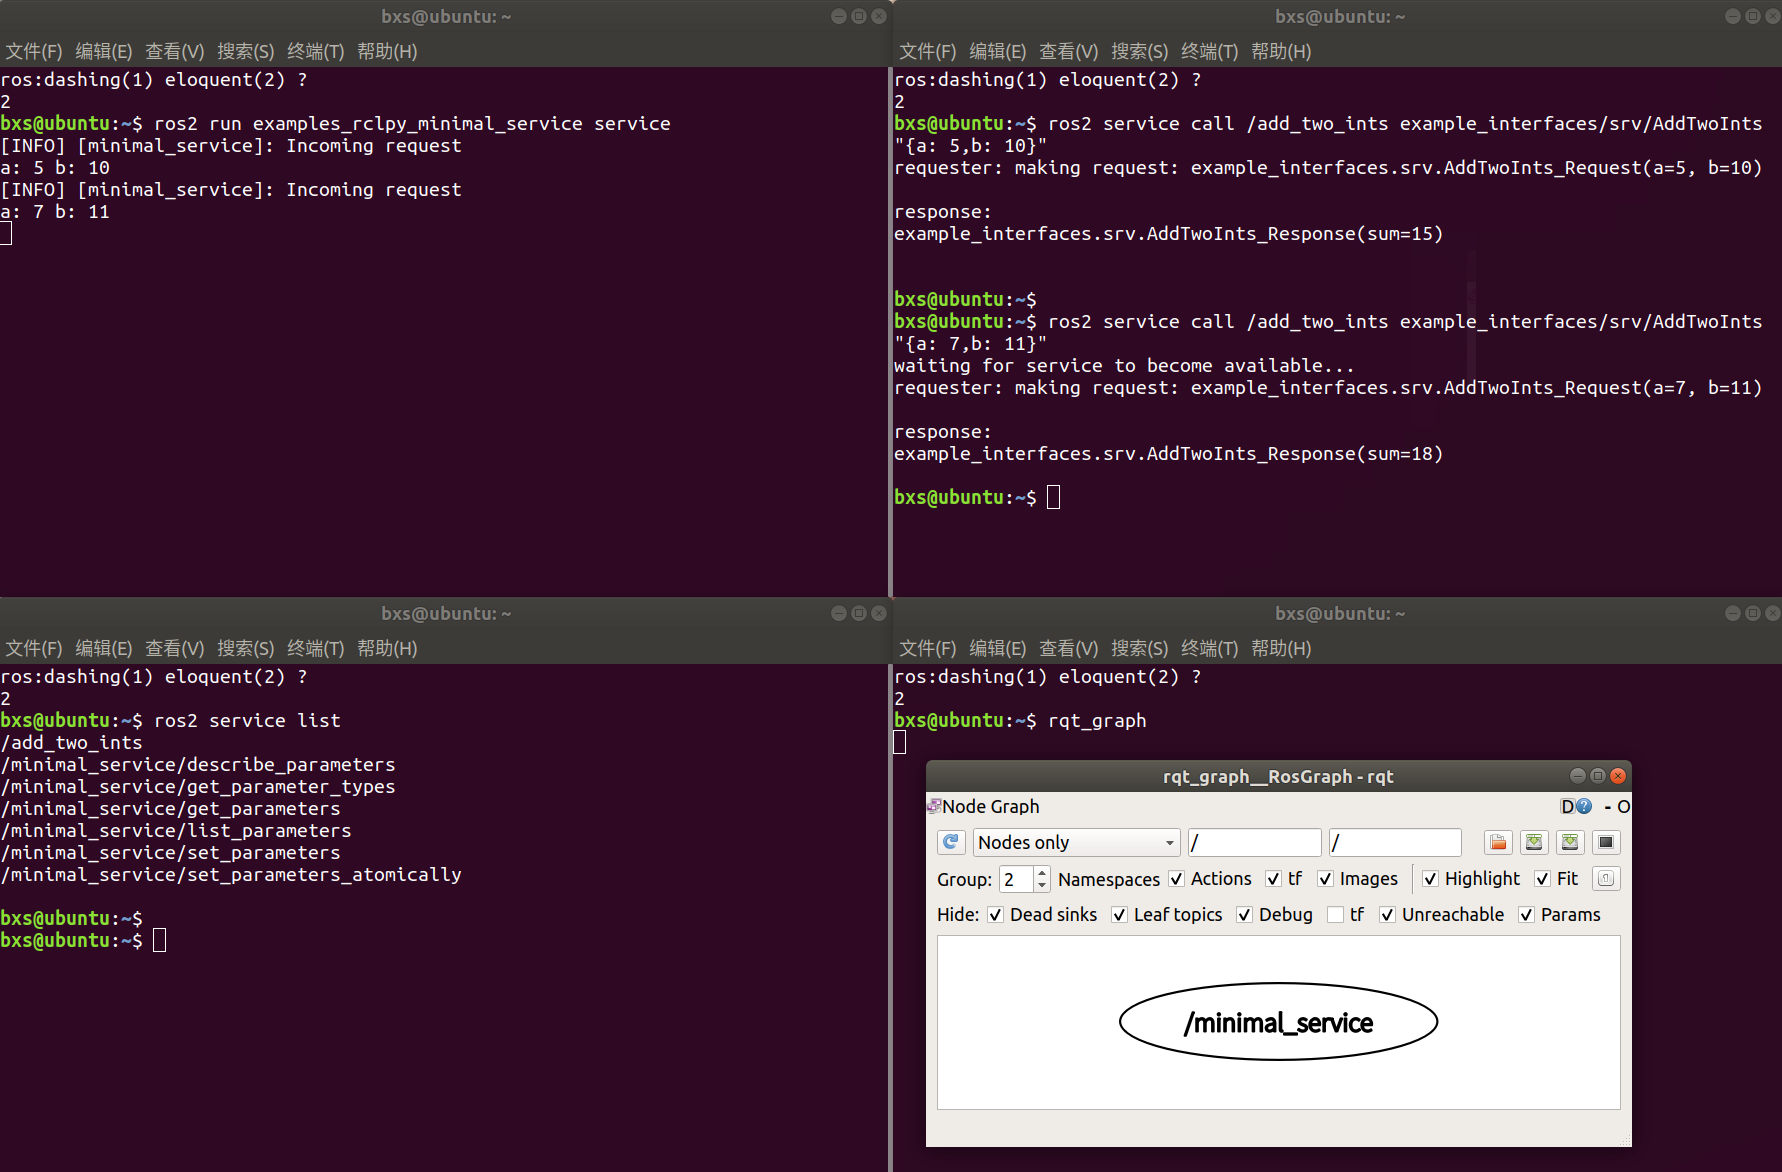
1、启动服务
ros2 run examples_rclpy_minimal_service service
- 查看服务列表
ros2 service list

2、手动调用服务
再启动一个终端,输入下面的命令(注意a:、b:后的空格)。
ros2 service call /add_two_ints example_interfaces/srv/AddTwoInts "{a: 5,b: 10}"
/bxs-1315075022.cos.ap-chengdu.myqcloud.com/img/image-20240315151538529.png" alt=“image-20240315151538529” style=“zoom: 50%;” />
2、手动调用服务
再启动一个终端,输入下面的命令(注意a:、b:后的空格)。
ros2 service call /add_two_ints example_interfaces/srv/AddTwoInts "{a: 5,b: 10}"
- 服务同样可以使用
RCLCPP和RCLPY实现


 3468
3468


 被折叠的 条评论
为什么被折叠?
被折叠的 条评论
为什么被折叠?
 到【灌水乐园】发言


