


官方示例原文地址:https://docs.unity3d.com/Manual/SL-SurfaceShaderExamples.html
Surface Shader示例
在表面着色器
。此页面上的示例显示如何使用内置照明模型。有关如何实现自定义光照模型的示例,请参阅Surface Shader光照示例。
简单着色器
例
我们将从一个非常简单的Shader开始,并在此基础上进行构建。这是一个将表面颜色设置为“白色”的着色器。它使用内置的Lambert(漫反射)光照模型。
Shader "Example/Diffuse Simple" {
    SubShader {
      Tags { "RenderType" = "Opaque" }
      CGPROGRAM
      #pragma surface surf Lambert
      struct Input {
          float4 color : COLOR;
      };
      void surf (Input IN, inout SurfaceOutput o) {
          o.Albedo = 1;
      }
      ENDCG
    }
    Fallback "Diffuse"
  }
效果
质地
一个全白的物体很无聊,所以让我们添加一个纹理。我们将为添加属性
块中的着色器,因此我们在材质中获得了一个纹理选择器。其他更改在下面以粗体显示。
Shader "Example/Diffuse Texture" {
    Properties {
      _MainTex ("Texture", 2D) = "white" {}
    }
    SubShader {
      Tags { "RenderType" = "Opaque" }
      CGPROGRAM
      #pragma surface surf Lambert
      struct Input {
          float2 uv_MainTex;
      };
      sampler2D _MainTex;
      void surf (Input IN, inout SurfaceOutput o) {
          o.Albedo = tex2D (_MainTex, IN.uv_MainTex).rgb;
      }
      ENDCG
    }
    Fallback "Diffuse"
  }
效果
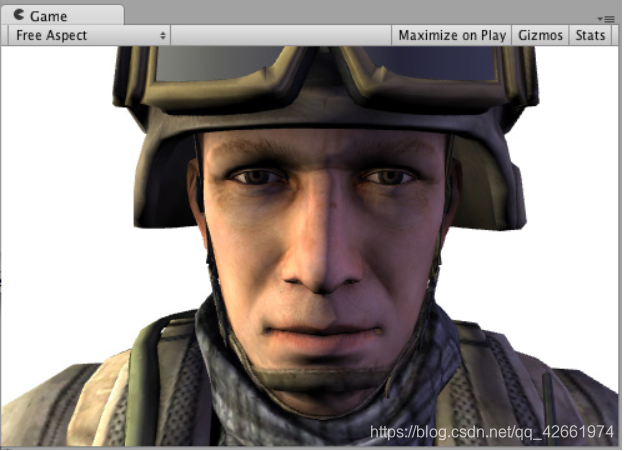
法线贴图
让我们添加一些法线贴图:
Shader "Example/Diffuse Bump" {
    Properties {
      _MainTex ("Texture", 2D) = "white" {}
      _BumpMap ("Bumpmap", 2D) = "bump" {}
    }
    SubShader {
      Tags { "RenderType" = "Opaque" }
      CGPROGRAM
      #pragma surface surf Lambert
      struct Input {
        float2 uv_MainTex;
        float2 uv_BumpMap;
      };
      sampler2D _MainTex;
      sampler2D _BumpMap;
      void surf (Input IN, inout SurfaceOutput o) {
        o.Albedo = tex2D (_MainTex, IN.uv_MainTex).rgb;
        o.Normal = UnpackNormal (tex2D (_BumpMap, IN.uv_BumpMap));
      }
      ENDCG
    }
    Fallback "Diffuse"
  }
效果
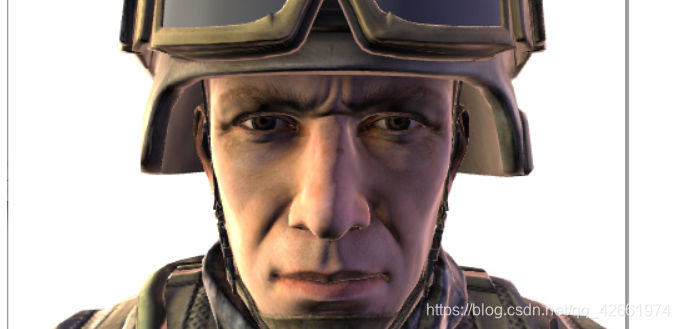
轮廓照明
现在,尝试添加一些Rim Lighting以突出GameObject
的边缘。我们将根据曲面法线和视图方向之间的角度添加一些自发光。为此,我们将使用内置的viewDirSurface Shader变量。
Shader "Example/Rim" {
    Properties {
      _MainTex ("Texture", 2D) = "white" {}
      _BumpMap ("Bumpmap", 2D) = "bump" {}
      _RimColor ("Rim Color", Color) = (0.26,0.19,0.16,0.0)
      _RimPower ("Rim Power", Range(0.5,8.0)) = 3.0
    }
    SubShader {
      Tags { "RenderType" = "Opaque" }
      CGPROGRAM
      #pragma surface surf Lambert
      struct Input {
          float2 uv_MainTex;
          float2 uv_BumpMap;
          float3 viewDir;
      };
      sampler2D _MainTex;
      sampler2D _BumpMap;
      float4 _RimColor;
      float _RimPower;
      void surf (Input IN, inout SurfaceOutput o) {
          o.Albedo = tex2D (_MainTex, IN.uv_MainTex).rgb;
          o.Normal = UnpackNormal (tex2D (_BumpMap, IN.uv_BumpMap));
          half rim = 1.0 - saturate(dot (normalize(IN.viewDir), o.Normal));
          o.Emission = _RimColor.rgb * pow (rim, _RimPower);
      }
      ENDCG
    }
    Fallback "Diffuse"
  }
效果
细节纹理
对于不同的效果,让我们添加一个与基础纹理结合的细节纹理。细节纹理通常在材质中使用相同的UV但不同的Tiling,因此我们需要使用不同的输入UV坐标。
Shader "Example/Detail" {
    Properties {
      _MainTex ("Texture", 2D) = "white" {}
      _BumpMap ("Bumpmap", 2D) = "bump" {}
      _Detail ("Detail", 2D) = "gray" {}
    }
    SubShader {
      Tags { "RenderType" = "Opaque" }
      CGPROGRAM
      #pragma surface surf Lambert
      struct Input {
          float2 uv_MainTex;
          float2 uv_BumpMap;
          float2 uv_Detail;
      };
      sampler2D _MainTex;
      sampler2D _BumpMap;
      sampler2D _Detail;
      void surf (Input IN, inout SurfaceOutput o) {
          o.Albedo = tex2D (_MainTex, IN.uv_MainTex).rgb;
          o.Albedo *= tex2D (_Detail, IN.uv_Detail).rgb * 2;
          o.Normal = UnpackNormal (tex2D (_BumpMap, IN.uv_BumpMap));
      }
      ENDCG
    }
    Fallback "Diffuse"
  }
效果
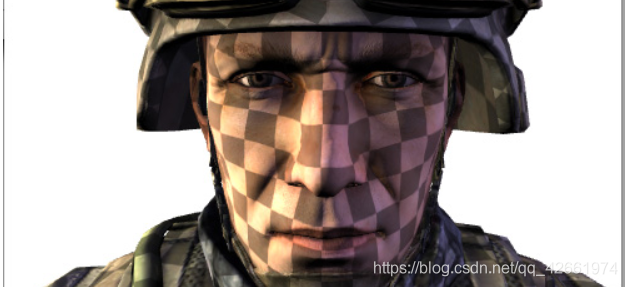
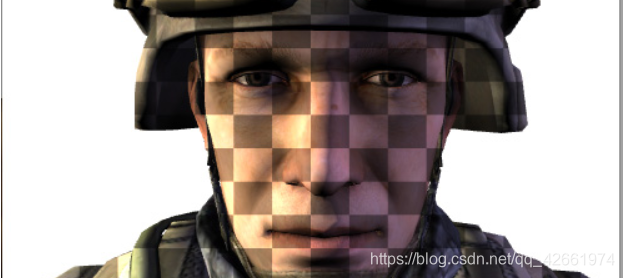
在屏幕空间的细节纹理
屏幕空间中的细节纹理对于士兵头模型没有实际意义,但是在这里它用于说明如何使用内置screenPos输入:
Shader "Example/ScreenPos" {
    Properties {
      _MainTex ("Texture", 2D) = "white" {}
      _Detail ("Detail", 2D) = "gray" {}
    }
    SubShader {
      Tags { "RenderType" = "Opaque" }
      CGPROGRAM
      #pragma surface surf Lambert
      struct Input {
          float2 uv_MainTex;
          float4 screenPos;
      };
      sampler2D _MainTex;
      sampler2D _Detail;
      void surf (Input IN, inout SurfaceOutput o) {
          o.Albedo = tex2D (_MainTex, IN.uv_MainTex).rgb;
          float2 screenUV = IN.screenPos.xy / IN.screenPos.w;
          screenUV *= float2(8,6);
          o.Albedo *= tex2D (_Detail, screenUV).rgb * 2;
      }
      ENDCG
    }
    Fallback "Diffuse"
  }
效果
立方体贴图反射
这是一个使用内置worldRefl输入进行立方体贴图反射的着色器。它与内置的Reflective / Diffuse Shader
非常相似:
Shader "Example/WorldRefl" {
    Properties {
      _MainTex ("Texture", 2D) = "white" {}
      _Cube ("Cubemap", CUBE) = "" {}
    }
    SubShader {
      Tags { "RenderType" = "Opaque" }
      CGPROGRAM
      #pragma surface surf Lambert
      struct Input {
          float2 uv_MainTex;
          float3 worldRefl;
      };
      sampler2D _MainTex;
      samplerCUBE _Cube;
      void surf (Input IN, inout SurfaceOutput o) {
          o.Albedo = tex2D (_MainTex, IN.uv_MainTex).rgb * 0.5;
          o.Emission = texCUBE (_Cube, IN.worldRefl).rgb;
      }
      ENDCG
    }
    Fallback "Diffuse"
  }
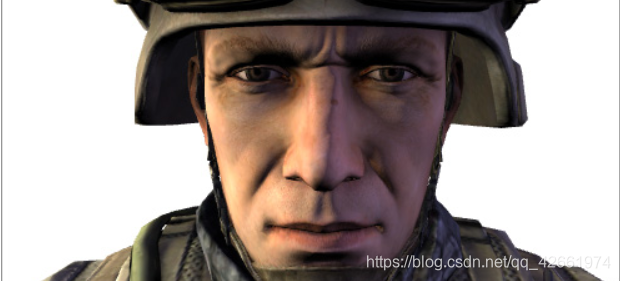
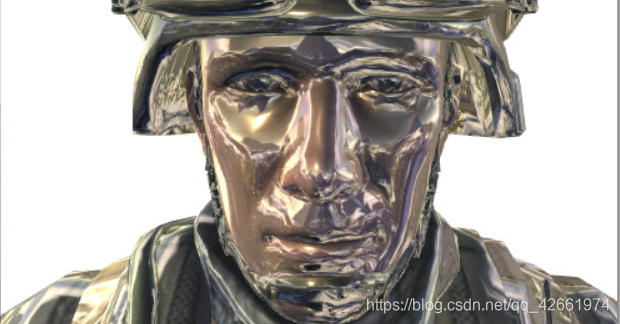
效果
因为它将反射颜色指定为Emission,我们得到一个非常闪亮的士兵:
如果要进行受法线贴图影响的反射,则需要稍微复杂一些:INTERNAL_DATA需要添加到Input结构中,以及WorldReflectionVector用于在写入“正常”输出后计算每像素反射向量的函数。
Shader "Example/WorldRefl Normalmap" {
    Properties {
      _MainTex ("Texture", 2D) = "white" {}
      _BumpMap ("Bumpmap", 2D) = "bump" {}
      _Cube ("Cubemap", CUBE) = "" {}
    }
    SubShader {
      Tags { "RenderType" = "Opaque" }
      CGPROGRAM
      #pragma surface surf Lambert
      struct Input {
          float2 uv_MainTex;
          float2 uv_BumpMap;
          float3 worldRefl;
          INTERNAL_DATA
      };
      sampler2D _MainTex;
      sampler2D _BumpMap;
      samplerCUBE _Cube;
      void surf (Input IN, inout SurfaceOutput o) {
          o.Albedo = tex2D (_MainTex, IN.uv_MainTex).rgb * 0.5;
          o.Normal = UnpackNormal (tex2D (_BumpMap, IN.uv_BumpMap));
          o.Emission = texCUBE (_Cube, WorldReflectionVector (IN, o.Normal)).rgb;
      }
      ENDCG
    }
    Fallback "Diffuse"
  }
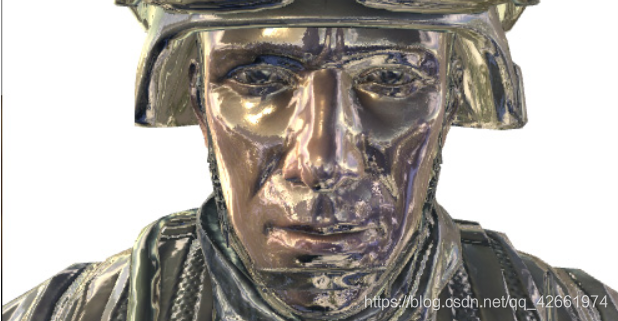
这是一个正常映射的闪亮士兵:
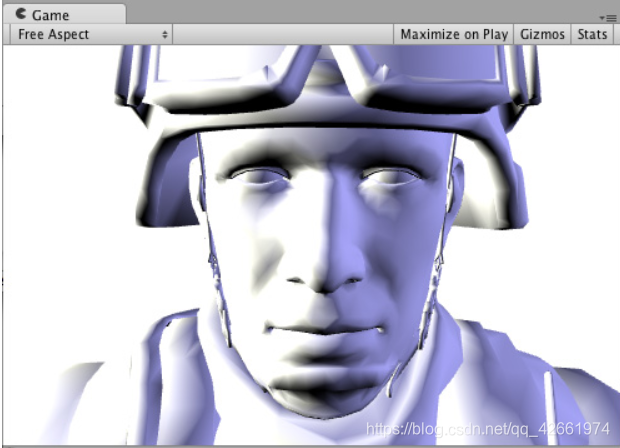
切片通过世界空间位置
这是一个Shader,通过丢弃像素
来“切片”GameObject 中的近水平环。它通过使用clip()基于像素的世界位置的Cg / HLSL函数来实现。我们将使用内置的worldPosSurface Shader变量。
Shader "Example/Slices" {
    Properties {
      _MainTex ("Texture", 2D) = "white" {}
      _BumpMap ("Bumpmap", 2D) = "bump" {}
    }
    SubShader {
      Tags { "RenderType" = "Opaque" }
      Cull Off
      CGPROGRAM
      #pragma surface surf Lambert
      struct Input {
          float2 uv_MainTex;
          float2 uv_BumpMap;
          float3 worldPos;
      };
      sampler2D _MainTex;
      sampler2D _BumpMap;
      void surf (Input IN, inout SurfaceOutput o) {
          clip (frac((IN.worldPos.y+IN.worldPos.z*0.1) * 5) - 0.5);
          o.Albedo = tex2D (_MainTex, IN.uv_MainTex).rgb;
          o.Normal = UnpackNormal (tex2D (_BumpMap, IN.uv_BumpMap));
      }
      ENDCG
    }
    Fallback "Diffuse"
  }
效果

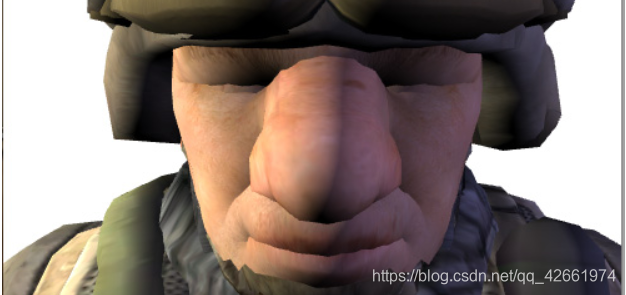
使用顶点修改器进行正常挤出
可以使用“顶点修改器”功能,该功能将修改在的顶点着色器
的传入顶点数据。这可以用于程序动画和法线挤出等事情。Surface Shader编译指令vertex:functionName用于此,带有一个带inout appdata_full参数的函数。
这是一个着色器,它沿着法线按照材质中指定的量移动顶点:
Shader "Example/Normal Extrusion" {
    Properties {
      _MainTex ("Texture", 2D) = "white" {}
      _Amount ("Extrusion Amount", Range(-1,1)) = 0.5
    }
    SubShader {
      Tags { "RenderType" = "Opaque" }
      CGPROGRAM
      #pragma surface surf Lambert vertex:vert
      struct Input {
          float2 uv_MainTex;
      };
      float _Amount;
      void vert (inout appdata_full v) {
          v.vertex.xyz += v.normal * _Amount;
      }
      sampler2D _MainTex;
      void surf (Input IN, inout SurfaceOutput o) {
          o.Albedo = tex2D (_MainTex, IN.uv_MainTex).rgb;
      }
      ENDCG
    }
    Fallback "Diffuse"
  }
效果
沿着法线移动顶点会让一个肥胖的士兵:
每个顶点计算的自定义数据
使用顶点修改器函数,还可以在顶点着色器中计算自定义数据,然后将其按像素传递给Surface Shader函数。使用相同的编译指令vertex:functionName,但该函数应该采用两个参数:inout appdata_full和out Input。您可以在那里填写任何不是内置值的Input成员。
注意:以这种方式使用的自定义输入成员不得以“uv”开头的名称,否则它们将无法正常工作。
下面的示例定义了一个自定义float3 customColor成员,它在顶点函数中计算:
Shader "Example/Custom Vertex Data" {
    Properties {
      _MainTex ("Texture", 2D) = "white" {}
    }
    SubShader {
      Tags { "RenderType" = "Opaque" }
      CGPROGRAM
      #pragma surface surf Lambert vertex:vert
      struct Input {
          float2 uv_MainTex;
          float3 customColor;
      };
      void vert (inout appdata_full v, out Input o) {
          UNITY_INITIALIZE_OUTPUT(Input,o);
          o.customColor = abs(v.normal);
      }
      sampler2D _MainTex;
      void surf (Input IN, inout SurfaceOutput o) {
          o.Albedo = tex2D (_MainTex, IN.uv_MainTex).rgb;
          o.Albedo *= IN.customColor;
      }
      ENDCG
    }
    Fallback "Diffuse"
  }
在此示例customColor中设置为法线的绝对值:
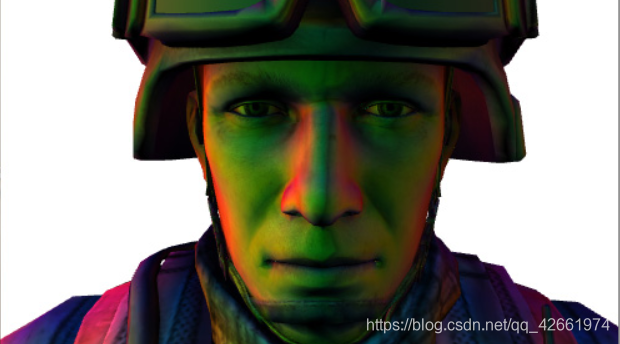
更实际的用途可能是计算内置输入变量不提供的任何每顶点数据; 或优化着色器计算。例如,可以在GameObject的顶点处计算Rim光照,而不是在每像素的Surface Shader中进行计算。
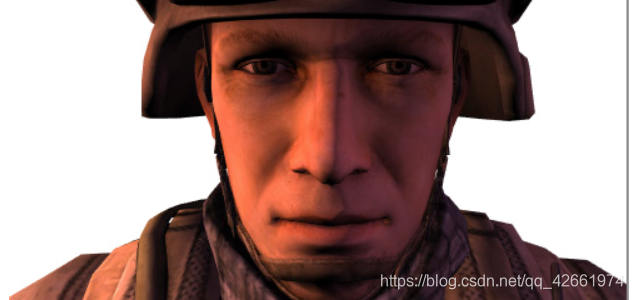
最终颜色修改器
可以使用“最终颜色修改器”功能来修改由着色器计算的最终颜色。表面着色器编译指令finalcolor:functionName用于此,带有一个带Input IN, SurfaceOutput o, inout fixed4 color参数的函数。
这是一个简单的着色器,它将色调应用于最终颜色。这与仅对表面Albedo颜色应用色调不同:此色调还会影响来自Lightmaps的
任何颜色,光探针
和类似的额外来源。
Shader "Example/Tint Final Color" {
    Properties {
      _MainTex ("Texture", 2D) = "white" {}
      _ColorTint ("Tint", Color) = (1.0, 0.6, 0.6, 1.0)
    }
    SubShader {
      Tags { "RenderType" = "Opaque" }
      CGPROGRAM
      #pragma surface surf Lambert finalcolor:mycolor
      struct Input {
          float2 uv_MainTex;
      };
      fixed4 _ColorTint;
      void mycolor (Input IN, SurfaceOutput o, inout fixed4 color)
      {
          color *= _ColorTint;
      }
      sampler2D _MainTex;
      void surf (Input IN, inout SurfaceOutput o) {
           o.Albedo = tex2D (_MainTex, IN.uv_MainTex).rgb;
      }
      ENDCG
    }
    Fallback "Diffuse"
  }
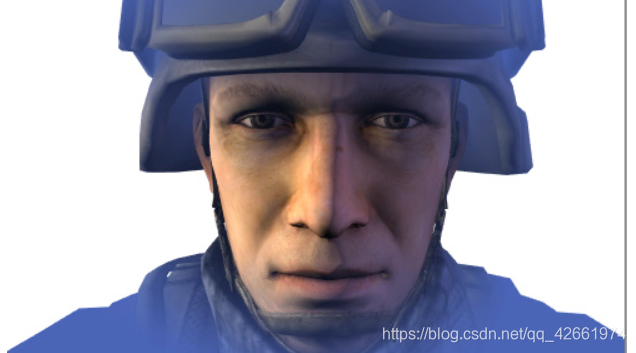
使用最终颜色修改器定制雾
使用最终颜色修改器(见上文)的一个常见情况是在前向渲染中
实现完全自定义Fog 。雾需要影响最终的计算像素着色器颜色,这正是finalcolor修改器所做的。
这是一个根据距离屏幕中心的距离应用雾色调的着色器。这将顶点修改器与自定义顶点数据(fog)和最终颜色修改器组合在一起。在前向渲染中
使用时将添加剂传递,雾需要淡化为黑色。此示例处理该问题并执行检查UNITY_PASS_FORWARDADD。
Shader "Example/Fog via Final Color" {
    Properties {
      _MainTex ("Texture", 2D) = "white" {}
      _FogColor ("Fog Color", Color) = (0.3, 0.4, 0.7, 1.0)
    }
    SubShader {
      Tags { "RenderType" = "Opaque" }
      CGPROGRAM
      #pragma surface surf Lambert finalcolor:mycolor vertex:myvert
      struct Input {
          float2 uv_MainTex;
          half fog;
      };
      void myvert (inout appdata_full v, out Input data)
      {
          UNITY_INITIALIZE_OUTPUT(Input,data);
          float4 hpos = UnityObjectToClipPos(v.vertex);
          hpos.xy/=hpos.w;
          data.fog = min (1, dot (hpos.xy, hpos.xy)*0.5);
      }
      fixed4 _FogColor;
      void mycolor (Input IN, SurfaceOutput o, inout fixed4 color)
      {
          fixed3 fogColor = _FogColor.rgb;
          #ifdef UNITY_PASS_FORWARDADD
          fogColor = 0;
          #endif
          color.rgb = lerp (color.rgb, fogColor, IN.fog);
      }
      sampler2D _MainTex;
      void surf (Input IN, inout SurfaceOutput o) {
           o.Albedo = tex2D (_MainTex, IN.uv_MainTex).rgb;
      }
      ENDCG
    }
    Fallback "Diffuse"
  }
线性雾
Shader "Example/Linear Fog" {
  Properties {
    _MainTex ("Base (RGB)", 2D) = "white" {}
  }
  SubShader {
    Tags { "RenderType"="Opaque" }
    LOD 200

    CGPROGRAM
    #pragma surface surf Lambert finalcolor:mycolor vertex:myvert
    #pragma multi_compile_fog

    sampler2D _MainTex;
    uniform half4 unity_FogStart;
    uniform half4 unity_FogEnd;

    struct Input {
      float2 uv_MainTex;
      half fog;
    };

    void myvert (inout appdata_full v, out Input data) {
      UNITY_INITIALIZE_OUTPUT(Input,data);
      float pos = length(UnityObjectToViewPos(v.vertex).xyz);
      float diff = unity_FogEnd.x - unity_FogStart.x;
      float invDiff = 1.0f / diff;
      data.fog = clamp ((unity_FogEnd.x - pos) * invDiff, 0.0, 1.0);
    }
    void mycolor (Input IN, SurfaceOutput o, inout fixed4 color) {
      #ifdef UNITY_PASS_FORWARDADD
        UNITY_APPLY_FOG_COLOR(IN.fog, color, float4(0,0,0,0));
      #else
        UNITY_APPLY_FOG_COLOR(IN.fog, color, unity_FogColor);
      #endif
    }

    void surf (Input IN, inout SurfaceOutput o) {
      half4 c = tex2D (_MainTex, IN.uv_MainTex);
      o.Albedo = c.rgb;
      o.Alpha = c.a;
    }
    ENDCG
  }
  FallBack "Diffuse"
}
贴花
贴图通常用于在运行时向材质添加细节(例如,子弹影响)。它们在延迟渲染中特别有用,因为它们在点亮之前会改变GBuffer,因此可以节省性能。
在典型的场景中,Decals应该在不透明对象之后呈现,并且不应该是阴影脚轮,如ShaderLab
下面示例 “标签”。
Shader "Example/Decal" {
  Properties {
    _MainTex ("Base (RGB)", 2D) = "white" {}
  }
  SubShader {
    Tags { "RenderType"="Opaque" "Queue"="Geometry+1" "ForceNoShadowCasting"="True" }
    LOD 200
    Offset -1, -1

    CGPROGRAM
    #pragma surface surf Lambert decal:blend

    sampler2D _MainTex;

    struct Input {
      float2 uv_MainTex;
    };

    void surf (Input IN, inout SurfaceOutput o) {
        half4 c = tex2D (_MainTex, IN.uv_MainTex);
        o.Albedo = c.rgb;
        o.Alpha = c.a;
      }
    ENDCG
    }
}


 5117
5117


 被折叠的 条评论
为什么被折叠?
被折叠的 条评论
为什么被折叠?
 到【灌水乐园】发言


