


在网上看了很多源码安装Moveit!和OMPL的方法,安装的过程中参考了CSDN,ROS官方上的一些文章,自己在安装过程中出现了很多问题,经过不懈努力,最后终于安装好了,决定把经验发出来供大家参考。
一、Moveit!源码安装
参考Moveit!
1、卸载Binary形式的Moveit!
首先我们需要卸载之前以Binary形式安装Moveit!,如果你之前没有安装过,可以跳过这一步。
sudo apt-get remove ros-noetic-moveit-*2、更新软件包
rosdep update
sudo apt-get update
sudo apt-get dist-upgrade
3、安装依赖
 sudo apt-get install python3-wstool
 sudo apt-get install python3-catkin-tools
 sudo apt-get installclang-format-3.9 //这一个我感觉没有多大用,失败了也没关系
4、创建moveit工作空间
mkdir ~/moveit
cd ~/moveit
4、下载源码编译
source /opt/ros/noetic/setup.bash  //添加环境变量
wstool init src
wstool merge -t src https://raw.githubusercontent.com/ros-planning/moveit/master/moveit.rosinstall
wstool update -t src
rosdep install -y --from-paths src --ignore-src --rosdistro ${ROS_DISTRO}
catkin config --extend /opt/ros/${ROS_DISTRO} --cmake-args -DCMAKE_BUILD_TYPE=Release
sudo catkin build
注:如果wstool merge -t src https://raw.githubusercontent.com/ros-planning/moveit/master/moveit.rosinstall这一步失败了,进入~/moveit/src目录,(cd ~/moveit/src)ctrl+F显示隐藏文件,打开.rosinstall,将下面的语句全部添加进去,保存,再继续上面的指令。
# This file is intended for users who want to build MoveIt from source.
# Used with wstool, users can download source of all packages of MoveIt.
- git:
    local-name: moveit_msgs
    uri: https://github.com/ros-planning/moveit_msgs.git
    version: master
- git:
    local-name: moveit_resources
    uri: https://github.com/ros-planning/moveit_resources.git
    version: master
- git:
    local-name: geometric_shapes
    uri: https://github.com/ros-planning/geometric_shapes.git
    version: noetic-devel
- git:
    local-name: srdfdom
    uri: https://github.com/ros-planning/srdfdom
    version: noetic-devel
- git:
    local-name: moveit
    uri: https://github.com/ros-planning/moveit.git
    version: noetic-devel
- git:
    local-name: rviz_visual_tools
    uri: https://github.com/PickNikRobotics/rviz_visual_tools
    version: noetic-devel
- git:
    local-name: moveit_visual_tools
    uri: https://github.com/ros-planning/moveit_visual_tools.git
    version: noetic-devel
- git:
    local-name: moveit_tutorials
    uri: https://github.com/ros-planning/moveit_tutorials.git
    version: master
- git:
    local-name: panda_moveit_config
    uri: https://github.com/ros-planning/panda_moveit_config.git
    version: noetic-devel
编译完成没有报错的话,说明你已经成功安装了moveit!,完成了第一步。
二、OMPL源码安装
参考博客
1、卸载之前的OMPL(很重要,给你们标红)
先到系统目录,检查自己有没有OMPL库。(类似libompl.so这种文件)
cd /opt/ros/noetic
find ./ -name "ompl*"
find ./ -name "libompl"
如果没有直接跳到下一步,如果有必须要卸载。
sudo apt-get purge ros-noetic-ompl
2、源码安装并编译
cd ~/ws_moveit/src
git clone https://github.com/ompl/ompl
注:很多文章说刚刚我们在一个/opt/ros/noetic/lib目录下卸载了三个.so文件,所以要把新下载的文件再安装上去。(修改ompl的安装目录,打开~/moveit/src/ompl/src/ompl/CMakeList.txt中的安装地址:DESTINATION ${CMAKE_INSTALL_LIBDIR},修改为:DESTINATION "/opt/ros/noetic/lib")。我认为这个没必要,因为源码安装ompl会在~/moveit/devel/.private/moveit_planners_ompl/lib/下再创建四个.so的库文件,而moveit真正用到的ompl库其实就是这几个库文件,所以,我们只需要将你自己创建的功能包放在~/moveit/src目录下,编译,source环境,就可以成功使用了。
cd ~/moveit
sudo catkin build
三、自定义规划算法(举例)
1、修改ompl源码
进入~/moveit/src/ompl/src/ompl/geometric/planners/rrt/src,把RRT.c和RRT.h复制重命名为MyRRT.c和MyRRT.h,进入这两个复制的文件,把里面所有的RRT字符替换为MyRRT。
2、修改moveit源码
进入~/moveit/src/moveit/moveit_planners/ompl/ompl_interface/src中找到planning_context_manager.cpp,添加头文件。
#include </home/lxj/moveit/src/ompl/src/ompl//geometric/planners/rrt/MyRRT.h>
//路径改成自己的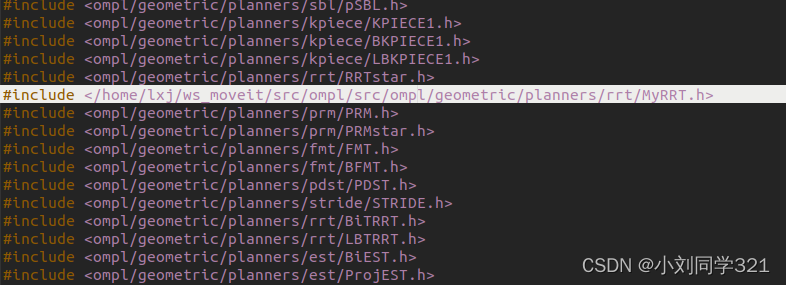
然后找到函数 void ompl_interface::PlanningContextManager::registerDefaultPlanners() ,注册你自定义的路径规划算法。
registerPlannerAllocatorHelper<og::MyRRT>("geometric::MyRRT");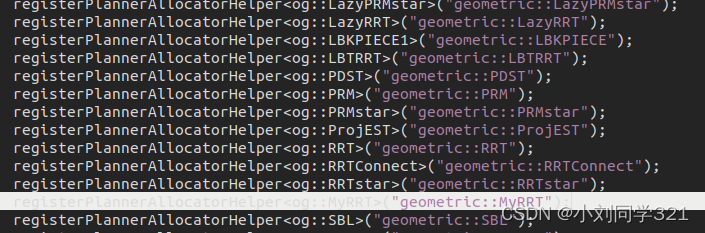
3、修改自己的功能包中的ompl_planning.yaml文件
比如,~/ws_moveit/src/panda_moveit_config/config/ompl_planning.yaml,仿照RRT添加你的自定义算法:
MyRRT:#自己的
    type: geometric::MyRRT
    range: 0.0  # Max motion added to tree. ==> maxDistance_ default: 0.0, if 0.0, set on setup()
    goal_bias: 0.05  # When close to goal select goal, with this probability? default: 0.05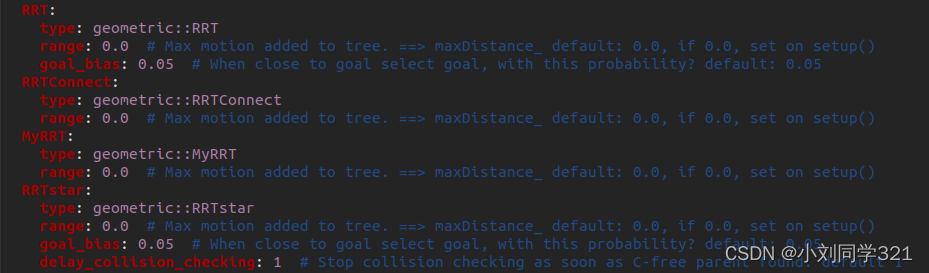
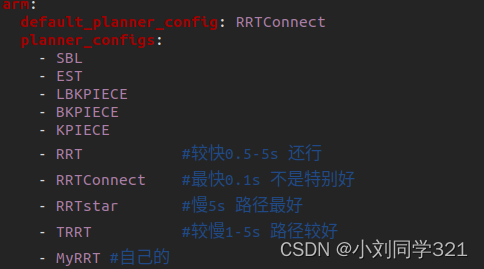
arm:
  default_planner_config: RRTConnect
  planner_configs:
    - MyRRT    #自己的
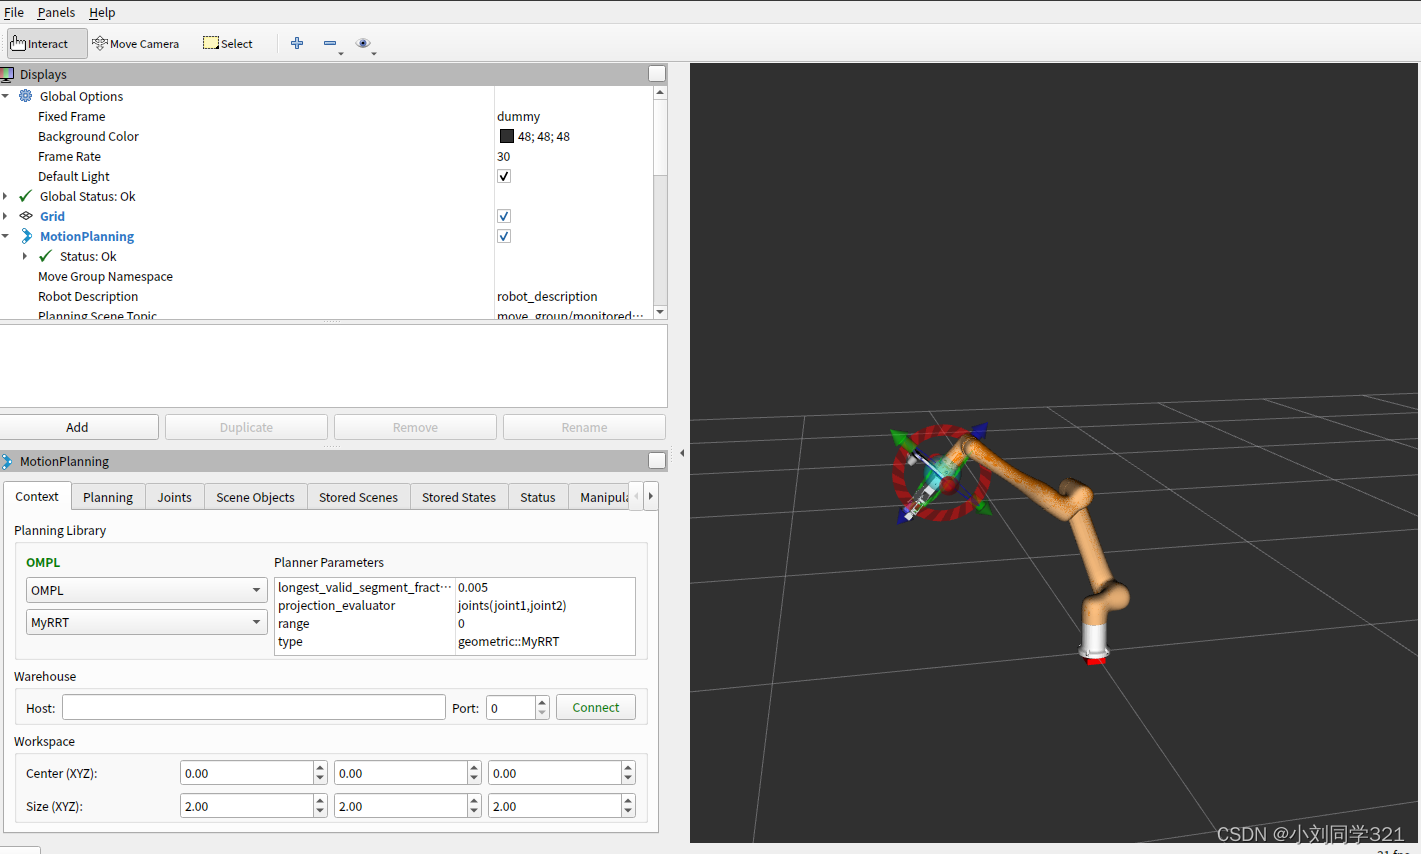
四、编译测试
cd ~/moveit
sudo catkin build
如果没有报错,那么恭喜你,成功了。你可以去深入了解怎么修改路径规划算法了!最后给个图展示一下!!!


 1059
1059


 被折叠的 条评论
为什么被折叠?
被折叠的 条评论
为什么被折叠?
 到【灌水乐园】发言


