转发请保持地址:http://blog.csdn.net/stalendp/article/details/21993227
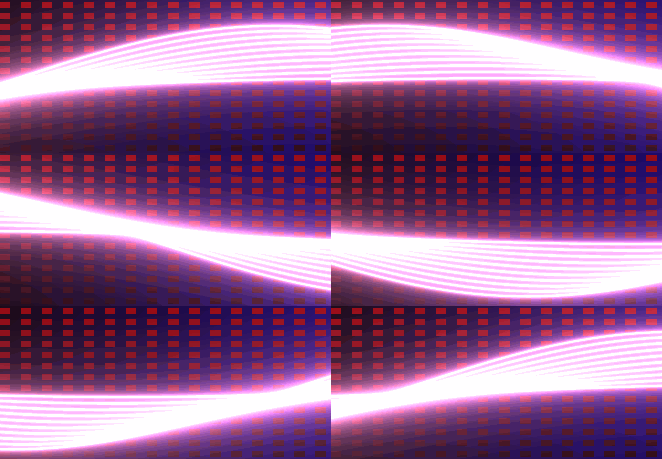
这篇文章主要分析一个Shader,从而感受shader的魅力,并学习相关shader的函数的用法。
先看Shader运行的效果:
下面是代码:
Shader "shadertoy/Waves" {  //see https://www.shadertoy.com/view/4dsGzH

	CGINCLUDE

		#include "UnityCG.cginc"
		#pragma target 3.0
		struct vertOut {
			float4 pos:SV_POSITION;
			float4 srcPos;
		};

		vertOut vert(appdata_base v) {
			vertOut o;
			o.pos = mul (UNITY_MATRIX_MVP, v.vertex);
			o.srcPos = ComputeScreenPos(o.pos);
			return o;
		}

		fixed4 frag(vertOut i) : COLOR0 {

			fixed3 COLOR1 = fixed3(0.0,0.0,0.3);
			fixed3 COLOR2 = fixed3(0.5,0.0,0.0);
			float BLOCK_WIDTH = 0.03;

			float2 uv = (i.srcPos.xy/i.srcPos.w);

			// To create the BG pattern
			fixed3 final_color = fixed3(1.0);
			fixed3 bg_color = fixed3(0.0);
			fixed3 wave_color = fixed3(0.0);

			float c1 = fmod(uv.x, 2.0* BLOCK_WIDTH);
			c1 = step(BLOCK_WIDTH, c1);
			float c2 = fmod(uv.y, 2.0* BLOCK_WIDTH);
			c2 = step(BLOCK_WIDTH, c2);
			bg_color = lerp(uv.x * COLOR1, uv.y * COLOR2, c1*c2


 本文深入分析了OpenGL Shader的使用,特别是针对Wave效果的实现。通过ComputeScreenPos转换三维坐标,结合fmod和step函数创建背景虚线网格,再利用lerp函数绘制波纹效果,展示了Shader在图形渲染中的魅力。

 最低0.47元/天 解锁文章


 223
223

 被折叠的 条评论
为什么被折叠?


