


获取点云数据进行三维重建
首先解决一下rviz报错的问题
又遇到了这个问题:
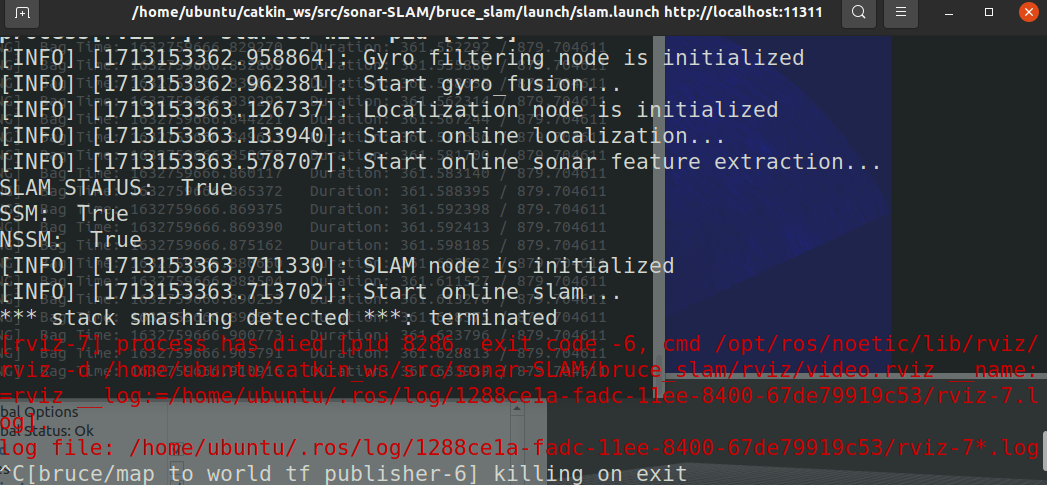
ros中启动rviz显示段错误,核心以转储问题_ros rviz启动报错-
终端输入:
export LIBGL_ALWAYS_SOFTWARE=1
解决:
后续:获取点云数据进行重建
This method employs the scan matching paradigm to align scans using dead-reckoning as an initial guess. Point clouds for ICP are generated by converting sonar images to in-plane clouds. Note that this system is 3DOF and we assume fixed depth motion.
该方法采用扫描匹配范例,使用航位推算作为初始猜测来对准扫描。ICP的点云是通过将声纳图像转换为面内云来生成的。注意,该系统是3DOF的,并且我们假设固定深度运动。
——jake 3991/sonar-SLAM:用于多波束声纳机器人的水下SLAM
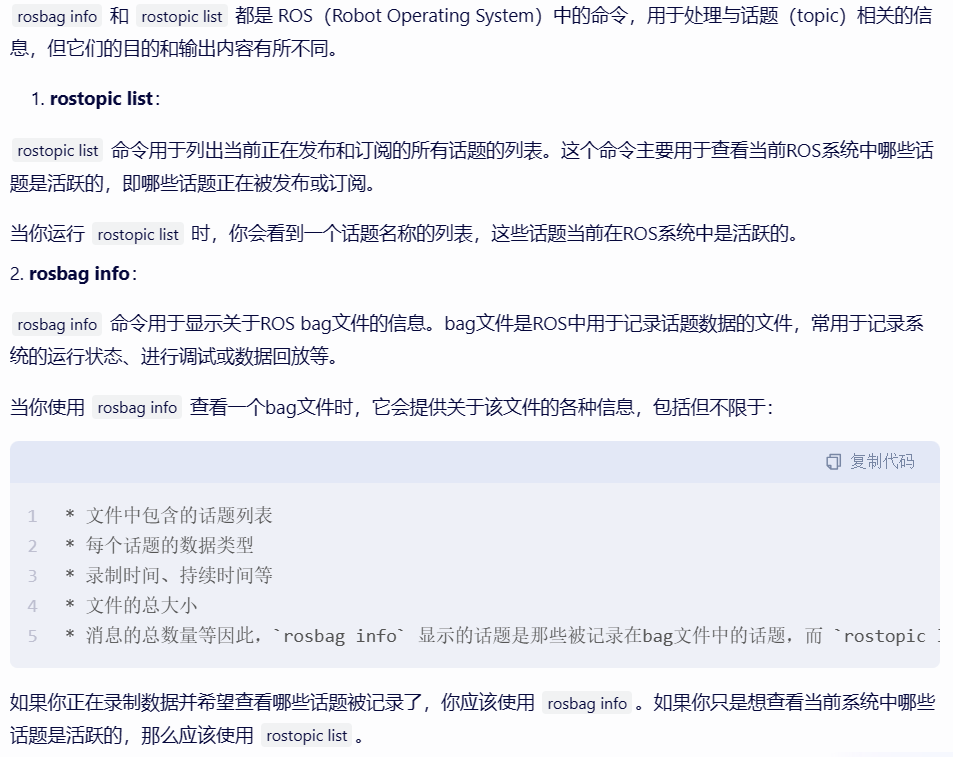
ROS:bag数据包内容提取——雷达点云数据和imu数据_rosbag数据提取-
ROS学习篇(七)rostopic消息记录、回放、转.txt_ros topic 记录-
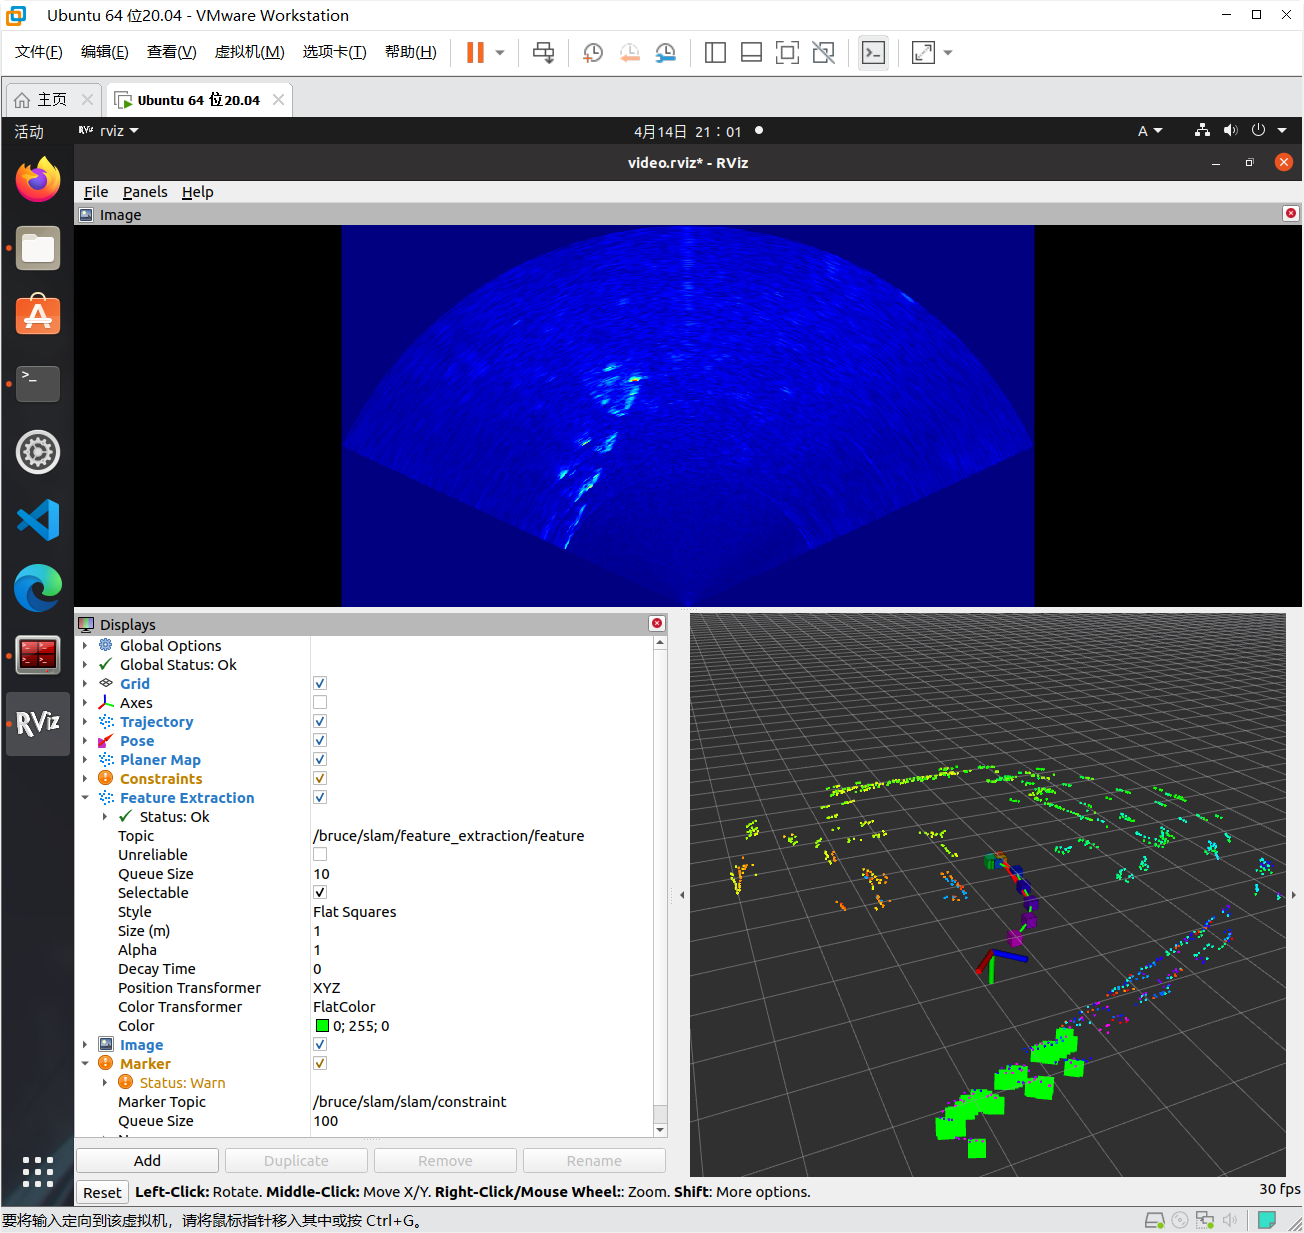
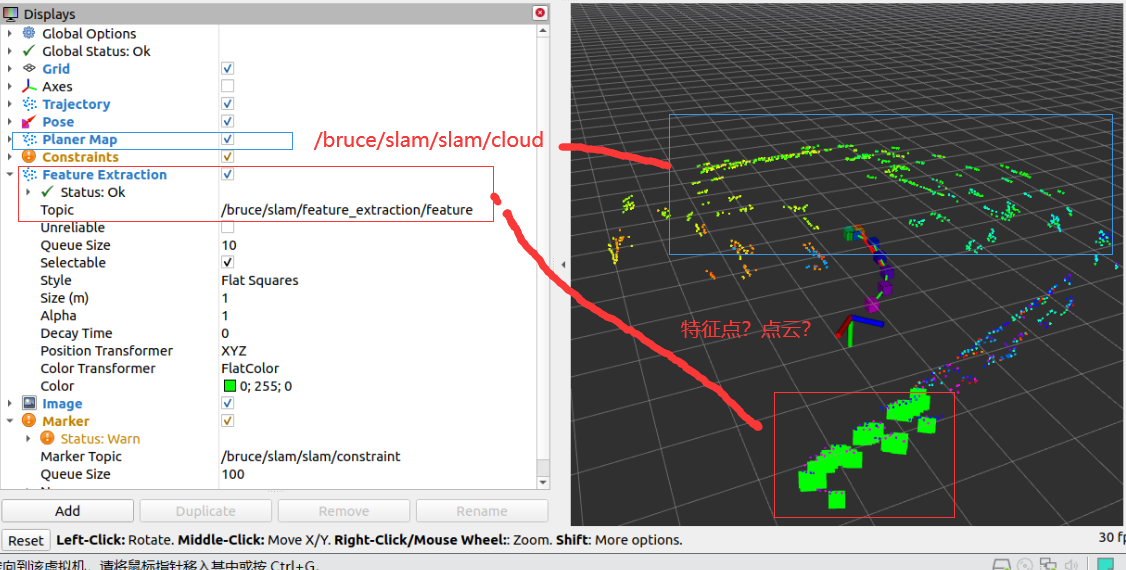
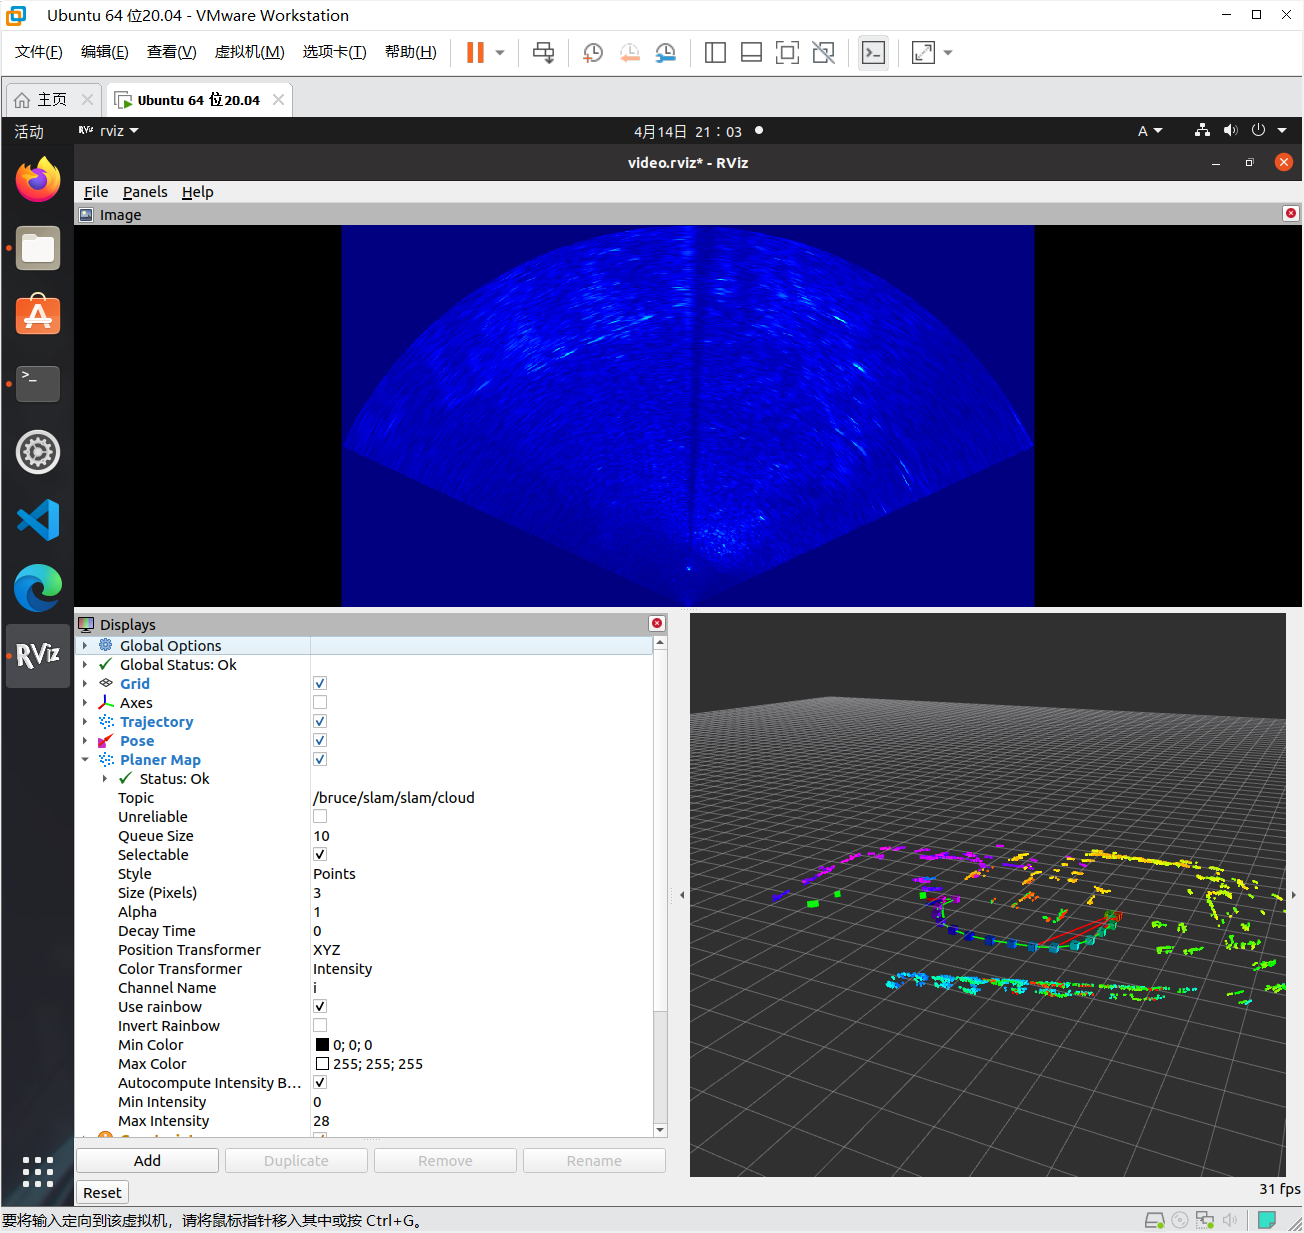
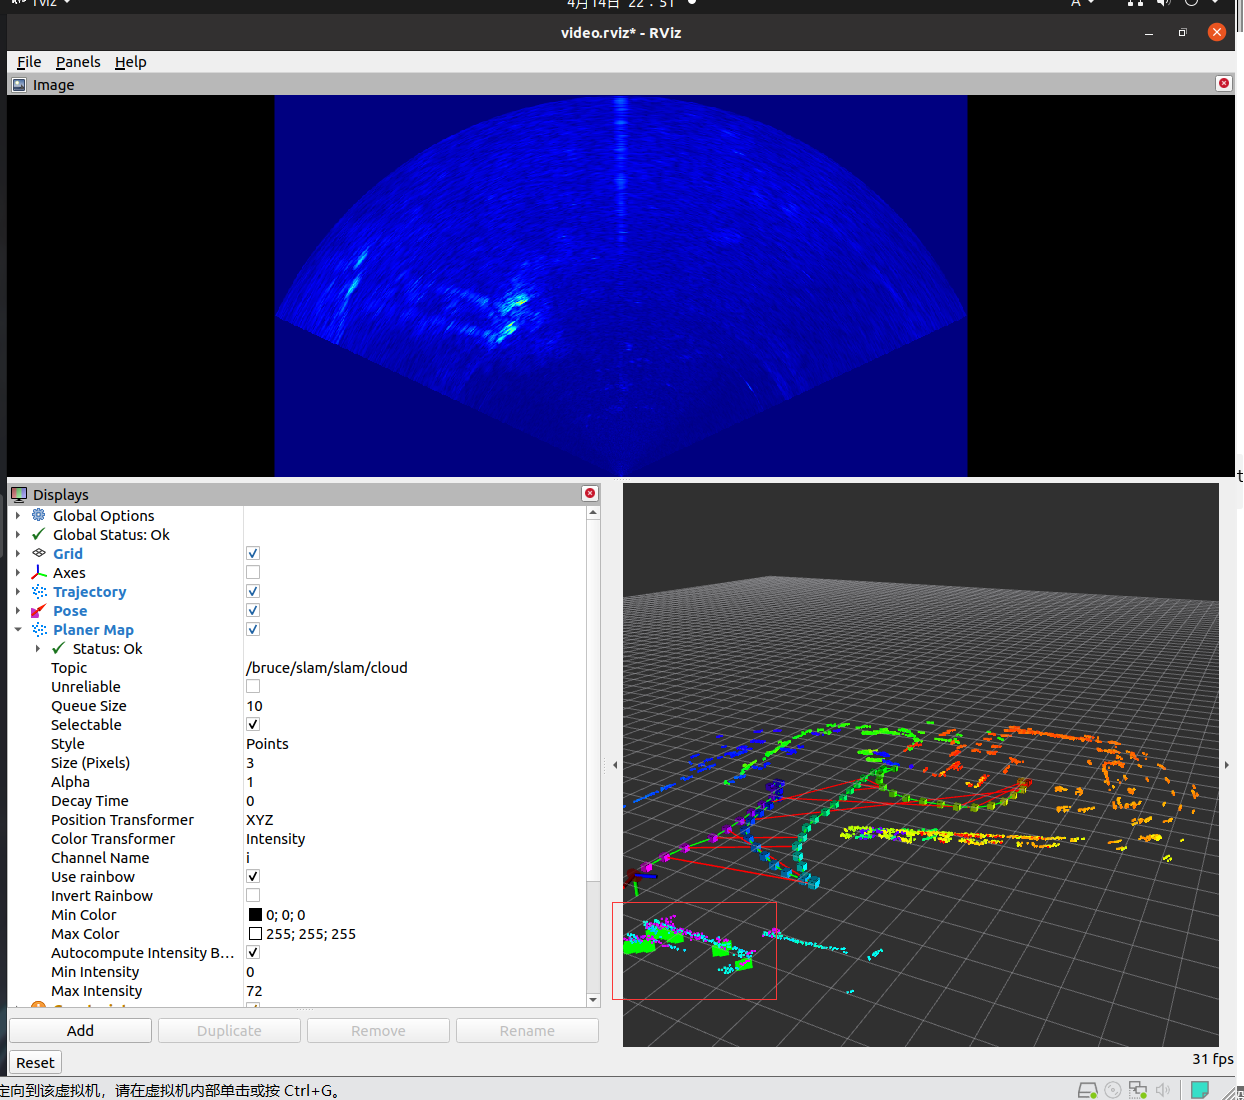
博主也是初学者,很多概念还不清楚,根据名字感觉feature应该是特征点,cloud应该是点云。但是在之后的操作中发现cloud话题中没有信息,所以暂且用feature代替点云,进行可视化(见下文)
下图中planer map部分的图像在最开始运行的时候并没有出现,不知道为什么,看着像是我想要的点云
feature extraction的点是特征点,按理来说把特征点都拿出来进行可视化,应该也能得到相似的形状
但是最终结果是一个扇形,看着就很奇怪,搞不懂
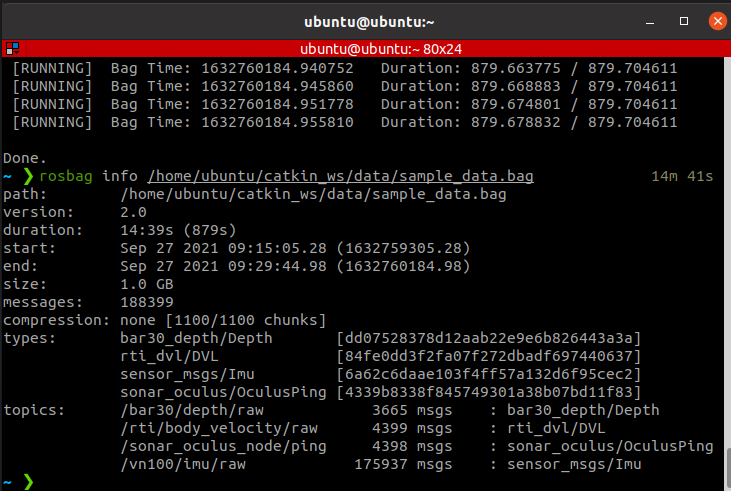
1.看一下有关于点云的topic
rosbag info /home/ubuntu/catkin_ws/data/sample_data.bag
在数据回放的时候:新建终端,在终端输入:
rostopic list -v
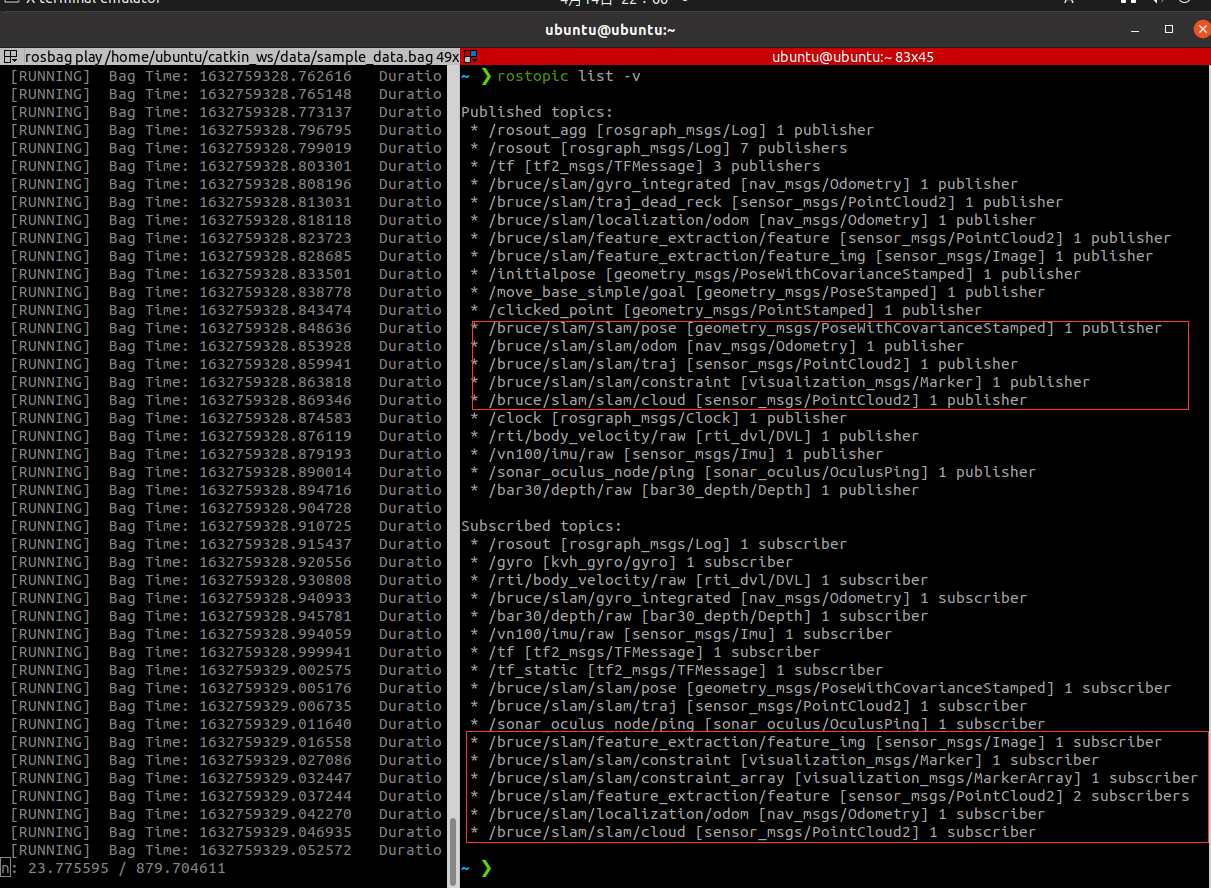
暂定topic是/bruce/slam/slam/cloud(错误的)
可以看到。rosbag info 中显示的话题和rostopic list显示的话题不太一样
2.保存pcd文件
rosrun pcl_ros bag_to_pcd <xxxxxx.bag> <topic> <output_directory>
# <xxxxxx.bag>指读取的bag数据包的名字
# <topic>指bag数据包雷达点云数据对应的topic名称
# <output_directory>指输出过程中所创建的目录名称,得到的pcd格式的雷达点云数据放在此目录下

报错bag包里没有需要的topic,尝试从原bag包里提取topic/重新录制bag:
- 提取其中的数据成立新的bag包,失败:

- 尝试重新录制bag:
rosbag record -a # -a表示录制所有节点发布的话题
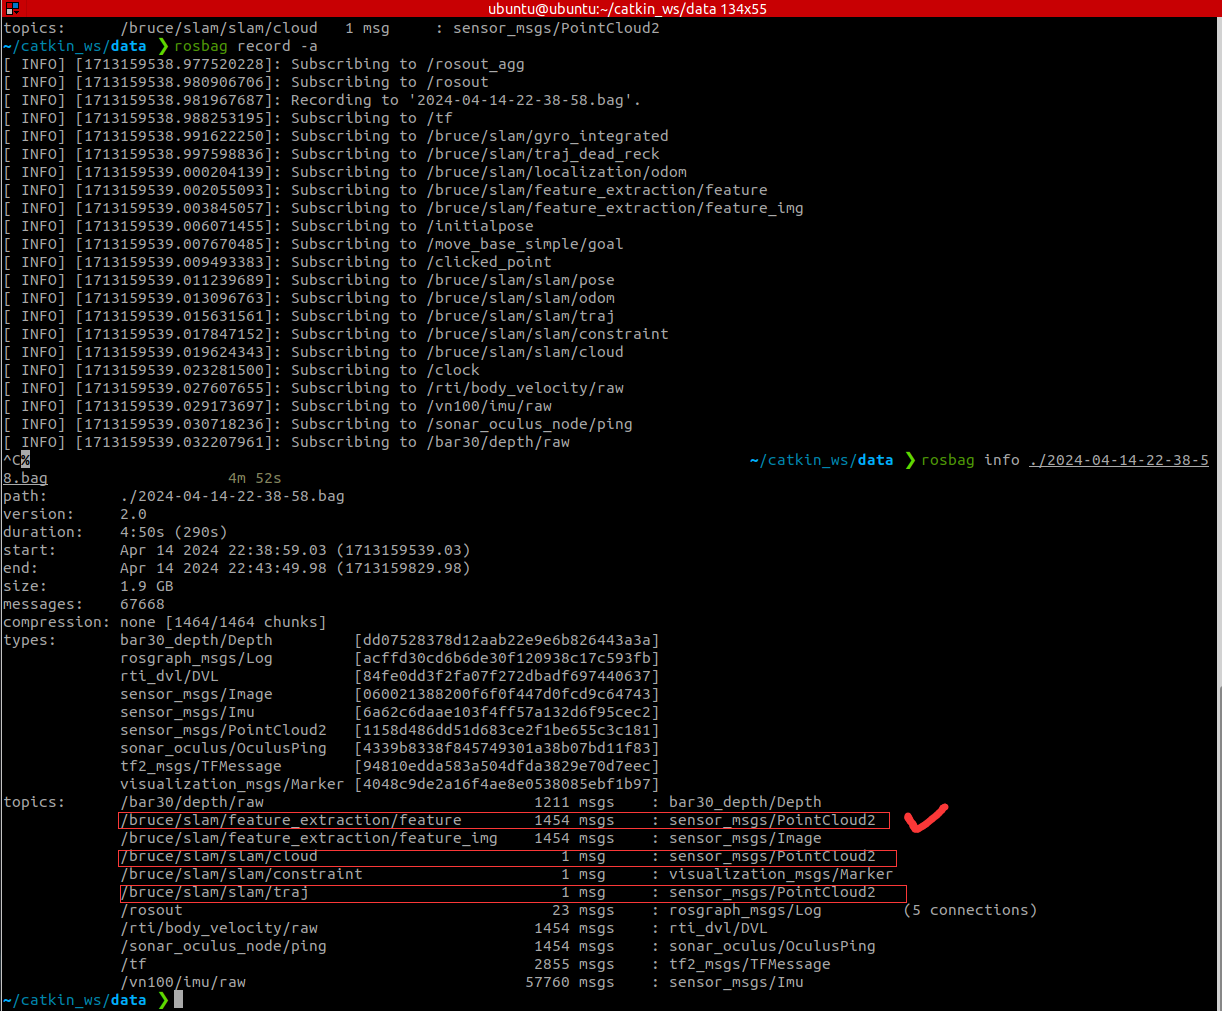
可以看到应该是之前提取的topic不对,本来就没有信息,应该提取/bruce/slam/feature_extraction/feature
博主也是小白,不明白为什么这些topic没有信息,按理来说feature可能是特征点而cloud才是点云,但是下文先把feature当点云用
rosbag record -O feature /bruce/slam/feature_extraction/feature
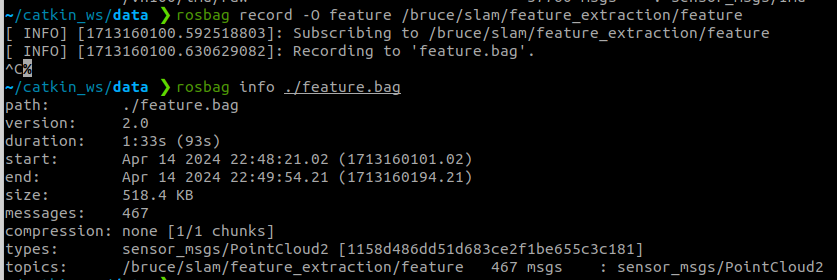
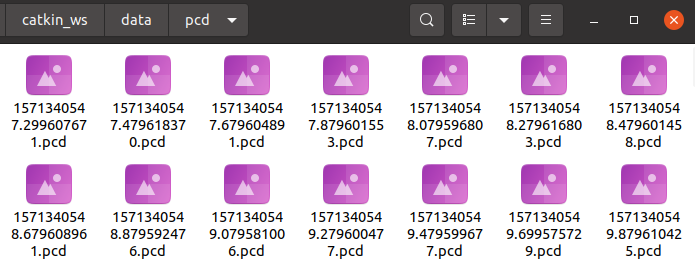
可以看到点云数据已经提取到新bag包里了,然后转换成pcd文件:
rosrun pcl_ros bag_to_pcd /home/ubuntu/catkin_ws/data/feature.bag /bruce/slam/feature_extraction/feature /home/ubuntu/catkin_ws/data/pcd
3.点云可视化
HuangCongQing/点云可视化:可视化点云可视化(open3D,mayavi,rviz(ros),PCL等)
可视化代码来自点云库PCL学习——点云的格式、PCD文件的打开和显示_viewpoint pcd 点云修该获取视点-
CMakeLists来自ubuntu20.04安装pcl_ubuntu20.04 pcl1.12+vtk9.1+qt6-
多线程操作 GUI 程序崩溃_most likely this is a multi-threaded client and xi-
点云拼接代码来自如何将多个.pcd文件合并为一个包含点云数据的.pcd文件(python)?-腾讯云开发者社区-腾讯云
c++在linux系统下实现获取目录下所有文件名操作
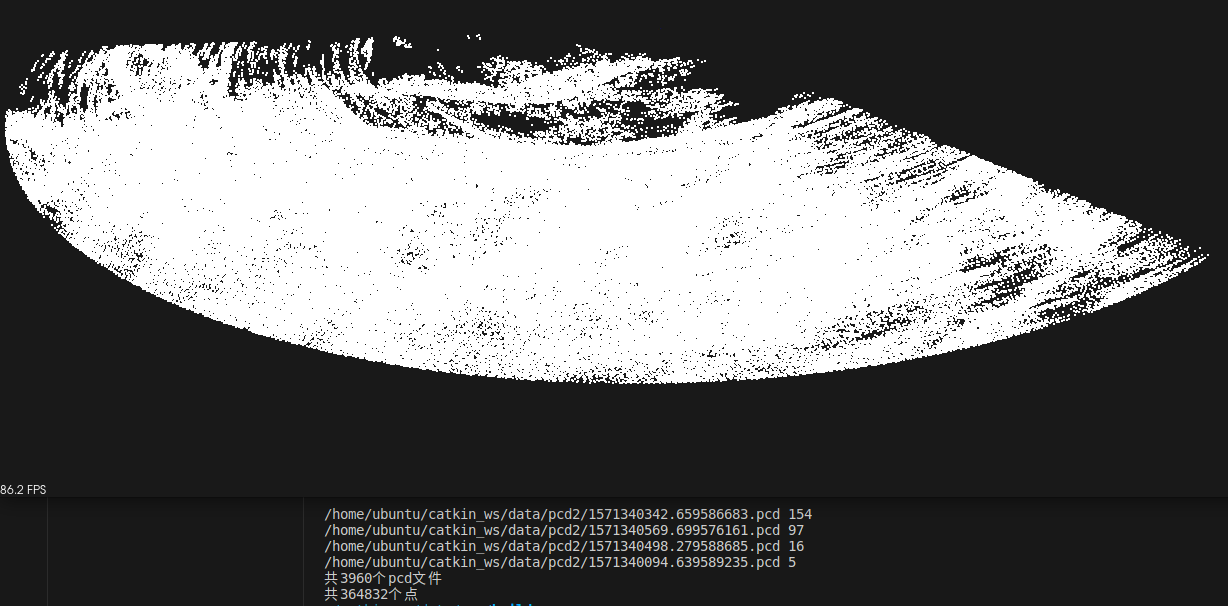
好奇怪,怎么会是这个样子,获取的数据有问题
#include "iostream"
#include <pcl/io/pcd_io.h>     //pcd读写文件
#include <pcl/point_types.h>   //点类型文件
#include <pcl/point_cloud.h>
#include <pcl/visualization/cloud_viewer.h>
// 记得增加在Opencv头文件位置之后
#include <X11/Xlib.h>
#include <unistd.h>
#include <cstring>
#include <vector>
#include <algorithm>
#include <dirent.h>
using namespace std;

typedef pcl::PointCloud<pcl::PointXYZ>::Ptr CloudType;

int main()
{
	XInitThreads();
    //将所有pcd文件放进vector
    vector<CloudType> pcdArray;
    // 定义一个点云指针
    CloudType cloud(new pcl::PointCloud<pcl::PointXYZ>);
	CloudType out(new pcl::PointCloud<pcl::PointXYZ>);

	const char *st="/home/ubuntu/catkin_ws/data/pcd/";
	DIR *dir = opendir(st);
	struct dirent* d_ent=NULL;
	string filePath = "/home/ubuntu/catkin_ws/data/pcd/";
    string p;
    int i = 0;//跳过前两个文件名. ..
    long long int c = 0;//统计所有点个数
    while ((d_ent = readdir(dir)) != NULL)
    {
        i++;
        if(i <= 2) continue;// . ..
        p.assign(filePath).append(d_ent->d_name);
        cout << p << " ";
        //加载点云并判定是否加载成功
    	if (pcl::io::loadPCDFile<pcl::PointXYZ>(p, *cloud) == -1)
    	{
    		PCL_ERROR("could not read file test.pcd\n");
    		return(-1);
    	}
    	cout << cloud->points.size() << endl;
        c += cloud->points.size();
        *out += *cloud;
    }
    cout << "共" << i-1 << "个pcd文件" << endl;
    cout << "共" << c << "个点" << endl;
    // Save the out file
    pcl::io::savePCDFileASCII("out.pcd", *out);
//--------------------------------------------------------------若此步出错,可以注释掉合并的代码,直接进行显示(out.pcd已保存)
    // pcl::io::loadPCDFile<pcl::PointXYZ>("/home/ubuntu/catkin_ws/data/cpp/build/out.pcd", *cloud);
	//定义一个点云可视化对象
	pcl::visualization::CloudViewer view("cloud_viewer");
	//可视化点云
	view.showCloud(out);
	while (!view.wasStopped())   //等待
	{

	}
	return 0;
}


/************************************************************
 * Description:
 *     获取dir目录下具有制定后缀名字的所有文件名,
 * parameter:
 *     src_dir:目录路径,例如 "../test"
 *     ext:后缀名,例如".jpg"
 * return;
 *     vector<string>:包含文件名的数组,
 * ***********************************************************/
vector<string> GetFiles(const char *src_dir, const char *ext)
{
    vector<string> result;
    string directory(src_dir);
    string m_ext(ext);
    //printf("ext length:%d\n",m_ext.length());

    // 打开目录, DIR是类似目录句柄的东西
    DIR *dir = opendir(src_dir);
    if ( dir == NULL )
    {
        printf("[ERROR] %s is not a directory or not exist!", src_dir);
        return result;
    }

    // dirent会存储文件的各种属性
    struct dirent* d_ent = NULL;

    // linux每个目录下面都有一个"."和".."要把这两个都去掉
    char dot[3] = ".";
    char dotdot[6] = "..";

    // 一行一行的读目录下的东西,这个东西的属性放到dirent的变量中
    while ( (d_ent = readdir(dir)) != NULL )
    {
        // 忽略 "." 和 ".."
        if ( (strcmp(d_ent->d_name, dot) != 0) && (strcmp(d_ent->d_name, dotdot) != 0) )
        {
            // d_type可以看到当前的东西的类型,DT_DIR代表当前都到的是目录,在usr/include/dirent.h中定义的
            if ( d_ent->d_type != DT_DIR)
            {
                string d_name(d_ent->d_name);
                //printf("%s\n",d_ent->d_name);
                if (strcmp(d_name.c_str () + d_name.length () - m_ext.length(), m_ext.c_str ()) == 0)
                {
                    // 构建绝对路径
                    //string absolutePath = directory + string("/") + string(d_ent->d_name);
                    // 如果传入的目录最后是/--> 例如"a/b/", 那么后面直接链接文件名
                    //if (directory[directory.length()-1] == '/')
                    //    absolutePath = directory + string(d_ent->d_name);
                    //result.push_back(absolutePath);
                    result.push_back(string(d_ent->d_name));
                }
            }
        }
    }

    // sort the returned files
    sort(result.begin(), result.end());

    closedir(dir);
    return result;
}
cmake_minimum_required(VERSION 2.6)
project(pcl_test)

find_package(PCL REQUIRED)

include_directories(${PCL_INCLUDE_DIRS})
link_directories(${PCL_LIBRARY_DIRS})
add_definitions(${PCL_DEFINITIONS})

add_executable(success success.cpp)

target_link_libraries (success ${PCL_LIBRARIES})
target_link_libraries (success -lX11)
3.1配置pcl库(ros自带的有,暂无需配置)
下载|点云库 — Downloads | Point Cloud Library
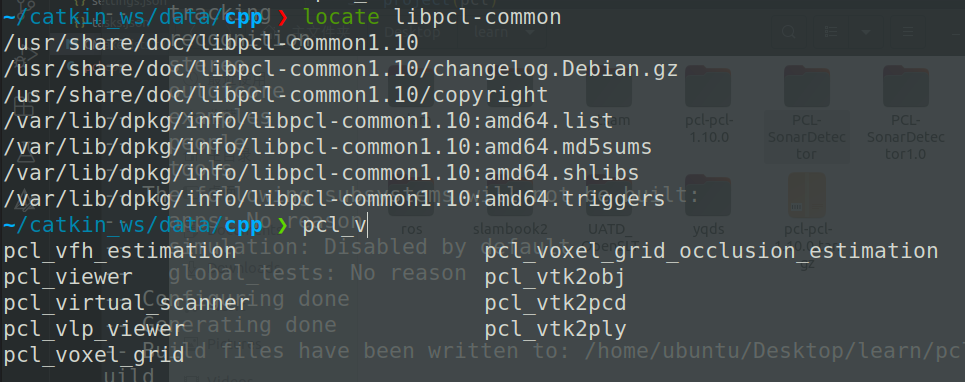
安装完ROS后在文件管理里面搜索libpcl-common,看搜索结果中.so文件后面的版本号,可以确定ROS自带的PCL版本,按这个版本在Tags
· PointCloudLibrary/pcl · GitHub上面下载对应版本的完整的PCL库,按照11.
PCL的搭建-CSDN博客这里的流程进行安装就可以解决问题。
————Ubuntu20.04的ROS1与PCL库版本不兼容造成link时报“undefined reference to `pcl::visualization::CloudViewer”错误-
若想下载以前版本PCL文件,登录下方网址,寻找对应文件并解压:https://github.com/PointCloudLibrary/pcl/releases
————Ubuntu 20.04安装PCL_ubuntu20.04安装pcl-
4.进行三维重建
获取了点云之后应该可以进行三维重建,目前还不会,待续


 2129
2129

 被折叠的 条评论
为什么被折叠?
被折叠的 条评论
为什么被折叠?
 到【灌水乐园】发言


