


初识着色器语言
变量和数据类型
可用的数据类型只有4种:有符号整数,无符号整数,浮点数,布尔值。
OpenGL着色语言中没有指针和字符串或字符。返回值可以为void。
向量类型
所有4种基本数据类型都可以存储在二维、三维或者四维向量中:
OpenGL着色语言向量数据类型
| 类型 | 描述 |
|---|---|
| vec2,vec3,vec4 | 2分量、3分量和4分量浮点向量 |
| ivec2,ivec3,ivec4 | 2分量、3分量和4分量整数向量 |
| uvec2,uvec3,uvec4 | 2分量、3分量和4分量无符号整数向量 |
| bvec2,vbec3,bvec4 | 2分量、3分量和4分量布尔向量 |
- 1
- 2
- 3
- 4
- 5
- 6
- 1
- 2
- 3
- 4
- 5
- 6
我们用点号来确定多大4个向量元素的地址,但是可以使用下列3组标识符中的任意一组:xyzw、rgba和stpq。但不能混合到一个向量中使用。
- 1
- 2
- 3
- 1
- 2
- 3
向量数据类型还支持swizzle(调换)操作。例如,将颜色数据从RGB顺序转换到BGR顺序:
- 1
- 1
矩阵类型
矩阵类型只支持浮点数。
OpenGL着色语言矩阵数据类型
| 类型 | 描述 |
|---|---|
| mat2,mat2x2 | 两行两列 |
| mat3,mat3x3 | 三行三列 |
| mat4,mat4x4 | 四行四列 |
| mat2x3 | 三行两列 |
| mat2x4 | 四行两列 |
| mat3x2 | 两行三列 |
| mat3x4 | 四行三列 |
| mat4x2 | 两行四列 |
| mat4x3 | 三行四列 |
实际上在OpenGL着色语言中,矩阵就是一个由向量组成的数组。可以对单独一列应用向量操作:
- 1
- 1
矩阵也可以乘以向量,通常用在通过模型视图投影矩阵来对一个向量进行变换时。
矩阵构造函数:
- 1
- 2
- 3
- 4
- 5
- 1
- 2
- 3
- 4
- 5
也可以如下方式构造单位矩阵:
- 1
- 1
存储限定符
限定符用于将变量标记为输入变量、输出变量或常量。
变量存储限定符
| 限定符 | 描述 |
|---|---|
| 只是普通的本地变量,外部不可见,外部不可访问 | |
| const | 一个编译时常量,或者说是一个队函数来说为只读的参数 |
| in | 一个从以前的截断传递过来的变量 |
| in centroid | 一个从以前的截断传递过来的变量,使用质心插值 |
| out | 传递到下一个处理阶段或者在一个函数中指定一个返回值 |
| out centroid | 传递到下一个处理阶段,使用质心插值 |
| inout | 一个读/写变量,只能用于局部函数参数 |
| uniform | 一个从客户端代码传递过来的变量,在顶点之间不做改变 |
inout只能在一个函数中声明一个参数时使用,这是将一个值传递到一个函数并且允许这个函数修改并返回同一个变量值的唯一方法。
除非正在对一个多重采样缓冲区进行渲染,否则centroid限定符不会起任何作用。
默认情况下,参数将在两个着色器截断之间以一种透视正确的方法进行插补。我们可以通过noperspective关键词来指定一个非透视插值,或者甚至可以通过flat关键词二不进行插值。我们还可以选择使用smooth关键词来声明,这个变量时以一种透视正确的方法进行插补的,实际上是默认设置:
- 1
- 2
- 3
- 1
- 2
- 3
真正的着色器
Shadedldentity着色器顶点程序
- 1
- 2
- 3
- 4
- 5
- 6
- 7
- 8
- 9
- 10
- 11
- 12
- 13
- 14
- 15
- 16
- 1
- 2
- 3
- 4
- 5
- 6
- 7
- 8
- 9
- 10
- 11
- 12
- 13
- 14
- 15
- 16
Shadedldentity着色器片段程序
- 1
- 2
- 3
- 4
- 5
- 6
- 7
- 8
- 9
- 10
- 11
- 12
- 13
- 1
- 2
- 3
- 4
- 5
- 6
- 7
- 8
- 9
- 10
- 11
- 12
- 13
OpenGL着色语言版本
每个着色器的第一行非命令行都是指定这个着色器要求的OpenGL着色语言的最低版本版本,如果OpenGL驱动不支持,那么着色器将不会编译:
- 1
- 1
OpenGL3.3版本
属性声明
属性是由OpenGL代码逐个顶点进行指定的,在顶点着色器中,这些属性指示简单地声明为
- 1
- 2
- 3
- 1
- 2
- 3
在GLSL中每个顶点程序都罪过可以有16个属性。
每个属性总是一个4分量向量,即使不适用所有的4汾江时也是如此。例如,我们指示指定了一个float值作为参数,那么在内部仍将占据4个浮点值的空间。
标记为in的变量时只读的。
声明输出
顶点程序的输出变量将成为要传送到片段着色器的顶点的颜色值,这个变量必须为片段朱搜而起声明一个in变量,否则在我们试图将着色器编译和连接到一起时,就会得到一个连接错误。
顶点动作
顶点程序的主体在批次中将为每个顶点执行一次:
- 1
- 2
- 3
- 4
- 1
- 2
- 3
- 4
变量gl_Position是一个预定义的内建4分量向量,它包含顶点着色器要求的一个输出。
片段三角形
在渲染一个图元(例如一个三角形)时,一旦3个顶点由顶点程序进行了处理,那么它们将组装成一个三角形,而这个三角形将由硬件进行光栅化。图形硬件确定独立片段属于屏幕上(或者更精确地,在颜色缓冲区中)的什么位置,并且为三角形中的每个片段(如果不进行任何多重采样的话则只是一个点)指定片段程序的一个实例。
片段程序的最终输出颜色是一个4分量浮点向量,我们如下声明这个向量:
- 1
- 1
输入片段着色器时经过平滑插值的颜色值,由顶点程序上游传入:
- 1
- 1
片段着色器只是将平滑插值的颜色分配给片段颜色:
- 1
- 2
- 3
- 1
- 2
- 3
编译、绑定和连接
指定属性
- 1
- 1
我们可能像下面这样调用该函数:
- 1
- 1
对于为两个属性位置进行0和1的选择视任意性的,只要这个值在0~15范围之内。我们也可以选择7和13。不过,GLTools类GLBatch和GLTriangleBatch则使用一系列一致的属性位置,由typedef指定:
- 1
- 2
- 3
- 1
- 2
- 3
如果使用了这些属性位置标识符,我们就可以开始和GLShaderManager类中支持的存储着色器一起使用自己的着色器了。
设置源代码
我们的首要任务是创建两个着色器对象,分别对应顶点着色器和片段着色器:
- 1
- 2
- 1
- 2
然后使用gltLoadShaderFile加载着色器文本。
接着对顶点着色器和片段着色器应用下面几项操作:
- 1
- 2
- 3
- 1
- 2
- 3
编译着色器
编译着色器时一项简单的一次性工作:
- 1
- 2
- 1
- 2
为了检查失败,我们使用以GL_COMPILE_STATUS标记为参数的glGetShader函数:
- 1
- 1
如果返回的testVal值为GL_FALSE,那就说明源代码编译失败了。也可以打印出编译信息来查看出问题的原因。
进行连接和绑定
首先,我们要创建最终的着色器程序对象,并将顶点着色器和片段着色器与它绑定到一起:
- 1
- 2
- 3
- 1
- 2
- 3
接着,将属性变量名绑定到指定的数字属性位置:
- 1
- 1
它接受我们正在讨论的着色器的标识符,将要进行绑定的属性位置和属性变量的名称。我们常采用一个约定:位置属性变量名用vVertex,属性位置用GLT_ATTRIBUTE_VERTEX值(值0)
连接着色器
- 1
- 1
连接之后可以丢弃顶点着色器对象和片段着色器对象:
- 1
- 2
- 1
- 2
最后,当不再使用这个着色器程序时,需要删除它:
- 1
- 1
使用着色器
要使用GLSL着色器,必须使用glUseProgram函数选定它:
- 1
- 1
接着调用Batch的Draw方法,即可应用对应的着色器效果:
- 1
- 2
- 3
- 4
- 5
- 6
- 7
- 8
- 9
- 10
- 11
- 12
- 13
- 14
- 15
- 16
- 17
- 18
- 1
- 2
- 3
- 4
- 5
- 6
- 7
- 8
- 9
- 10
- 11
- 12
- 13
- 14
- 15
- 16
- 17
- 18
Provoking Vertex
单个三角形,我们可以使用插值来实现插值渐变等特效,但是对于批次图形,这么做性能很低。使用flat存储标识符后,图元将只使用一个顶点的颜色,但是整个批次图形会进行插值渐变实现特效:
- 1
- 1
对应的片段着色器的in变量也必须声明为flat。
- 1
- 2
- 1
- 2
着色器统一值
属性是每个顶点位置、表面法线和纹理坐标等都需要的,而统一值则用于为整个图元批次向保持不变的(统一(uniform)的)着色器传递数据。
创建一个统一值只需在变量声明开始时放置一个uniform关键词:
- 1
- 1
统一值不能标记为in或out,它们也不能在着色器阶段之间进行插值,且它们总是只读的。
寻找统一值
在着色器进行编译和连接之后可以使用glGetUniformLocation函数来寻找统一值:
- 1
- 1
该函数返回在shaderID指定的着色器中由varName命名的变量的位置。-1则表示无法定位。
设置标量和向量统一值
一个单独的标量和向量数据类型可以在glUniform函数中使用下面的变量进行设置:
- 1
- 2
- 3
- 4
- 5
- 6
- 7
- 8
- 1
- 2
- 3
- 4
- 5
- 6
- 7
- 8
例如:
- 1
- 2
- 3
- 4
- 5
- 6
- 7
- 8
- 1
- 2
- 3
- 4
- 5
- 6
- 7
- 8
布尔值也可以作为浮点值进行传递,0.0代表假,1.0代表真。
设置统一数组
glUniform函数还接受一个指针,假定指向一个数值数组:
- 1
- 2
- 3
- 4
- 5
- 6
- 7
- 8
- 1
- 2
- 3
- 4
- 5
- 6
- 7
- 8
其中,count代表每个含有x分量的数组中的元素个数。
- 1
- 2
- 3
- 4
- 1
- 2
- 3
- 4
设置统一矩阵
下面的函数分别用来加载一个2X2,3X3,4X4矩阵:
- 1
- 2
- 3
- 1
- 2
- 3
变脸count代表指针参数m中存储的矩阵数量(我们可以使用矩阵数组)。transpose设为GL_TRUE表示这个值已经按照优先排序(OpenGL推荐的方式)进行存储,否则会导致这个矩阵在复制到着色器中时发生变换。
内建函数
三角函数
下标用anyFloat来表示float、vec2、vec3和vec4中的一种:
三角函数
| 函数 | 描述 |
|---|---|
| anyFloat radians(anyFloat degrees) | 将角度值转化为弧度值 |
| anyFloat degrees(anyFloat radians) | 将弧度值转化为角度值 |
| anyFloat sin(anyFloat angle) | 三角正弦 |
| anyFloat cos(anyFLoat angle) | 三角余弦 |
| anyFloat tan(anyFLoat angle) | 三角正切 |
| anyFloat asin(anyFloat x) | 反正弦 |
| anyFloat acos(anyFloat x) | 反余弦 |
| anyFloat atan(anyFloat y,anyFloat x) | y/x的反正切 |
| anyFloat sinh(anyFloat x) | 双曲正弦 |
| anyFloat cosh(anyFloat x) | 双曲余弦 |
| anyFloat tanh(anyFloat x) | 双曲正切 |
| anyFloat asinh(anyFloat x) | 反双曲正弦 |
| anyFloat acosh(anyFloat x) | 反双曲余弦 |
| anyFloat atanh(anyFloat x) | 反双曲正切 |
指数函数
指数函数
| 函数 | 描述 |
|---|---|
| anyFloat pow(anyFLoat x,anyFloat y) | x的y次方 |
| anyFloat exp(anyFLoat x) | x的自然指数 |
| anyFloat log(anyFloat x) | x的自然对数 |
| anyFloat exp2(anyFloat x) | 2的x次方 |
| anyFloat log2(anyFLoat angle) | 以2为底的x的自然对数 |
| anyFloat sqrt(anyFloat x) | x的平方根 |
| anyFloat inversesqrt(anyFloat x) | x的逆平方根 |
几何函数
几何函数
| 函数 | 描述 |
|---|---|
| float length(vec2/vec3/vec4 x) | 返回x向量的长度 |
| float distance(vec p0,vec p1) | 返回p0和p1之间的距离 |
| float dot(vec x,vec y) | 返回x和y的点乘结果 |
| vec3 cross(vec3 x,vec3 y) | 返回x和y的叉乘结果 |
| vec normalize(vec x) | 返回和x方向相同的单位长度向量 |
| vec faceforward(vec N,vec I,vec nRef) | 如果dot(Nref,l)<0则返回N,否则返回-N |
| vec reflect(vec l,vec N) | 返回入社向量l的反射方向和表面方向N |
| vec refract(vec vec N,float eta) | 返回入射向量l的反射方向、表面方向N和折射指数比eta |
矩阵函数
许多矩阵操作都是使用常规数学运算符进行的,不过还有一些有用的矩阵函数:
矩阵函数
| 函数 | 描述 |
|---|---|
| mat matrixCompMult(mat x,mat y) | 逐个分量地将两个矩阵相乘。这与线性代数的矩阵乘法不同 |
| mat2 outerProduct(vec2 c,vec2 r) | 返回一个矩阵,这个矩阵是指定的两个向量的外积(叉乘积) |
| mat3 outerProduct(vec3 c,vec3 r) | |
| mat4 outerProduct(vec4 c,vec4 r) | |
| mat2X3 outerProduct(vec3 c,vec2 r) | |
| mat3X2 outerProduct(vec2 c,vec3 r) | |
| mat2X4 outerProduct(vec4 c,vec2 r) | |
| mat4X2 outerProduct(vec2 c,vec4 r) | |
| mat3X4 outerProduct(vec4 c,vec3 r) | |
| mat4X3 outerProduct(vec3 c,vec4 r) | |
| mat2 transpose(mat2 m) | 返回一个矩阵,这个矩阵是指定就很的转置矩阵 |
| mat3 transpose(mat3 m) | |
| mat4 transpose(mat4 m) | |
| mat2X3 transpose(mat3X2 m) | |
| mat3X2 transpose(mat2X3 m) | |
| mat2X4 transpose(mat4X2 m) | |
| mat4X2 transpose(mat2X4 m) | |
| mat3X4 transpose(mat4X3 m) | |
| mat4X3 transpose(mat3X4 m) | |
| float determinant(mat2 m) | 返回一个矩阵,这个矩阵是指定矩阵的行列式 |
| float determinant(mat3 m) | |
| float determinant(mat4 m) | |
| mat2 inverse(mat2 m) | 返回一个矩阵,这个矩阵是指定矩阵的逆矩阵 |
| mat3 inverse(mat3 m) | |
| mat4 inverse(mat4 m) |
向量相关函数
向量之间的比较,要使用下标列出的这些函数:
向量相关函数
| 函数 | 描述 |
|---|---|
| bvec lessThan(vec x,vec y) | 逐个分量地返回x |
| bvec lessThan(ivec x,ivec y) | |
| bvec lessThan(uvec x,uvec y) | |
| bvec lessThanEqual(vec x,vec y) | 逐个分量地返回x<=y的结果 |
| bvec lessThanEquea(ivec x,ivec y) | |
| bvec lessThanEqual(uvec x,uvec y) | |
| bvec greaterThan(vec x,vec y) | 逐个分量地返回x>y的结果 |
| bvec greaterThan(ivec x,ivec y) | |
| bvec greaterThan(uvec x,uvec y) | |
| bvec greaterThanEqual(vec x,vec y) | 逐个分量地返回x>=y的结果 |
| bvec greaterThanEqual (ivec x,ivec y) | |
| bvec greaterThanEqual (uvec x,uvec y) | |
| bvec equal(vec x,vec y) | 逐个分量地返回x==y的结果 |
| bvec equal(ivec x,ivec y) | |
| bvec equal(uvec x,uvec y) | |
| bvec notEqual(vec x,vec y) | 逐个分量地返回x!=y的结果 |
| bvec notEqual (ivec x,ivec y) | |
| bvec notEqual (uvec x,uvec y) | |
| bool any(bvec x) | 如果x的任意分量为真,则返回真 |
| bool all(bvec x) | 如果x的所有分量都为真,则返回真 |
| bvec not(bvec x) | 返回x的逐个分量的补集 |
常用函数
所有这些函数都能用于标量和向量数据类型的运算,并且也返回标量和向量数据类型:
矩阵函数 通用函数
| 函数 | 描述 |
|---|---|
| anyFloat abs(anyFLoat x) | 返回x的绝对值 |
| anyInt abs(anyInt x) | |
| anyFLoat sign(anyFloat x) | 返回1.0或-1.0,取决于x |
| anyInt sign(anyInt x) | |
| anyFloat floor(anyFLoat x) | 返回不大于x的最小整数 |
| anyFloat trunc(anyFloat x) | 返回不大于x的最接近的整数 |
| anyFloat round(anyFloat x) | 返回最接近x的整数的值。如果是小数部分为0.5则可能取任意一个方向的整数(根据具体实现而定) |
| anyFloat roundEven(anyFloat x) | 返回最接近x的整数的值。如果是小数部分为0.5则取最接近的偶数 |
| anyFloat ceil(anyFloat x) | 返回大于x的最接近它的整数值 |
| anyFloat fract(anyFloat x) | 返回x的小数部分 |
| anyFloat mod(anyFloat x,float y) | 返回x对y取余得到的模数 |
| anyFloat mod(anyFloat x,anyFloat y) | |
| anyFloat mod(anyFloat x,out anyFloat l) | 返回x的小数部分,并将l设为余下的整数部分的值 |
| anyFloat min(anyFloat x,anyFloat y) | 返回x和y中较小的一个 |
| anyFloat min(anyFloat x,anyInt y) | |
| anyInt min(anyInt x,anyInt y) | |
| anyInt min(anyInt x,int y) | |
| anyUInt min(anyUInt x,anyUInt y) | |
| anyUint min(anyUInt x,uint y) | |
| anyFloat max(anyFloat x,anyFloat y) | 返回x和y中较大的一个 |
| anyFloat max (anyFloat x,anyInt y) | |
| anyInt max (anyInt x,anyInt y) | |
| anyInt max (anyInt x,int y) | |
| anyUInt max (anyUInt x,anyUInt y) | |
| anyUint max (anyUInt x,uint y) | |
| anyFLoat clamp(anyFLoat x,anyFLoat minVal,anyFLoat maxVal) | 返回缩放到minVal到maxVal范围内的x |
| anyFLoat clamp(anyFLoat x,float minVal,float maxVal) | |
| anyFLoat clamp(anyInt x,anyInt minVal, anyInt maxVal) | |
| anyFLoat clamp(anyInt x,int minVal, int maxVal) | |
| anyFLoat clamp(anyUint x, anyUint minVal, anyUint maxVal) | |
| anyFLoat clamp(anyUint x, uint minVal, uint maxVal) | |
| anyFLoat mix(anyFLoat x,anyFloat y,anyFloat a) | 返回x和y的线性混合,a从0到1变化 |
| anyFLoat mix(anyFLoat x,anyFloat y,float a) | |
| anyFloat mix(anyFloat x,anyFLoat y,anyBool a) | 在a为假时返回x的各个分量,而在a为真时返回y的各个分量 |
| anyFLoat step(anyFloat edge,anyFloat x) | 如果x小于edge则返回0.0或1.0,否则返回1.0 |
| anyFloat step(float edge,anyFloat x) | |
| anyFloat smoothstep(anyFloat edge0,anyFLoat edge1,anyFloat x) | 如果x<=edge0则返回0.0,如果x>=edge1则返回1.0,如果在两者之间则在0.0和1.0之间取一个平滑的Hermite插值 |
| anyFloat smoothstep(anyFloat edge0,fLoat edge1,anyFloat x) | |
| anyBool isnan(anyFLoat x) | Returns true ifxis Nan |
| anyBool isinf(anyFloat x) | 如果x为正无穷大或负无穷大,则返回真 |
| anyInt floatBitsToInt(anyFLoat x) | 将一个浮点值转换成整数值 |
| anyUint floatBitsToUint(anyFloat x) | |
| anyFLoat intBitsToFloat(anyInt x) | 将一个整数值转换成浮点值 |
| anyFLoat uintBitsToFloat(anyUint x) |
模拟光线
简单漫射光
要确定一个指定顶点上光线的强度,我们需要两个向量:光源的方向和表面法线。
顶点照明
我们可以用点乘积的值与顶点的一个颜色值相乘,得到一个基于顶点光线强度的光照颜色值。:
- 1
- 1
点光源漫反射着色器
- 1
- 2
- 3
- 4
- 5
- 6
- 7
- 8
- 9
- 10
- 11
- 12
- 13
- 14
- 15
- 16
- 17
- 18
- 19
- 20
- 21
- 22
- 23
- 24
- 25
- 26
- 27
- 28
- 29
- 30
- 31
- 32
- 33
- 34
- 35
- 36
- 37
- 38
- 39
- 40
- 41
- 42
- 1
- 2
- 3
- 4
- 5
- 6
- 7
- 8
- 9
- 10
- 11
- 12
- 13
- 14
- 15
- 16
- 17
- 18
- 19
- 20
- 21
- 22
- 23
- 24
- 25
- 26
- 27
- 28
- 29
- 30
- 31
- 32
- 33
- 34
- 35
- 36
- 37
- 38
- 39
- 40
- 41
- 42
ADS光照模型
ADS代表环境光(Ambient)、漫射光(Diffuse)和镜面光(Specular)。
环境光
为了计算一个环境光源对最终顶点颜色的影响,环境光材质的性质由环境光的值来度量(就是将这两个颜色值相乘)。
- 1
- 2
- 3
- 1
- 2
- 3
漫射光
在ADS光照模式下,漫反射材质和光照值相乘,所得结果由表面法线和光照向量的点乘积(漫反射强度)进行缩放。
- 1
- 2
- 3
- 4
- 1
- 2
- 3
- 4
点乘积可能是一个负数,但会被0代替。
镜面光
首先我们必须找到被表面法线反射的向量和反向的光线向量。随后这两个向量的点乘积将取“反光度”(shininess)次幂。反光度数值越大,结果得到镜面反射的高亮度区越小。
- 1
- 2
- 3
- 4
- 5
- 6
- 7
- 1
- 2
- 3
- 4
- 5
- 6
- 7
反光度参数也可以是统一值。传统上最高镜面指数被设置为128,大于它效果将逐渐减弱。
ADS着色器
基于前三个例子,顶点最终的颜色可以以如下方式进行计算:
- 1
- 1
示例:
- 1
- 2
- 3
- 4
- 5
- 6
- 7
- 8
- 9
- 10
- 11
- 12
- 13
- 14
- 15
- 16
- 17
- 18
- 19
- 20
- 21
- 22
- 23
- 24
- 25
- 26
- 27
- 28
- 29
- 30
- 31
- 32
- 33
- 34
- 35
- 36
- 37
- 38
- 39
- 40
- 41
- 42
- 43
- 44
- 45
- 46
- 47
- 48
- 49
- 50
- 51
- 52
- 53
- 54
- 55
- 56
- 57
- 1
- 2
- 3
- 4
- 5
- 6
- 7
- 8
- 9
- 10
- 11
- 12
- 13
- 14
- 15
- 16
- 17
- 18
- 19
- 20
- 21
- 22
- 23
- 24
- 25
- 26
- 27
- 28
- 29
- 30
- 31
- 32
- 33
- 34
- 35
- 36
- 37
- 38
- 39
- 40
- 41
- 42
- 43
- 44
- 45
- 46
- 47
- 48
- 49
- 50
- 51
- 52
- 53
- 54
- 55
- 56
- 57
Phong着色
在Phong着色时,我们并不在顶点之间进行颜色值插值,而是在顶点之间进行表面法线插值。
顶点着色器
- 1
- 2
- 3
- 4
- 5
- 6
- 7
- 8
- 9
- 10
- 11
- 12
- 13
- 14
- 15
- 16
- 17
- 18
- 19
- 20
- 21
- 22
- 23
- 24
- 25
- 26
- 27
- 28
- 29
- 30
- 31
- 32
- 33
- 34
- 35
- 36
- 1
- 2
- 3
- 4
- 5
- 6
- 7
- 8
- 9
- 10
- 11
- 12
- 13
- 14
- 15
- 16
- 17
- 18
- 19
- 20
- 21
- 22
- 23
- 24
- 25
- 26
- 27
- 28
- 29
- 30
- 31
- 32
- 33
- 34
- 35
- 36
片段着色器
- 1
- 2
- 3
- 4
- 5
- 6
- 7
- 8
- 9
- 10
- 11
- 12
- 13
- 14
- 15
- 16
- 17
- 18
- 19
- 20
- 21
- 22
- 23
- 24
- 25
- 26
- 27
- 28
- 29
- 30
- 31
- 32
- 33
- 34
- 35
- 36
- 1
- 2
- 3
- 4
- 5
- 6
- 7
- 8
- 9
- 10
- 11
- 12
- 13
- 14
- 15
- 16
- 17
- 18
- 19
- 20
- 21
- 22
- 23
- 24
- 25
- 26
- 27
- 28
- 29
- 30
- 31
- 32
- 33
- 34
- 35
- 36
访问纹理
照亮纹理单元
我们在ADSPhong着色器中添加一个纹理:
- 1
- 2
- 3
- 4
- 5
- 6
- 7
- 8
- 9
- 10
- 11
- 12
- 13
- 14
- 15
- 16
- 17
- 18
- 19
- 20
- 21
- 22
- 23
- 24
- 25
- 26
- 27
- 28
- 29
- 30
- 31
- 32
- 33
- 34
- 35
- 36
- 37
- 38
- 39
- 1
- 2
- 3
- 4
- 5
- 6
- 7
- 8
- 9
- 10
- 11
- 12
- 13
- 14
- 15
- 16
- 17
- 18
- 19
- 20
- 21
- 22
- 23
- 24
- 25
- 26
- 27
- 28
- 29
- 30
- 31
- 32
- 33
- 34
- 35
- 36
- 37
- 38
- 39
示例中出现了一个新的变量类型sampler2D:
- 1
- 1
一个采样器实际上就是一个整数(我们使用glUniform1)来设置它的值,它代表我们将要采样的纹理所绑定的纹理单元。2D表示这是一个2D纹理,还可以是1D和3D。目前来说这个值总是设为0。
texture函数使用插值纹理坐标对纹理进行采样,并将颜色值直接分配给片段颜色:
- 1
- 1
丢弃片段
颜色的混合计算过程并不简单,而如果某个片段的alpha为0,或非常接近0,则该片段实际上是不可见的,也就是不需要计算。
要测试一个alpha值是不是小于0.1,我们可以如下操作:
- 1
- 2
- 1
- 2
例如,对一个图像按红色值进行采样丢弃(比如燃烧效果):
首先,我们需要为采样器和倒计时器提供统一值:
- 1
- 2
- 1
- 2
然后对纹理进行取样,并确定红色值是否低于倒计时值,最终完全丢弃这个片段:
- 1
- 2
- 3
- 1
- 2
- 3
卡通着色(Cell Shading)——将纹理单元作为光线
卡通着色将一个一维纹理贴图作为查询表,使用纹理贴图中的纯色(使用GL_NEAREST)填充集合图形。
基本思路是,使用漫射光照强度作为纹理坐标添加到一个包含逐渐变亮颜色表的一维纹理中。
- 1
- 2
- 3
- 4
- 5
- 6
- 7
- 8
- 9
- 10
- 11
- 12
- 13
- 14
- 15
- 16
- 17
- 18
- 19
- 20
- 21
- 22
- 23
- 24
- 25
- 26
- 27
- 28
- 29
- 30
- 31
- 32
- 33
- 34
- 35
- 1
- 2
- 3
- 4
- 5
- 6
- 7
- 8
- 9
- 10
- 11
- 12
- 13
- 14
- 15
- 16
- 17
- 18
- 19
- 20
- 21
- 22
- 23
- 24
- 25
- 26
- 27
- 28
- 29
- 30
- 31
- 32
- 33
- 34
- 35
除了经过变换的几何图形位置外,这个着色器唯一的输出就是一个插值纹理坐标textureCoordinate,它表示一个单独的float。
卡通着色器的片段程序只是对一维纹理进行采样,并将它的值写入帧缓冲区片段:
- 1
- 2
- 3
- 4
- 5
- 6
- 7
- 8
- 9
- 10
- 11
- 12
- 13
- 14
- 15
- 1
- 2
- 3
- 4
- 5
- 6
- 7
- 8
- 9
- 10
- 11
- 12
- 13
- 14
- 15
转载请注明出处:http://blog.csdn.net/ylbs110/article/details/51868381
示例
着色器
顶点着色器
- 1
- 2
- 3
- 4
- 5
- 6
- 7
- 8
- 9
- 10
- 11
- 12
- 13
- 14
- 15
- 16
- 17
- 18
- 19
- 20
- 21
- 22
- 23
- 24
- 25
- 26
- 27
- 28
- 29
- 30
- 31
- 32
- 33
- 1
- 2
- 3
- 4
- 5
- 6
- 7
- 8
- 9
- 10
- 11
- 12
- 13
- 14
- 15
- 16
- 17
- 18
- 19
- 20
- 21
- 22
- 23
- 24
- 25
- 26
- 27
- 28
- 29
- 30
- 31
- 32
- 33
片段着色器
- 1
- 2
- 3
- 4
- 5
- 6
- 7
- 8
- 9
- 10
- 11
- 12
- 13
- 14
- 15
- 16
- 17
- 18
- 19
- 20
- 21
- 22
- 23
- 24
- 25
- 26
- 27
- 28
- 29
- 30
- 31
- 32
- 33
- 34
- 35
- 36
- 37
- 38
- 39
- 40
- 41
- 42
- 43
- 44
- 45
- 46
- 1
- 2
- 3
- 4
- 5
- 6
- 7
- 8
- 9
- 10
- 11
- 12
- 13
- 14
- 15
- 16
- 17
- 18
- 19
- 20
- 21
- 22
- 23
- 24
- 25
- 26
- 27
- 28
- 29
- 30
- 31
- 32
- 33
- 34
- 35
- 36
- 37
- 38
- 39
- 40
- 41
- 42
- 43
- 44
- 45
- 46
调用代码
- 1
- 2
- 3
- 4
- 5
- 6
- 7
- 8
- 9
- 10
- 11
- 12
- 13
- 14
- 15
- 16
- 17
- 18
- 19
- 20
- 21
- 22
- 23
- 24
- 25
- 26
- 27
- 28
- 29
- 30
- 31
- 32
- 33
- 34
- 35
- 36
- 37
- 38
- 39
- 40
- 41
- 42
- 43
- 44
- 45
- 46
- 47
- 48
- 49
- 50
- 51
- 52
- 53
- 54
- 55
- 56
- 57
- 58
- 59
- 60
- 61
- 62
- 63
- 64
- 65
- 66
- 67
- 68
- 69
- 70
- 71
- 72
- 73
- 74
- 75
- 76
- 77
- 78
- 79
- 80
- 81
- 82
- 83
- 84
- 85
- 86
- 87
- 88
- 89
- 90
- 91
- 92
- 93
- 94
- 95
- 96
- 97
- 98
- 99
- 100
- 101
- 102
- 103
- 104
- 105
- 106
- 107
- 108
- 109
- 110
- 111
- 112
- 113
- 114
- 115
- 116
- 117
- 118
- 119
- 120
- 121
- 122
- 123
- 124
- 125
- 126
- 127
- 128
- 129
- 130
- 131
- 132
- 133
- 134
- 135
- 136
- 137
- 138
- 139
- 140
- 141
- 142
- 143
- 144
- 145
- 146
- 147
- 148
- 149
- 150
- 151
- 152
- 153
- 154
- 155
- 156
- 157
- 158
- 159
- 160
- 161
- 162
- 163
- 164
- 165
- 166
- 167
- 168
- 169
- 170
- 171
- 172
- 173
- 174
- 175
- 176
- 177
- 178
- 179
- 180
- 181
- 182
- 183
- 184
- 185
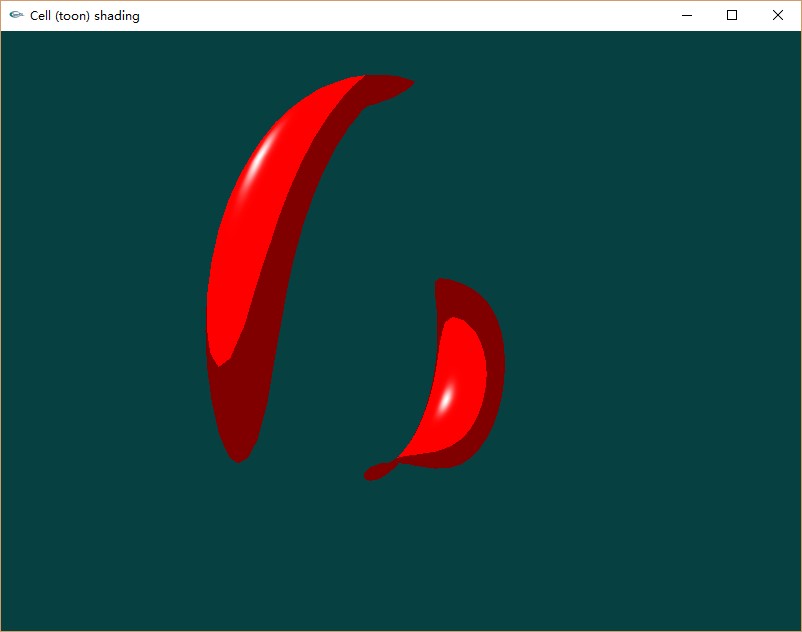
运行结果
可以看到一个实现了冯氏着色的使用一维为例进行卡通渲染的花托通过红色值的大小实现了消融效果。


 1804
1804

 被折叠的 条评论
为什么被折叠?
被折叠的 条评论
为什么被折叠?
 到【灌水乐园】发言


