如何在Unity中画抛物线

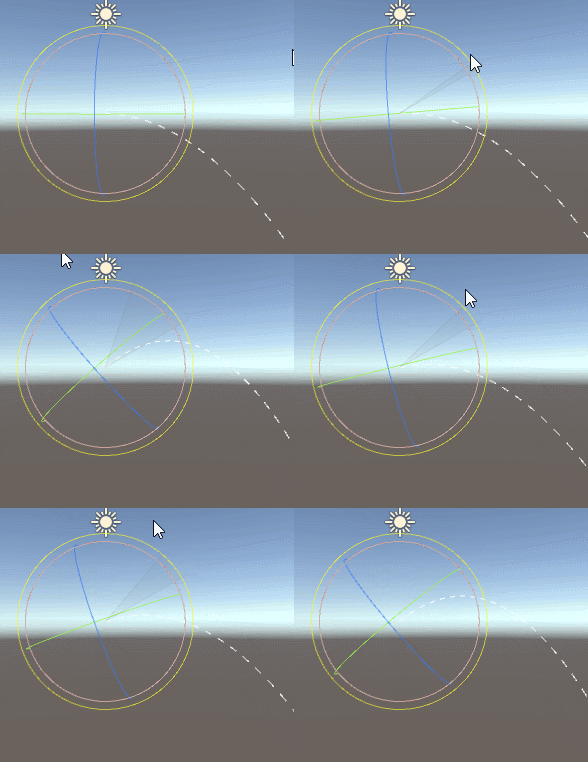
最近在开发HTC VIVE VR新品的时候想模仿The Lab中的移动模式,模仿这个功能首先就是要实现抛物线的效果,在网上找了一下发现有很多大家的解决方案,还有一堆关于抛物线的算法,发现不太好用,所以花了点时间自己实现了一个,共享出来欢迎大家来喷。

这里写图片描述

using UnityEngine;
using System.Collections;
using System.Collections.Generic;
[ExecuteInEditMode]
public class Parabola : MonoBehaviour {
    //重力
    [Range(0,1)]
    public float gravity = 0.13f;
    //最大长度
    public float maxLength = 50;
    //两点之间的距离
    const float length = 0.2f;
    //点集合
    List<Vector3> m_List = new List<Vector3>();
    Material m_LineMat;

    public void OnRenderObject() {
        CreateLineMaterial();
        m_LineMat.SetPass(0);

        Vector3 position = transform.position;
        Vector3 forward = transform.rotation * Vector3.forward * length;
        Vector3 newPos = position;
        Vector3 lastPos = newPos;
        m_List.Add(newPos);
        int i = 0, iMax = 0;
        float dis = 0;
        while (dis < maxLength) {
            i++;
            newPos = lastPos + forward + Vector3.up * i * -gravity * 0.1f;
            dis += Vector3.Distance(lastPos, newPos);
            m_List.Add(newPos);
            lastPos = newPos;
        }

        GL.Begin(GL.LINES);
        i = 0;
        iMax = m_List.Count;
        for (i = 0; i < iMax; i++) {
            GL.Vertex(m_List[i]);
        }
        GL.End();

        m_List.Clear();
    }

    void CreateLineMaterial() {
        if (!m_LineMat) {
            var shader = Shader.Find("Hidden/Internal-Colored");
            m_LineMat = new Material(shader);
            m_LineMat.hideFlags = HideFlags.HideAndDontSave;
            m_LineMat.SetInt("_SrcBlend", (int)UnityEngine.Rendering.BlendMode.SrcAlpha);
            m_LineMat.SetInt("_DstBlend", (int)UnityEngine.Rendering.BlendMode.OneMinusSrcAlpha);
            m_LineMat.SetInt("_Cull", (int)UnityEngine.Rendering.CullMode.Off);
            m_LineMat.SetInt("_ZWrite", 0);
        }
    }
}
  • 12
    点赞
  • 14
    收藏
    觉得还不错? 一键收藏
  • 5
    评论
以下是Unity实现物体按抛物线运动的代码示例: ```csharp public class ParabolicMotion : MonoBehaviour { // 起始点、终止点和高度 public Transform startPoint; public Transform endPoint; public float height; // 运动时间 public float timeToReachTarget = 1f; private bool isMoving = false; private float timer = 0f; private Vector3 startPosition; private Vector3 endPosition; void Start() { // 获取起始点和终止点的位置 startPosition = startPoint.position; endPosition = endPoint.position; } void Update() { if (isMoving) { // 计算当前时间与总时间的比例 float t = timer / timeToReachTarget; // 计算当前位置 Vector3 currentPos = ParabolicInterpolation(startPosition, endPosition, height, t); // 更新物体位置 transform.position = currentPos; // 更新计时器 timer += Time.deltaTime; // 判断是否到达终点 if (timer >= timeToReachTarget) { isMoving = false; timer = 0f; } } } public void StartMotion() { isMoving = true; } // 抛物线插值函数 private Vector3 ParabolicInterpolation(Vector3 start, Vector3 end, float height, float t) { Vector3 result = Vector3.zero; // 计算抛物线顶点位置 Vector3 vertex = new Vector3((start.x + end.x) / 2f, height, (start.z + end.z) / 2f); // 计算当前位置 result.x = Mathf.Lerp(start.x, end.x, t); result.y = Mathf.Lerp(start.y, end.y, t) + Mathf.Sin(t * Mathf.PI) * height; result.z = Mathf.Lerp(start.z, end.z, t); return result; } } ``` 在这个示例,我们定义了起始点、终止点和高度等参数,然后在Update函数计算当前位置,利用抛物线插值函数实现物体按抛物线运动。我们还通过StartMotion函数来启动运动,可以通过其他事件来触发该函数。
评论 5
添加红包

请填写红包祝福语或标题

红包个数最小为10个

红包金额最低5元

当前余额3.43前往充值 >
需支付:10.00
成就一亿技术人!
领取后你会自动成为博主和红包主的粉丝 规则
hope_wisdom
发出的红包
实付
使用余额支付
点击重新获取
扫码支付
钱包余额 0

抵扣说明:

1.余额是钱包充值的虚拟货币,按照1:1的比例进行支付金额的抵扣。
2.余额无法直接购买下载,可以购买VIP、付费专栏及课程。

余额充值