


1. 安装
项目官网OpenVLA

首先按照官网提示的以下代码,执行创建环境->安装最小依赖->git克隆项目等
# Create and activate conda environment
conda create -n openvla python=3.10 -y
conda activate openvla

# Install PyTorch. Below is a sample command to do this, but you should check the following link
# to find installation instructions that are specific to your compute platform:
# https://pytorch.org/get-started/locally/
conda install pytorch torchvision torchaudio pytorch-cuda=12.4 -c pytorch -c nvidia -y  # UPDATE ME!

# Clone and install the openvla repo
git clone https://github.com/openvla/openvla.git
cd openvla
pip install -e .

# Install Flash Attention 2 for training (https://github.com/Dao-AILab/flash-attention)
#   =>> If you run into difficulty, try `pip cache remove flash_attn` first
pip install packaging ninja
ninja --version; echo $?  # Verify Ninja --> should return exit code "0"
pip install "flash-attn==2.5.5" --no-build-isolation
下载openvla-7b模型到本地
从hugging face镜像网站https://hf-mirror.com上下载
我用的是AutoDL,所以想直接把模型下载到远程的服务器上,操作如下。
(1)安装工具huggingface-cli
pip install -U huggingface_hub
(2)创建python脚本
import os
// 设置环境变量
os.environ['HF_ENDPOINT'] = 'https://hf-mirror.com'
// 下载模型
os.system('huggingface-cli download --resume-download HF上的模型名称 --local-dir 本地存放路径')
// 下载数据集
os.system('huggingface-cli download --repo-type dataset --resume-download HF上的数据集名称 --local-dir 本地存放路径')
例如,我只想下载openvla-7b这个模型,脚本如下
import os
# // 设置环境变量
os.environ['HF_ENDPOINT'] = 'https://hf-mirror.com'
# // 下载模型
os.system('huggingface-cli download --resume-download openvla/openvla-7b --local-dir /root/openvla/openvla7b')
执行上述脚本即可下载模型到本地,即时镜像也需要挺长时间。
在运行过程中,出现磁盘空间不够的问题导致下载终止!需要注意autodl中租用的实例中会自动分配30G系统盘+50G数据盘,如下图。其中/root/autodl-tmp为数据盘,除此之外的都认为是系统盘,一般创建的环境可以默认在系统盘,但是项目源码特别是模型(通常几十个G)在下载存放时要注意路径,如果不小心将模型放到系统盘(容量非常小,只有30G),很可能导致下载终止浪费掉几个小时时间!
手动删除系统盘的模型文件后,最后再清理一下磁盘AutoDL清理磁盘

2. 在BridgeData上微调OpenVLA
首先下载数据集,使用一下命令下载
# Change directory to your base datasets folder
cd <PATH TO BASE DATASETS DIR>

# Download the full dataset (124 GB)
wget -r -nH --cut-dirs=4 --reject="index.html*" https://rail.eecs.berkeley.edu/datasets/bridge_release/data/tfds/bridge_dataset/

# Rename the dataset to `bridge_orig` (NOTE: Omitting this step may lead to runtime errors later)
mv bridge_dataset bridge_orig
3 windows系统远程连接ubuntu系统并回传GUI界面
问了autoDL客服,不支持X11!!,一般商用的云服务器上都装的是不支持图形界面的ubuntu server版本,所以不要再尝试在autoDL上运行带有GUI的程序并试图把GUI画面传回本地,走不通!不过作为通用技术,下面的扫盲贴还是可以看一下的!
首先关于该问题的一些扫盲贴
1. 图形显示系统——X11和Xorg简介
2. Win11下开启x11服务,linux上调用windows的图形管理界面
通过 X11 在你的 Windows 上显示 Linux 服务器里的 GUI 程序
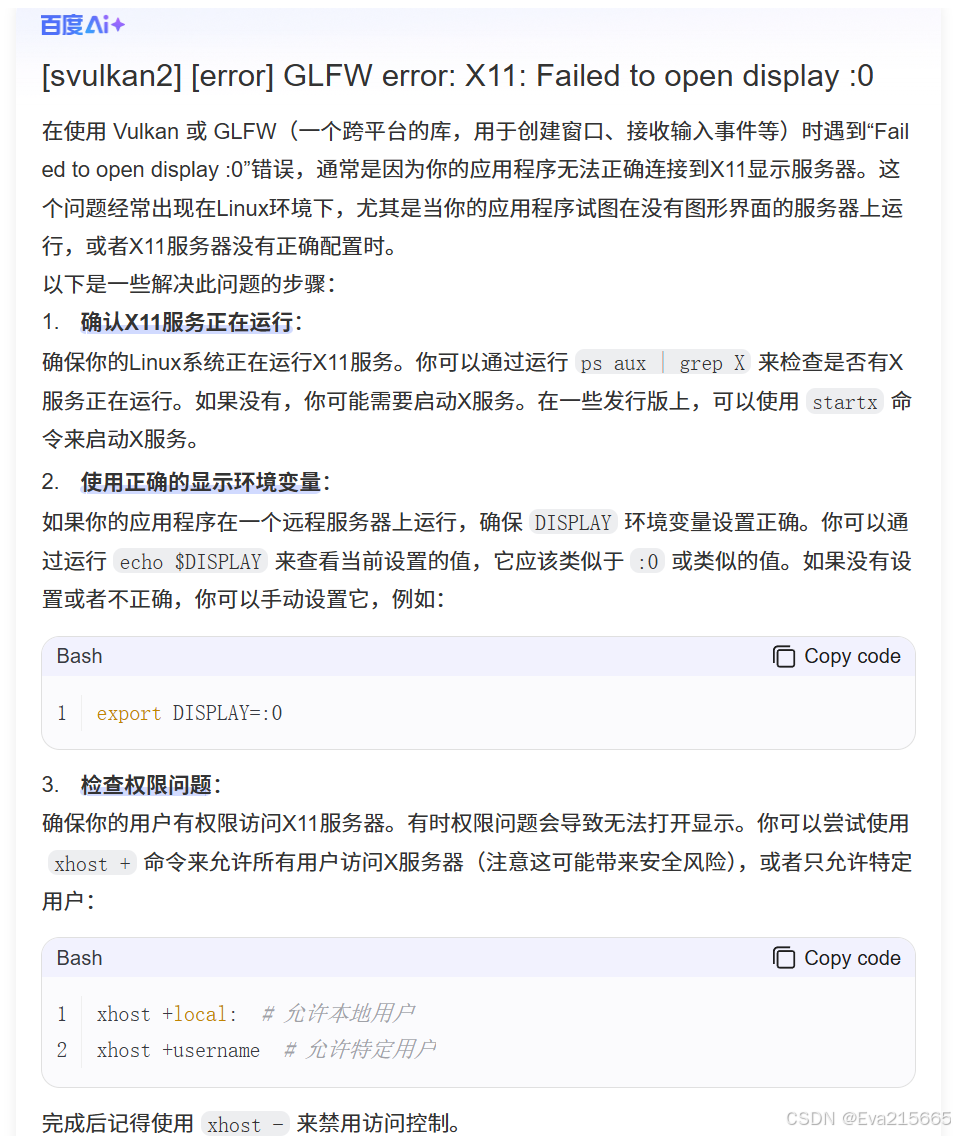
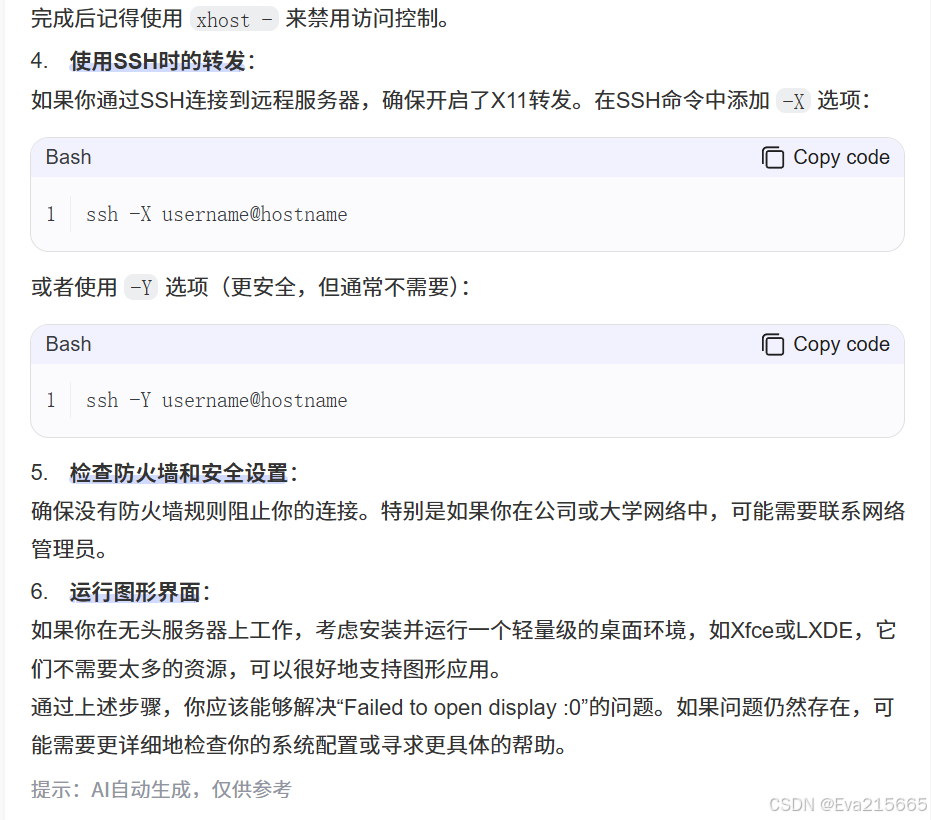
在运行一个开源real2sim项目simpler-env时,报以下错误:
[svulkan2] [error] GLFW error: X11: Failed to open display :0
原因如下
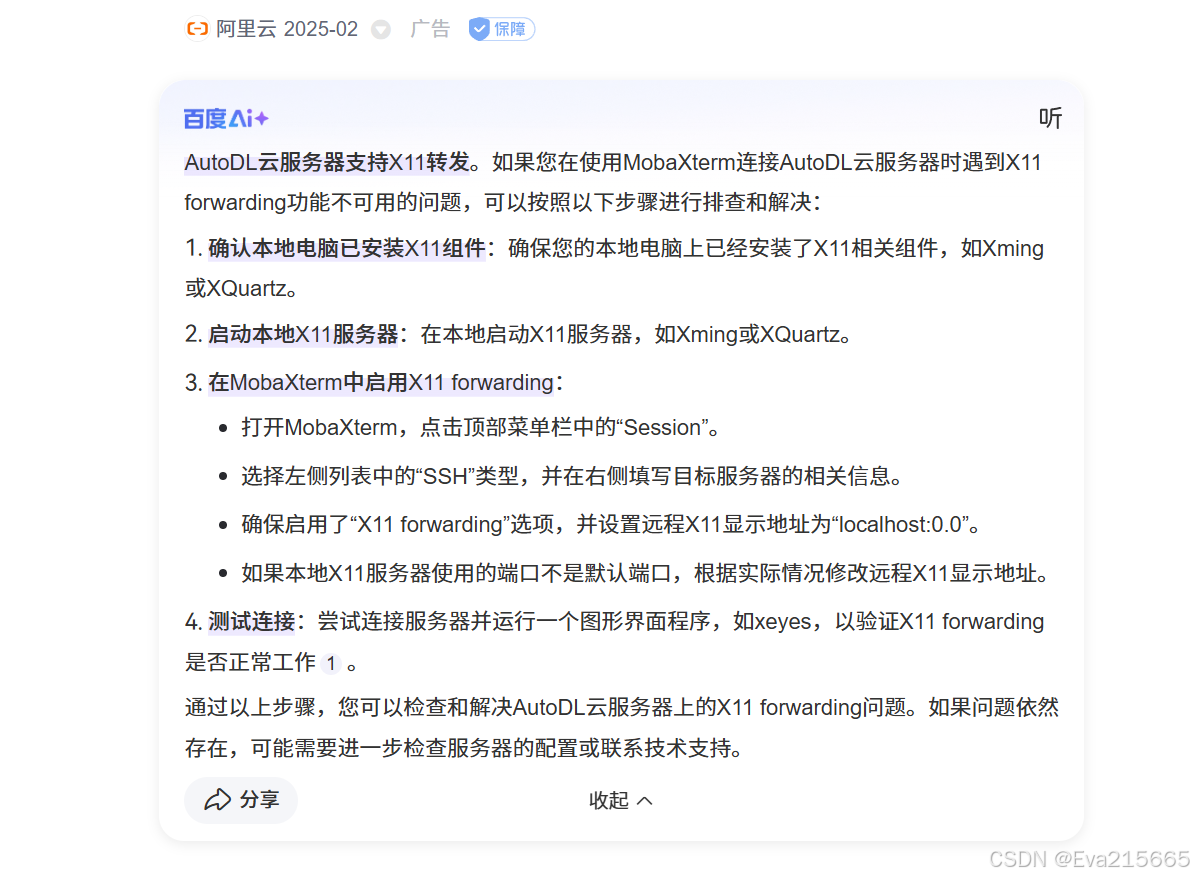
AutoDL上的ubuntu系统是支持X11转发的,如下图所示,所以原因是需要把虚拟环境中机器人执行任务的界面回传至本地windows界面。
4 关于强化学习Gymnasium库
Real2Sim项目SimplerEnv项目中,对Gymnasium进行了一定程度的封装,关于Gymnasium库,可参考强化学习,Gymnasium库的介绍和使用
5 OpenVLM项目所用的模拟器Sapien
OpenVLM用了一个开源的real2sim模拟器,用于快速的让机器人在虚拟环境中执行各种任务以评估VLM模型的性能。模拟器有很多,如Mujoco,pybullet等。这里就沿用OpenVLM项目用的这个开源项目SimplerEnv,这个项目是基于sapien模拟器项目构建,这个项目是由美国多个大学共同创建并维护,sapien项目官网,至于好不好用,大家自己亲自测试吧。OpenVLM用的是sapien 2.2.2版本,这个版本的API文档如下sapien 2.2.2API文档。
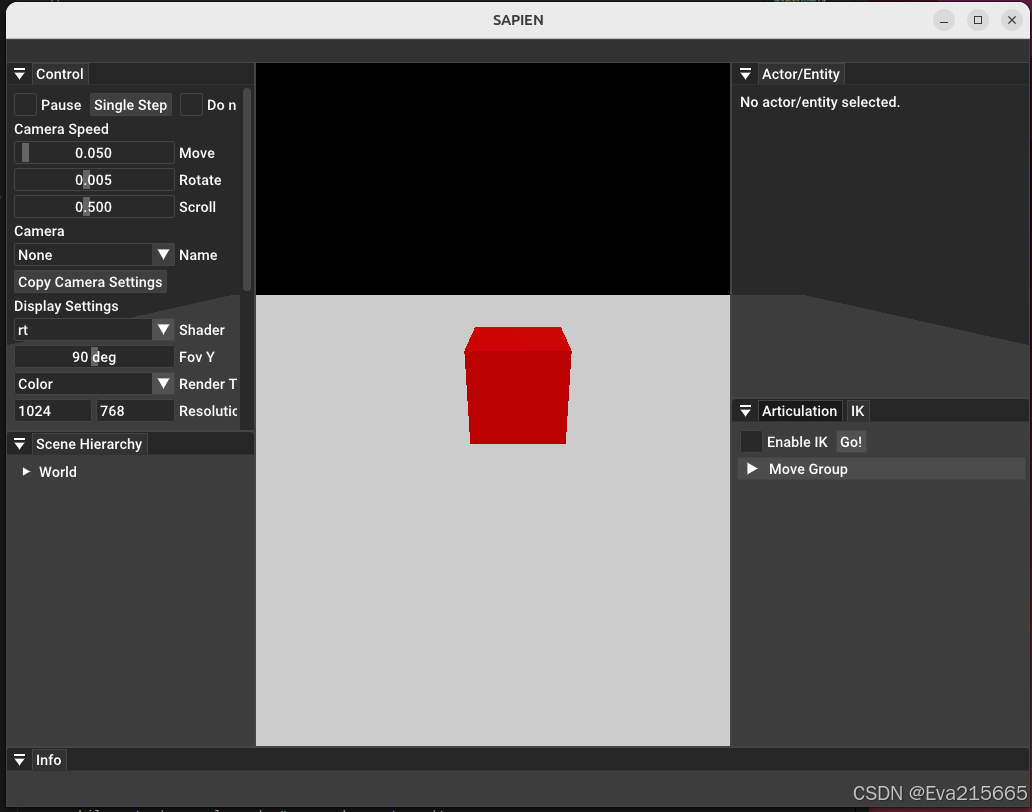
下面是官网上一个简单的例子,实现创建引擎->创建渲染器->创建场景->给场景中添加一个立方体->给场景中添加一些光照->循环将这个场景运行起来 等一系列任务。
import sapien.core as sapien
from sapien.utils import Viewer
import torch
import numpy as np

# 检查 CUDA 可用性并设置设备
device = 'cuda' if torch.cuda.is_available() else 'cpu'

# # 创建仿真环境并设置渲染器
engine = sapien.Engine() # create a physical simulation engine
renderer = sapien.SapienRenderer() # create a render
engine.set_renderer(renderer) # Bind the renderer and the engine

scene = engine.create_scene() # create an instance of simulation world
scene.set_timestep(1/100.0) # set the simulation frequency

scene.add_ground(altitude=0)
actor_builder = scene.create_actor_builder()
actor_builder.add_box_collision(half_size=[0.5, 0.5, 0.5])
actor_builder.add_box_visual(half_size=[0.5, 0.5, 0.5], color=[1.0, 0., 0.])
box = actor_builder.build(name='box') # Add a box
box.set_pose(sapien.Pose(p=[0, 0, 0.5]))

# Viewer creates a window (GUI) to render the simulation world.
#  It is only available with a connected display (e.g. monitor).
# Usage of the GUI will be elaborated in Viewer.

# Add some lights so that you can observe the scene
scene.set_ambient_light([0.5, 0.5, 0.5])
scene.add_directional_light([0, 1, -1], [0.5, 0.5, 0.5])

viewer = Viewer(renderer) # create a viewer(window)
viewer.set_scene(scene) # Bind the viewer and the scene

# The coordinate frame in Sapien is: x(forward), y(left), z(upward)
# The principle axis of the camera is the x-axis
viewer.set_camera_xyz(x=-4, y=0, z=2)

# The rotation of the free camera is represented as [roll(x), pitch(-y), yaw(-z)]
# The camera now looks at the origin
viewer.set_camera_rpy(r=0, p=-np.arctan2(2, 4), y=0)
viewer.window.set_camera_parameters(near=0.05, far=100, fovy=1)

# 设置模拟世界后,实际模拟会循环进行。
# 每次迭代,场景都会模拟一步并将世界更新到渲染器。查看器调用render以更新屏幕上的结果。
while not viewer.closed: # press key q to quit
    scene.step() # Simulate the world
    scene.update_render() #update the world to the renderer
    viewer.render()
# # export VK_ICD_FILENAMES=/usr/share/vulkan/icd.d/nvidia_icd.json:ml-citation{ref="1,5" data="citationList"}
# # export VK_ICD_FILENAMES="/usr/share/vulkan/icd.d/nvidia_icd.json"
运行效果如下
在上述过程中遇到不少报错,总结如下:
报错1: `GLIBCXX_3.4.32’ not found错误
转而在本地windows虚拟机上安装的ubuntu上运行Real2Sim项目,项目地址SimplerEnv,在执行import simpler_env 时报错/home/eva/anaconda3/envs/simpler_env/bin/../lib/libstdc++.so.6: version GLIBCXX_3.4.32' not found
根据错误信息可以知道运行调用c++标准库报错,显示的被调用的c++标准库地址为/home/eva/anaconda3/envs/simpler_env/bin/../lib/libstdc++.so.6
也就是说在anaconda创建的python环境中默认调用的库地址首先是自身环境的lib路径,那么我们可以看看在当前系统重一共有多少个c++标准库libstdc++.so.6这个文件。
sudo find / -name libstdc++.so.6
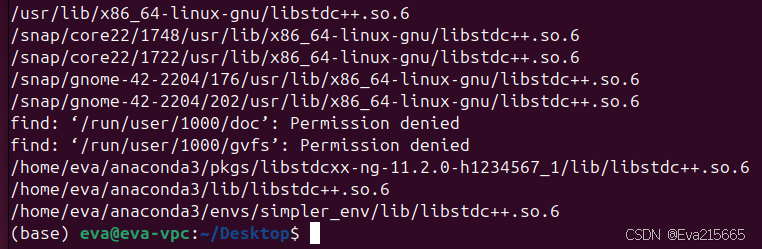
可以看到系统中C++标准库libstdc++.so.6文件有多个,基本是每个独立性较高的程序都在自己的环境路径下有个libstdc++.so.6文件,所以这样是因为不同的libstdc++.so.6文件可能内部的GLIBCXX版本并不相同,因此一些不需要从源码编译的软件就会采用这种方式,把符合自身版本需要的libstdc++.so.6文件放在自身的库路径下,这样在调用的时候会优先调用自身带有的libstdc++.so.6文件而不是系统自带的。
接下来我们可以看一下系统libstdc++.so.6文件中支持的GLIBCXX版本(仅列出部分):
strings /usr/lib/x86_64-linux-gnu/libstdc++.so.6 | grep GLIBC
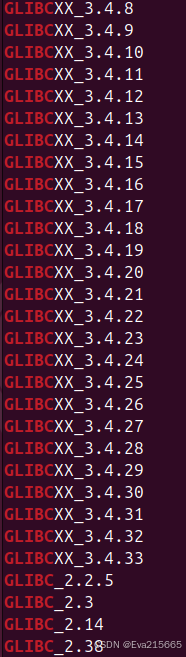
可以看到,系统的libstdc++.so.6文件中是支持GLIBCXX_3.4.32的,下面再来看一下报错的这个anaconda环境下libstdc++.so.6文件中支持的GLIBCXX版本:
strings /home/eva/anaconda3/envs/simpler_env/lib/libstdc++.so.6 | grep GLIBC
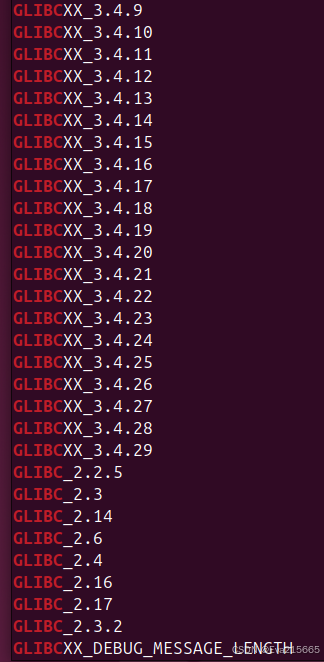
可以看到报错的这个anaconda环境下libstdc++.so.6文件支持的GLIBCXX最高版本为GLIBCXX_3.4.29,因此有了前面的报错!
因此,我们只需要将报错的这个anaconda环境下的libstdc++.so.6和libstdc++.so.6的链接地址指向系统路径中的地址即可。
查看anaconda环境下libstdc++.so.6的相关文件:
ls libstdc++.so.6 -al
查看系统环境下libstdc++.so.6的相关文件
解决方案:
- 将系统路径
/usr/lib/x86_64-linux-gnu下的两个文件libstdc++.so.6和libstdc++so.6.0.33复制然后替换掉anaconda环境/home/eva/anaconda3/envs/simpler_env/lib下的同名文件。 - 删除
/home/eva/anaconda3/envs/simpler_env/lib下面的这两个文件,然后创建软链接,指向系统的文件即可,如下

执行上述操作后,不再报错。
在后续测试中,虚拟机ubuntu系统显卡设置问题,运行GUI程序还是有点问题,在ubuntu主机上运行,问题解决。
报错2 No matching distribution found for sapien==2.2.2
Real2Sim项目SimplerEnv项目是基于sapien模拟器构建的,其安装包里有一条sapien==2.2.2,在执行安装时报如下错误
(D:\Code\SimpEnv\venv) D:\Code\SimpEnv\SimplerEnv>pip install sapien==2.2.2
ERROR: Could not find a version that satisfies the requirement sapien==2.2.2 (from versions: 3.0.0b0, 3.0.0b1)
ERROR: No matching distribution found for sapien==2.2.2
尝试安装其他版本如3.0版本的sapien,项目有问题,于是找到sapien==2.2.2whl文件手动安装,文件来源sapien 2.2.2,下载和自己相应的python版本即可。
E1: ubuntu系统 RuntimeError: vk::PhysicalDevice::createDeviceUnique: ErrorExtensionNotPresent
报错3 render = sapien.SapienRenderer() # create a render RuntimeError:
转战一台拥有多图形显卡(2块4090)的ubuntu主机,在使用sapien 2.2.2官网测试以下代码
import sapien.core as sapien
import torch
device = 'cuda' if torch.cuda.is_available() else 'cpu'
renderer = sapien.SapienRenderer(**renderer_kwargs)
sim.add_renderer(renderer)
render = sapien.SapienRenderer() # create a render
engine.set_renderer(render) # Bind the renderer and the engine
报错如下
sapien2.2.2版本报错 render = sapien.SapienRenderer() # create a render RuntimeError: vk::PhysicalDevice::createDeviceUnique: ErrorExtensionNotPresent
贴进百度并且用AI+搜索后,可能与VULKAN渲染引擎的扩展支持有关,给出一系列解决方案包括
- 检查GPU版本及驱动
nvidia-smi - 更新库
sudo apt install vulkan-tools vulkan-utils libvulkan-dev - 查看并测试vulkan
vulkaninfo - 配置环境变量,特别是集成显卡或者多显卡环境,可能需要强制指定物理设备
export VK_ICD_FILENAMES="/usr/share/vulkan/icd.d/nvidia_icd.json"
都尝试了一遍,没有起作用,去/usr/share/vulkan/icd.d/目录下看了以下,发现没有nvidia_icd,json文件,用find / -name "nvidia_icd.json" 全局搜索了一下,找了一个这个文件复制到/usr/share/vulkan/icd.d/目录下(遇无权限粘贴问题,百度解决),再次运行,没有继续报该错误。


 1819
1819

 被折叠的 条评论
为什么被折叠?
被折叠的 条评论
为什么被折叠?
 到【灌水乐园】发言


