


 本文详细描述了如何在Jetson平台上配置ORBSLAM2,包括修复编译错误、调整OpenCV版本和库依赖,以及针对D455相机的实时运行过程。作者分享了遇到的问题及解决方案,适用于想要在机器人平台运行视觉SLAM的读者。
0、写在前面
用板子配置完orbslam3之后,发现orbslam3运行数据集效果是相当稳定的,但是跑实物似乎还是会存在bug(大概十帧左右就会重新绘制轨迹,丢失原来的里程),目前暂时不知道是主板的问题还是系统环境的问题。
市面上部分商家,包括部分论文还是基于orbslam2配置和开发,因此还是很有必要在板子上配置一下orbslam2的。
我这里ROS(noetic)、Eigen3、Pangolin0.5、Opencv4.2.0、DBow2和g2o库都已经提前配置好了
注意!!如果是ROS-noetic版本的,可能无法编译orbslam系列(至少包括orbslam2和orbslam3)的ros版,因为orb创立是依据ROS-melodic版本的。如果想要正常编译通过,至少需要修改CMakelists文件以及创建一个新的package.xml(新的.xml需要根据orbslam自带的manifest.xml文件去迁移,比较麻烦)
---------------------------------------------------------------------------------------------------------------------------------
一、下载ORBSLAM2
首先创建文件夹并命名为ORB_SLAM2
调用如下命令调用功能包:
cd ORB_SLAM2
git clone https://github.com/raulmur/ORB_SLAM2.git ORB_SLAM2
二、编译
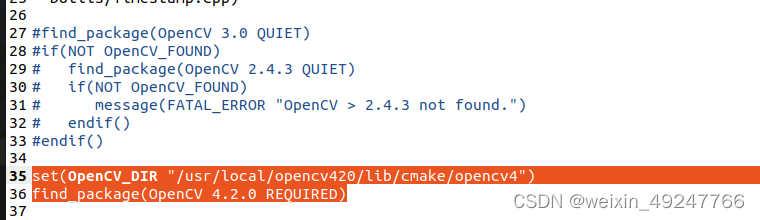
进入下载的功能包中,修改CMakeLists.txt文件(因为我的Openc是4.2.0版本,所以还是需要修改的)
cd ORB_SLAM2
set(OpenCV_DIR "/usr/local/opencv420/lib/cmake/opencv4")
find_package(OpenCV 4.2.0 REQUIRED)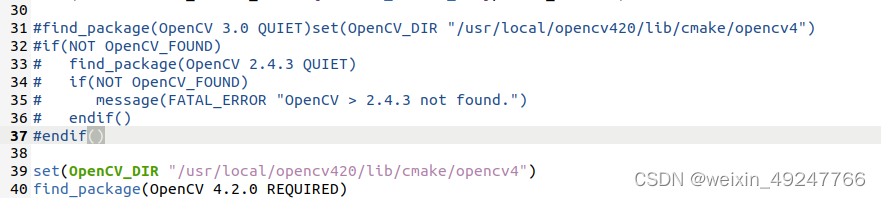
解放权限和编译
chmod +x build.sh
./build.sh
由于opencv版本问题,可能会出现关于opencv的报错,比如没有头文件,或者cpp内部函数的名称不对。这里需要修改成对应的opencv4.2.0的头文件,以及对应的函数。

解决措施:
将该头文件改成
#include <opencv2/opencv.hpp>函数未能正确调用,函数变量因为opencv版本变化而产生的报错:

CV_REDUCE_SUM函数问题,在Sim3Solver.cc文件中添加如下头文件,可以解决:
#include<opencv2/core/core_c.h>
CvMat函数问题,可以在PnPsolver.cc文件中添加头文件:
#include <opencv2/core/types_c.h>‘cvCreateMat’ was not declared in this scope等以下报错,通过添加头文件解决:
#include <opencv2/imgproc/types_c.h>
或
#include <opencv2/imgproc.hpp>
usleep报错,需要添加如下头文件:
#include <unistd.h> CV_GRAY2BGR报错,将CV_GRAY2BGR改为cv::COLOR_GRAY2BGR,或者加入头文件:
#include <opencv2/imgproc/types_c.h>
error: static assertion failed: std::map must have the same value_type as its allocator
需要在loopclosing.h第49行左右修改:
typedef map<KeyFrame*,                  //键
                g2o::Sim3,                  //值
                std::less<KeyFrame*>,       //排序算法
                Eigen::aligned_allocator<std::pair<const KeyFrame*, g2o::Sim3> > // 指定分配器,和内存空间开辟有关. 为了能够使用Eigen库中的SSE和AVX指令集加速,需要将传统STL容器中的数据进行对齐处理
                > KeyFrameAndPose;
改为:
typedef map<KeyFrame*,                  //键
                g2o::Sim3,                  //值
                std::less<KeyFrame*>,       //排序算法
                Eigen::aligned_allocator<std::pair<KeyFrame* const , g2o::Sim3> > // 指定分配器,和内存空间开辟有关. 为了能够使用Eigen库中的SSE和AVX指令集加速,需要将传统STL容器中的数据进行对齐处理
                > KeyFrameAndPose;
注意,修改完所有报错后,可能会提示缺少DBoW2.so文件,这是因为没有DBoW2库没有编译通过,需要修改对应文件中的CMakeLists,因为DBoW2也使用了opencv库的东西。要么选择安装该库,要么选择修改至别的词袋库如DBoW3等。CMakeLists文件修改如下:
‘CV_LOAD_IMAGE_UNCHANGED’ was not declared in this scope
需要将对应的函数修改为:
cv::IMREAD_UNCHANGED
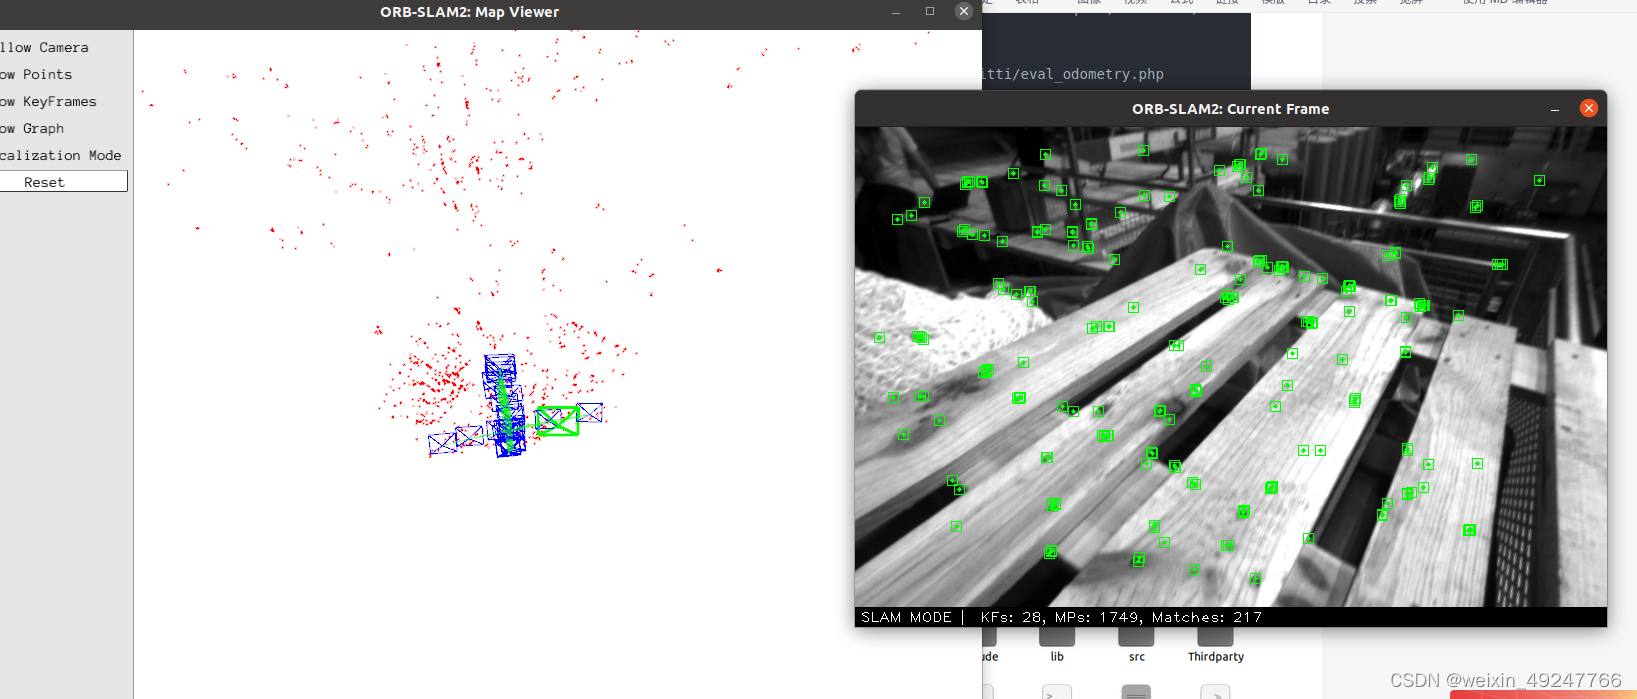
编译通过后,应该是如下的界面:

三、运行(数据集)
首先我们需要下载数据集,网站如下:
#单目:
(1)TUM数据集:http://vision.in.tum.de/data/datasets/rgbd-dataset/download
./Examples/Monocular/mono_tum Vocabulary/ORBvoc.txt Examples/Monocular/TUMX.yaml PATH_TO_SEQUENCE_FOLDER
(2)KITTI数据集:http://www.cvlibs.net/datasets/kitti/eval_odometry.php
./Examples/Monocular/mono_kitti Vocabulary/ORBvoc.txt Examples/Monocular/KITTIX.yaml PATH_TO_DATASET_FOLDER/dataset/sequences/SEQUENCE_NUMBER
(3)EuRoc数据集:http://projects.asl.ethz.ch/datasets/doku.php?id=kmavvisualinertialdatasets
./Examples/Monocular/mono_euroc Vocabulary/ORBvoc.txt Examples/Monocular/EuRoC.yaml PATH_TO_SEQUENCE_FOLDER/mav0/cam0/data Examples/Monocular/EuRoC_TimeStamps/SEQUENCE.txt

#双目:
(1)KITTI数据集:http://www.cvlibs.net/datasets/kitti/eval_odometry.php
./Examples/Stereo/stereo_kitti Vocabulary/ORBvoc.txt Examples/Stereo/KITTIX.yaml PATH_TO_DATASET_FOLDER/dataset/sequences/SEQUENCE_NUMBER
(2)EuRoc数据集:http://projects.asl.ethz.ch/datasets/doku.php?id=kmavvisualinertialdatasets
./Examples/Stereo/stereo_euroc Vocabulary/ORBvoc.txt Examples/Stereo/EuRoC.yaml PATH_TO_SEQUENCE/mav0/cam0/data PATH_TO_SEQUENCE/mav0/cam1/data Examples/Stereo/EuRoC_TimeStamps/SEQUENCE.txt

#RGBD深度
TUM数据集:http://vision.in.tum.de/data/datasets/rgbd-dataset/download
#需要使用associate.py文件关联RGB图像和深度图像,associate.py链接:http://vision.in.tum.de/data/datasets/rgbd-dataset/tools
python associate.py PATH_TO_SEQUENCE/rgb.txt PATH_TO_SEQUENCE/depth.txt > associations.txt
./Examples/RGB-D/rgbd_tum Vocabulary/ORBvoc.txt Examples/RGB-D/TUMX.yaml PATH_TO_SEQUENCE_FOLDER ASSOCIATIONS_FILE
每个数据集网址下面一行就是运行的命令,根据自己的设定修改路径即可。比如我的(Euroc):
./Examples/Stereo/stereo_euroc Vocabulary/ORBvoc.txt /home/jetson/ORB_SLAM2/ORB_SLAM2/Examples/Stereo/EuRoC.yaml /home/jetson/MH_01_easy/mav0/cam0/data /home/jetson/MH_01_easy/mav0/cam1/data ./Examples/Stereo/EuRoC_TimeStamps/MH01.txt这里以双目运行为例,运行过程如下:
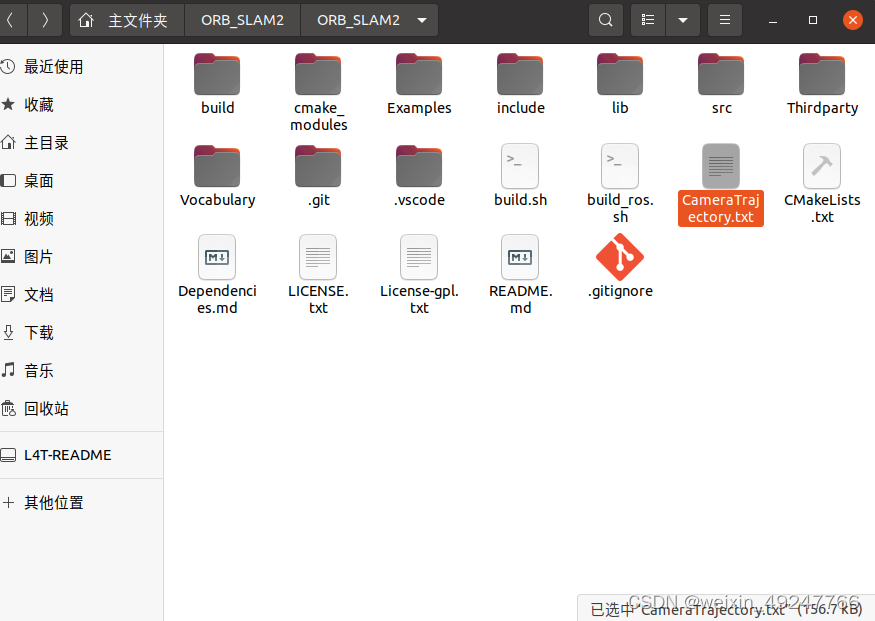
运行结果将存放在如下,并命名为CameraTrajectory.txt
TUM+单目:单目三个数据集都能跑,双目只能跑euroc和kitti,RGB-D只能跑TUM,好神奇!
./Examples/Monocular/mono_tum Vocabulary/ORBvoc.txt Examples/Monocular/TUM1.yaml /home/jetson/ORB_SLAM2/rgbd_dataset_freiburg1_xyz注意这里TUM必须是来自TUM-RGBD的数据集,别的数据集暂时跑不了,比如TUM-VI的就没任何反应

结果存放在KeyFrameTrajectory.txt中
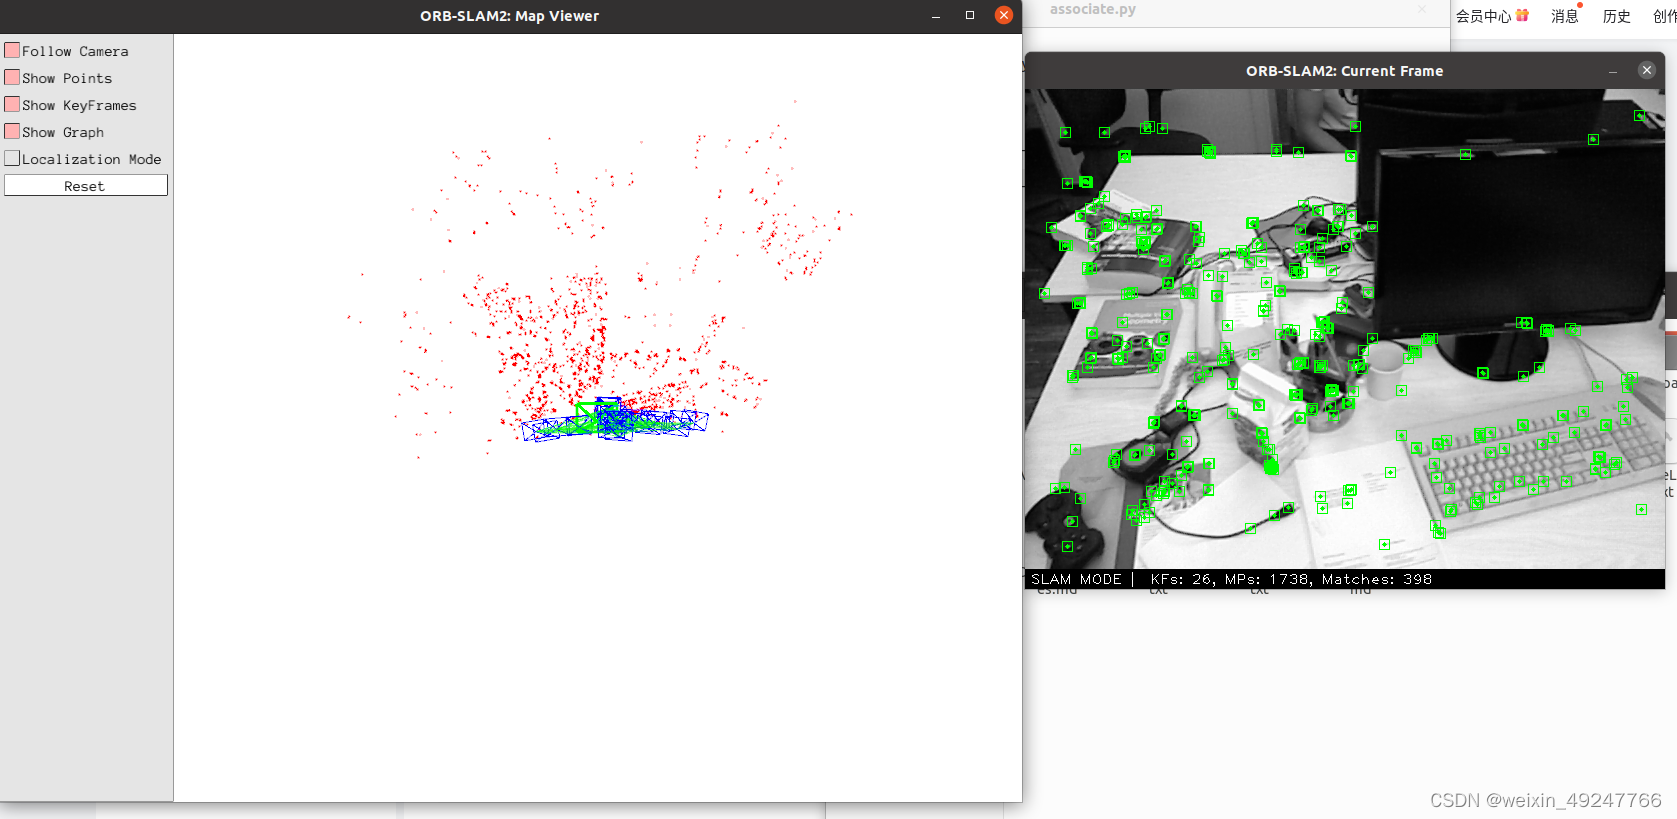
TUM+RGB-D
需要用associate.py文件将rgb.txt和depth.txt联合起来
结果如下:
四、运行D455相机
首先要保证自己的相机可以正常运行,调用roslaunch命令,可以参考我之前的博客。
编写对应的yaml和cpp文件。基础版的orbslam2只有数据集对应的cpp和yaml,所以如果想要跑相机,需要我们自己写一个.cc文件和yaml文件。
以单目为例,.cc文件也放在mono的路径下,内容如下:
#include<iostream>
#include<chrono>

#include<librealsense2/rs.hpp>
#include<opencv2/core/core.hpp>
#include<System.h>

using namespace std;
using namespace cv;

#define width 640
#define height 480
#define fps 30

bool SLAM_state  = false;


void enable_stream_init(rs2::config cfg)
{
    //Add desired streams to configuration
    cfg.enable_stream(RS2_STREAM_COLOR, width, height, RS2_FORMAT_BGR8, fps);//向配置添加所需的流
    cfg.enable_stream(RS2_STREAM_DEPTH, width, height, RS2_FORMAT_Z16,fps);
    cfg.enable_stream(RS2_STREAM_INFRARED, 1, width, height, RS2_FORMAT_Y8, fps);
    cfg.enable_stream(RS2_STREAM_INFRARED, 2, width, height, RS2_FORMAT_Y8, fps);
    cfg.enable_stream(RS2_STREAM_ACCEL, RS2_FORMAT_MOTION_XYZ32F);
    cfg.enable_stream(RS2_STREAM_GYRO, RS2_FORMAT_MOTION_XYZ32F);
}

//按下s结束
void Stop_thread()
{
    while(1)
    {
        char c = getchar();
        if (c == 's')
        {
            SLAM_state = false;
        }
        std::chrono::milliseconds dura(5);
        std::this_thread::sleep_for(dura);
    }
}


//字典 内参
int main(int argc, char **argv)
{
    if(argc != 3)
    {
        cerr << endl << "Usage: ./mono_tran path_to_vocabulary path_to_settings " << endl;
        return 1;
    }
    //vector<double> vTimestamps;

    // Create SLAM system. It initializes all system threads and gets ready to process frames.
    ORB_SLAM2::System SLAM(argv[1],argv[2],ORB_SLAM2::System::MONOCULAR,true);

    SLAM_state = true;

    //配置realsense
    rs2::context ctx;
    auto list = ctx.query_devices(); // Get a snapshot of currently connected devices
    if (list.size() == 0)
        throw std::runtime_error("No device detected. Is it plugged in?");
    rs2::device dev = list.front();

    rs2::frameset frames;
    //Contruct a pipeline which abstracts the device
    rs2::pipeline pipe;//创建一个通信管道//https://baike.so.com/doc/1559953-1649001.html pipeline的解释
    //Create a configuration for configuring the pipeline with a non default profile
    rs2::config cfg;//创建一个以非默认配置的配置用来配置管道
    enable_stream_init(cfg);
    // start stream
    pipe.start(cfg);//指示管道使用所请求的配置启动流
    for( int i = 0; i < 30 ; i ++)
    {
        frames = pipe.wait_for_frames();
    }

    cout << endl << "-------" << endl;
    cout << "Start processing sequence ..." << endl;

    thread stop_thread(Stop_thread);

    while(SLAM_state)
    {
        frames = pipe.wait_for_frames();//等待所有配置的流生成框架
        //   Align to color
        rs2::align align_to_color(RS2_STREAM_COLOR);
        frames = align_to_color.process(frames);
        // Get imu data
        //Get_imu_data(frames);

        //Get each frame
        rs2::frame color_frame = frames.get_color_frame();
        //rs2::depth_frame depth_frame = frames.get_depth_frame();
        //rs2::video_frame ir_frame_left = frames.get_infrared_frame(1);
       // rs2::video_frame ir_frame_right = frames.get_infrared_frame(2);

        // Creating OpenCV Matrix from a color image
        Mat color(Size(width, height), CV_8UC3, (void*)color_frame.get_data(), Mat::AUTO_STEP);
        double tframe = color_frame.get_timestamp();
        //Mat pic_right(Size(width,height), CV_8UC1, (void*)ir_frame_right.get_data());
        //Mat pic_left(Size(width,height), CV_8UC1, (void*)ir_frame_left.get_data());
        //Mat pic_depth(Size(width,height), CV_16U, (void*)depth_frame.get_data(), Mat::AUTO_STEP);
        //namedWindow("Display Image", WINDOW_AUTOSIZE );
        //imshow("Display Image", color);


#ifdef COMPILEDWITHC11
        std::chrono::steady_clock::time_point t1 = std::chrono::steady_clock::now();
#else
        std::chrono::monotonic_clock::time_point t1 = std::chrono::monotonic_clock::now();
#endif
        SLAM.TrackMonocular(color,tframe);

        if(color.empty())
        {
            cerr << endl << "Failed to load image at: "
                 <<  tframe << endl;
            return 1;
        }

#ifdef COMPILEDWITHC11
        std::chrono::steady_clock::time_point t2 = std::chrono::steady_clock::now();
#else
        std::chrono::monotonic_clock::time_point t2 = std::chrono::monotonic_clock::now();
#endif
        double ttrack= std::chrono::duration_cast<std::chrono::duration<double> >(t2 - t1).count();

        //TODO:检测跟踪时间
    }

    // Stop all threads
    SLAM.Shutdown();
    cout << "-------" << endl << endl;
    SLAM.SaveKeyFrameTrajectoryTUM("KeyFrameTrajectory.txt");

    return 0;
}
配置d455.yaml文件,内容为(需要根据自己相机标定的结果修改):
单目的话是彩色相机,也就是d455的cam2,需要将cam2的参数填上去
%YAML:1.0

#--------------------------------------------------------------------------------------------
# Camera Parameters. Adjust them!
#--------------------------------------------------------------------------------------------

# Camera calibration and distortion parameters (OpenCV)
Camera.fx: 459.48613884558245
Camera.fy: 454.9835751443726
Camera.cx: 419.2875869406933
Camera.cy: 241.1974077432945

Camera.k1: -0.023905051331099318
Camera.k2:  0.07205423074593338
Camera.p1: -0.0021017170768971574
Camera.p2: -0.003237005249385528

# Camera frames per second
Camera.fps: 20.0

# Color order of the images (0: BGR, 1: RGB. It is ignored if images are grayscale)
Camera.RGB: 1

#--------------------------------------------------------------------------------------------
# ORB Parameters
#--------------------------------------------------------------------------------------------

# ORB Extractor: Number of features per image
ORBextractor.nFeatures: 1000

# ORB Extractor: Scale factor between levels in the scale pyramid
ORBextractor.scaleFactor: 1.2

# ORB Extractor: Number of levels in the scale pyramid
ORBextractor.nLevels: 8

# ORB Extractor: Fast threshold
# Image is divided in a grid. At each cell FAST are extracted imposing a minimum response.
# Firstly we impose iniThFAST. If no corners are detected we impose a lower value minThFAST
# You can lower these values if your images have low contrast
ORBextractor.iniThFAST: 20
ORBextractor.minThFAST: 7

#--------------------------------------------------------------------------------------------
# Viewer Parameters
#---------------------------------------------------------------------------------------------
Viewer.KeyFrameSize: 0.05
Viewer.KeyFrameLineWidth: 1
Viewer.GraphLineWidth: 0.9
Viewer.PointSize:2
Viewer.CameraSize: 0.08
Viewer.CameraLineWidth: 3
Viewer.ViewpointX: 0
Viewer.ViewpointY: -0.7
Viewer.ViewpointZ: -1.8
Viewer.ViewpointF: 500
然后再修改CMakeLists.txt文件,生成对应的可执行程序:
找到这句话:
set(CMAKE_RUNTIME_OUTPUT_DIRECTORY ${PROJECT_SOURCE_DIR}/Examples/Monocular)
在下面增加:
add_executable(mono_D435i
        Examples/Monocular/mono_D435i.cc)
target_link_libraries(mono_D435i ${PROJECT_NAME})
在上面增加:
find_package(realsense2 REQUIRED) # 新增在include_directories里增加:
${realsense2_INCLUDE_DIRS}
在target_link_libraries增加:
${realsense2_LIBRARY}
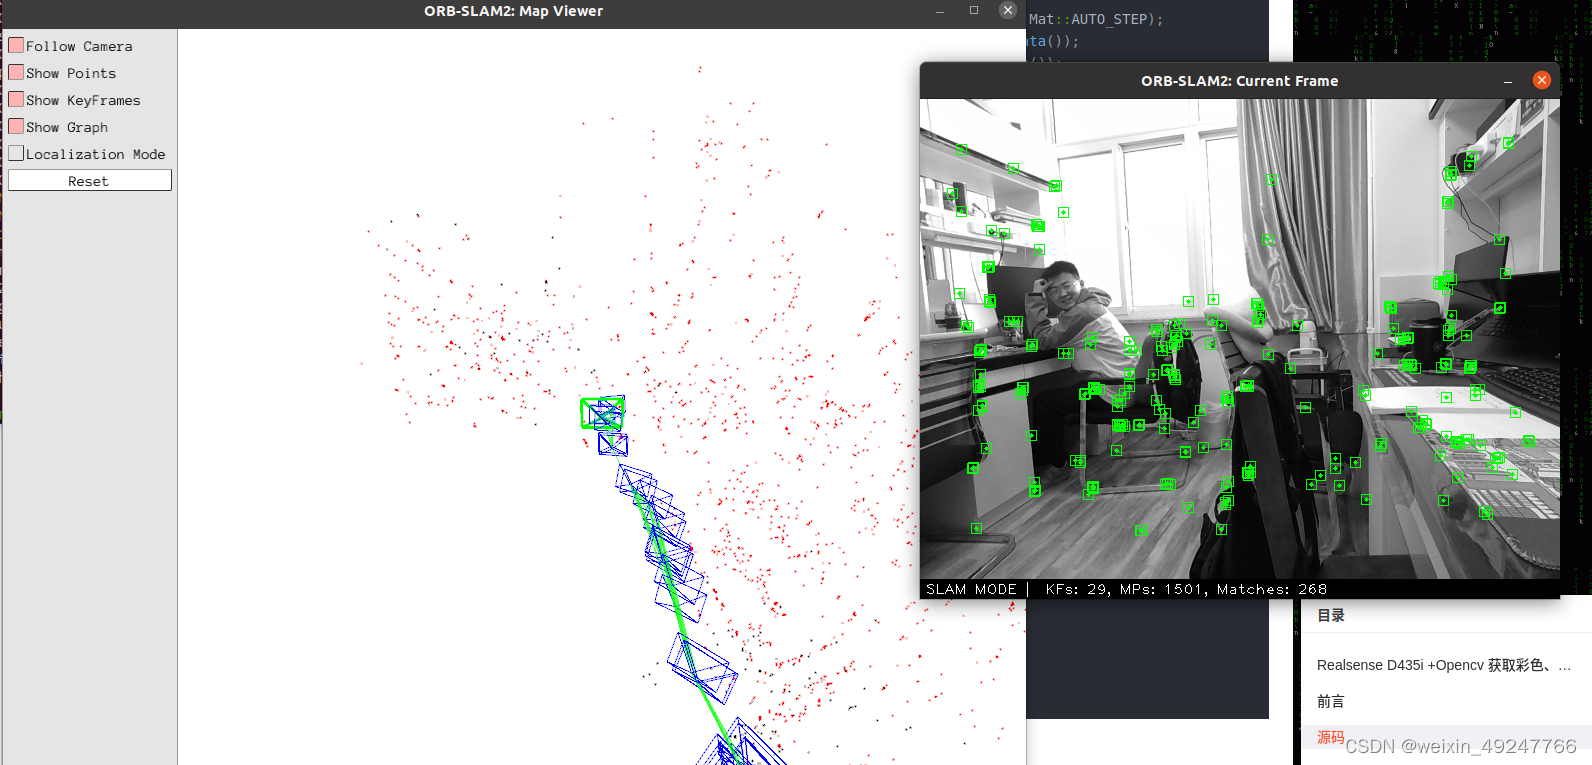
再运行编译:
./bulid.sh编译成功后的运行结果如下:


 1403
1403


 被折叠的 条评论
为什么被折叠?
被折叠的 条评论
为什么被折叠?
 到【灌水乐园】发言


