


一、按键中断实现LED亮灭
1、按键中断实现LED亮灭
LED.c文件
#include "stm32f10x.h" // Device header
#include "LED.h"
void LED_Init(void)
{
GPIO_InitTypeDef GPIO_InitStructure;//定义一个GPIO_InitTypeDef类型的结构体变量
RCC_APB2PeriphClockCmd(RCC_APB2Periph_GPIOB,ENABLE);//开启GPIOB时钟
GPIO_InitStructure.GPIO_Pin = GPIO_Pin_5;//选择PB5所以引脚
GPIO_InitStructure.GPIO_Mode = GPIO_Mode_Out_PP;//设置引脚输出模式为浮空输入
GPIO_InitStructure.GPIO_Speed = GPIO_Speed_50MHz;//设置输出速度为50MHz
GPIO_Init(GPIOB,&GPIO_InitStructure);//调用初始化库函数初始化GPIOB端口
}
LED.h文件
#ifndef __LED_H #define __LED_H #include "stm32f10x.h" // Device header void LED_Init(void); #endif
Exti_key_.c文件
#include "stm32f10x.h" // Device header
#include "Exti_key.h"
#include "misc.h"
void EXTI_Key_Init(void)
{
RCC_APB2PeriphClockCmd(RCC_APB2Periph_GPIOA,ENABLE);
RCC_APB2PeriphClockCmd(RCC_APB2Periph_AFIO,ENABLE);
GPIO_InitTypeDef GPIO_InitStructure;
GPIO_InitStructure.GPIO_Pin = GPIO_Pin_3;
GPIO_InitStructure.GPIO_Mode = GPIO_Mode_IN_FLOATING;
GPIO_Init(GPIOA,&GPIO_InitStructure);
NVIC_InitTypeDef NVIC_InitStructure;
NVIC_PriorityGroupConfig(NVIC_PriorityGroup_2);
NVIC_InitStructure.NVIC_IRQChannel = EXTI3_IRQn;
NVIC_InitStructure.NVIC_IRQChannelPreemptionPriority = 0;
NVIC_InitStructure.NVIC_IRQChannelSubPriority = 1;
NVIC_InitStructure.NVIC_IRQChannelCmd = ENABLE;
NVIC_Init(&NVIC_InitStructure);
EXTI_InitTypeDef EXTI_InitStructure;
EXTI_ClearITPendingBit(EXTI_Line3);
GPIO_EXTILineConfig(GPIO_PortSourceGPIOA,GPIO_PinSource3);
EXTI_InitStructure.EXTI_Line = EXTI_Line3;
EXTI_InitStructure.EXTI_Mode = EXTI_Mode_Interrupt;
EXTI_InitStructure.EXTI_Trigger = EXTI_Trigger_Falling;
EXTI_InitStructure.EXTI_LineCmd = ENABLE;
EXTI_Init(&EXTI_InitStructure);
}
Exti_key_.h文件
#ifndef __EXTI_KEY_H #define __EXTI_KEY_H #include "stm32f10x.h" void EXTI_Key_Init(void); #endif
mian.c文件
#include "stm32f10x.h"
#include "exti_key.h"
#include "LED.h"
uint8_t led =1;
void EXTI3_IRQHandler(void)
{
if(EXTI_GetITStatus(EXTI_Line3) != RESET)
{
led = ~led;
if(led == 1)
GPIO_WriteBit(GPIOB,GPIO_Pin_5,Bit_SET);
else
GPIO_WriteBit(GPIOB,GPIO_Pin_5,Bit_RESET);
}
EXTI_ClearITPendingBit(EXTI_Line3);
}
int main(void)
{
LED_Init();
GPIO_WriteBit(GPIOB,GPIO_Pin_5,Bit_SET);
EXTI_Key_Init();
while (1)
{
}
}
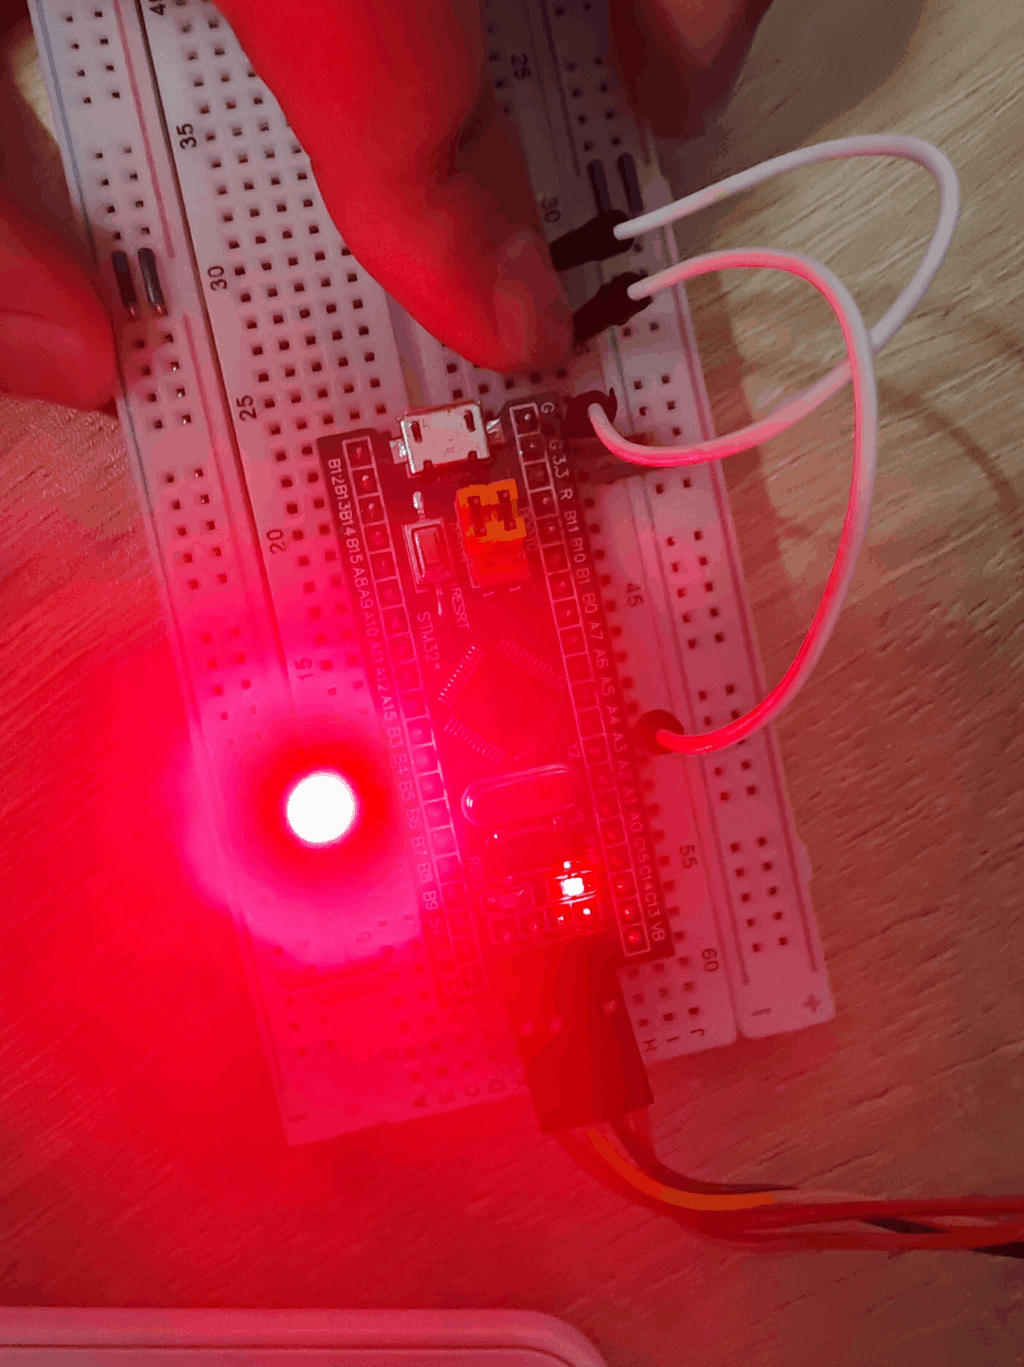
在STM32开发板上演示如图所示:
2、尝试在main函数while循环中加入一个串口每隔1s 发送一次字符的代码片段,观察按键中断对串口发送是否会带来干扰或延迟
Serial.c文件
#include "stm32f10x.h" // Device header
#include <stdio.h>
void Serial_Init(void)
{
RCC_APB2PeriphClockCmd(RCC_APB2Periph_USART1,ENABLE);
RCC_APB2PeriphClockCmd(RCC_APB2Periph_GPIOA,ENABLE);
GPIO_InitTypeDef GPIO_InitStructure;//定义结构体变量
GPIO_InitStructure.GPIO_Mode =GPIO_Mode_AF_PP;
GPIO_InitStructure.GPIO_Pin =GPIO_Pin_9;
GPIO_InitStructure.GPIO_Speed =GPIO_Speed_50MHz;//给三个结构体变量赋值
GPIO_Init(GPIOA,&GPIO_InitStructure);
GPIO_InitStructure.GPIO_Mode =GPIO_Mode_IPU;
GPIO_InitStructure.GPIO_Pin =GPIO_Pin_10;
GPIO_InitStructure.GPIO_Speed =GPIO_Speed_50MHz;//给三个结构体变量赋值
GPIO_Init(GPIOA,&GPIO_InitStructure);
USART_InitTypeDef USART_InitStructure;
USART_InitStructure.USART_BaudRate=9600;//设置波特率为9600
USART_InitStructure.USART_WordLength=USART_WordLength_8b;//数据位占8位
USART_InitStructure.USART_StopBits=USART_StopBits_1;//1位停止位
USART_InitStructure.USART_Parity=USART_Parity_No;//无校验
USART_InitStructure.USART_HardwareFlowControl=USART_HardwareFlowControl_None;
USART_InitStructure.USART_Mode=USART_Mode_Tx|USART_Mode_Rx;
USART_Init(USART1,&USART_InitStructure);
USART_Cmd(USART1,ENABLE);
}
void Serial_SendByte(uint8_t Byte)//显示字符,参考ASCII字符集,例如发送A,Byte=0x41或者‘A’
{
USART_SendData(USART1,Byte);
while(USART_GetFlagStatus(USART1,USART_FLAG_TXE)==RESET);
}
int fputc(int ch,FILE *f)
{
Serial_SendByte(ch);
return ch;
}
Serial.h文件
#ifndef __SERIAL_H #define __SERIAL_H void Serial_Init(void); void Serial_SendByte(uint8_t Byte); #endif
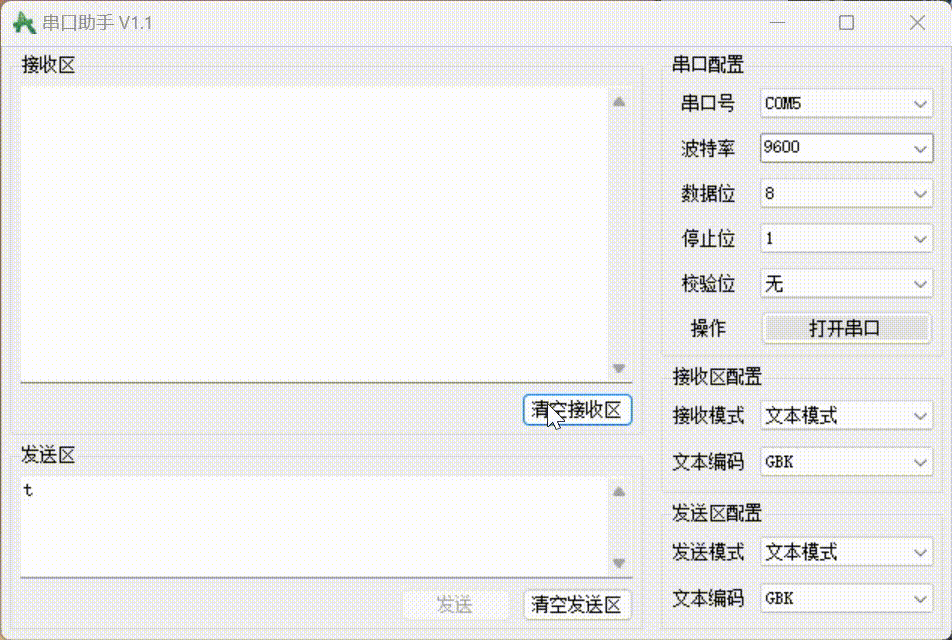
串口演示如图所示,按键中断对串口发送是不会带来干扰或延迟

二、采用串口中断方式做查询方式的串口通信
1、当stm32接收到1个字符“s”时,停止持续发送“hello windows!”; 当接收到1个字符“t”时,持续发送“hello windows!”
Serial.c文件
#include "stm32f10x.h" // Device header
#include <stdio.h>
void Serial_Init(void)
{
RCC_APB2PeriphClockCmd(RCC_APB2Periph_USART1,ENABLE);
RCC_APB2PeriphClockCmd(RCC_APB2Periph_GPIOA,ENABLE);
GPIO_InitTypeDef GPIO_InitStructure;//定义结构体变量
GPIO_InitStructure.GPIO_Mode =GPIO_Mode_AF_PP;
GPIO_InitStructure.GPIO_Pin =GPIO_Pin_9;
GPIO_InitStructure.GPIO_Speed =GPIO_Speed_50MHz;//给三个结构体变量赋值
GPIO_Init(GPIOA,&GPIO_InitStructure);
GPIO_InitStructure.GPIO_Mode =GPIO_Mode_IN_FLOATING;
GPIO_InitStructure.GPIO_Pin =GPIO_Pin_10;
GPIO_InitStructure.GPIO_Speed =GPIO_Speed_50MHz;//给三个结构体变量赋值
GPIO_Init(GPIOA,&GPIO_InitStructure);
USART_InitTypeDef USART_InitStructure;
USART_InitStructure.USART_BaudRate=9600;//设置波特率为9600
USART_InitStructure.USART_WordLength=USART_WordLength_8b;//数据位占8位
USART_InitStructure.USART_StopBits=USART_StopBits_1;//1位停止位
USART_InitStructure.USART_Parity=USART_Parity_No;//无校验
USART_InitStructure.USART_HardwareFlowControl=USART_HardwareFlowControl_None;
USART_InitStructure.USART_Mode=USART_Mode_Tx|USART_Mode_Rx;
USART_Init(USART1,&USART_InitStructure);
USART_ClearFlag(USART1,USART_FLAG_TC);
USART_ITConfig(USART1,USART_IT_RXNE,ENABLE);
USART_Cmd(USART1,ENABLE);
}
void Serial_SendByte(uint8_t Byte)//显示字符,参考ASCII字符集,例如发送A,Byte=0x41或者‘A’
{
USART_SendData(USART1,Byte);
while(USART_GetFlagStatus(USART1,USART_FLAG_TXE)==RESET);
}
int fputc(int ch,FILE *f)
{
Serial_SendByte(ch);
return ch;
}
Serial.h文件
#ifndef __SERIAL_H #define __SERIAL_H void Serial_Init(void); void Serial_SendByte(uint8_t Byte); #endif
main.c文件
#include "stm32f10x.h" // Device header
#include "Serial.h"
#include "Delay.h"
#include <stdio.h>
uint8_t temp=0;
void Serial_Send()
{
if(temp==1)
{
unsigned char arr[14]={'h','e','l','l','o','w','i','n','d','o','w','s','!',' '};
for (uint8_t i = 0; i < 14; i++)
{
USART_SendData(USART1,arr[i]);
while (USART_GetFlagStatus(USART1, USART_FLAG_TXE) == RESET);
}
Delay_s(1);
}
}
int main(void)
{
Serial_Init();
NVIC_InitTypeDef NVIC_InitStructure;
NVIC_InitStructure.NVIC_IRQChannel = USART1_IRQn;
NVIC_InitStructure.NVIC_IRQChannelPreemptionPriority=3;
NVIC_InitStructure.NVIC_IRQChannelSubPriority =3;
NVIC_InitStructure.NVIC_IRQChannelCmd = ENABLE;
NVIC_Init(&NVIC_InitStructure);
while(1)
{
Serial_Send();
}
}
void USART1_IRQHandler(void)
{
if(USART_GetITStatus(USART1, USART_IT_RXNE) != RESET)
{
uint8_t receivedChar = USART_ReceiveData(USART1);
if (receivedChar == 's')
{
temp = 0;
}
else if (receivedChar == 't')
{
temp = 1;
}
}
}
STM32开发板上演示如图:
2、当stm32接收到字符“stop stm32!”时,停止持续发送“hello windows!”; 当接收到字符“go stm32!”时,持续发送“hello windows!”
mian.c文件如下,其他代码不变
*** Using Compiler 'V5.06 update 5 (build 528)', folder: 'E:\Keil5\ARM\ARMCC\Bin'
Build target 'Target 1'
compiling main.c...
linking...
Program Size: Code=2136 RO-data=268 RW-data=24 ZI-data=1048
".\Objects\project.axf" - 0 Error(s), 0 Warning(s).
Build Time Elapsed:  00:00:01
Load "F:\\stm32.project\\STM32标准库中断查询方式串口发收通信\\Objects\\project.axf"
Erase Done.
Programming Done.
Verify OK.
Application running ...
Flash Load finished at 17:53:42
Load "F:\\stm32.project\\STM32标准库中断查询方式串口发收通信\\Objects\\project.axf"
Erase Done.
Programming Done.
Verify OK.
Application running ...
Flash Load finished at 17:54:14
STM32开发板上演示如图:


 314
314


 被折叠的 条评论
为什么被折叠?
被折叠的 条评论
为什么被折叠?
 到【灌水乐园】发言


