


前言
最近要实现手柄控制机械臂的运动,苦于经费不足,手柄目前还用不上,不得已采用鼠标代替,不过原理是一样的,其实笔者早些时间学过一点ROS,不过已经忘的差不多了,趁此机会好好恶补一下,学习资料参考《ROS机器人开发实践》
鼠标部分
安装功能包
为了能够让系统检测到外设的接入同时正常使用,我们需要下载一些功能包
sudo apt-get install ros-noetic-joystick-drivers有时候会出现安装版本不同导致异常的情况,这个时候用aptitude辅助安装,他会智能检索要安装的包
sudo apt-get install aptitude
sudo aptitude install <package name>
检测外设
我们需要查看Ubuntu中的硬件驱动层目录dev/input,在终端中输入
ls /dev/input/我们会看到如下输出
ls /dev/input/
by-id  by-path  event0  event1  event2  event3  event4  event5  event6  js0  js1  mice  mouse0  mouse1  mouse2
创建的端口是js0,我们通过jstest来测试其是否工作
jstest /dev/input/js0输出的结果应该为

输出的信息很清晰地告诉我们鼠标X&Y轴的状态,到时候换成手柄也就是多几个键的事情,原理是一样的,至此外设测试完成,现在我们来梳理一下控制逻辑
控制逻辑
用口头讲可能有点晦涩,直接上思维导图来解释,我们先启动joy_node手柄节点来发布外设的X&Y轴数据,然后通过简单的转换成机械臂能接收到的数据,再发布到joint_state上,move_group订阅到这些数据后对机械臂进行运动学规划,这个下次我打算从原理开始好好总结一下
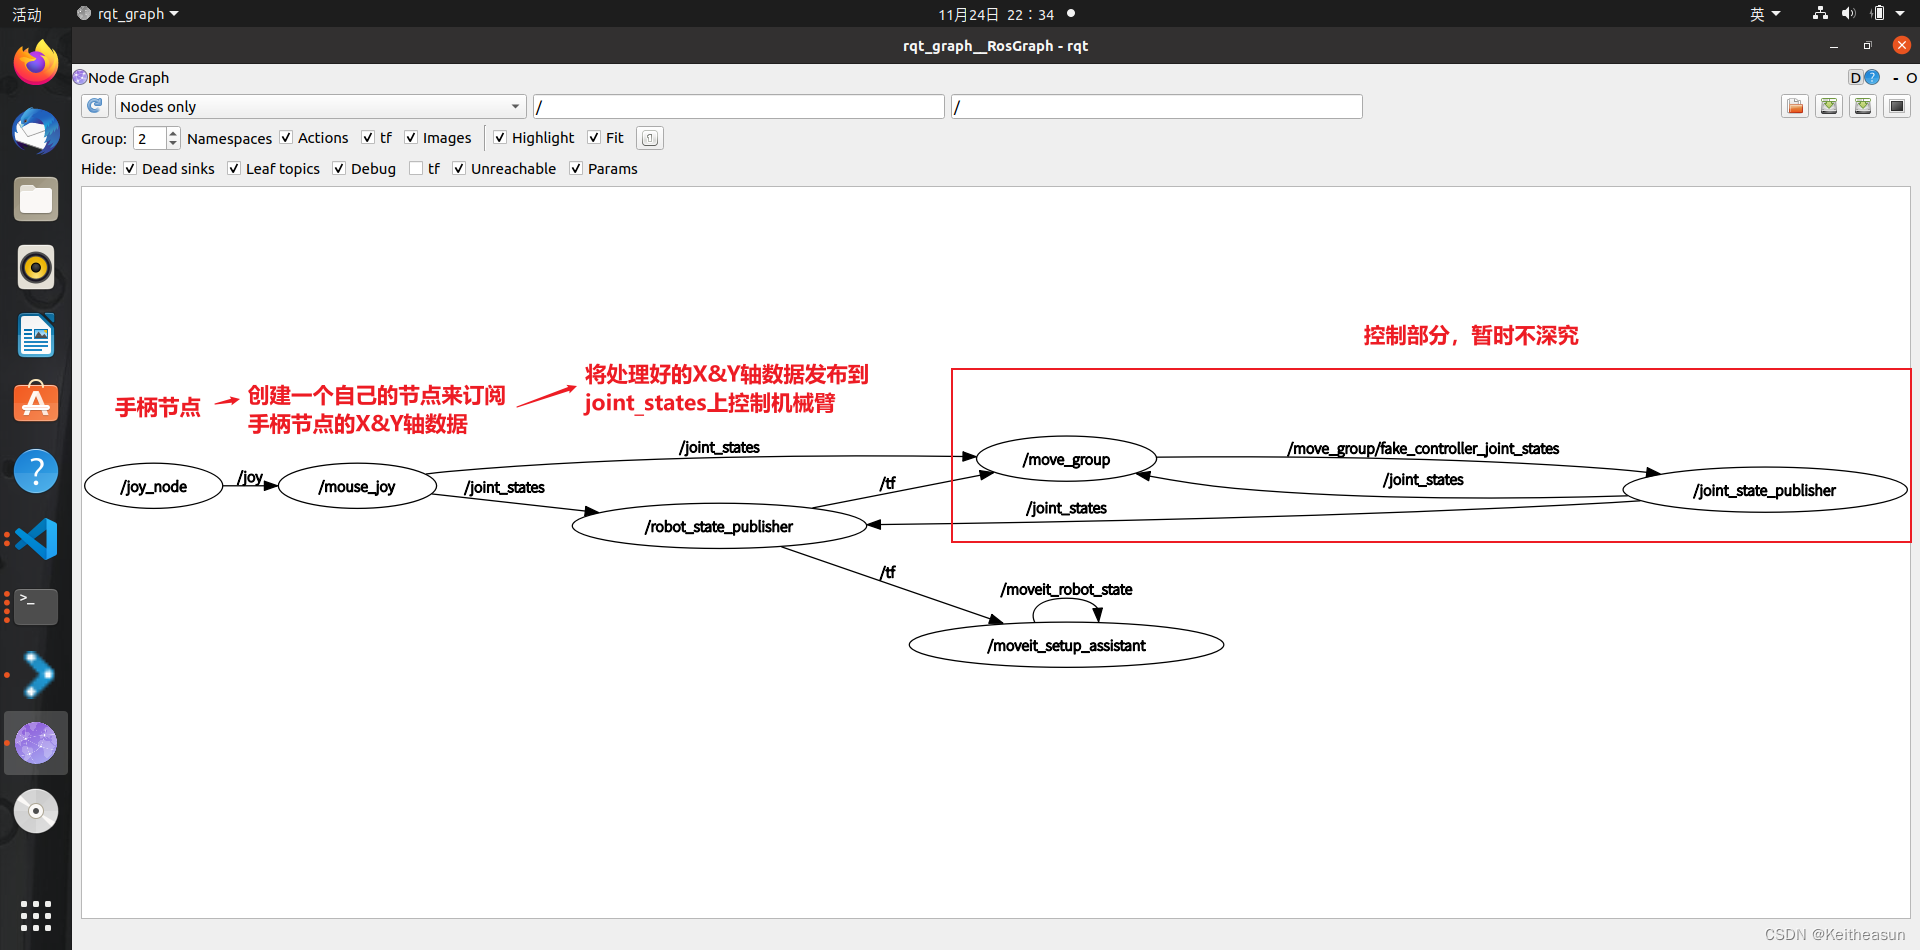
因此我们首先要做的第一步是启动joy_node节点,在这里我把它集成到了launch文件中,在第二个node标签中,当节点死掉了就重新生成,包名为joy,节点类型&名称:“joy_node”
<?xml version="1.0"?>
<launch>
    <!--create a node named mouse_joy to sub&pub datas,and set axis parameters about device-->
    <node pkg="joystick" type="mouse_joy" name="mouse_joy"/>
    <param name="axis_linear" value="1" type="int"/>
    <param name="axis_angular" value="0" type="int"/>
    <!--create a joy node and set some parameters about device-->
    <node respawn="true" pkg="joy" type="joy_node" name="joy_node">
        <param name="dev" value="/dev/input/js0" type="string"/>
        <param name="deadzone" value="0.12"/>
    </node>
</launch>接下来第二步就是创建订阅者和发布者来处理数据
类的创建
class TeleopJoy{
    public:
    TeleopJoy();    //define a constructor
    private:
    void callBack(const sensor_msgs::Joy::ConstPtr& joy);   //define a callback function,param is the data adress which sub recieve
    ros::NodeHandle n;
    ros::Publisher pub;
    ros::Subscriber sub;
    int i_velLinear,i_velAngular;   //device's axis input value
};
构造函数
TeleopJoy::TeleopJoy()
{
    i_velLinear = 1;
    i_velAngular = 0;
    n.param("axis_linear",i_velLinear,i_velLinear); //set vaule from param
    n.param("axis_angular",i_velAngular,i_velAngular);
    /*
        pub advertise meassage to topic named /joint_states,maximum quene:100
        meassage type is ensor_msgs::JointState
    */
    pub = n.advertise<sensor_msgs::JointState>("/joint_states",100);
    /*
        sub subscribe from topic named 'joy' and after receive using the callback function
        meassage type is sensor_msgs::Joy
    */
    sub = n.subscribe<sensor_msgs::Joy>("joy",100,
    &TeleopJoy::callBack,this);
}
回调函数
/*
    every time sub node receive messages will recall callback function
    it will create a new value named vel and publish it
*/
void TeleopJoy::callBack(const sensor_msgs::Joy::ConstPtr& joy)
{
    sensor_msgs::JointState joint_state;
    joint_state.header.stamp = ros::Time::now();

    joint_state.name.resize(6); //指定name数组长度
    joint_state.position.resize(6);//指定position数组长度
    joint_state.velocity.resize(1);//指定velocity数组长度
    joint_state.effort.resize(1);//指定effort数组长度
    joint_state.name ={"joint1","joint2","joint3","joint4","joint5","joint6"};
    joint_state.position = {20.0*joy->axes[0],10.0*joy->axes[0],25.0*joy->axes[0],15.0*joy->axes[0],20.0*joy->axes[0],20.0*joy->axes[0]};//position数组的元素赋值
    joint_state.velocity[0] = 0.1*joy->axes[1];
    joint_state.effort[0] = 20.0*joy->axes[1];

    pub.publish(joint_state);   //publish the meassage
}
主函数入口
int main(int argc,char** argv)
{
    ros::init(argc,argv,"mouse_joy");
    TeleopJoy teleop_joy;   //create an object
    ros::spin();
}
逻辑梳理
订阅者和发布者直接的逻辑都比较清晰,个人认为实现程序的关键是数据类型是否能对的上,因此在通讯之前了解话题消息类型很重要,我们要用到rostopic echo <topic name>
这是前面看到过的鼠标信息
---
header:
  seq: 1582
  stamp:
    secs: 1669302437
    nsecs: 962512510
  frame_id: "/dev/input/js0"
axes: [-0.31968000531196594, -0.8116175532341003]
buttons: [0]
这是joint_state消息信息
---
header:
  seq: 4126
  stamp:
    secs: 1669302509
    nsecs: 743610368
  frame_id: ''
name:
  - joint1
  - joint2
  - joint3
  - joint4
  - joint5
  - joint6
position: [-6.393600106239319, -3.1968000531196594, -7.992000132799149, -4.795200079679489, -6.393600106239319, -6.393600106239319]
velocity: [-0.03451005220413208]
effort: [-6.902010440826416]
因此我们要要将接收到的两个鼠标的数据映射到至少八个(position velocity effort)数据再发布到joint_states话题上,这个时候就需要指定每个数组的长度以发送对应长度的数据,否则会报错,ps:这里的映射关系非常地不严谨,只是为了验证消息能够成功传递而设置的
sensor_msgs::JointState joint_state;
    joint_state.header.stamp = ros::Time::now();

    joint_state.name.resize(6); //指定name数组长度
    joint_state.position.resize(6);//指定position数组长度
    joint_state.velocity.resize(1);//指定velocity数组长度
    joint_state.effort.resize(1);//指定effort数组长度
    joint_state.name ={"joint1","joint2","joint3","joint4","joint5","joint6"};
    joint_state.position = {20.0*joy->axes[0],10.0*joy->axes[0],25.0*joy->axes[0],15.0*joy->axes[0],20.0*joy->axes[0],20.0*joy->axes[0]};//position数组的元素赋值
    joint_state.velocity[0] = 0.1*joy->axes[1];
    joint_state.effort[0] = 20.0*joy->axes[1];
机械臂部分
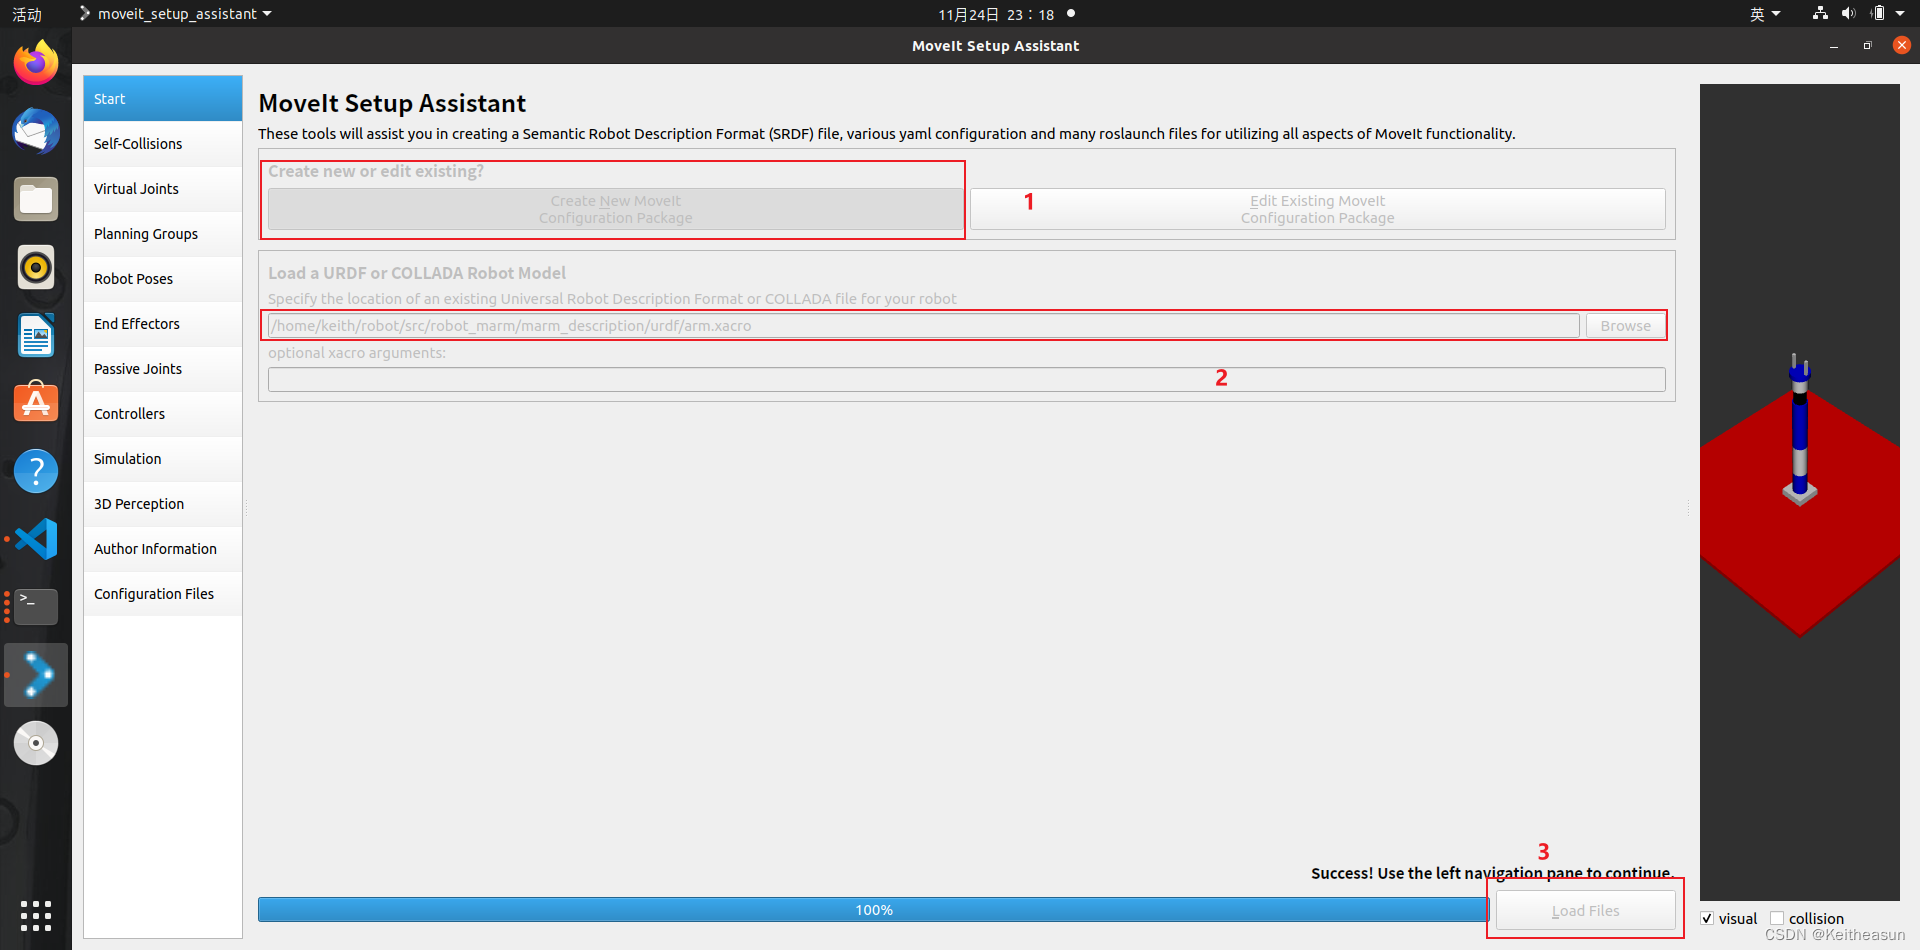
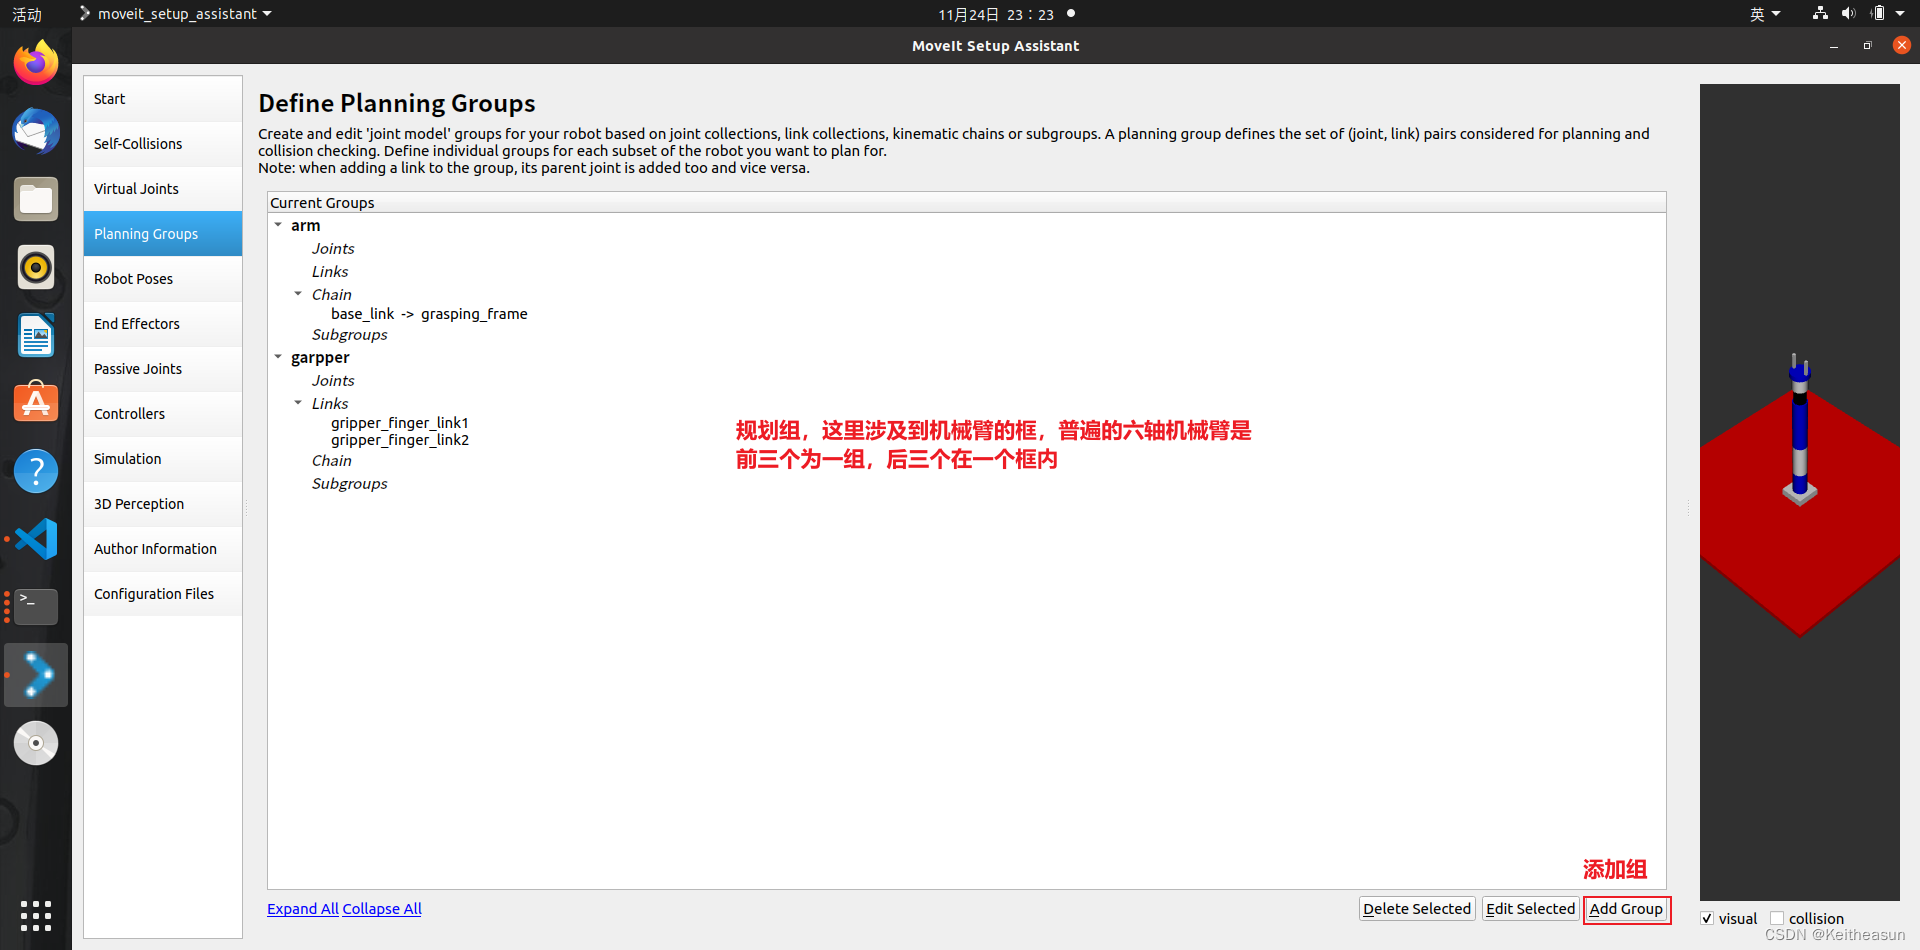
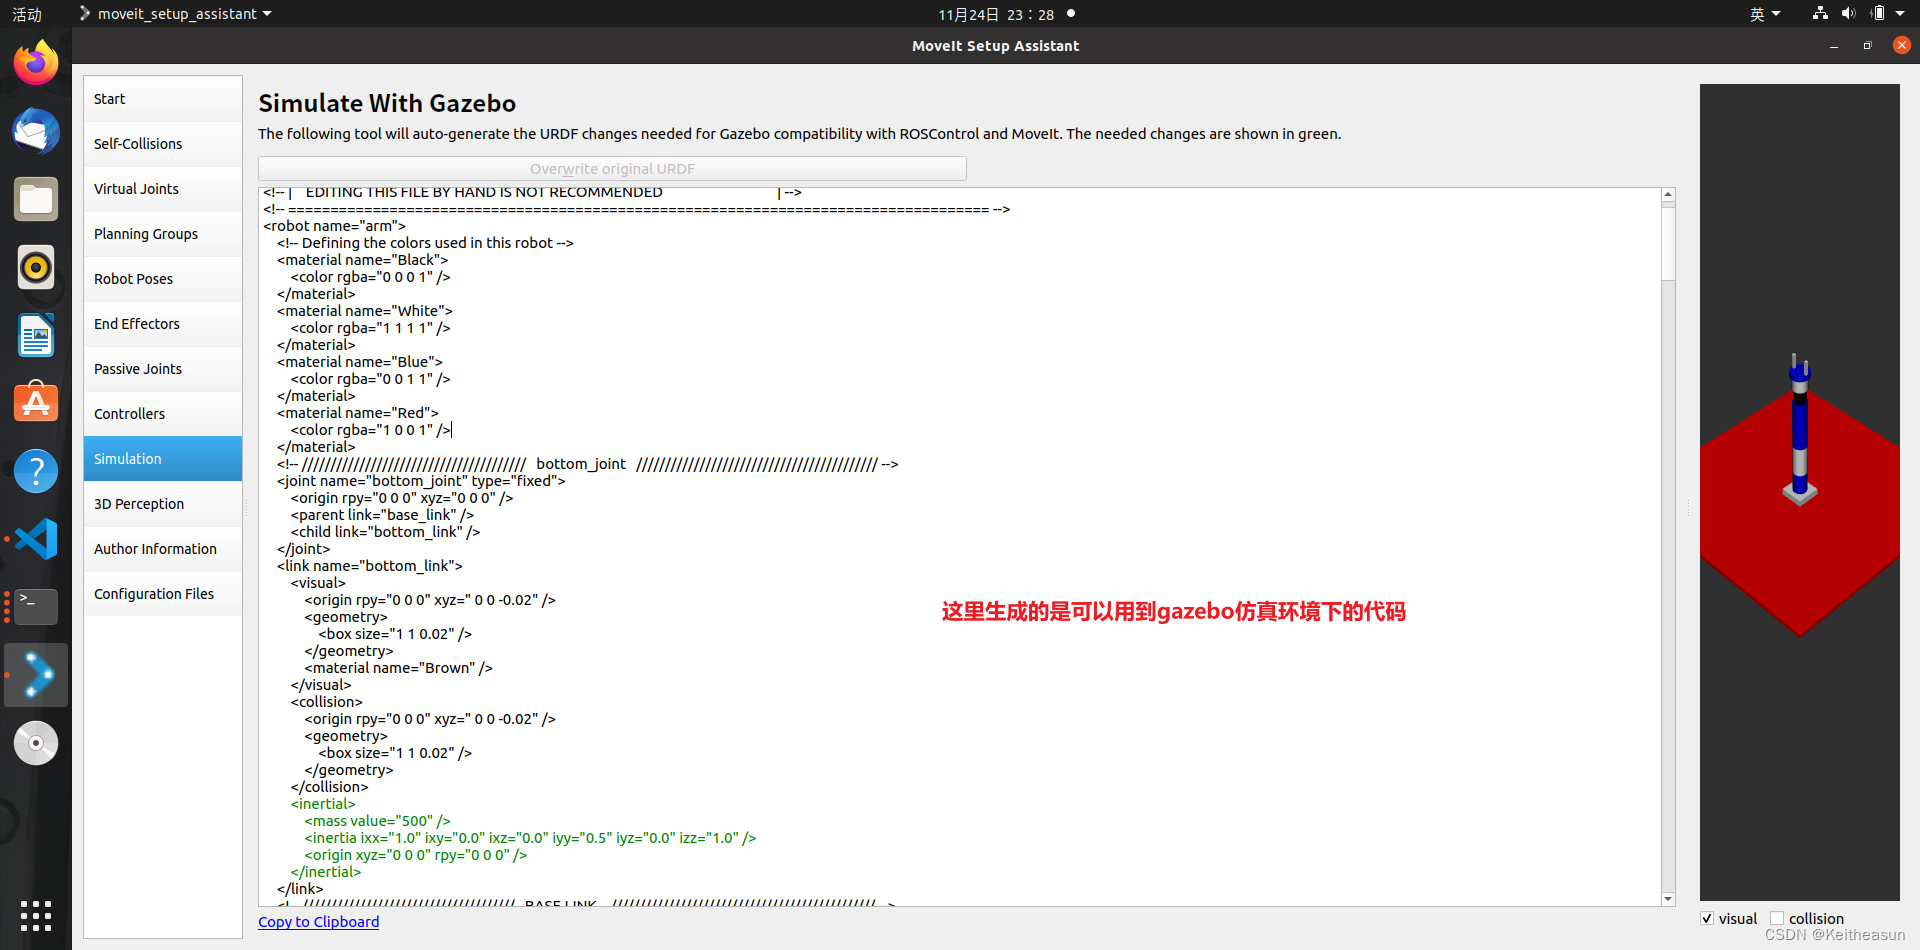
算法实现方面不是本篇的重点,这里就通过moveit_setup_assistant简单配置一下
URDF部分
首先我们要有一个描述机械臂的urdf文件,可以通过solidwroks插件导出,这里为了图方便我就用古月的了,学习资料可以在GitHub上找到
https://github.com/huchunxu/ros_exploring
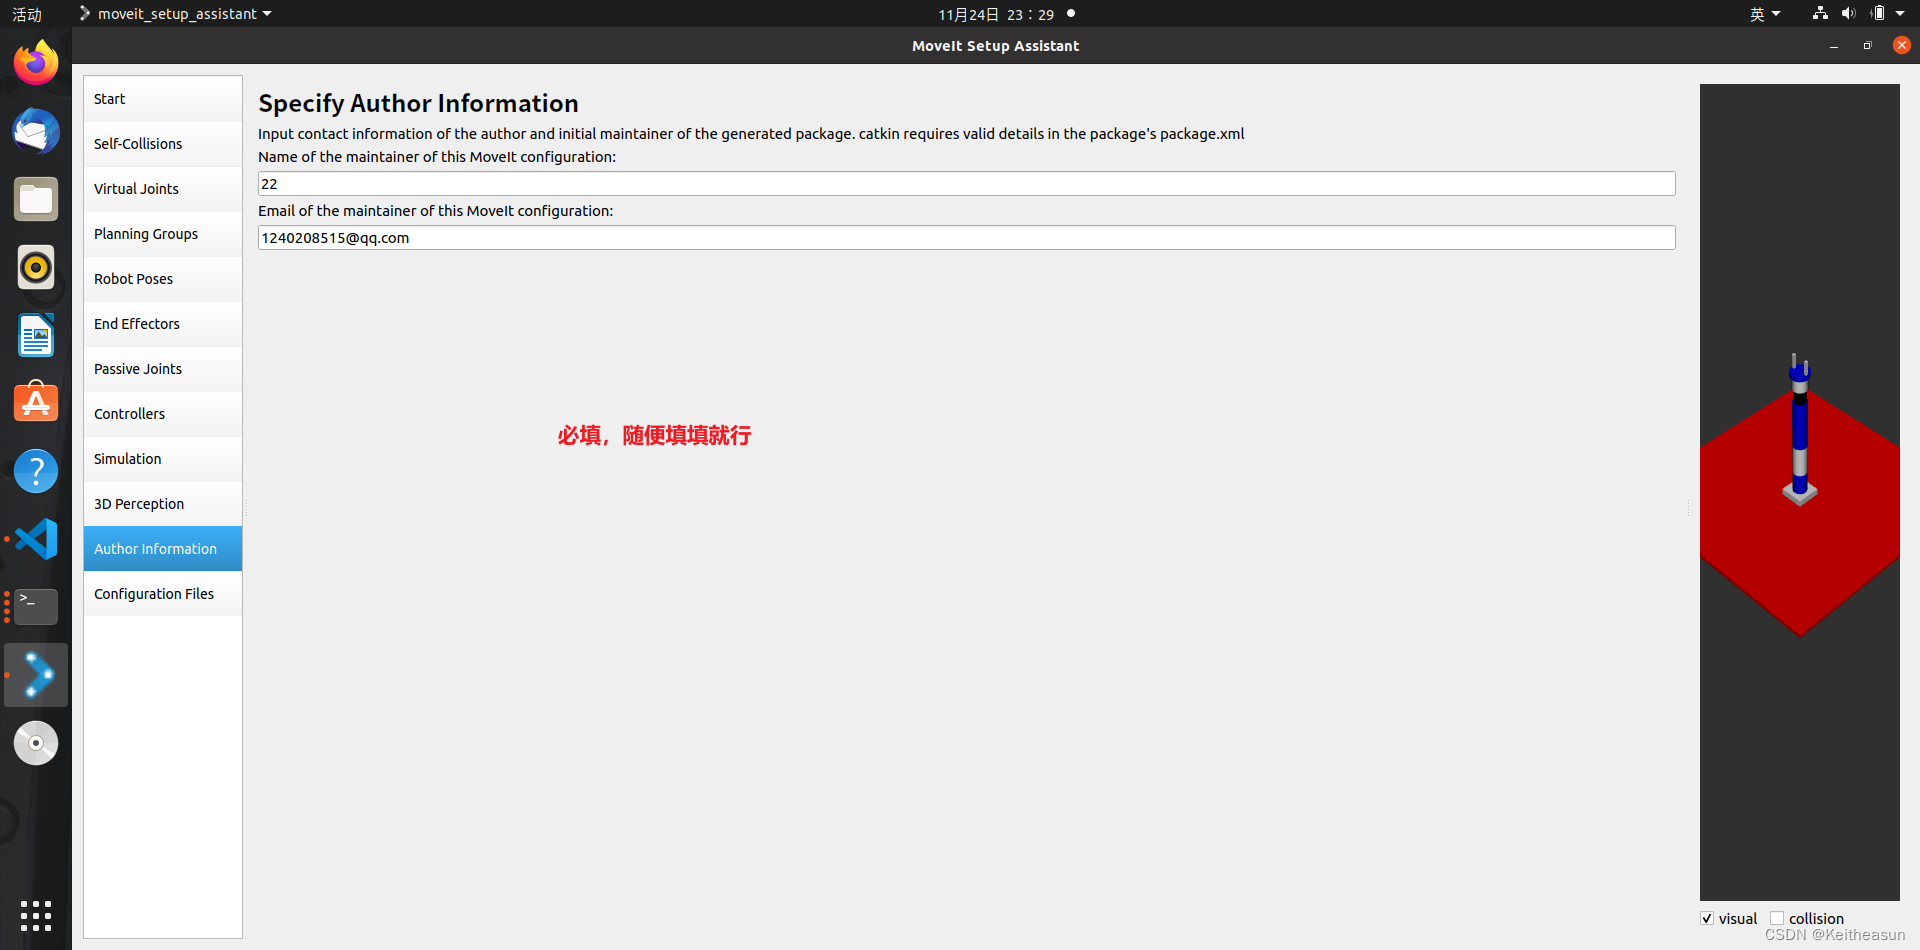
配置部分
如果没有Moveit setup assistant的话要下载一个
sudo apt install ros-noetic-moveit
roslaunch moveit_setup_assistant setup_assistant.launch
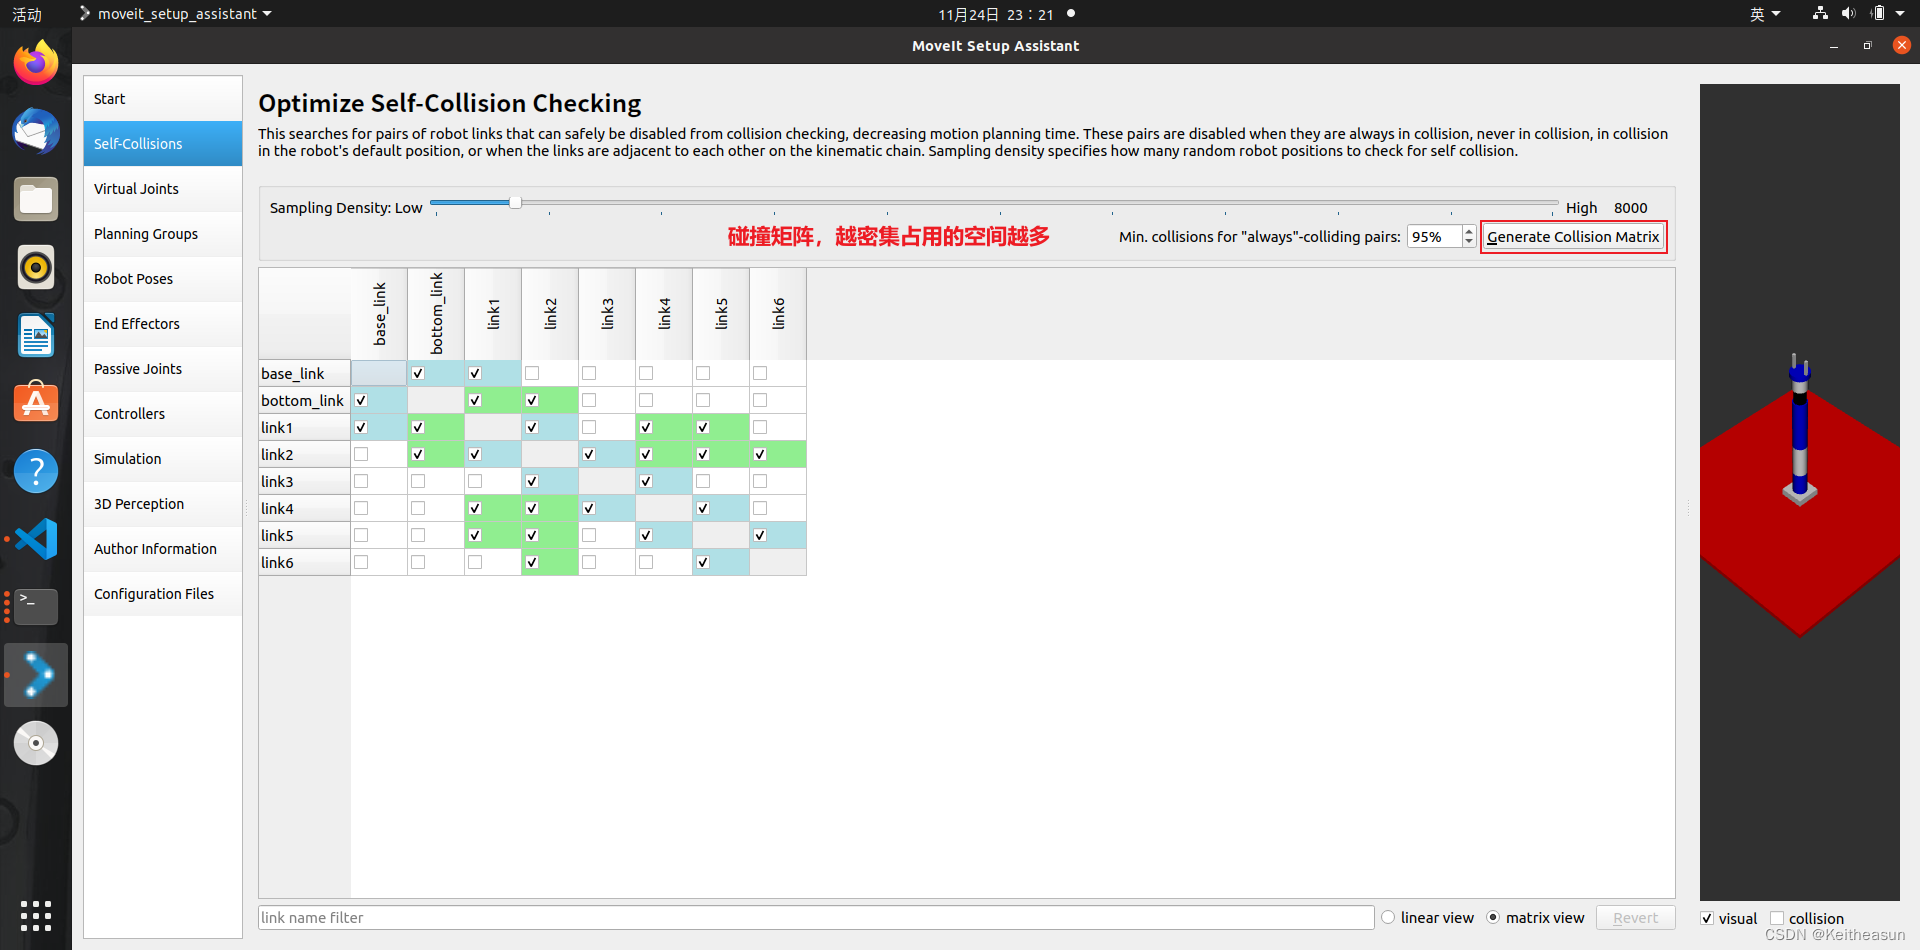
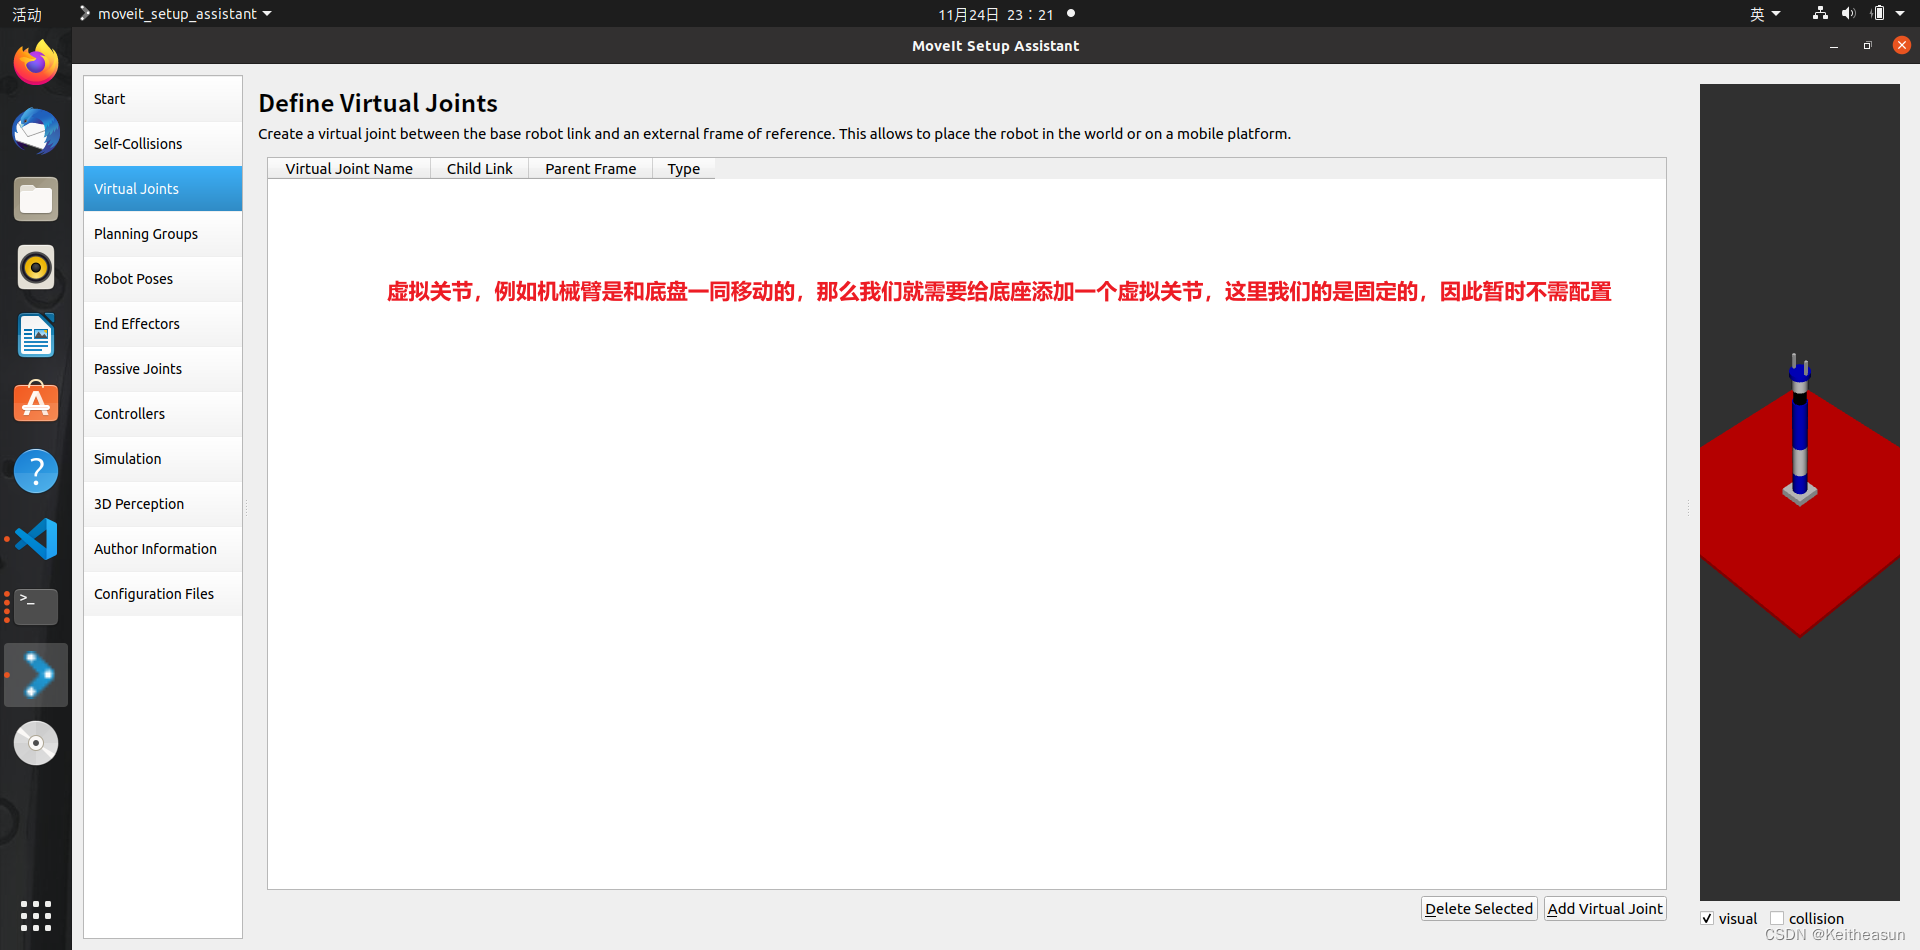
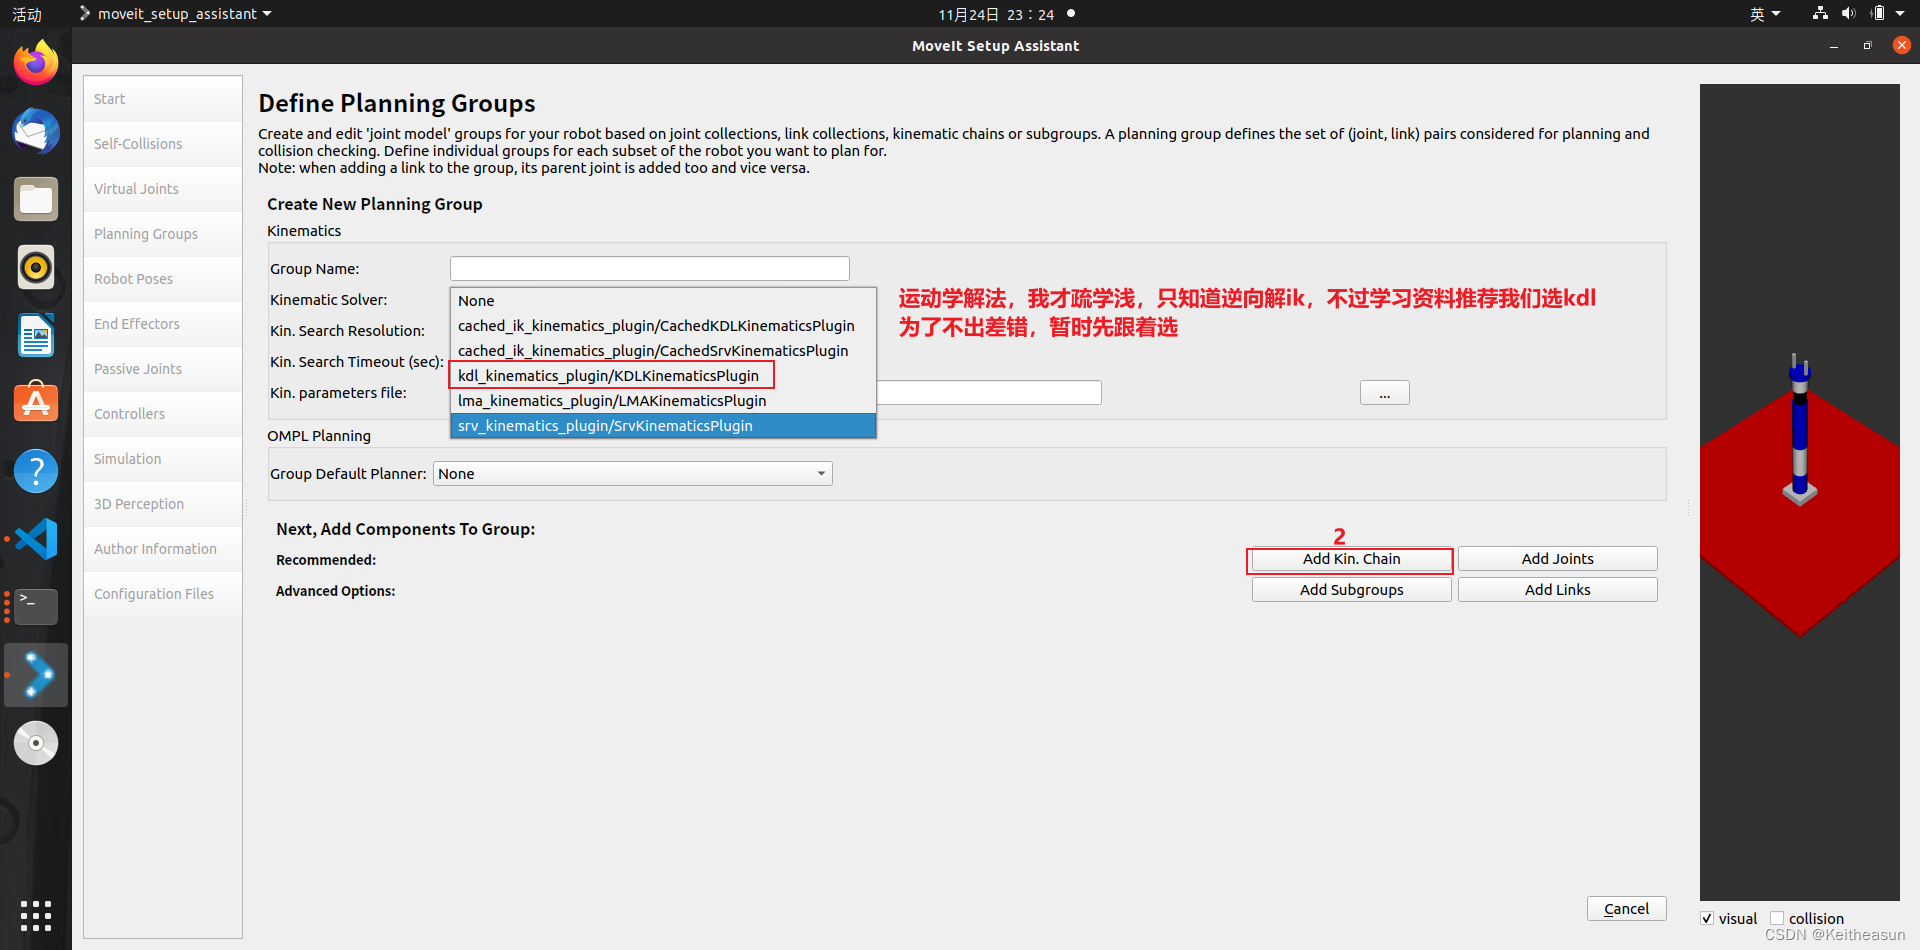
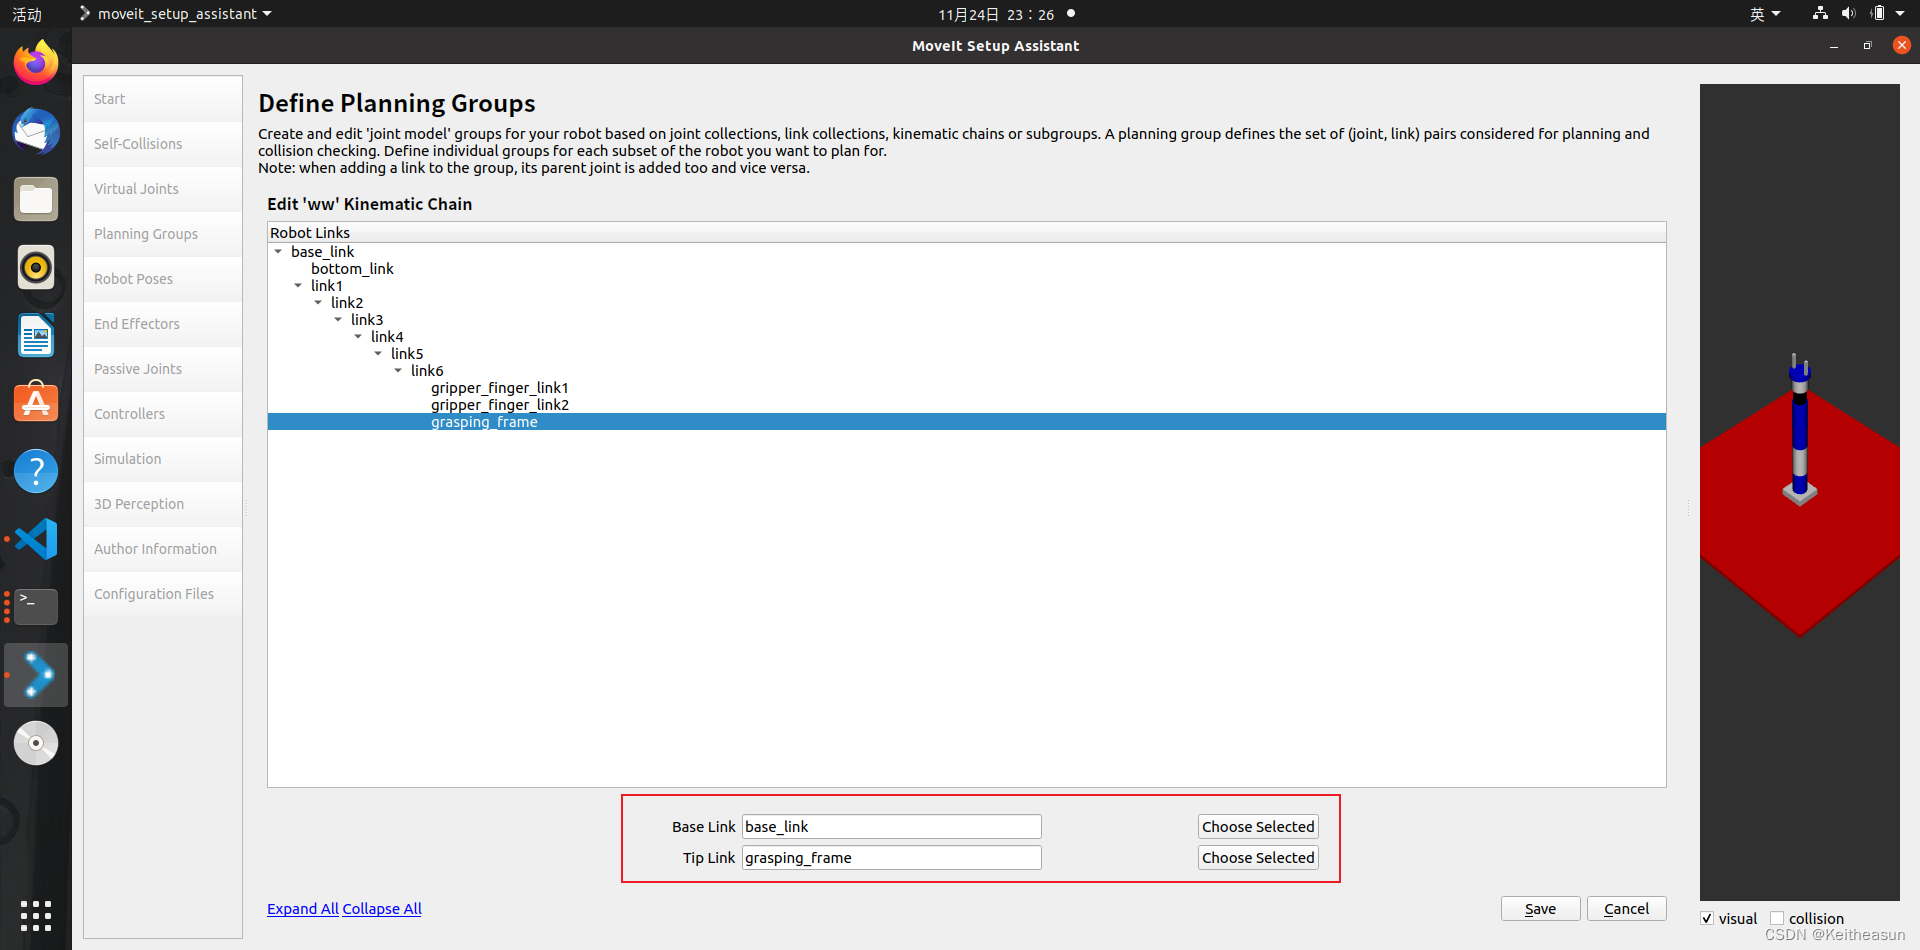
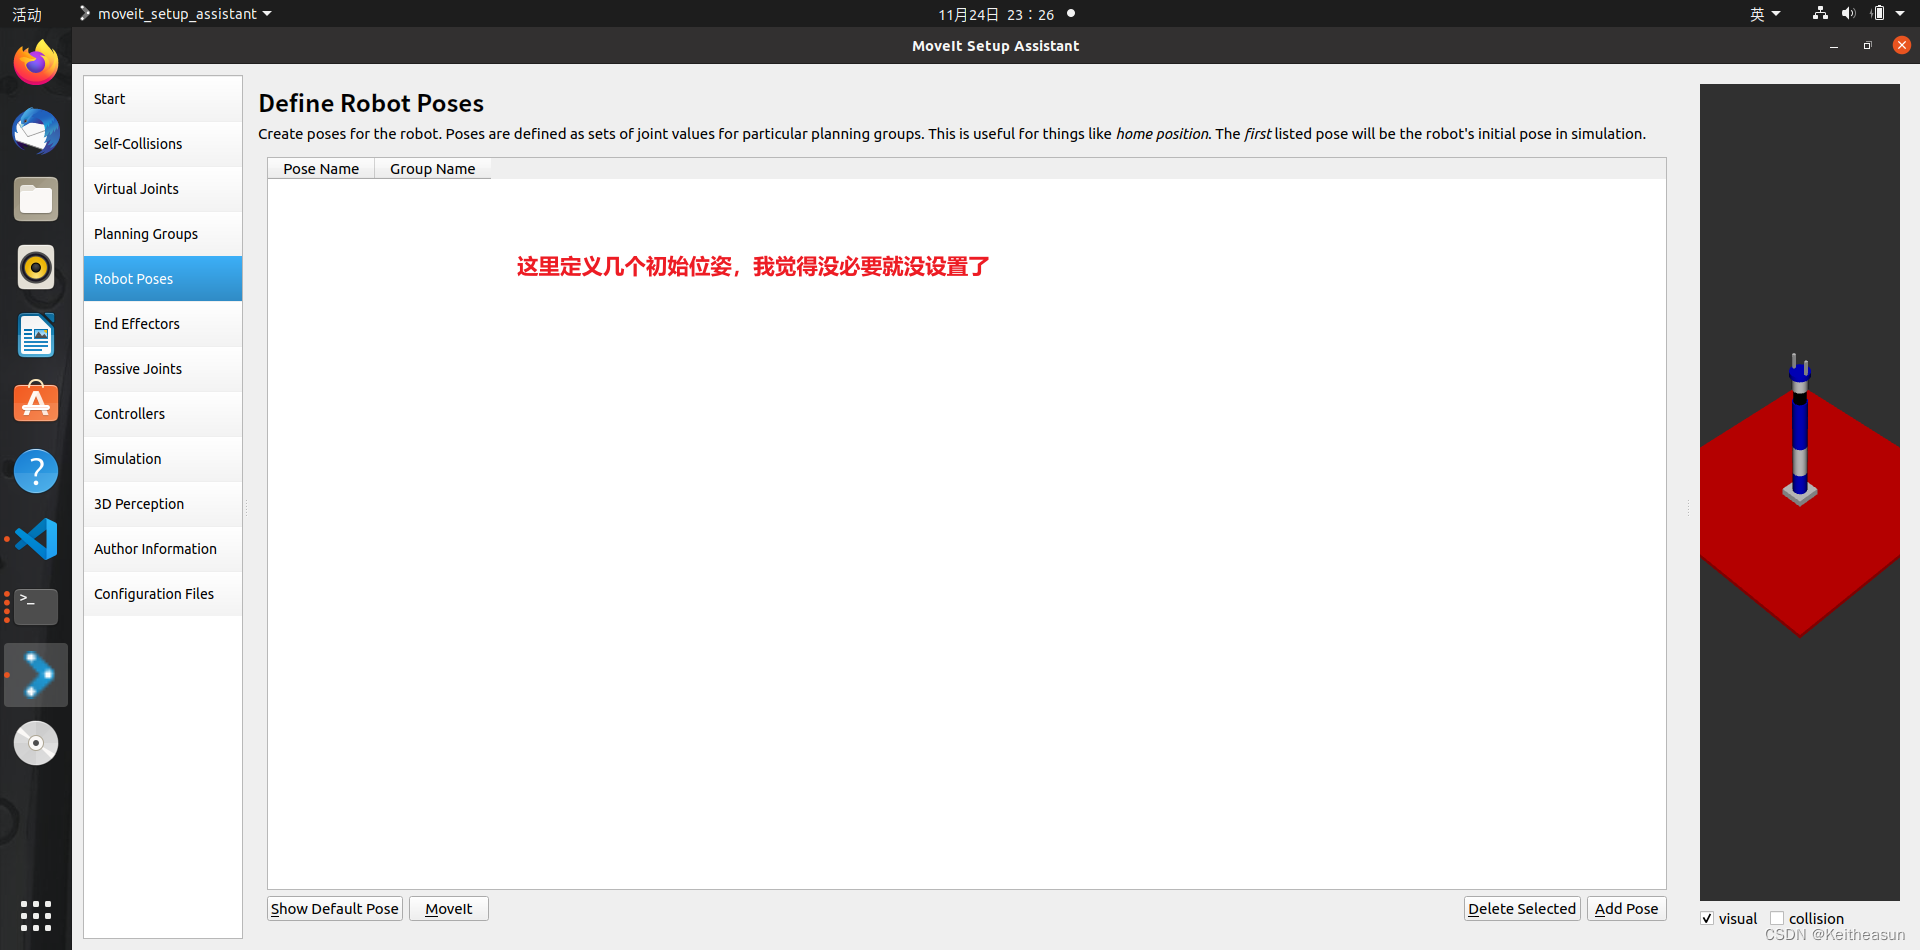
接下来开始配置


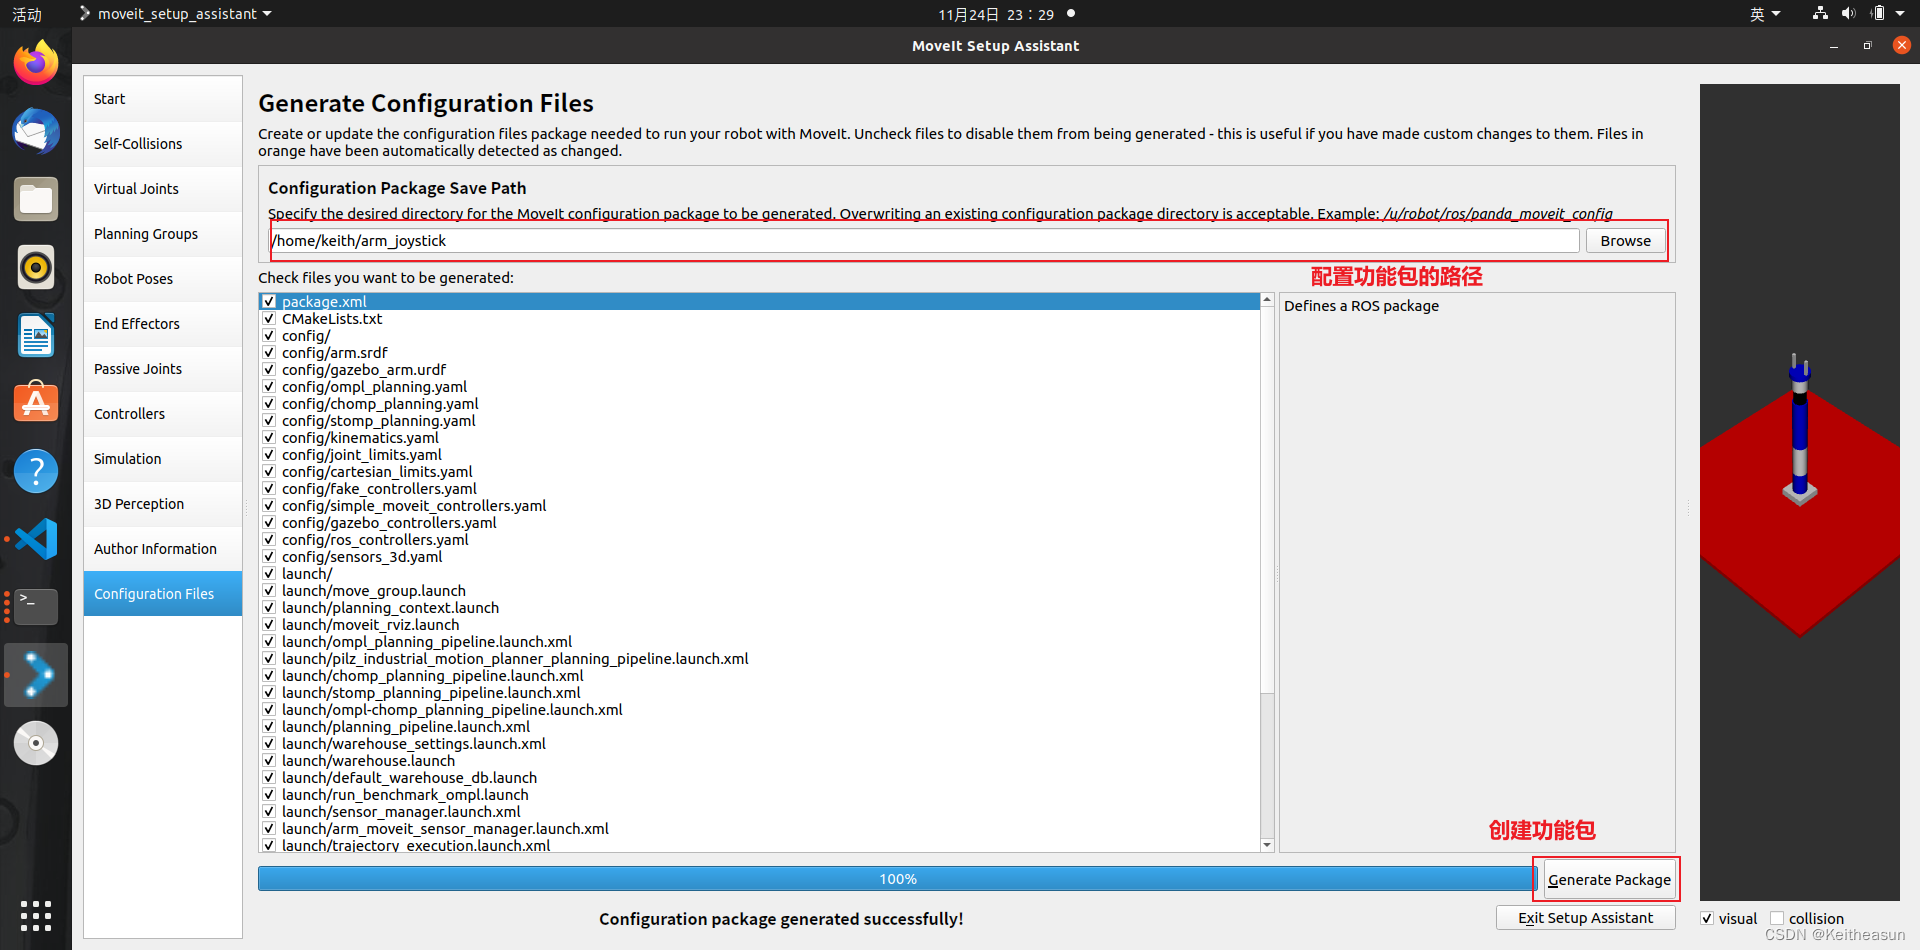
至此机械臂的功能包就创建好了
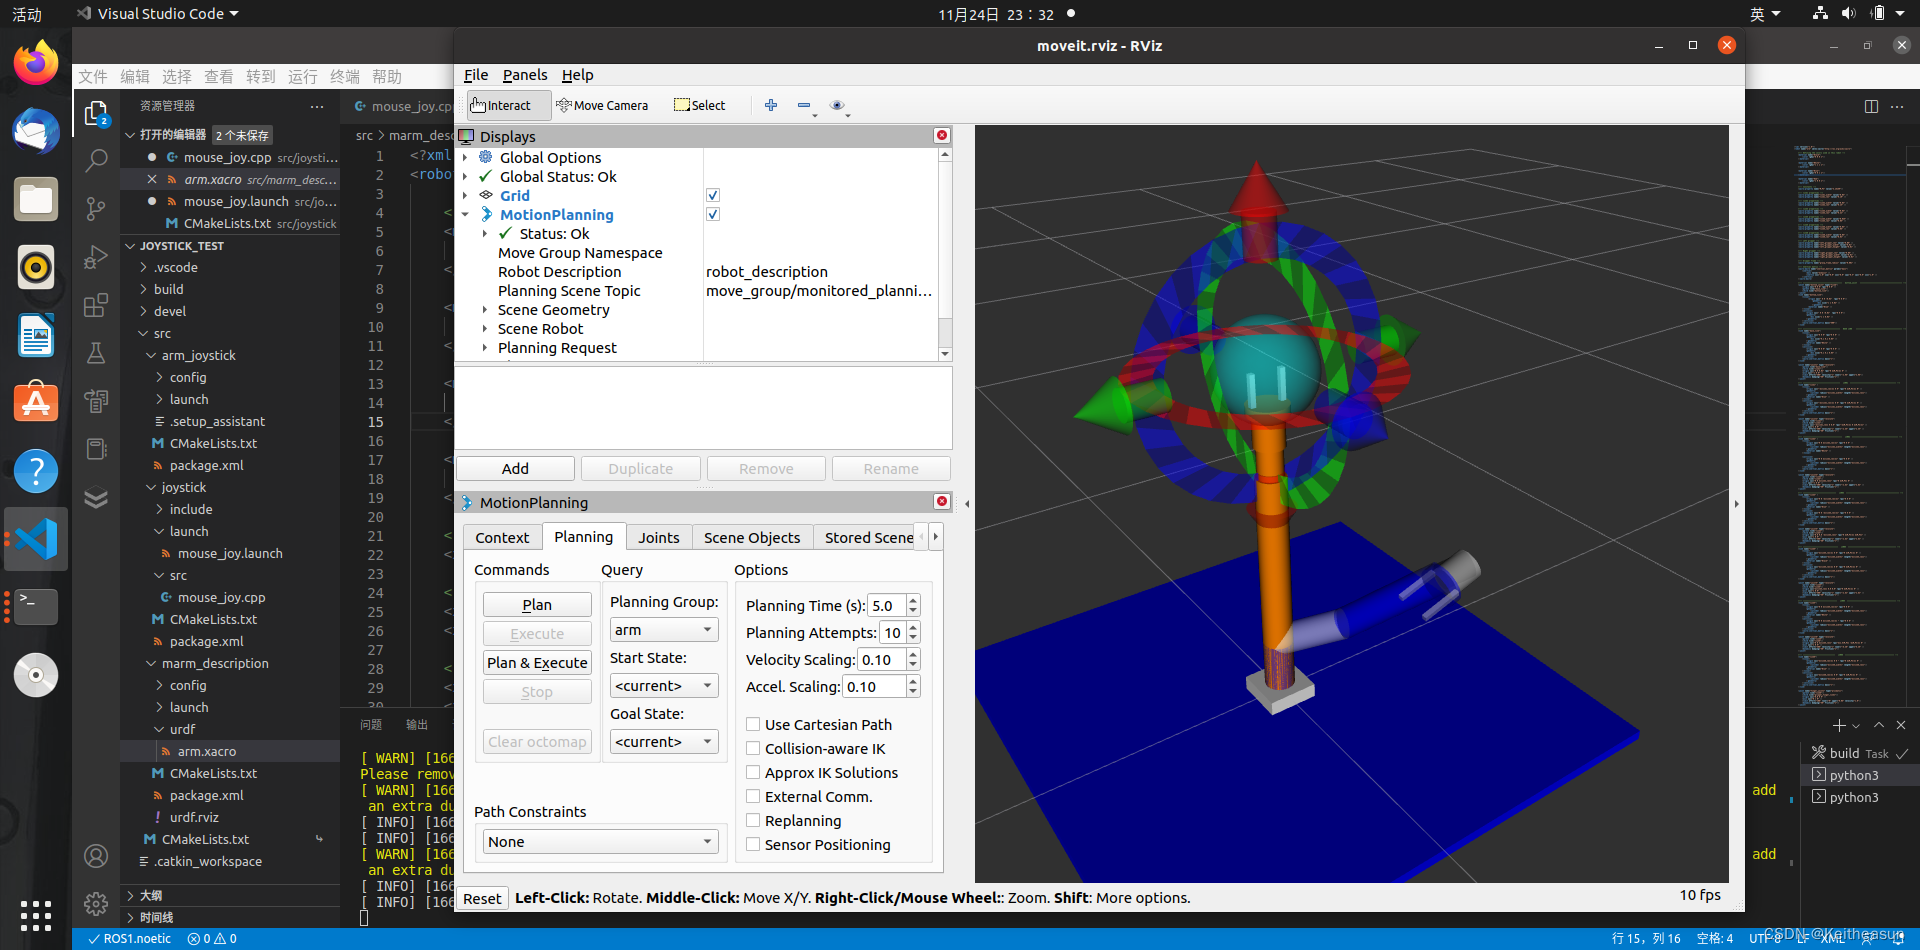
机械臂测试
在终端输入
roslaunch arm_joystick demo.launch 不出意外就能在rviz里面看到机械臂模型了
鼠标控制
此时我们再启动先前写好的launch文件就可以实现鼠标控制机械臂了
roslaunch joystick mouse_joy.launch 效果演示
鼠标移动一下机械臂也跟着移动了
源码部分
其实前面已经差不多贴完了,不过再贴一次吧
CPP部分
/*
    joy node publish joystick meassage,than sub acall the callback function
    to publish vel which caculate from parameters named i_velLinear,i_velAngular
    to the topic named /turtle1/cmd_vel,turtle node receieve the meassage and
    control turtle to move
*/

#include <ros/ros.h>
#include <iostream>
#include <geometry_msgs/Twist.h>
#include <sensor_msgs/Joy.h>
#include <sensor_msgs/JointState.h>

using namespace std;

class TeleopJoy{
    public:
    TeleopJoy();    //define a constructor
    private:
    void callBack(const sensor_msgs::Joy::ConstPtr& joy);   //define a callback function,param is the data adress which sub recieve
    ros::NodeHandle n;
    ros::Publisher pub;
    ros::Subscriber sub;
    int i_velLinear,i_velAngular;   //device's axis input value
};

TeleopJoy::TeleopJoy()
{
    i_velLinear = 1;
    i_velAngular = 0;
    n.param("axis_linear",i_velLinear,i_velLinear); //set vaule from param
    n.param("axis_angular",i_velAngular,i_velAngular);
    /*
        pub advertise meassage to topic named /joint_states,maximum quene:100
        meassage type is ensor_msgs::JointState
    */
    pub = n.advertise<sensor_msgs::JointState>("/joint_states",100);
    /*
        sub subscribe from topic named 'joy' and after receive using the callback function
        meassage type is sensor_msgs::Joy
    */
    sub = n.subscribe<sensor_msgs::Joy>("joy",100,
    &TeleopJoy::callBack,this);
}
/*
    every time sub node receive messages will recall callback function
    it will create a new value named vel and publish it
*/
void TeleopJoy::callBack(const sensor_msgs::Joy::ConstPtr& joy)
{
    sensor_msgs::JointState joint_state;
    joint_state.header.stamp = ros::Time::now();

    joint_state.name.resize(6); //指定name数组长度
    joint_state.position.resize(6);//指定position数组长度
    joint_state.velocity.resize(1);//指定velocity数组长度
    joint_state.effort.resize(1);//指定effort数组长度
    joint_state.name ={"joint1","joint2","joint3","joint4","joint5","joint6"};
    joint_state.position = {20.0*joy->axes[0],10.0*joy->axes[0],25.0*joy->axes[0],15.0*joy->axes[0],20.0*joy->axes[0],20.0*joy->axes[0]};//position数组的元素赋值
    joint_state.velocity[0] = 0.1*joy->axes[1];
    joint_state.effort[0] = 20.0*joy->axes[1];

    pub.publish(joint_state);   //publish the meassage
}
int main(int argc,char** argv)
{
    ros::init(argc,argv,"mouse_joy");
    TeleopJoy teleop_joy;   //create an object
    ros::spin();
}
Launch部分
<?xml version="1.0"?>
<launch>
    <!--create a node named mouse_joy to sub&pub datas,and set axis parameters about device-->
    <node pkg="joystick" type="mouse_joy" name="mouse_joy"/>
    <param name="axis_linear" value="1" type="int"/>
    <param name="axis_angular" value="0" type="int"/>
    <!--create a joy node and set some parameters about device-->
    <node respawn="true" pkg="joy" type="joy_node" name="joy_node">
        <param name="dev" value="/dev/input/js0" type="string"/>
        <param name="deadzone" value="0.12"/>
    </node>
</launch>


 1286
1286

 被折叠的 条评论
为什么被折叠?
被折叠的 条评论
为什么被折叠?
 到【灌水乐园】发言


