


Windows 7 64bit
软件安装
首先,需要安装一些软件,CMake、32位的Java jdk以及PX4 Toolchain Installer。
CMake的话笔者使用的是CMake-3.3.2-win32-x86版本。
关于CMake的安装有一点需要注意,在第三步Install Options安装选项中,需要将CMake加入到系统路径中:

Java sdk:
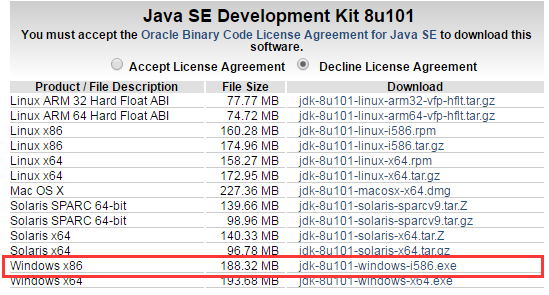
Eclipse 需要 Java,用命令 java -version 来查看 Java 是否配置 成功。

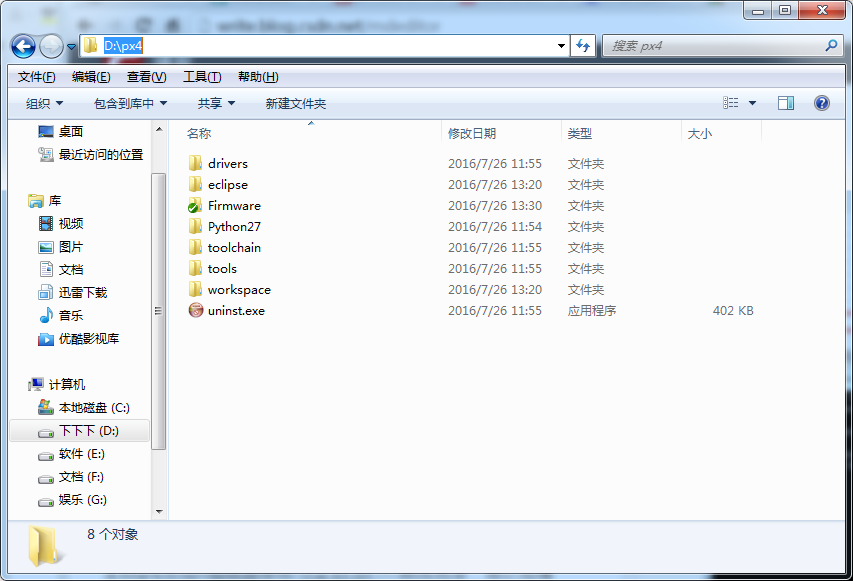
接下来进行PX4固件相关的配置,安装PX4 Toolchain Installer,默认安装在C盘根目录下,笔者不服,非要安装在D盘,安装的时候一路下一步就行。
安装完以后在开始菜单会出现一套工具链包括,PX4Console、PX4Ecplise.

代码编译
打开PX4console,下载PX4固件,输入指令:
<code class="hljs php has-numbering" style="display: block; padding: 0px; color: inherit; box-sizing: border-box; font-family: 'Source Code Pro', monospace;font-size:undefined; white-space: pre; border-radius: 0px; word-wrap: normal; background: transparent;">git <span class="hljs-keyword" style="color: rgb(0, 0, 136); box-sizing: border-box;">clone</span> https:<span class="hljs-comment" style="color: rgb(136, 0, 0); box-sizing: border-box;">//github.com/PX4/Firmware.git</span></code><ul class="pre-numbering" style="box-sizing: border-box; position: absolute; width: 50px; top: 0px; left: 0px; margin: 0px; padding: 6px 0px 40px; border-right-width: 1px; border-right-style: solid; border-right-color: rgb(221, 221, 221); list-style: none; text-align: right; background-color: rgb(238, 238, 238);"><li style="box-sizing: border-box; padding: 0px 5px;">1</li></ul>
切换到Firmware文件夹,输入指令:
<code class="hljs bash has-numbering" style="display: block; padding: 0px; color: inherit; box-sizing: border-box; font-family: 'Source Code Pro', monospace;font-size:undefined; white-space: pre; border-radius: 0px; word-wrap: normal; background: transparent;"><span class="hljs-built_in" style="color: rgb(102, 0, 102); box-sizing: border-box;">cd</span> Firmware</code><ul class="pre-numbering" style="box-sizing: border-box; position: absolute; width: 50px; top: 0px; left: 0px; margin: 0px; padding: 6px 0px 40px; border-right-width: 1px; border-right-style: solid; border-right-color: rgb(221, 221, 221); list-style: none; text-align: right; background-color: rgb(238, 238, 238);"><li style="box-sizing: border-box; padding: 0px 5px;">1</li></ul>
之后输入指令:
<code class="hljs brainfuck has-numbering" style="display: block; padding: 0px; color: inherit; box-sizing: border-box; font-family: 'Source Code Pro', monospace;font-size:undefined; white-space: pre; border-radius: 0px; word-wrap: normal; background: transparent;"><span class="hljs-comment" style="color: rgb(136, 0, 0); box-sizing: border-box;">git</span> <span class="hljs-comment" style="color: rgb(136, 0, 0); box-sizing: border-box;">submodule</span> <span class="hljs-comment" style="color: rgb(136, 0, 0); box-sizing: border-box;">update</span> <span class="hljs-literal" style="color: rgb(0, 102, 102); box-sizing: border-box;">-</span><span class="hljs-literal" style="color: rgb(0, 102, 102); box-sizing: border-box;">-</span><span class="hljs-comment" style="color: rgb(136, 0, 0); box-sizing: border-box;">init</span> <span class="hljs-literal" style="color: rgb(0, 102, 102); box-sizing: border-box;">-</span><span class="hljs-literal" style="color: rgb(0, 102, 102); box-sizing: border-box;">-</span><span class="hljs-comment" style="color: rgb(136, 0, 0); box-sizing: border-box;">recursive</span></code><ul class="pre-numbering" style="box-sizing: border-box; position: absolute; width: 50px; top: 0px; left: 0px; margin: 0px; padding: 6px 0px 40px; border-right-width: 1px; border-right-style: solid; border-right-color: rgb(221, 221, 221); list-style: none; text-align: right; background-color: rgb(238, 238, 238);"><li style="box-sizing: border-box; padding: 0px 5px;">1</li></ul>
(根据网速耗时有差异,耐心等待)
关键一步
在开始最后的编译之前,有一个步骤必不可少,将arm-none-eabi-gcc 4.7.4换成4.8.4,下载4.8.4版本的压缩文件。
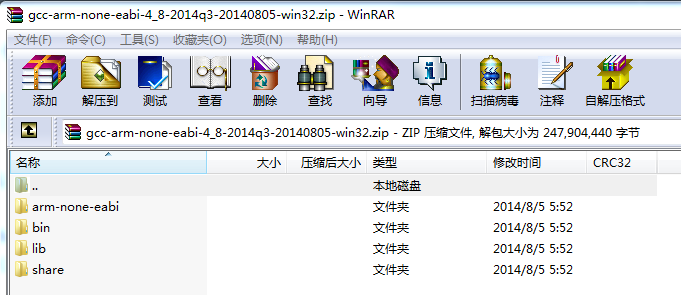
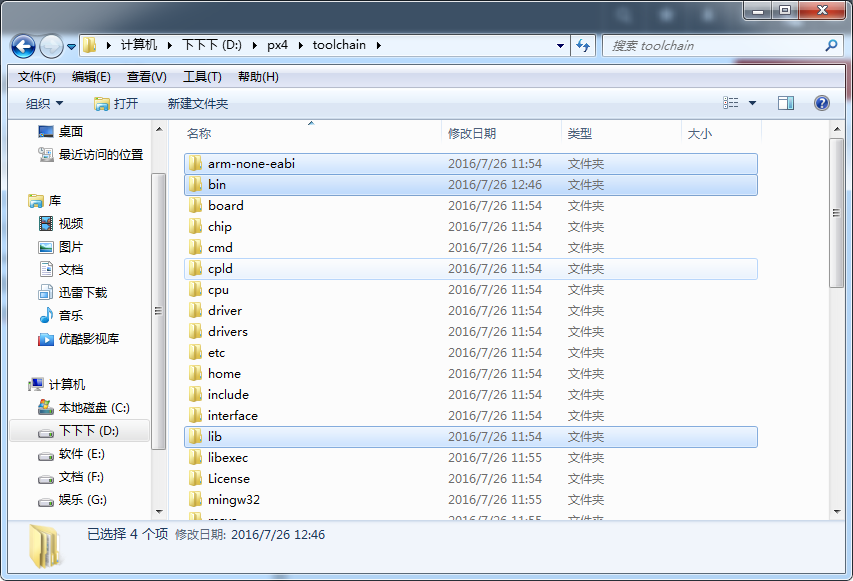
解压后将这四个文件夹复制并替换到PX4Toolchain安装目录下的toolchain文件夹下,这里笔者替换到的文件夹为D:\px4\toolchain。
随后启动PX4 Console控制台进行编译,先进入Firmware文件夹,输入指令:
<code class="hljs bash has-numbering" style="display: block; padding: 0px; color: inherit; box-sizing: border-box; font-family: 'Source Code Pro', monospace;font-size:undefined; white-space: pre; border-radius: 0px; word-wrap: normal; background: transparent;"><span class="hljs-built_in" style="color: rgb(102, 0, 102); box-sizing: border-box;">cd</span> Firmware</code><ul class="pre-numbering" style="box-sizing: border-box; position: absolute; width: 50px; top: 0px; left: 0px; margin: 0px; padding: 6px 0px 40px; border-right-width: 1px; border-right-style: solid; border-right-color: rgb(221, 221, 221); list-style: none; text-align: right; background-color: rgb(238, 238, 238);"><li style="box-sizing: border-box; padding: 0px 5px;">1</li></ul>
进行编译
<code class="hljs lasso has-numbering" style="display: block; padding: 0px; color: inherit; box-sizing: border-box; font-family: 'Source Code Pro', monospace;font-size:undefined; white-space: pre; border-radius: 0px; word-wrap: normal; background: transparent;">make px4fmu<span class="hljs-attribute" style="box-sizing: border-box;">-v2_default</span></code><ul class="pre-numbering" style="box-sizing: border-box; position: absolute; width: 50px; top: 0px; left: 0px; margin: 0px; padding: 6px 0px 40px; border-right-width: 1px; border-right-style: solid; border-right-color: rgb(221, 221, 221); list-style: none; text-align: right; background-color: rgb(238, 238, 238);"><li style="box-sizing: border-box; padding: 0px 5px;">1</li></ul>
(漫长的等待,可能需要半个小时)
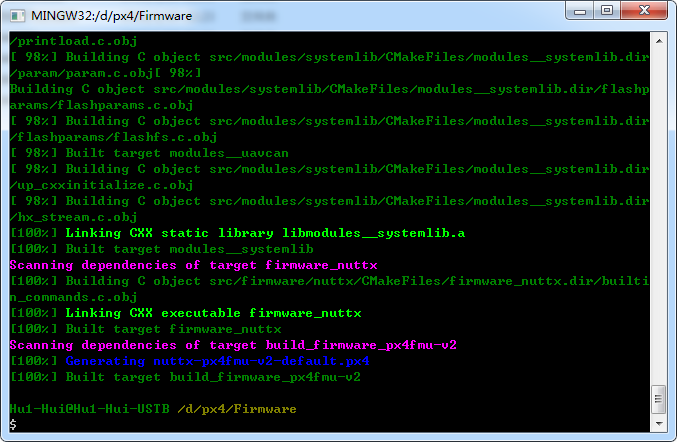
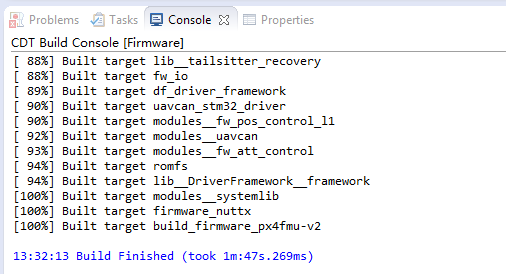
编译成功的界面如下:
如果在没有进行arm-none-eabi-gcc 4.7.4替换的情况下直接进行固件编译,则会出现如下所示的错误:
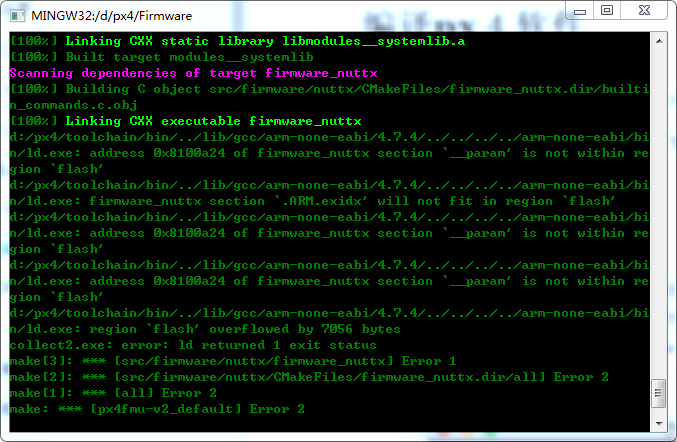
为时不晚,依然来得及将下载好的4.8.4版arm-none-eabi-gcc解压并替换掉Toolchain文件夹下的相应文件。
之后重启PX4Console控制台,首先还是先进入到Firmware文件夹下:
<code class="hljs bash has-numbering" style="display: block; padding: 0px; color: inherit; box-sizing: border-box; font-family: 'Source Code Pro', monospace;font-size:undefined; white-space: pre; border-radius: 0px; word-wrap: normal; background: transparent;"><span class="hljs-built_in" style="color: rgb(102, 0, 102); box-sizing: border-box;">cd</span> Firmware</code><ul class="pre-numbering" style="box-sizing: border-box; position: absolute; width: 50px; top: 0px; left: 0px; margin: 0px; padding: 6px 0px 40px; border-right-width: 1px; border-right-style: solid; border-right-color: rgb(221, 221, 221); list-style: none; text-align: right; background-color: rgb(238, 238, 238);"><li style="box-sizing: border-box; padding: 0px 5px;">1</li></ul>
输入指令:
<code class="hljs go has-numbering" style="display: block; padding: 0px; color: inherit; box-sizing: border-box; font-family: 'Source Code Pro', monospace;font-size:undefined; white-space: pre; border-radius: 0px; word-wrap: normal; background: transparent;"><span class="hljs-built_in" style="color: rgb(102, 0, 102); box-sizing: border-box;">make</span> clean</code><ul class="pre-numbering" style="box-sizing: border-box; position: absolute; width: 50px; top: 0px; left: 0px; margin: 0px; padding: 6px 0px 40px; border-right-width: 1px; border-right-style: solid; border-right-color: rgb(221, 221, 221); list-style: none; text-align: right; background-color: rgb(238, 238, 238);"><li style="box-sizing: border-box; padding: 0px 5px;">1</li></ul>
清除上一次的编译,然后重新编译,输入指令:
<code class="hljs lasso has-numbering" style="display: block; padding: 0px; color: inherit; box-sizing: border-box; font-family: 'Source Code Pro', monospace;font-size:undefined; white-space: pre; border-radius: 0px; word-wrap: normal; background: transparent;">make px4fmu<span class="hljs-attribute" style="box-sizing: border-box;">-v2_default</span></code><ul class="pre-numbering" style="box-sizing: border-box; position: absolute; width: 50px; top: 0px; left: 0px; margin: 0px; padding: 6px 0px 40px; border-right-width: 1px; border-right-style: solid; border-right-color: rgb(221, 221, 221); list-style: none; text-align: right; background-color: rgb(238, 238, 238);"><li style="box-sizing: border-box; padding: 0px 5px;">1</li></ul>
(又是漫长的等待,但是等待都是值得的)
固件烧录
将飞控板通过USB连接电脑,输入以下指令即可完成固件的烧录:
<code class="hljs lasso has-numbering" style="display: block; padding: 0px; color: inherit; box-sizing: border-box; font-family: 'Source Code Pro', monospace;font-size:undefined; white-space: pre; border-radius: 0px; word-wrap: normal; background: transparent;">make px4fmu<span class="hljs-attribute" style="box-sizing: border-box;">-v2_default</span> upload</code><ul class="pre-numbering" style="box-sizing: border-box; position: absolute; width: 50px; top: 0px; left: 0px; margin: 0px; padding: 6px 0px 40px; border-right-width: 1px; border-right-style: solid; border-right-color: rgb(221, 221, 221); list-style: none; text-align: right; background-color: rgb(238, 238, 238);"><li style="box-sizing: border-box; padding: 0px 5px;">1</li></ul>
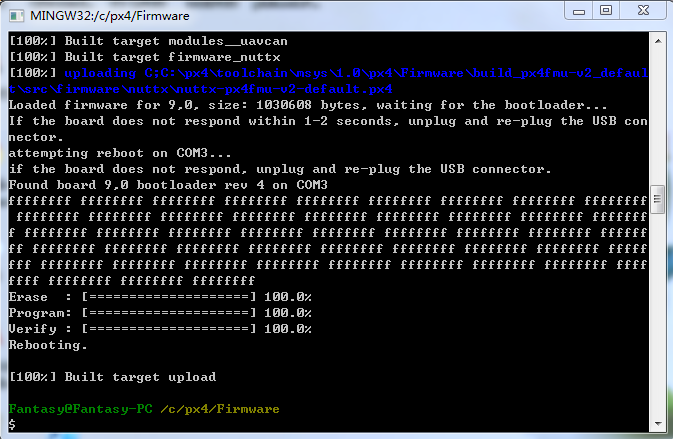
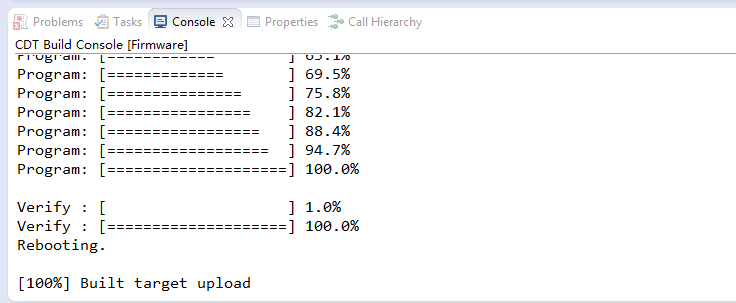
烧录成功的界面如下图:
配置Eclipse
现在控制台已经编译成功了,接下来就是进行Eclipse的配置了
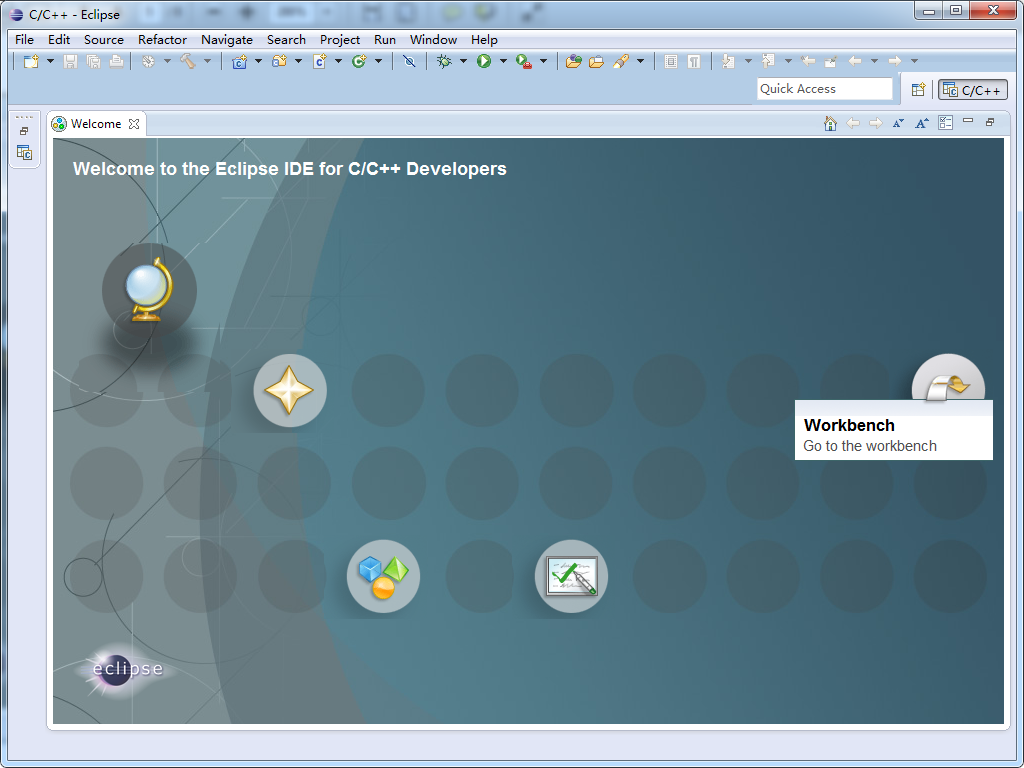
- 打开PX4Eclipse。
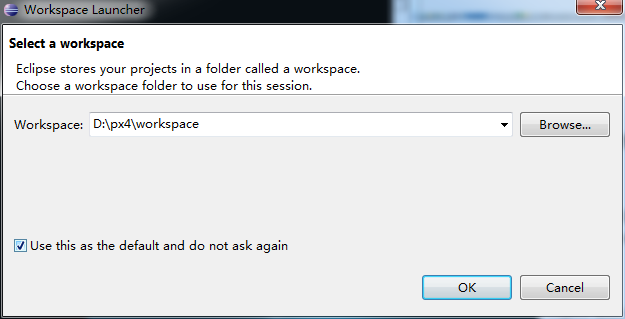
第一次启动时,选择好workplace,并勾选Use this as the default and……。由于笔者以D盘作为工作目录,因此这里依然保持将workplace放置在D盘。
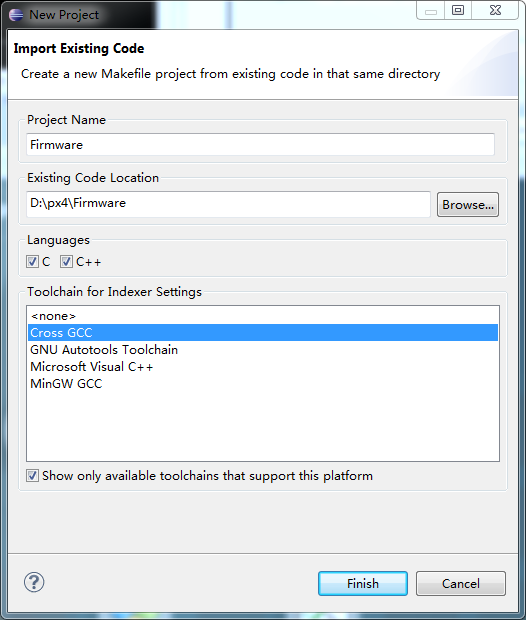
- 建立工程
File -> New -> Makefile Project with Existing Code。
然后点击Browse……到D:\px4\Firmware,并选择Cross GCC,点击Finish。
然后进入Workbench:

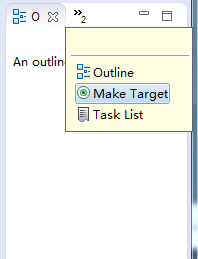
- 创建编译目标
可以在右边板块中Make Target( 或者菜单 Window -> Show View -> Make Target 也可以打开),选中根文件夹(Firmware),可以创建新的 make Target(绿色圆形按钮)。 如创建目标 px4fmu-v2_default
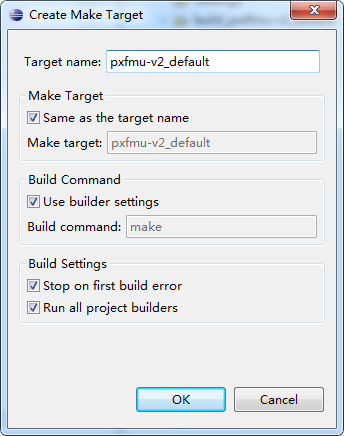
px4fmu-v2_default创建好如下:

同理创建目标:all,archives,clean,distclean,px4io-v2_default, px4fmu-v2_default upload
-
各 make target 说明
- all – builds the autopilot software (depends on archives)
- archives– 编译实时系统 NuttX OS
- distclean– 删除所有编译的文件,包括编译的操作系统
- clean – 删除编译的固件相关文件,不会清除archives
- px4fmu-v2_default—FMU 固件
- px4io-v2_default—IO 固件
- px4fmu-v2_default upload – 烧录固件到飞控板
-
路径配置
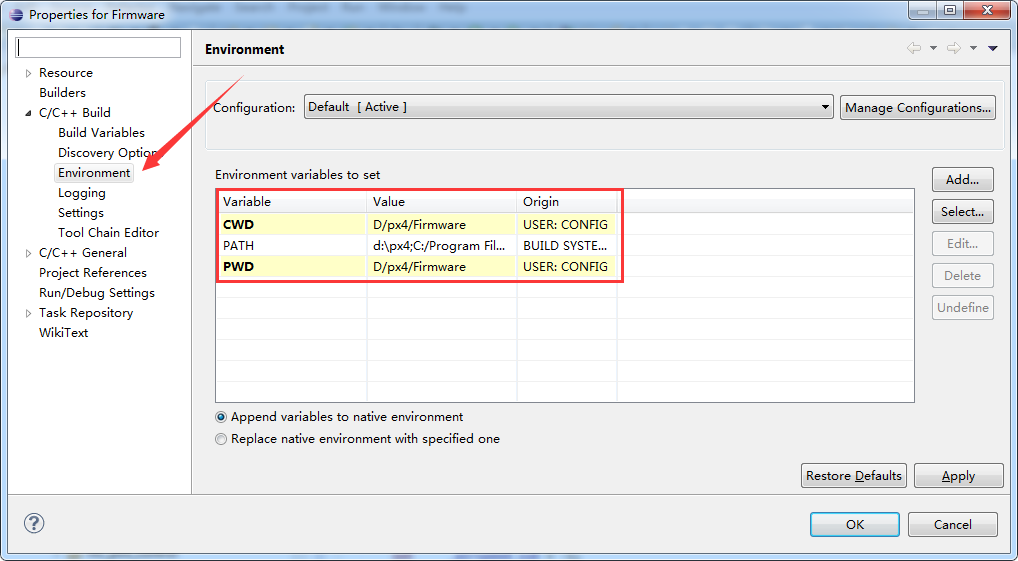
必须配置好Eclipse软件的路径才能进行编译,这一步至关重要。
打开eclipse软件,打开目录栏的Project -> Priorities
有点意思的是,你得先打开左边Firmware中的随便一个文件,否则Priorities这一项会是灰色的,无法进行操作。
打开相应栏,更改CWD、PWD的路径:
开始的路径(如果装在默认路径则为C:\px4)
然后你的CWD路径为 C:\px4\Firmware
这里将路径改为 /D/px4/Firmware
差别不大,还望仔细,笔者当时在这个问题上可是纠结了特别久,无限的报错,not contain Cmakelists.txt。也是得到高人相助,开始人指出来笔者还根本看不出,然后仔细的发现原来是:“\”、“/”“这样的问题。
然后再将PWD的路径也做相应的更改。 -
编译固件
点击上述Target中的px4fmu-v2_default,即可进行编译。此操作与在Console控制台中输入make有同样的效果。
- 烧录固件
固件的烧录可以直接使用QGC地面站进行。也可以在PX4 Console或者PX4 Eclipse中进行,编译成功后在PX4 Eclipse界面右侧点击Target中的px4fmu-v2_default upload即可进行固件的烧录。这样就可以将自己的算法加入到原生固件中了。
至此,在Windows环境下编译Pixhawk原生固件PX4的操作已经完成。
Ubuntu 14.04 LTS
笔者同时也进行了Ubuntu上的环境搭建。跟随大流,笔者安装了Ubutnu 14.04 LTS虚拟机,64位操作系统。
在Ubuntu上搭建环境相对简单许多,按照PX4中文维基官网的教程即可。
工具链安装
- 权限设置
把用户添加到用户组 “dialout”(如果这步没做,会导致很多用户权限问题):
<code class="hljs bash has-numbering" style="display: block; padding: 0px; color: inherit; box-sizing: border-box; font-family: 'Source Code Pro', monospace;font-size:undefined; white-space: pre; border-radius: 0px; word-wrap: normal; background: transparent;"><span class="hljs-built_in" style="color: rgb(102, 0, 102); box-sizing: border-box;">sudo</span> usermod <span class="hljs-operator" style="box-sizing: border-box;">-a</span> -G dialout <span class="hljs-variable" style="color: rgb(102, 0, 102); box-sizing: border-box;">$USER</span></code><ul class="pre-numbering" style="box-sizing: border-box; position: absolute; width: 50px; top: 0px; left: 0px; margin: 0px; padding: 6px 0px 40px; border-right-width: 1px; border-right-style: solid; border-right-color: rgb(221, 221, 221); list-style: none; text-align: right; background-color: rgb(238, 238, 238);"><li style="box-sizing: border-box; padding: 0px 5px;">1</li></ul>
然后注销后,重新登录,因为重新登录后所做的改变才会有效
- 安装CMake
<code class="hljs bash has-numbering" style="display: block; padding: 0px; color: inherit; box-sizing: border-box; font-family: 'Source Code Pro', monospace;font-size:undefined; white-space: pre; border-radius: 0px; word-wrap: normal; background: transparent;"><span class="hljs-built_in" style="color: rgb(102, 0, 102); box-sizing: border-box;">sudo</span> add-apt-repository ppa:george-edison55/cmake-<span class="hljs-number" style="color: rgb(0, 102, 102); box-sizing: border-box;">3</span>.x -y
<span class="hljs-built_in" style="color: rgb(102, 0, 102); box-sizing: border-box;">sudo</span> apt-get update
<span class="hljs-built_in" style="color: rgb(102, 0, 102); box-sizing: border-box;">sudo</span> apt-get install python-argparse git-core wget zip \
    python-empy qtcreator cmake build-essential genromfs -y
<span class="hljs-comment" style="color: rgb(136, 0, 0); box-sizing: border-box;"># simulation tools</span>
<span class="hljs-built_in" style="color: rgb(102, 0, 102); box-sizing: border-box;">sudo</span> apt-get install ant protobuf-compiler libeigen3-dev libopencv-dev openjdk-<span class="hljs-number" style="color: rgb(0, 102, 102); box-sizing: border-box;">7</span>-jdk openjdk-<span class="hljs-number" style="color: rgb(0, 102, 102); box-sizing: border-box;">7</span>-jre clang-<span class="hljs-number" style="color: rgb(0, 102, 102); box-sizing: border-box;">3.5</span> lldb-<span class="hljs-number" style="color: rgb(0, 102, 102); box-sizing: border-box;">3.5</span> -y</code><ul class="pre-numbering" style="box-sizing: border-box; position: absolute; width: 50px; top: 0px; left: 0px; margin: 0px; padding: 6px 0px 40px; border-right-width: 1px; border-right-style: solid; border-right-color: rgb(221, 221, 221); list-style: none; text-align: right; background-color: rgb(238, 238, 238);"><li style="box-sizing: border-box; padding: 0px 5px;">1</li><li style="box-sizing: border-box; padding: 0px 5px;">2</li><li style="box-sizing: border-box; padding: 0px 5px;">3</li><li style="box-sizing: border-box; padding: 0px 5px;">4</li><li style="box-sizing: border-box; padding: 0px 5px;">5</li><li style="box-sizing: border-box; padding: 0px 5px;">6</li></ul>
- 卸载模式管理器
Ubuntu配备了一系列代理管理,这会严重干扰任何机器人相关的串口(或usb串口),卸载掉它也不会有什么影响。
<code class="hljs bash has-numbering" style="display: block; padding: 0px; color: inherit; box-sizing: border-box; font-family: 'Source Code Pro', monospace;font-size:undefined; white-space: pre; border-radius: 0px; word-wrap: normal; background: transparent;"><span class="hljs-built_in" style="color: rgb(102, 0, 102); box-sizing: border-box;">sudo</span> apt-get remove modemmanager</code><ul class="pre-numbering" style="box-sizing: border-box; position: absolute; width: 50px; top: 0px; left: 0px; margin: 0px; padding: 6px 0px 40px; border-right-width: 1px; border-right-style: solid; border-right-color: rgb(221, 221, 221); list-style: none; text-align: right; background-color: rgb(238, 238, 238);"><li style="box-sizing: border-box; padding: 0px 5px;">1</li></ul>
- 更新包列表和安装下面的依赖包
<code class="hljs lasso has-numbering" style="display: block; padding: 0px; color: inherit; box-sizing: border-box; font-family: 'Source Code Pro', monospace;font-size:undefined; white-space: pre; border-radius: 0px; word-wrap: normal; background: transparent;">sudo add<span class="hljs-attribute" style="box-sizing: border-box;">-apt</span><span class="hljs-attribute" style="box-sizing: border-box;">-repository</span> ppa:terry<span class="hljs-built_in" style="color: rgb(102, 0, 102); box-sizing: border-box;">.</span>guo/gcc<span class="hljs-attribute" style="box-sizing: border-box;">-arm</span><span class="hljs-attribute" style="box-sizing: border-box;">-embedded</span> <span class="hljs-attribute" style="box-sizing: border-box;">-y</span>
sudo apt<span class="hljs-attribute" style="box-sizing: border-box;">-get</span> update
sudo apt<span class="hljs-attribute" style="box-sizing: border-box;">-get</span> install python<span class="hljs-attribute" style="box-sizing: border-box;">-serial</span> openocd <span class="hljs-subst" style="color: rgb(0, 0, 0); box-sizing: border-box;">\</span>
    flex bison libncurses5<span class="hljs-attribute" style="box-sizing: border-box;">-dev</span> autoconf texinfo build<span class="hljs-attribute" style="box-sizing: border-box;">-essential</span> <span class="hljs-subst" style="color: rgb(0, 0, 0); box-sizing: border-box;">\</span>
    libftdi<span class="hljs-attribute" style="box-sizing: border-box;">-dev</span> libtool zlib1g<span class="hljs-attribute" style="box-sizing: border-box;">-dev</span> <span class="hljs-subst" style="color: rgb(0, 0, 0); box-sizing: border-box;">\</span>
    python<span class="hljs-attribute" style="box-sizing: border-box;">-empy</span> gcc<span class="hljs-attribute" style="box-sizing: border-box;">-arm</span><span class="hljs-attribute" style="box-sizing: border-box;">-none</span><span class="hljs-attribute" style="box-sizing: border-box;">-eabi</span> <span class="hljs-attribute" style="box-sizing: border-box;">-y</span></code><ul class="pre-numbering" style="box-sizing: border-box; position: absolute; width: 50px; top: 0px; left: 0px; margin: 0px; padding: 6px 0px 40px; border-right-width: 1px; border-right-style: solid; border-right-color: rgb(221, 221, 221); list-style: none; text-align: right; background-color: rgb(238, 238, 238);"><li style="box-sizing: border-box; padding: 0px 5px;">1</li><li style="box-sizing: border-box; padding: 0px 5px;">2</li><li style="box-sizing: border-box; padding: 0px 5px;">3</li><li style="box-sizing: border-box; padding: 0px 5px;">4</li><li style="box-sizing: border-box; padding: 0px 5px;">5</li><li style="box-sizing: border-box; padding: 0px 5px;">6</li></ul>
代码编译
根据PX4中文维基官网教程。
- 安装Git
<code class="hljs lasso has-numbering" style="display: block; padding: 0px; color: inherit; box-sizing: border-box; font-family: 'Source Code Pro', monospace;font-size:undefined; white-space: pre; border-radius: 0px; word-wrap: normal; background: transparent;">sudo apt<span class="hljs-attribute" style="box-sizing: border-box;">-get</span> install git<span class="hljs-attribute" style="box-sizing: border-box;">-all</span></code><ul class="pre-numbering" style="box-sizing: border-box; position: absolute; width: 50px; top: 0px; left: 0px; margin: 0px; padding: 6px 0px 40px; border-right-width: 1px; border-right-style: solid; border-right-color: rgb(221, 221, 221); list-style: none; text-align: right; background-color: rgb(238, 238, 238);"><li style="box-sizing: border-box; padding: 0px 5px;">1</li></ul>
- 下载代码
<code class="hljs php has-numbering" style="display: block; padding: 0px; color: inherit; box-sizing: border-box; font-family: 'Source Code Pro', monospace;font-size:undefined; white-space: pre; border-radius: 0px; word-wrap: normal; background: transparent;">mkdir -p ~/src
cd ~/src
git <span class="hljs-keyword" style="color: rgb(0, 0, 136); box-sizing: border-box;">clone</span> https:<span class="hljs-comment" style="color: rgb(136, 0, 0); box-sizing: border-box;">//github.com/PX4/Firmware.git</span></code><ul class="pre-numbering" style="box-sizing: border-box; position: absolute; width: 50px; top: 0px; left: 0px; margin: 0px; padding: 6px 0px 40px; border-right-width: 1px; border-right-style: solid; border-right-color: rgb(221, 221, 221); list-style: none; text-align: right; background-color: rgb(238, 238, 238);"><li style="box-sizing: border-box; padding: 0px 5px;">1</li><li style="box-sizing: border-box; padding: 0px 5px;">2</li><li style="box-sizing: border-box; padding: 0px 5px;">3</li></ul>
- 初始化
先进入Firmware文件夹,进而进行初始化、更新子模块操作,耐心的等待……
<code class="hljs brainfuck has-numbering" style="display: block; padding: 0px; color: inherit; box-sizing: border-box; font-family: 'Source Code Pro', monospace;font-size:undefined; white-space: pre; border-radius: 0px; word-wrap: normal; background: transparent;"><span class="hljs-comment" style="color: rgb(136, 0, 0); box-sizing: border-box;">cd</span> <span class="hljs-comment" style="color: rgb(136, 0, 0); box-sizing: border-box;">Firmware</span>
<span class="hljs-comment" style="color: rgb(136, 0, 0); box-sizing: border-box;">git</span> <span class="hljs-comment" style="color: rgb(136, 0, 0); box-sizing: border-box;">submodule</span> <span class="hljs-comment" style="color: rgb(136, 0, 0); box-sizing: border-box;">update</span> <span class="hljs-literal" style="color: rgb(0, 102, 102); box-sizing: border-box;">-</span><span class="hljs-literal" style="color: rgb(0, 102, 102); box-sizing: border-box;">-</span><span class="hljs-comment" style="color: rgb(136, 0, 0); box-sizing: border-box;">init</span> <span class="hljs-literal" style="color: rgb(0, 102, 102); box-sizing: border-box;">-</span><span class="hljs-literal" style="color: rgb(0, 102, 102); box-sizing: border-box;">-</span><span class="hljs-comment" style="color: rgb(136, 0, 0); box-sizing: border-box;">recursive</span></code><ul class="pre-numbering" style="box-sizing: border-box; position: absolute; width: 50px; top: 0px; left: 0px; margin: 0px; padding: 6px 0px 40px; border-right-width: 1px; border-right-style: solid; border-right-color: rgb(221, 221, 221); list-style: none; text-align: right; background-color: rgb(238, 238, 238);"><li style="box-sizing: border-box; padding: 0px 5px;">1</li><li style="box-sizing: border-box; padding: 0px 5px;">2</li></ul>
- 编译
在上一步的操作结束之后,即可进行编译:
<code class="hljs lasso has-numbering" style="display: block; padding: 0px; color: inherit; box-sizing: border-box; font-family: 'Source Code Pro', monospace;font-size:undefined; white-space: pre; border-radius: 0px; word-wrap: normal; background: transparent;">make px4fmu<span class="hljs-attribute" style="box-sizing: border-box;">-v2_default</span></code><ul class="pre-numbering" style="box-sizing: border-box; position: absolute; width: 50px; top: 0px; left: 0px; margin: 0px; padding: 6px 0px 40px; border-right-width: 1px; border-right-style: solid; border-right-color: rgb(221, 221, 221); list-style: none; text-align: right; background-color: rgb(238, 238, 238);"><li style="box-sizing: border-box; padding: 0px 5px;">1</li></ul>
注意到“make”是一个字符命令编译工具,“px4fmu-v2”是硬件版本,“default”是默认配置,所有的PX4编译目标遵循这个规则。
与Windows环境中相同,这里也可能因为gcc-arm-none-eabi版本不对,需要进行版本升级到4.8.4,方法如下:
- 下载gcc-arm-none-eabi 4.8.4,对于的文件夹命名为arm-none-eabi-4_8-2014**q3**
<code class="hljs avrasm has-numbering" style="display: block; padding: 0px; color: inherit; box-sizing: border-box; font-family: 'Source Code Pro', monospace;font-size:undefined; white-space: pre; border-radius: 0px; word-wrap: normal; background: transparent;">wget https://launchpadlibrarian<span class="hljs-preprocessor" style="color: rgb(68, 68, 68); box-sizing: border-box;">.net</span>/<span class="hljs-number" style="color: rgb(0, 102, 102); box-sizing: border-box;">186124160</span>/gcc-arm-none-eabi-<span class="hljs-number" style="color: rgb(0, 102, 102); box-sizing: border-box;">4</span>_8-<span class="hljs-number" style="color: rgb(0, 102, 102); box-sizing: border-box;">2014</span>q3-<span class="hljs-number" style="color: rgb(0, 102, 102); box-sizing: border-box;">20140805</span>-linux<span class="hljs-preprocessor" style="color: rgb(68, 68, 68); box-sizing: border-box;">.tar</span><span class="hljs-preprocessor" style="color: rgb(68, 68, 68); box-sizing: border-box;">.bz</span>2</code><ul class="pre-numbering" style="box-sizing: border-box; position: absolute; width: 50px; top: 0px; left: 0px; margin: 0px; padding: 6px 0px 40px; border-right-width: 1px; border-right-style: solid; border-right-color: rgb(221, 221, 221); list-style: none; text-align: right; background-color: rgb(238, 238, 238);"><li style="box-sizing: border-box; padding: 0px 5px;">1</li></ul>
- 去旧迎新
<code class="hljs bash has-numbering" style="display: block; padding: 0px; color: inherit; box-sizing: border-box; font-family: 'Source Code Pro', monospace;font-size:undefined; white-space: pre; border-radius: 0px; word-wrap: normal; background: transparent;"><span class="hljs-built_in" style="color: rgb(102, 0, 102); box-sizing: border-box;">pushd</span> .
<span class="hljs-comment" style="color: rgb(136, 0, 0); box-sizing: border-box;"># => 卸载新版的gcc-arm-none-eabi</span>
<span class="hljs-built_in" style="color: rgb(102, 0, 102); box-sizing: border-box;">sudo</span> apt-get remove gcc-arm-none-eabi
<span class="hljs-comment" style="color: rgb(136, 0, 0); box-sizing: border-box;"># => 安装下载好的gcc-arm-none-eabi</span>
tar xjvf gcc-arm-none-eabi-<span class="hljs-number" style="color: rgb(0, 102, 102); box-sizing: border-box;">4</span>_8-<span class="hljs-number" style="color: rgb(0, 102, 102); box-sizing: border-box;">2014</span>q3-<span class="hljs-number" style="color: rgb(0, 102, 102); box-sizing: border-box;">20140805</span>-linux.tar.bz2
<span class="hljs-built_in" style="color: rgb(102, 0, 102); box-sizing: border-box;">sudo</span> mv gcc-arm-none-eabi-<span class="hljs-number" style="color: rgb(0, 102, 102); box-sizing: border-box;">4</span>_8-<span class="hljs-number" style="color: rgb(0, 102, 102); box-sizing: border-box;">2014</span>q3 /opt
exportline=<span class="hljs-string" style="color: rgb(0, 136, 0); box-sizing: border-box;">"export PATH=/opt/gcc-arm-none-eabi-4_8-2014q3/bin:\$PATH"</span>
<span class="hljs-keyword" style="color: rgb(0, 0, 136); box-sizing: border-box;">if</span> grep -Fxq <span class="hljs-string" style="color: rgb(0, 136, 0); box-sizing: border-box;">"<span class="hljs-variable" style="color: rgb(102, 0, 102); box-sizing: border-box;">$exportline</span>"</span> ~/.profile; <span class="hljs-keyword" style="color: rgb(0, 0, 136); box-sizing: border-box;">then</span> <span class="hljs-built_in" style="color: rgb(102, 0, 102); box-sizing: border-box;">echo</span> nothing to <span class="hljs-keyword" style="color: rgb(0, 0, 136); box-sizing: border-box;">do</span> ; <span class="hljs-keyword" style="color: rgb(0, 0, 136); box-sizing: border-box;">else</span> <span class="hljs-built_in" style="color: rgb(102, 0, 102); box-sizing: border-box;">echo</span> <span class="hljs-variable" style="color: rgb(102, 0, 102); box-sizing: border-box;">$exportline</span> >> ~/.profile; <span class="hljs-keyword" style="color: rgb(0, 0, 136); box-sizing: border-box;">fi</span>
<span class="hljs-comment" style="color: rgb(136, 0, 0); box-sizing: border-box;"># => 使路径生效</span>
. ~/.profile
<span class="hljs-built_in" style="color: rgb(102, 0, 102); box-sizing: border-box;">popd</span></code><ul class="pre-numbering" style="box-sizing: border-box; position: absolute; width: 50px; top: 0px; left: 0px; margin: 0px; padding: 6px 0px 40px; border-right-width: 1px; border-right-style: solid; border-right-color: rgb(221, 221, 221); list-style: none; text-align: right; background-color: rgb(238, 238, 238);"><li style="box-sizing: border-box; padding: 0px 5px;">1</li><li style="box-sizing: border-box; padding: 0px 5px;">2</li><li style="box-sizing: border-box; padding: 0px 5px;">3</li><li style="box-sizing: border-box; padding: 0px 5px;">4</li><li style="box-sizing: border-box; padding: 0px 5px;">5</li><li style="box-sizing: border-box; padding: 0px 5px;">6</li><li style="box-sizing: border-box; padding: 0px 5px;">7</li><li style="box-sizing: border-box; padding: 0px 5px;">8</li><li style="box-sizing: border-box; padding: 0px 5px;">9</li><li style="box-sizing: border-box; padding: 0px 5px;">10</li><li style="box-sizing: border-box; padding: 0px 5px;">11</li></ul>
笔者装的是Ubuntu 64位系统,而上述arm-none-eabi是直接下载的编译好的32位,还需要安装一个东西
<code class="hljs lasso has-numbering" style="display: block; padding: 0px; color: inherit; box-sizing: border-box; font-family: 'Source Code Pro', monospace;font-size:undefined; white-space: pre; border-radius: 0px; word-wrap: normal; background: transparent;">sudo apt<span class="hljs-attribute" style="box-sizing: border-box;">-get</span> install lsb<span class="hljs-attribute" style="box-sizing: border-box;">-core</span></code><ul class="pre-numbering" style="box-sizing: border-box; position: absolute; width: 50px; top: 0px; left: 0px; margin: 0px; padding: 6px 0px 40px; border-right-width: 1px; border-right-style: solid; border-right-color: rgb(221, 221, 221); list-style: none; text-align: right; background-color: rgb(238, 238, 238);"><li style="box-sizing: border-box; padding: 0px 5px;">1</li></ul>
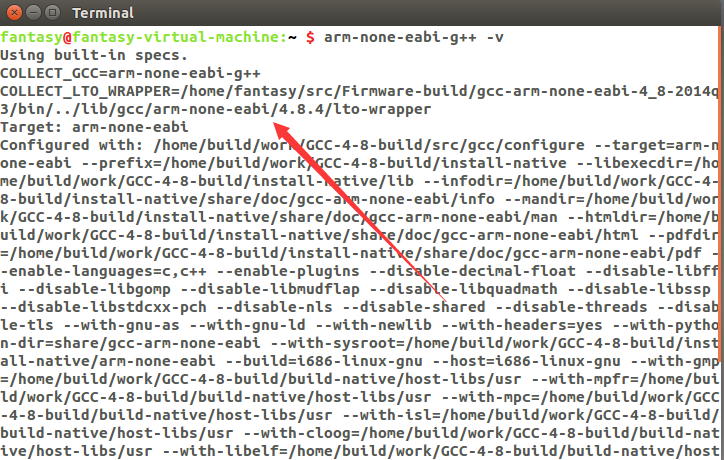
可以检查arm-none-eabi 4.8.4是否安装成功,输入以下指令:
<code class="hljs lasso has-numbering" style="display: block; padding: 0px; color: inherit; box-sizing: border-box; font-family: 'Source Code Pro', monospace;font-size:undefined; white-space: pre; border-radius: 0px; word-wrap: normal; background: transparent;">arm<span class="hljs-attribute" style="box-sizing: border-box;">-none</span><span class="hljs-attribute" style="box-sizing: border-box;">-eabi</span><span class="hljs-attribute" style="box-sizing: border-box;">-g</span><span class="hljs-subst" style="color: rgb(0, 0, 0); box-sizing: border-box;">++</span> <span class="hljs-attribute" style="box-sizing: border-box;">-v</span></code><ul class="pre-numbering" style="box-sizing: border-box; position: absolute; width: 50px; top: 0px; left: 0px; margin: 0px; padding: 6px 0px 40px; border-right-width: 1px; border-right-style: solid; border-right-color: rgb(221, 221, 221); list-style: none; text-align: right; background-color: rgb(238, 238, 238);"><li style="box-sizing: border-box; padding: 0px 5px;">1</li></ul>
如果出现如下信息,交叉编译环境搭建就没有什么问题了
- 编译
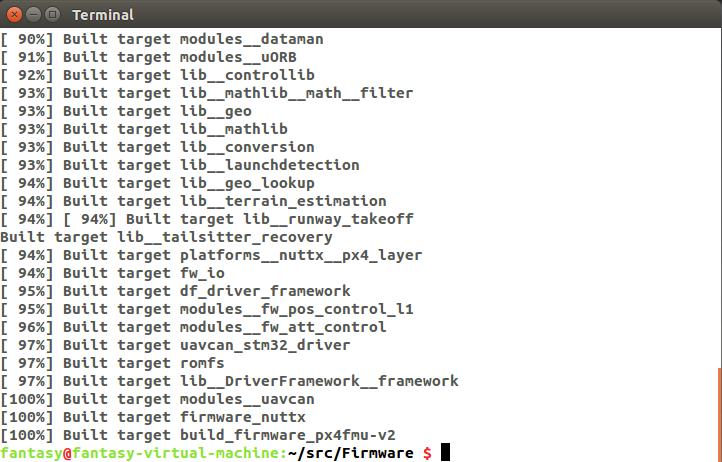
<code class="hljs bash has-numbering" style="display: block; padding: 0px; color: inherit; box-sizing: border-box; font-family: 'Source Code Pro', monospace;font-size:undefined; white-space: pre; border-radius: 0px; word-wrap: normal; background: transparent;"><span class="hljs-built_in" style="color: rgb(102, 0, 102); box-sizing: border-box;">cd</span> ~/src/Firmware
make</code><ul class="pre-numbering" style="box-sizing: border-box; position: absolute; width: 50px; top: 0px; left: 0px; margin: 0px; padding: 6px 0px 40px; border-right-width: 1px; border-right-style: solid; border-right-color: rgb(221, 221, 221); list-style: none; text-align: right; background-color: rgb(238, 238, 238);"><li style="box-sizing: border-box; padding: 0px 5px;">1</li><li style="box-sizing: border-box; padding: 0px 5px;">2</li></ul>
进入Firmware所在的文件夹,make成功后,显示如下:
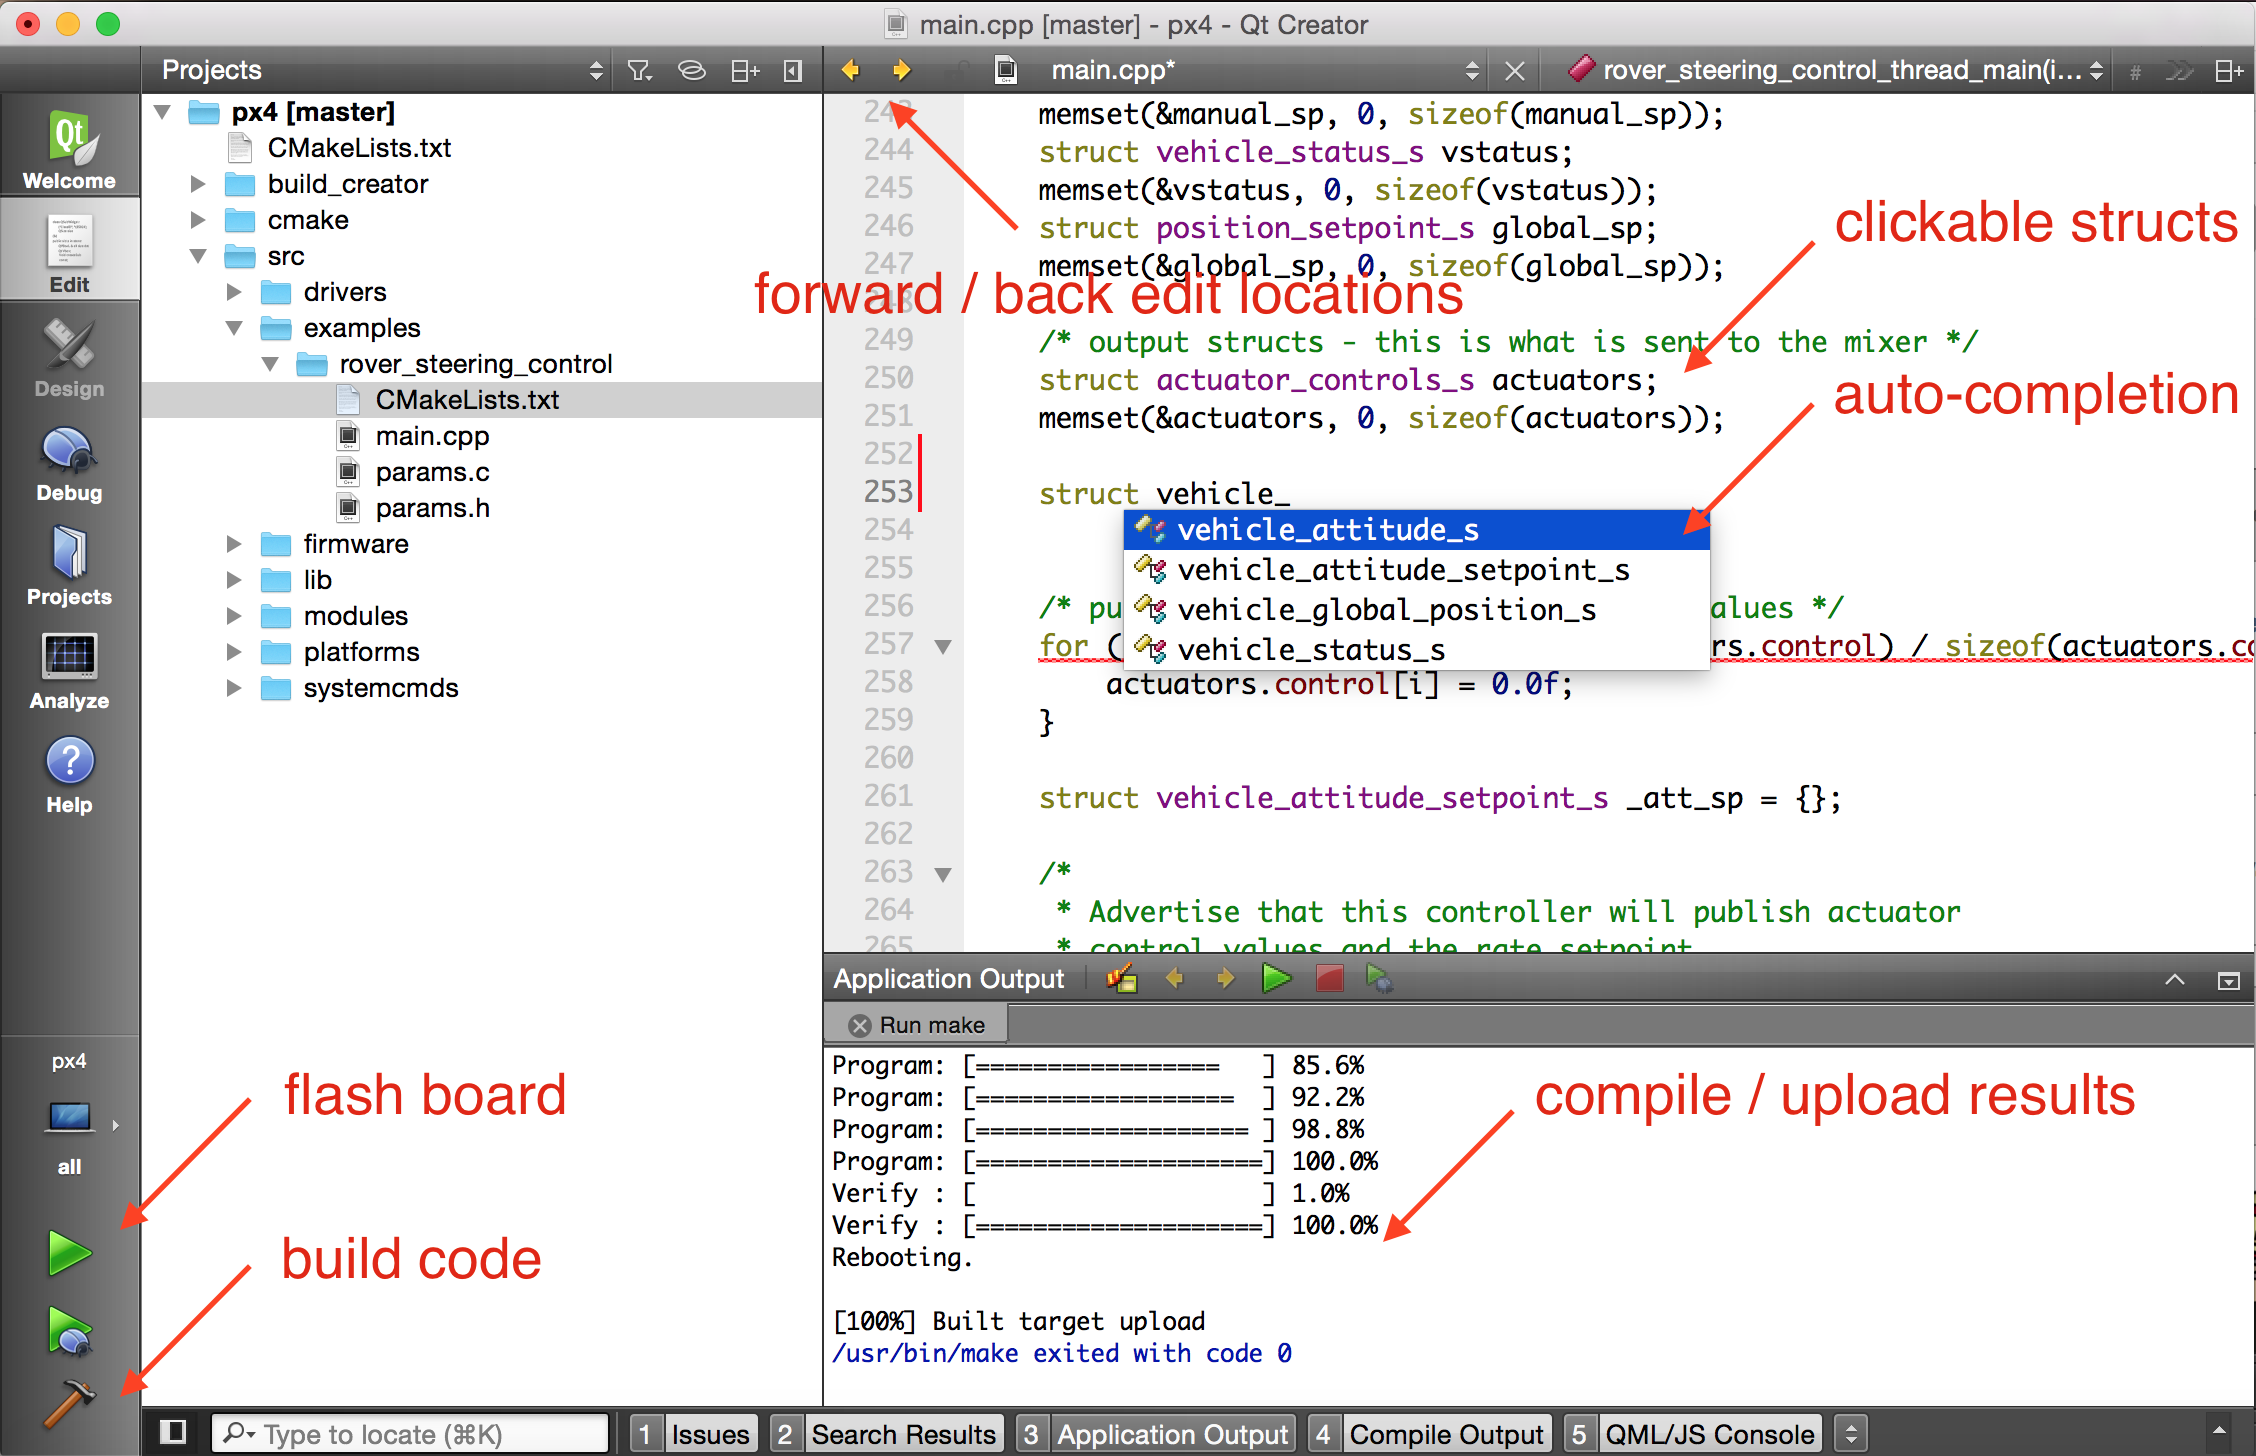
Qt Creator
Qt Creator是官方唯一支持的IDE,在Ubuntu上针对PX4固件使用,便于看代码的同时也可以进行编译烧录。
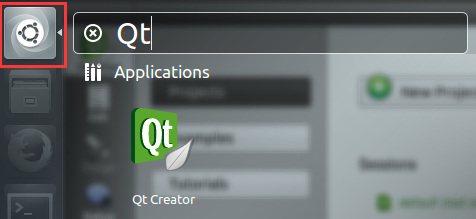
- 安装Qt
<code class="hljs bash has-numbering" style="display: block; padding: 0px; color: inherit; box-sizing: border-box; font-family: 'Source Code Pro', monospace;font-size:undefined; white-space: pre; border-radius: 0px; word-wrap: normal; background: transparent;"><span class="hljs-built_in" style="color: rgb(102, 0, 102); box-sizing: border-box;">sudo</span> apt-get install qtcreator</code><ul class="pre-numbering" style="box-sizing: border-box; position: absolute; width: 50px; top: 0px; left: 0px; margin: 0px; padding: 6px 0px 40px; border-right-width: 1px; border-right-style: solid; border-right-color: rgb(221, 221, 221); list-style: none; text-align: right; background-color: rgb(238, 238, 238);"><li style="box-sizing: border-box; padding: 0px 5px;">1</li></ul>
Qt Creator的常见功能如下:
在打开Qt之前,应该创建project文件:
<code class="hljs bash has-numbering" style="display: block; padding: 0px; color: inherit; box-sizing: border-box; font-family: 'Source Code Pro', monospace;font-size:undefined; white-space: pre; border-radius: 0px; word-wrap: normal; background: transparent;"><span class="hljs-built_in" style="color: rgb(102, 0, 102); box-sizing: border-box;">cd</span> ~/src/Firmware
mkdir ../Firmware-build
<span class="hljs-built_in" style="color: rgb(102, 0, 102); box-sizing: border-box;">cd</span> ../Firmware-build
cmake ../Firmware -G <span class="hljs-string" style="color: rgb(0, 136, 0); box-sizing: border-box;">"CodeBlocks - Unix Makefiles"</span>
<span class="hljs-comment" style="color: rgb(136, 0, 0); box-sizing: border-box;">#可以发现Firmware-build目录生成了一些文件</span></code><ul class="pre-numbering" style="box-sizing: border-box; position: absolute; width: 50px; top: 0px; left: 0px; margin: 0px; padding: 6px 0px 40px; border-right-width: 1px; border-right-style: solid; border-right-color: rgb(221, 221, 221); list-style: none; text-align: right; background-color: rgb(238, 238, 238);"><li style="box-sizing: border-box; padding: 0px 5px;">1</li><li style="box-sizing: border-box; padding: 0px 5px;">2</li><li style="box-sizing: border-box; padding: 0px 5px;">3</li><li style="box-sizing: border-box; padding: 0px 5px;">4</li><li style="box-sizing: border-box; padding: 0px 5px;">5</li></ul>
-
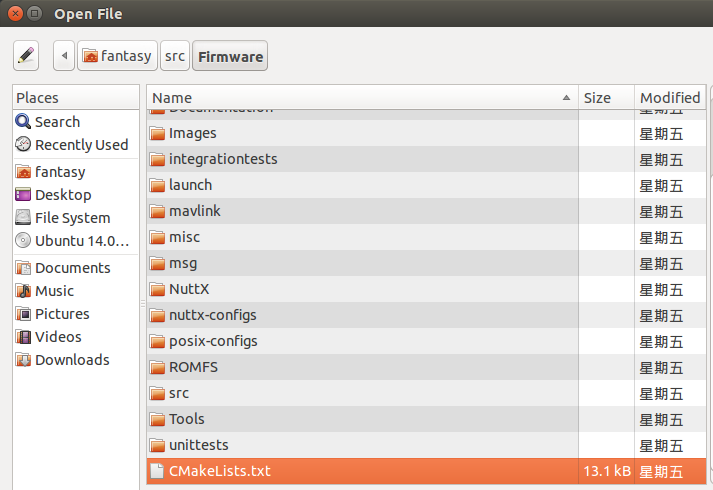
打开Qt
Ubuntu用户只要导入主文件夹里的CMakeLists.txt文件就可以了,打开Qt,通过File -> Open File or Project -> 选择CMakeLists.txt (默认位置在Firmware文件夹根目录下)
-
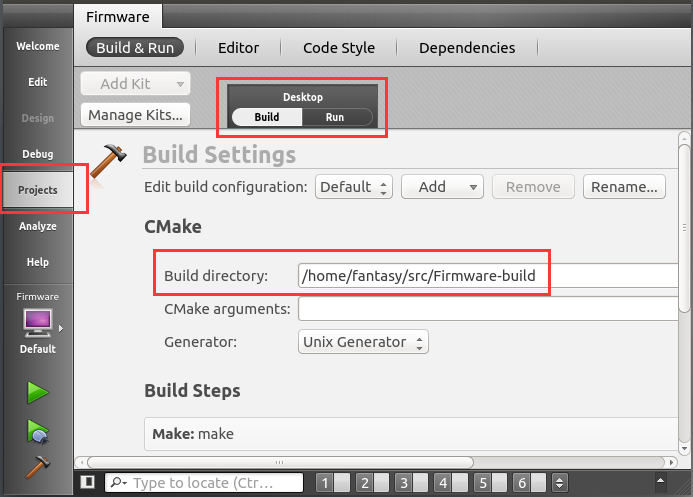
项目配置
选择src/Firmware-build作为构建目录
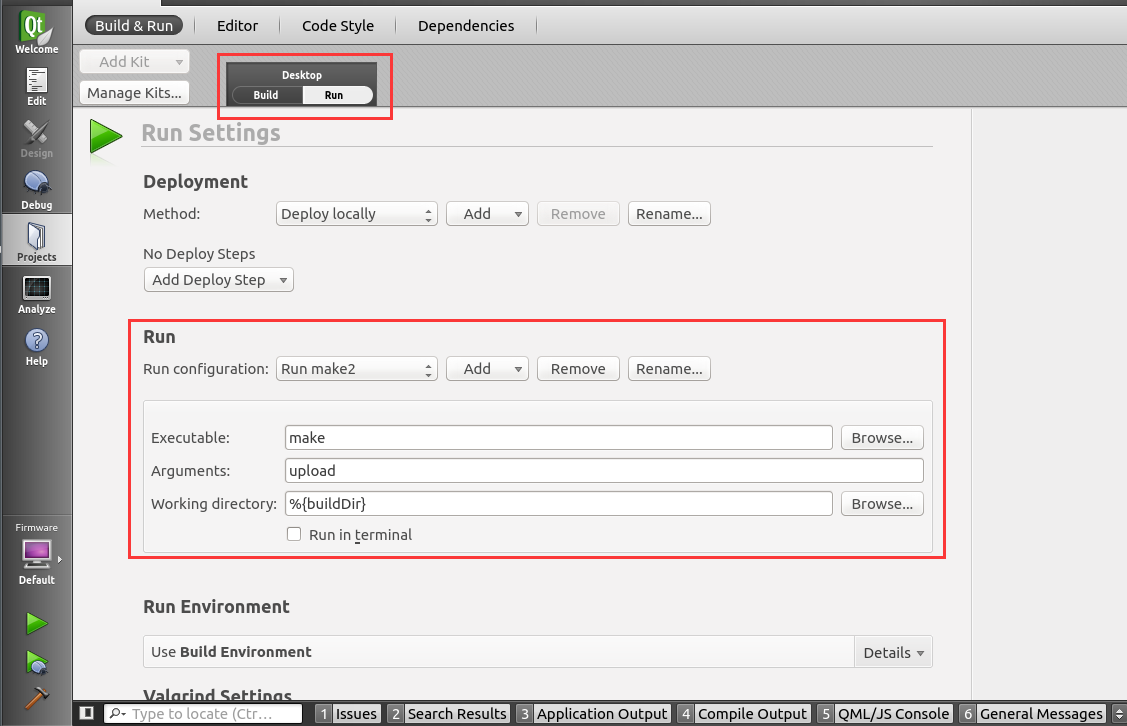
运行设置
-
编译
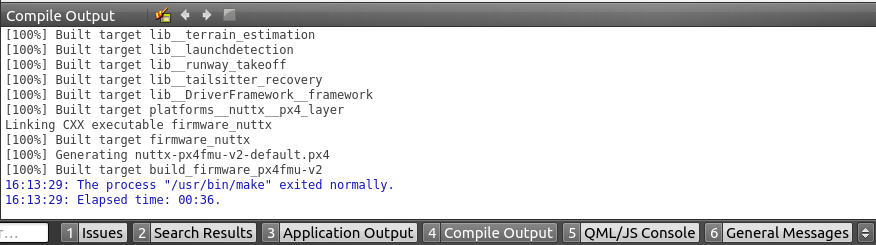
至此,在Windows已经Ubuntu下的环境搭建已经全部搭建成功。
现在是2016.7.26 19:37 为了确保方法的有效性,笔者已经在都装有Ubuntu虚拟机的笔记本和台式机上用上述方法完成了两种系统下环境搭建、代码编译的复现,亲测有效。


 1万+
1万+

 被折叠的 条评论
为什么被折叠?
被折叠的 条评论
为什么被折叠?
 到【灌水乐园】发言


