


 本文深入探讨游戏开发中各种视觉特效与后期处理技术,包括自动曝光、Bloom、色差、颜色校正、景深、噪点、镜头扭曲、运动模糊、空间反射及暗角效果。每种效果都附有详细参数说明,帮助开发者精确控制游戏画面,提升视觉体验。
Auto Exposure
Auto Exposure :自动曝光,根据图像包含的亮度级别范围动态调整图像的曝光
Properties
| Property | Function |
|---|---|
| Filtering | 过滤器,设置直方图的上下百分比,找到稳定的平均亮度。超出此范围的值将被丢弃,不会影响平均亮度。 |
| Minimum | 设置环境光当中最小平均亮度 |
| Maximum | 设置环境光当中最大平均亮度 |
| Exposure Compensation | 曝光补偿,设置中灰色值来补偿场景的全局曝光。. |
Adaptation settings:
| Property | Function |
|---|---|
| Type | 选择适应类型。progressive的自动曝光。fix的自动曝光。 |
| Speed Up | 设置从黑暗环境到光明环境的适应速度. |
| Speed Down | 设置从光亮环境到黑暗环境的适应速度。 |
Details
使用Filtering 去控制非常黑暗和光亮的像素,让这些像素不参加平均亮度的计算
Minimum/Maximum 的值用来计算给定范围内的平均亮
Fixed 就像一个自动曝光设置
使用Light Meter 监视器,在使用这个效果
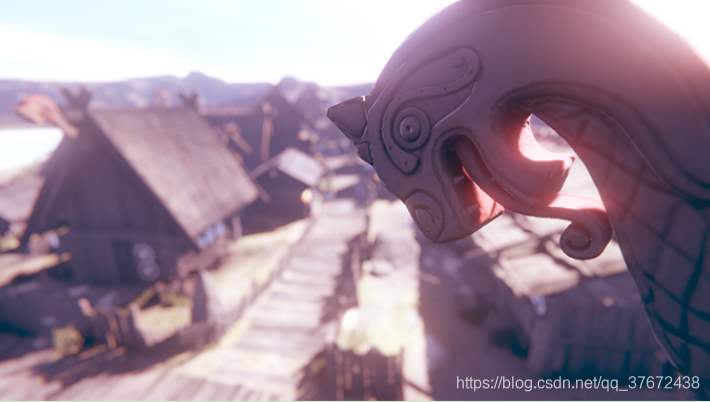
Bloom
Bloom 创建了一种在图片中 从光亮区域往外扩散的流苏效果 , 就像一个白场
亮度高的区域回往外扩散,通过控制值,让他扩散整个屏幕
也可以用Lens Dirt 在屏幕上设置一些灰尘,衍射bloom这个效果

Properties
Bloom settings:
| Property | Function |
|---|---|
| Intensity | 强度 |
| Threshold | 设置亮度的等级,在此等级下过滤像素,用 gamma-space表示 |
| Soft Knee | 设置阈值以下/阈值以上的渐变阈值(0 =硬阈值,1 =软阈值)。越大扩散范围越大 |
| Clamp | 控制 Bloom 效果像素的数量. |
| Diffusion | 设置往外扩散的等级Set the extent of veiling effects in a screen resolution-independent fashion. |
| Anamorphic Ratio | 设置比例以垂直(范围[-1,0])或水平(范围[0,1])缩放Bloom。这模拟了变形透镜的效果 |
| Color | 设置往外扩散的颜色. |
| Fast Mode | 开启扩散的质量变低 |
Dirtiness settings:
| Property | Function |
|---|---|
| Texture | 选择一个肮脏的纹理添加污渍或灰尘的镜头。 |
| Intensity | 设置镜头的脏度。 |
Details
对于适当暴露的HDR场景,阈值应该设置为~1,这样只有大于1的像素才会泄漏到周围的对象中。在LDR中工作时删除此值,否则效果将不可见。
Performance
Diffusion 越低,效果渲染越快 Anamorphic Ratio越大,渲染月满. Fast Mode适用移动平台
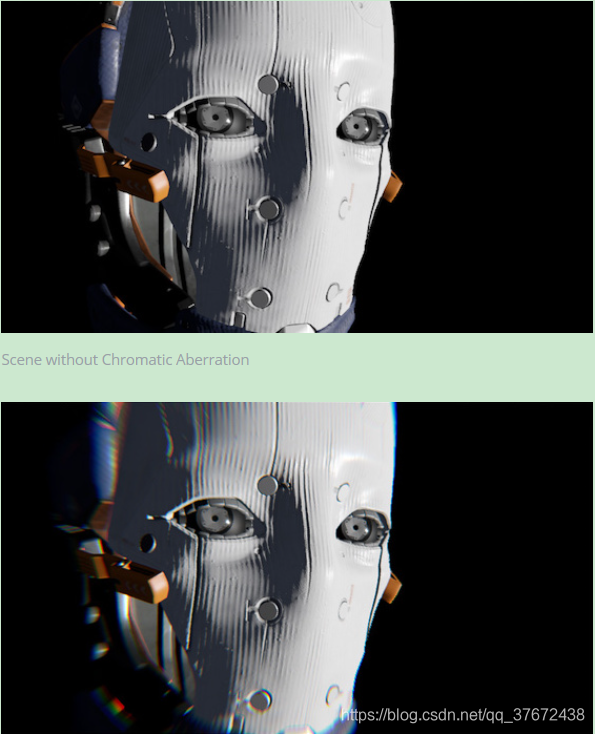
Chromatic Aberration
给物体添加带色彩的边缘条

Properties
| Property | Function |
|---|---|
| Spectral Lut | Select the texture used for a custom fringing color. When left empty, Unity will use the default texture. |
| Intensity | Set the strength of the Chromatic Aberration effect. |
| Fast Mode | Use a faster variant of Chromatic Aberration effect for improved performance. |
Color Grading
颜色矫正,调色,这个比较使用,但是现在一般都有专门的镜头调色插件
The Color Grading effect comes with three modes:
- Low Definition Range (LDR): ideal for lower-end platforms. Grading is applied to the final rendered frame clamped in a [0,1] range and stored in a standard LUT.
- High Definition Range (HDR): ideal for platforms that support HDR rendering. All color operations are applied in HDR and stored into a 3D log-encoded LUT to ensure a sufficient range coverage and precision (Alexa LogC El1000).
- External: for use with custom 3D LUTs authored in external software.
Properties
| Property | Function |
|---|---|
| Lookup Texture | LDR: Select a custom lookup texture (strip format, e.g. 256x16) to apply before the rest of the color grading operators. If none is provided, a neutral one will be generated internally. External: A custom 3D log-encoded texture. |
| Contribution | LDR: Set how much of the lookup texture will contribute to the color grading. |
Note: Volume blending between multiple LDR lookup textures is supported but only works correctly if they're the same size. For this reason it is recommended to stick to a single LUT size for the whole project (256x16 or 1024x32).
Tonemapping
色调映射
| Property | Function |
|---|---|
| Mode | Only available in the High Definition Range mode. Select the Tonemapping mode from the dropdown menu. None: No Tonemapping applied. Neutral: Applies a range-remapping with minimal impact on color hue and saturation. ACES: Applies a close approximation of the reference ACES tonemapper for a cinematic look. This effect has more contrast than Neutral affects color hue and saturation. When this tonemapper is enabled, all grading operations are performed in the ACES color spaces for optimal precision and results. Custom: A fully parametric tonemapper. This is the only tonemapper with its own settings. |
| Toe Strength | Set a value for the transition between the toe and the mid section of the curve. A value of 0 means no toe, a value of 1 means a very hard transition. |
| Toe Length | Set the value for how much of the dynamic range is in the toe. With a small value, the toe will be very short and quickly transition into the linear section, and with a longer value having a longer toe. |
| Shoulder Strength | Set the value for the transition between the mid section and the shoulder of the curve. A value of 0 means no shoulder, value of 1 means a very hard transition. |
| Shoulder Length | Set the value for how many F-stops (EV) to add to the dynamic range of the curve. |
| Shoulder Angle | Set the value for how much overshot to add to the shoulder. |
| Gamma | Set the value for applying a gamma function to the curve. |
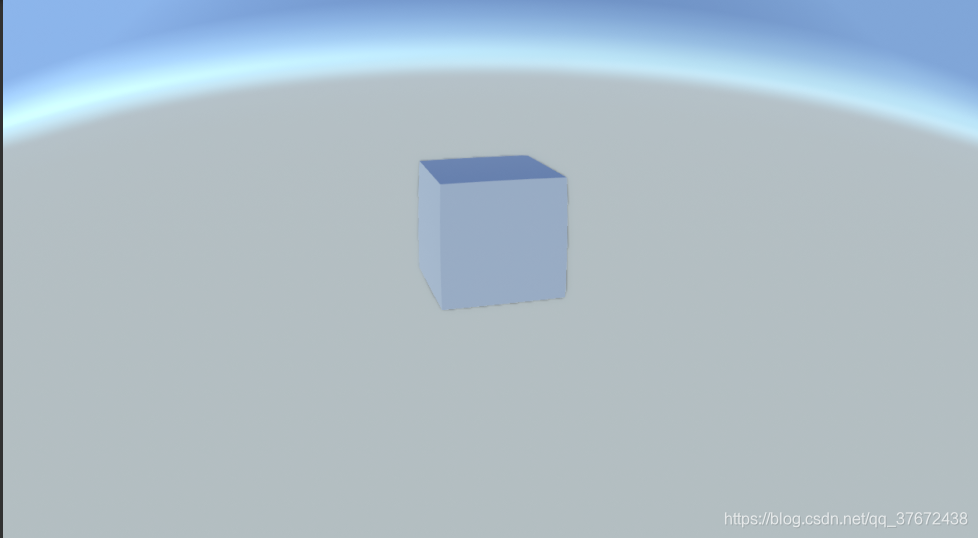
Depth of Field
Depth of Field :景深

Properties
| Property | Function |
|---|---|
| Focus Distance | 设置焦点的距离,就是哪个地方是焦点 |
| Aperture | 光圈大小,光圈和景深成反比,光圈越大,景深越小 |
| Focal Length | 焦距,焦距和景深成反比,焦距越大,景深越小. |
| Max Blur Size | Select the convolution kernel size of the bokeh filter from the dropdown. This setting determines the maximum radius of bokeh. It also affects the performance (the larger the kernel is, the longer the GPU time is required). |
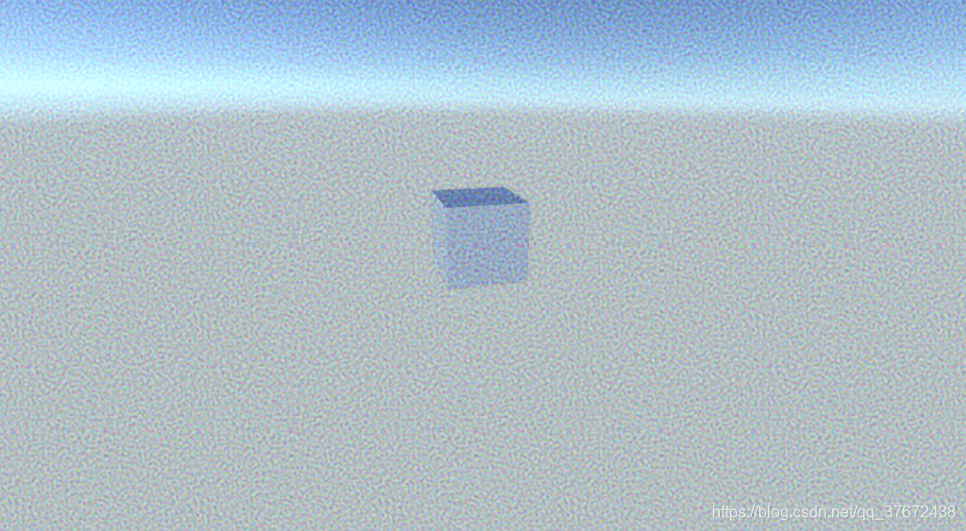
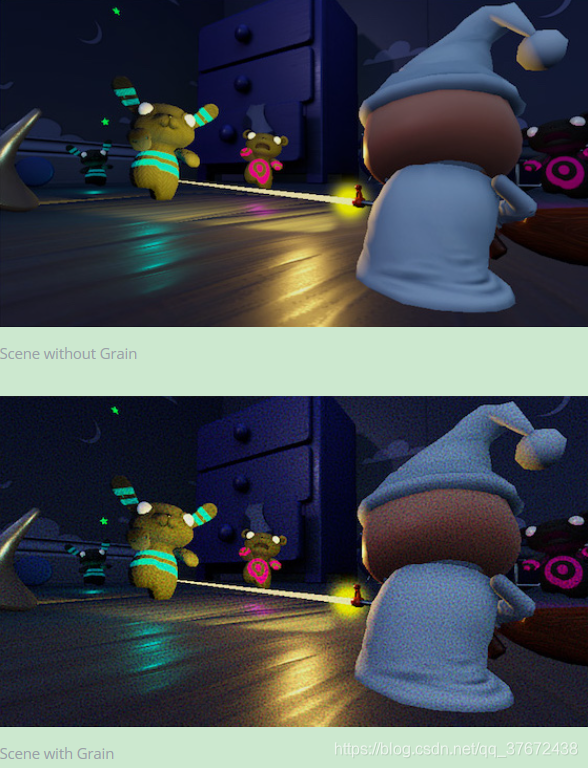
Grain
Grain :给屏幕添加噪点

Properties
| Property | Function |
|---|---|
| Colored | 启动彩色噪点,打开耗费性能. |
| Intensity | 强度 |
| Size | 噪点大小 |
| Luminance Contribution | 设置数值,控制噪声响应曲线。此值基于场景亮度。值越低场景中黑暗的地方,噪点就少。 |
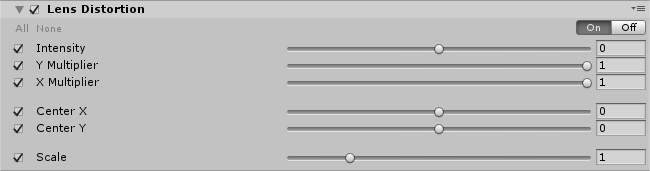
Lens Distortion
Lens Distortion:扭曲图片,鱼眼镜头
Properties
| Property | Function |
|---|---|
| Intensity | 设置鱼眼镜头的强度 |
| X Multiplier | 在X轴上设置强度倍增器。将其设置为0以禁用此轴上的失真。 |
| Y Multiplier | 在Y轴上设置强度倍增器。将其设置为0以禁用此轴上的失真。 |
| Center X | 设置畸变中心点(X轴)。 |
| Center Y | 设置畸变中心点(Y轴) |
| Scale | 设置全局屏幕缩放的值。 |
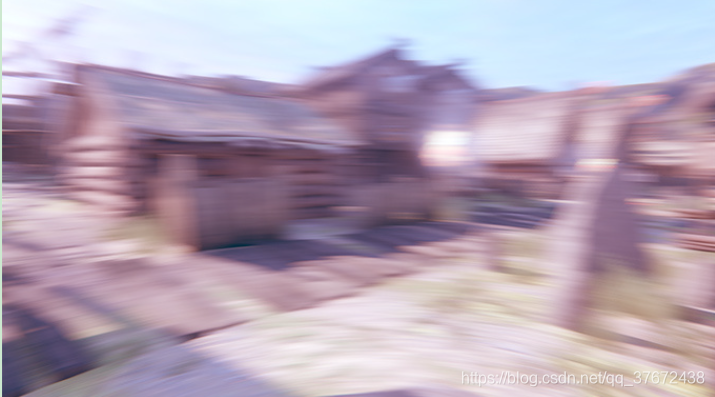
Motion Blur
Motion Blur运动模糊,当物体的运动速度大于曝光时间,物体就会模糊.

Properties
| Property | Function |
|---|---|
| Shutter Angle | 设置旋转快门的角度。更大的值提供更长的曝光时间和更强的模糊效果 |
| Sample Count | 设置采样点数量的值。这会影响质量和性能,较低的值,性能越高 |
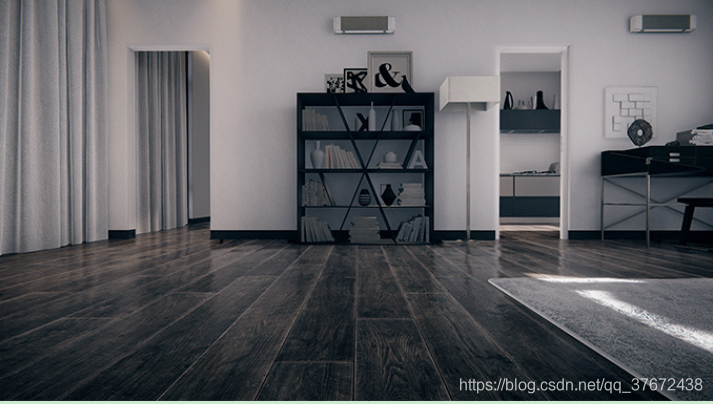
Screen Space Reflections
The Screen Space Reflection 空间反射,在一些镜子和小水坑的时候容易用,防止反射光过强
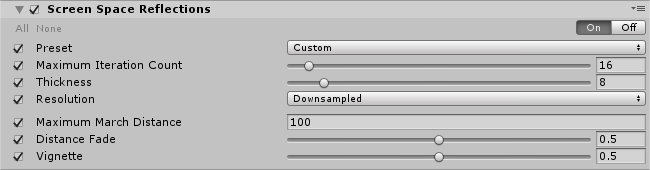
Properties
| Property | Function |
|---|---|
| Preset | 渲染质量预设 |
Maximum Iteration Count (Custom preset only) | 更高的数值意味着更多的反射。 |
Thickness (Custom preset only) | 设置射线厚度的值。值越低,资源越密集,但检测的细节越小。 |
Resolution (Custom preset only) | 选择内部缓冲区的大小。选择Downsample以最大化性能。Supersample是较慢的,但产生更高的质量的结果。 |
| Maximum March Distance | 设置在场景中穿越的最大距离,之后将停止绘制反射。 |
| Distance Fade | 设置距离的值,使反射在近平面附近渐褪。这对于隐藏常见的工件非常有用。. |
| Vignette | 选择使屏幕边缘附近的反射褪色的值。 |
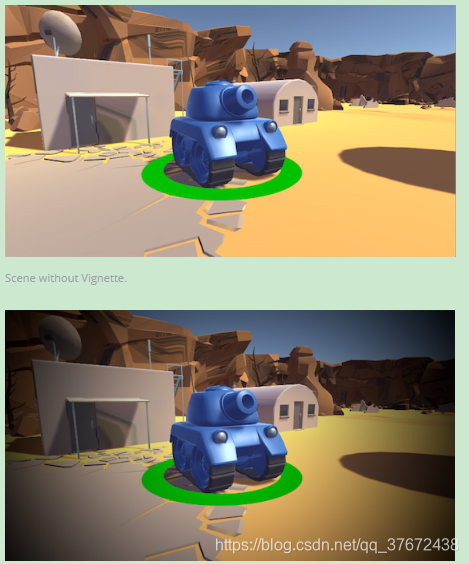
Vignette
Vignette 使图像的边缘变暗,使图像的中心变亮
Classic
经典模式
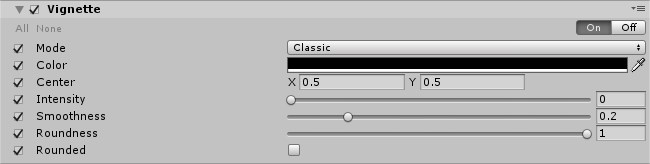
Properties
| Property | Function |
|---|---|
| Color | 设置颜色. |
| Center | 设置中心点,屏幕重心是 [0.5,0.5]). |
| Intensity | 强度 |
| Smoothness | 平滑度 |
| Roundness | 值越小包围图形越方 |
| Rounded | 启用时,使用圆形包围,禁用时,使用方形 |


 1566
1566

 被折叠的 条评论
为什么被折叠?
被折叠的 条评论
为什么被折叠?
 到【灌水乐园】发言


