


本文是图象分割数据集进行数据扩增,和图象分类进行数据扩增有稍许不同
需求:
已有的图象分割数据集已经进行了五折交叉验证,得到了分配结果。但是数据量不够,就对原始数据量进行图象增强,然后保存,重写交叉分配结果,在模型训练时,根据是否需要数据扩增来读取不同的文件夹,进行模型训练。最后的结果如下:
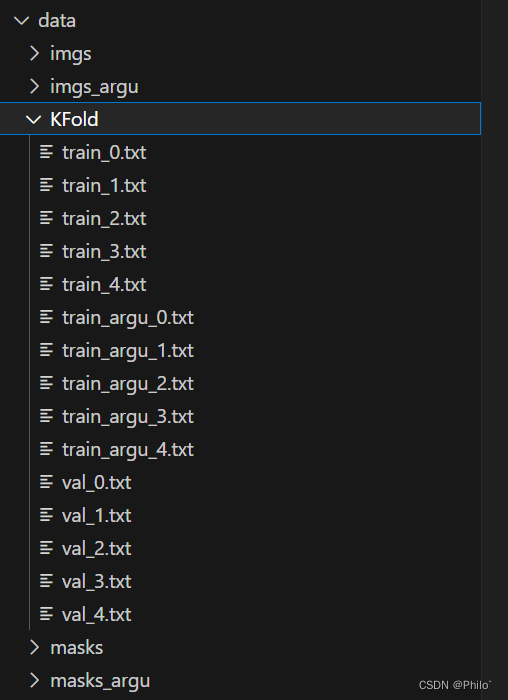
imgs: 原始数据,只有385张图片
imgs_argu: 增强后的数据,使用了两种增强方式,再加上原始图象,共3853张图象
KFold: 交叉验证时,得到的数据分配,train和val是读取原始的数据集,train_argu是进行数据扩增时,模型训练需要读取的文件
masks:原始mask数据,是imgs对应的GT图象,共385张图片
masks_argu: 增强后的mask数据,是imgs_argu对应的GT图象,共3853张图象
1 思路
- 正常的进行交叉验证,得到对应的train和val.txt
- 对原始的数据进行增强,图片名称添加标识,区分不同,然后保存到imgs_argu和mask_argu文件夹中
- 遍历train_i.txt文件,针对train_i.txt文件,将数据读取出来,形成列表,然后再逐个的按照当时增强后的名称规则进行数据写入到train_argu_i.txt文件中
- 模型训练时,需要扩增数据,就读取train_argu.txt文本,再结合路径从imgs_argu和masks_argu中找到图片。
2 交叉验证实现
# K折交叉验证,将数据分为5分进行训练,所以会产生5个训练集和测试集
# 需要注意得是,在分割数据集中,imgs和masks的文件名称是相同的,最多只有文件名后缀不同

import os
from sklearn.model_selection import KFold

# 传入图片所在文件夹父目录,因为需要在同一目录下生成KFold文件夹用来存放交叉验证的分配结果
def Fold(path, num):
    file_path = path+"/imgs"
    file_list = os.listdir(file_path)   # 获取文件夹下的所以文件 返回的是列表
    file_list.sort()     # 对列表内容排个序 可有可无

    kf = KFold(n_splits=num, shuffle=True)      # √ 这个最重要,实例化划分类对象,一共划分为5分,每次划分时打乱,划分的是序号,最后写的操作还是按照序号进行匹配是写入
    splits_list = []   #需要存入的分配结果,五个,要存下来,然后一个一个写入
    for idx, idn in enumerate(kf.split(file_list)):   # 这里进行遍历加入,kf.split的返回值包含两个部,一个训练集,一个测试集
        print(f"第{idx}训练集合和测试集合:",len(idn[0]),len(idn[1]))   # idn[0]为训练集  idn[1]为训练集 每个里面都有num个具体分配情况
        # print(idn[0],"11"*10)
        # print(idn[1],"22"*10)
        splits_list.append(idn)  # 将结果存入,用于后续的文件写操作

    os.makedirs(f'{path}/KFold', exist_ok=True)   # 在传入的目录下创建KFold文件夹,用来存放具体分配结果

    for i in range(len(splits_list)): # 正式写分配结果
        with open(f'{path}/KFold/train_' + str(i) + '.txt', 'w') as f:
            for idx in splits_list[i][0]:
                f.write(file_list[idx] + '\n')    # 将训练集写入txt文件中
        with open(f'{path}/KFold/val_' + str(i) + '.txt', 'w') as f:
            for idx in splits_list[i][1]:
                f.write(file_list[idx]+ '\n')   # 将测试集写入txt文件中


if __name__ == '__main__':
    Fold(path="data/", num=5)    # 这里写相对路径就可以了,绝对路径也可以,可自行尝试
代码中的注释已经介绍的很详细啦,可以添加print方法进行逐步的理解!
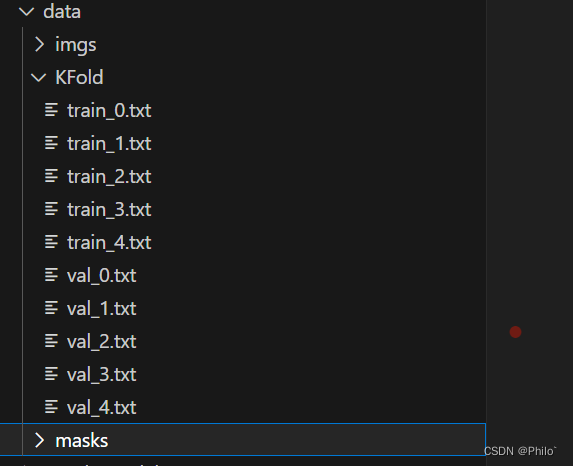
得到以下结果:
3 数据扩增并且保存
代码包含常见的数据增强手段,重点是后面的数据保存!
# -*- coding: utf-8 -*-

import cv2
import numpy as np
import os.path
import copy
import matplotlib.pyplot as plt
from PIL import Image

# 椒盐噪声
def SaltAndPepper(src,percetage):
    SP_NoiseImg=src.copy()
    SP_NoiseNum=int(percetage*src.shape[0]*src.shape[1])
    for i in range(SP_NoiseNum):
        randR=np.random.randint(0,src.shape[0]-1)
        randG=np.random.randint(0,src.shape[1]-1)
        randB=np.random.randint(0,3)
        if np.random.randint(0,1)==0:
            SP_NoiseImg[randR,randG,randB]=0
        else:
            SP_NoiseImg[randR,randG,randB]=255
    return SP_NoiseImg

# 高斯噪声
# percetage代表的是出现的噪声点数量,越高,噪声点越多
def addGaussianNoise(image,percetage):
    G_Noiseimg = image.copy()
    w = image.shape[1]
    h = image.shape[0]
    G_NoiseNum=int(percetage*image.shape[0]*image.shape[1])
    for i in range(G_NoiseNum):
        temp_x = np.random.randint(0,h)
        temp_y = np.random.randint(0,w)
        G_Noiseimg[temp_x][temp_y][np.random.randint(3)] = np.random.randn(1)[0]
    return G_Noiseimg

# 昏暗
def darker(image,percetage=0.9):
    image_copy = image.copy()
    w = image.shape[1]
    h = image.shape[0]
    #get darker
    for xi in range(0,w):
        for xj in range(0,h):
            image_copy[xj,xi,0] = int(image[xj,xi,0]*percetage)
            image_copy[xj,xi,1] = int(image[xj,xi,1]*percetage)
            image_copy[xj,xi,2] = int(image[xj,xi,2]*percetage)
    return image_copy

# 亮度
def brighter(image, percetage=1.5):
    image_copy = image.copy()
    w = image.shape[1]
    h = image.shape[0]
    #get brighter
    for xi in range(0,w):
        for xj in range(0,h):
            image_copy[xj,xi,0] = np.clip(int(image[xj,xi,0]*percetage),a_max=255,a_min=0)
            image_copy[xj,xi,1] = np.clip(int(image[xj,xi,1]*percetage),a_max=255,a_min=0)
            image_copy[xj,xi,2] = np.clip(int(image[xj,xi,2]*percetage),a_max=255,a_min=0)
    return image_copy

# 旋转 angle度数
def rotate(image, angle, center=None, scale=1.0):
    (h, w) = image.shape[:2]
    # If no rotation center is specified, the center of the image is set as the rotation center
    if center is None:
        center = (w / 2, h / 2)
    m = cv2.getRotationMatrix2D(center, angle, scale)
    rotated = cv2.warpAffine(image, m, (w, h), borderValue=(255,255,255))
    return rotated

# 翻转
def flip(image):
    flipped_image = np.fliplr(image)
    return flipped_image

# 颜色反转
def image_inverse(input):
    value_max = np.max(input)
    output = value_max - input
    return output

# 这个没用,是将数据都缩小到一定范围内,较少了像素之间的区别,不适合分割任务
def image_log(input):
    output = np.copy(input)
    output[...,0] = np.log(input[...,0] + 1)
    output[...,1] = np.log(input[...,1] + 1)
    output[...,2] = np.log(input[...,2] + 1)

    return output


# 增加亮度 或者是提升对比度
def img_conv(input, a=1.5, b=0):
    output = cv2.convertScaleAbs(input,alpha=a,beta=b)
    return output

# 限制阈值的自适应直方图均衡化
# clipLimit未像素值阈值,tileGridSize在多大范围内进行自适应均衡化
def equ_patch(input, clipLimit=190, tileGridSize=(8,8)):
    clahe = cv2.createCLAHE(clipLimit,tileGridSize)
    output = clahe.apply(input)
    return output

# 全局均衡化 但是两个均衡化需要将数据规范到uin8上,线性转化 后期有需要进行修改
def equa_global(input):
    out = cv2.equalizeHist(input)
    return out

def img_resize(input, h, w):
    out = cv2.resize(input, (h, w))
    return out


# 这里区分是否是mask的作用是,针对mask不做加噪处理,只是对img进行加噪
# 同时在进行实际的扩增时,自己展示一下图片,是否是自己想要的,确认好再进行扩增
def Argu1(img, mask=False):
    if mask == False:   # 使用旋转 椒盐噪声 提升亮度
        img_argu = rotate(img, 20)
        img_argu = SaltAndPepper(img_argu, 0.7)
        img_argu = brighter(img_argu,1.3)
    else:
        img_argu = rotate(img, 20)
        img_argu = brighter(img_argu,1.3)
    # img_argu = cv2.resize(img_argu, (256, 256))
    return img_argu


def Argu2(img, mask=False):
    if mask == False:   # 使用旋转 高斯噪声 降低亮度
        img_argu = brighter(img,0.9)
        img_argu = rotate(img_argu, -20)
        img_argu = addGaussianNoise(img_argu, 0.7)
    else:
        img_argu = brighter(img,1)
        img_argu = rotate(img_argu, -20)
    # img_argu = cv2.resize(img_argu, (256, 256))
    return img_argu

from tqdm import tqdm
file_dir = r'E:/Seg/data/imgs/'   # 这里是需要扩增的文件夹目录11,后面加上/
file_argu =  r'E:/Seg/data/imgs/'  # 这里是建立在同一目录下的扩增文件夹目录22, 后面加上/
for img_name in tqdm(os.listdir(file_dir)):  # tqdm是用来展示遍历进程的, 同时获取到11中的文件,遍历,读取,转换
    img_path = file_dir + img_name
    img = cv2.imread(img_path)  # 这里默认分割数据集img和mask名称,除了后缀不同,其余都相同
    mask = cv2.imread(img_path.replace("imgs", "masks").replace("jpg", "tif").replace("bmp", "tif"))  # 读取对应的mask文件

    img_1 = Argu1(img, False)
    mask_1 = Argu1(mask, True)
    img_2 = Argu2(img, False)
    mask_2 = Argu2(mask, True)

    cv2.imwrite(file_argu + img_name[0:-4] + '.jpg', img)
    cv2.imwrite(file_argu.replace("imgs", "masks") + img_name[0:-4] + '.tif', mask)

    cv2.imwrite(file_argu + img_name[0:-4] + '_Arg1.jpg', img_1)  # 扩增后的图片,在图片名称后加一个标识用来和原始图片进行区分
    cv2.imwrite(file_argu.replace("imgs", "masks") + img_name[0:-4] + '_Arg1.jpg'.replace("jpg", "tif"), mask_1)

    cv2.imwrite(file_argu + img_name[0:-4] + '_Arg2.jpg', img_2)
    cv2.imwrite(file_argu.replace("imgs", "masks") + img_name[0:-4] + '_Arg2.jpg'.replace("jpg", "tif"), mask_2)
结果:
将数据增强后保存在相应的文件夹中!代码中我是用了两种组合的数据增强手段,自己可以照葫芦画瓢,使用自己需要的数据增强!
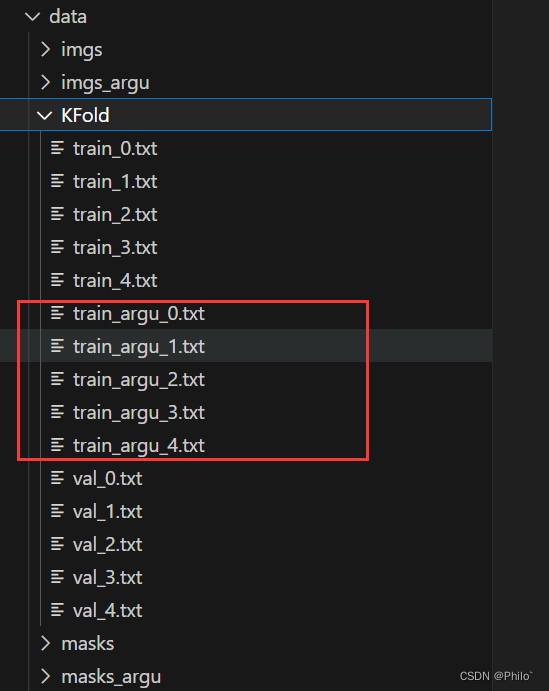
4 读原始交叉验证文件,针对argu文件夹新写一个
import os

file_path = r"E:\\Seg\\data\\KFold"
f_list = os.listdir(file_path)  # 找到K折交叉验证的文件夹目录
for i, name in enumerate(f_list):  # 遍历其,然后读取Tran文件夹,因为只有在训练集上需要数据增强,测试集不需要
    if "train" in name:
        f_add = os.path.join(file_path, name)
        arg_add = os.path.join(file_path,name).replace("train", "train_argu111")   # 同级目录下新建和train对应的扩增后的文件

        img_path = []
        with open(f_add, "r") as f:  # 先读取,存在列表中
            for i in f.readlines():
                img_path.append(f"{i.strip()}")
        with open(arg_add, "w+") as w:   # 再写入对应的文件中
            for i, n in enumerate(img_path):
                arg1 = n[0:-4] + "_Arg1" + ".jpg" + "\n"
                arg2 = n[0:-4] + "_Arg2" + ".jpg" + "\n"
                org = n[0:-4] + ".jpg" + "\n"
                w.write(arg1)
                w.write(arg2)
                w.write(org)
结果:
5 模型Dataset
'''
Descripttion:
Author: Philo
Date: 2023-02-08 12:10:45
LastEditors: Philo
LastEditTime: 2023-02-20 19:00:11
'''
import torch
from torchvision import transforms
import os
from matplotlib import pyplot as plt
import cv2
from torch.utils.data import DataLoader, Dataset
import torch.nn as nn
from PIL import Image
import numpy as np
from DataArgu import JointRandomHorizontalFlip, JointRandomVerticalFlip, JointRandomRotate,JointResize

class Custom_dataset(Dataset):
    def __init__(self, path, train, fold, joint_transforms, in_ch, Ad_data=False): #path="data"
        super(Custom_dataset, self).__init__()
        self.path = path
        self.train = train
        self.fold = fold
        self.in_ch = in_ch
        self.Ad_data = Ad_data
        self.joint_transforms = joint_transforms
        if self.train:
            self.image_file = f"{path}/KFold/train_{fold}.txt"
            if self.Ad_data:
                self.image_file = f"{path}/KFold/train_argu_{fold}.txt"
        else:
            self.image_file = f"{path}/KFold/val_{fold}.txt"
        print(self.image_file)
        if not os.path.exists(self.image_file):
            raise FileNotFoundError("File is not Found!")
        self.img_path = []
        with open(self.image_file, "r") as f:
            for i in f.readlines():
                self.img_path.append(f"{i.strip()}")

    def __len__(self):
        return len(self.img_path)

    def __getitem__(self, index):
        if self.train:
            if self.Ad_data:
                if self.in_ch == 3:
                    img = Image.open(os.path.join(self.path, "imgs_argu", self.img_path[index]))
                else:
                    img = Image.open(os.path.join(self.path, "imgs_argu", self.img_path[index])).convert("L")
                mask = Image.open(os.path.join(self.path, "masks_argu", self.img_path[index]).replace("bmp", "tif").replace("jpg", "tif")).convert("L")
            else:
                if self.in_ch == 3:
                    img = Image.open(os.path.join(self.path, "imgs", self.img_path[index]))
                else:
                    img = Image.open(os.path.join(self.path, "imgs", self.img_path[index])).convert("L")
                mask = Image.open(os.path.join(self.path, "masks", self.img_path[index]).replace("bmp", "tif").replace("jpg", "tif")).convert("L")
        else:
            if self.in_ch == 3:
                img = Image.open(os.path.join(self.path, "imgs", self.img_path[index]))
            else:
                img = Image.open(os.path.join(self.path, "imgs", self.img_path[index])).convert("L")
            mask = Image.open(os.path.join(self.path, "masks", self.img_path[index]).replace("bmp", "tif").replace("jpg", "tif")).convert("L")


        trans = transforms.ToTensor()

        ob = [img, mask]
        # if self.joint_transforms is not None:  # 同时改变大小和剪裁
        #     img = self.joint_transforms(img)
        #     mask = self.joint_transforms(mask)

        if self.joint_transforms is not None:
            img, mask = self.joint_transforms(ob)
        # print(type(img))
        # 将img转化为[0,1]之间
        img = trans(img) # 1/3*256*256

        mask_np = np.asarray(mask).copy()
        mask_np[mask_np<255] = 1
        mask_np[mask_np==255] = 0
        mask_np = mask_np.reshape(1, mask_np.shape[0], mask_np.shape[1])  # 1*256*256

        return img, mask_np


if __name__ == "__main__":

    # joint_trans = transforms.Compose([
    #     transforms.Resize((256,256)),  # 这里的大小必须是2的倍数或者有一定关系,否则在通道连接上,会因为大小不同报错
    # ])
    joint_trans = transforms.Compose([
        JointRandomVerticalFlip(),
        JointRandomHorizontalFlip(),
        JointResize(256),
    ])
    dataset = Custom_dataset(path="data", train=True, fold=0, joint_transforms=joint_trans, in_ch=3,Ad_data=True)
    dataloader = DataLoader(dataset, batch_size=1, shuffle=True)

    # 展示图片
    for i, (img, mask) in enumerate(dataloader):
        trans = transforms.ToPILImage()
        plt.subplot(2,5,i+1)
        plt.imshow(trans(img.squeeze().squeeze()), cmap="gray")
        plt.subplot(2,5,i+6)
        plt.imshow(trans(mask.squeeze().squeeze()), cmap="gray")
        if i==4:
            break
    plt.show()

    # 信息展示
    # for i, (img, mask) in enumerate(dataloader):
    #     print(type(img), type(mask))
    #     print(img.shape, mask.shape)
    #     print(img, mask)
    #     if i == 0:
    #         break
这是我自己的Dataset类,大家可以参考一下,以上四个操作结束后,就可以继续之后的模型训练了!
6 总结和建议
- 从网上没有找到类似的,就自己想了一下,有着很强的个性化,通用性有待提高,但是理解了思路,对大家自己写也是有帮助的!
- 先理解,再使用,三个代码中有着很多需要修改成自己的文件目录的地方
- 大家加油!
参考博客:
python批量实现图像数据增强(扩增)


 206
206


 被折叠的 条评论
为什么被折叠?
被折叠的 条评论
为什么被折叠?
 到【灌水乐园】发言


