


 wandb是一个用于机器学习实验跟踪和可视化的平台,支持超参数记录、可视化分析、模型管理以及团队协作。它可以与PyTorch、TensorFlow等框架无缝集成。文章介绍了如何快速上手使用wandb,包括离线模式下使用和数据上传。wandb提供了强大的实验管理和数据分析能力,相比Tensorboard更便于使用。
各位海涵,我想进步,这是我的博士自荐: 2025年博士自荐——给个机会我定肝脑涂地(狗头)
1 wandb介绍
wandb地址:wandb
Wandb(Weights & Biases)是一个用于机器学习实验跟踪和可视化的工具和平台。它旨在帮助机器学习团队更好地组织、记录和共享实验过程和结果。相较于Tensorboard更加方便和智能。
1. 实验跟踪和版本控制: W&B可以记录和跟踪您的机器学习实验,包括超参数、指标、模型架构等。已用到
2. 可视化和分析: W&B提供丰富的可视化工具,可以直观地展示实验结果、训练曲线、指标趋势等。可以轻松地创建交互式图表、散点图、直方图等,以更好地理解和分析实验数据。已用到
3. 模型登记和部署: W&B可以帮助您登记和管理训练的模型,包括模型文件、权重和元数据。可以轻松地共享和部署模型,以便在其他环境中进行推理和评估。暂时没用到
4. 协作和共享: W&B提供团队协作和共享功能,可以邀请团队成员参与实验、查看结果,并进行讨论和反馈。还可以将实验和结果与其他人共享,使其可以在不同的环境中重现和使用您的工作。暂时没用到
5. 集成和兼容性: W&B与常用的机器学习框架(如PyTorch、TensorFlow、Scikit-learn等)以及其他工具(如Jupyter Notebook、Docker等)具有良好的集成和兼容性,可以无缝地与您的工作流程集成。已用到
上图:
2 快速上手
参考链接:wandb quickstart
- 激活conda环境,安装wandb
pip install wandb
如果下载太慢,可以使用以下命令从清华源下载
pip install wandb -i https://pypi.tuna.tsinghua.edu.cn/simple
- 登陆账号,
输入API KEY
wandb login
如果报以下错误,请关闭VPN:
wandb: Network error (ProxyError), entering retry loop.
wandb: W&B API key is configured. Use `wandb login --relogin` to force relogin
- 运行教程案例
import wandb
import random

# start a new wandb run to track this script
wandb.init(
    # set the wandb project where this run will be logged
    project="my-awesome-project",

    # track hyperparameters and run metadata
    config={
    "learning_rate": 0.02,
    "architecture": "CNN",
    "dataset": "CIFAR-100",
    "epochs": 10,
    }
)

# simulate training
epochs = 10
offset = random.random() / 5
for epoch in range(2, epochs):
    acc = 1 - 2 ** -epoch - random.random() / epoch - offset
    loss = 2 ** -epoch + random.random() / epoch + offset

    # log metrics to wandb
    wandb.log({"acc": acc, "loss": loss})

# [optional] finish the wandb run, necessary in notebooks
wandb.finish()
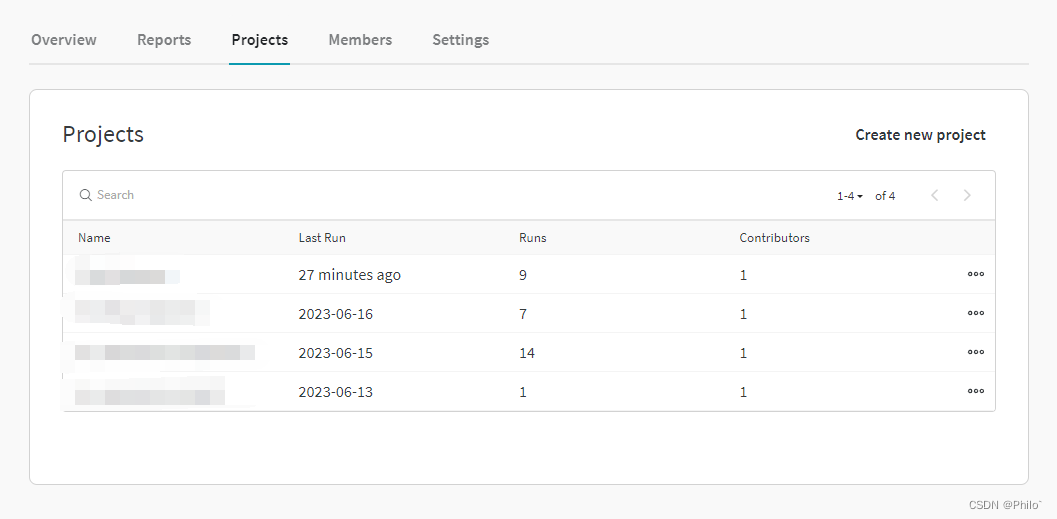
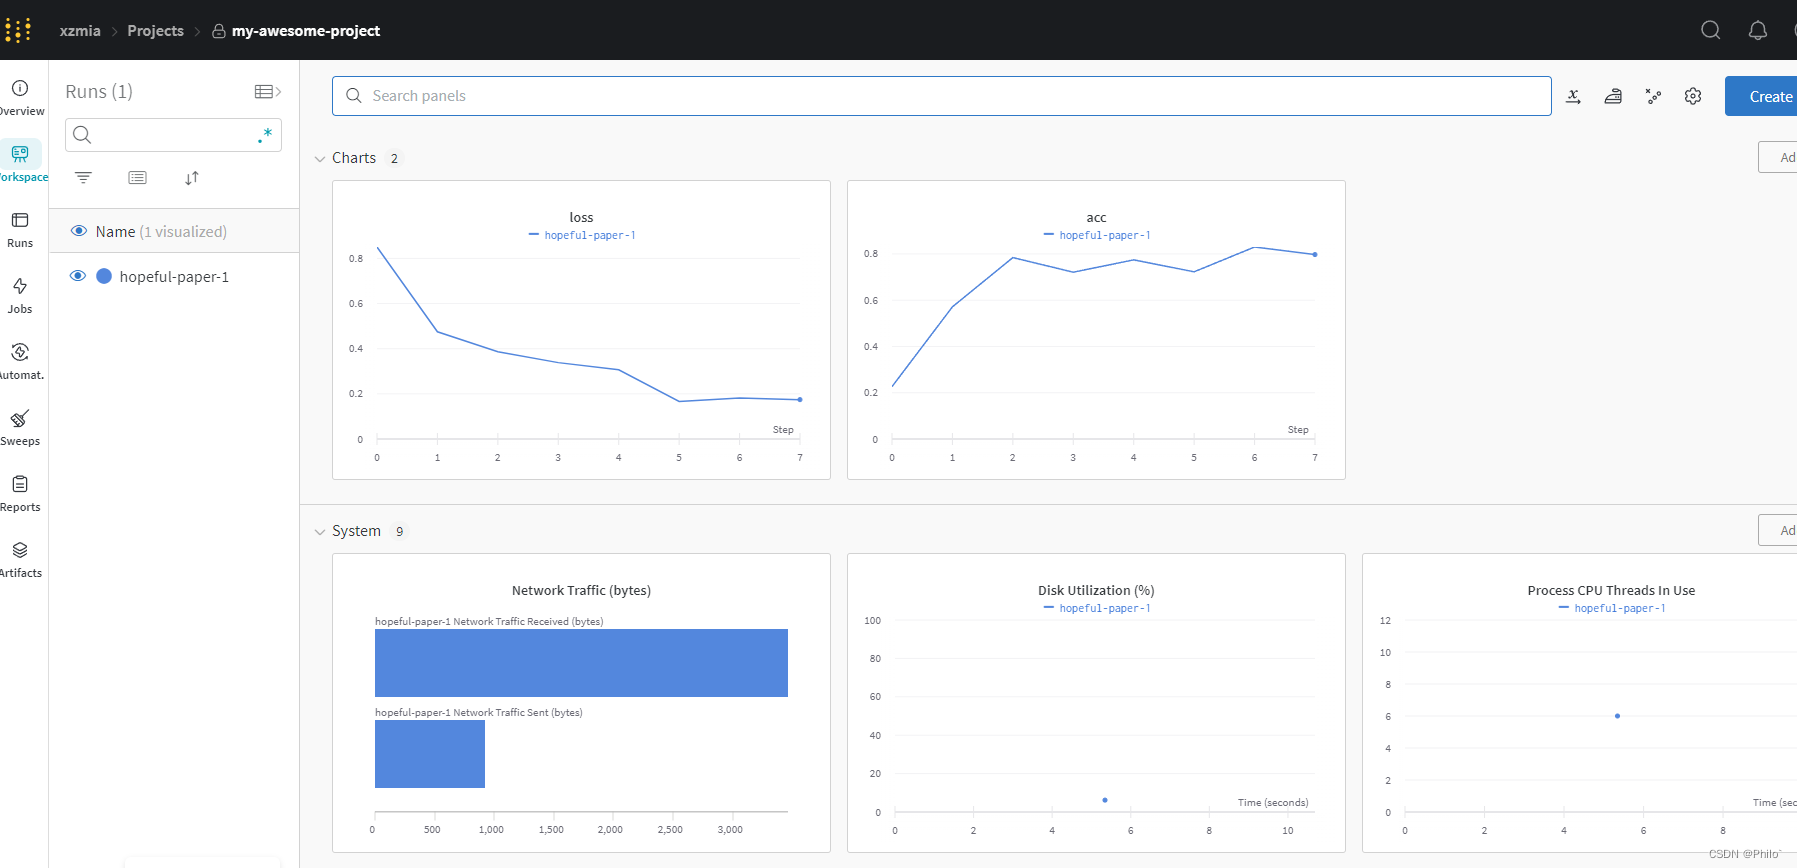
- 查看结果
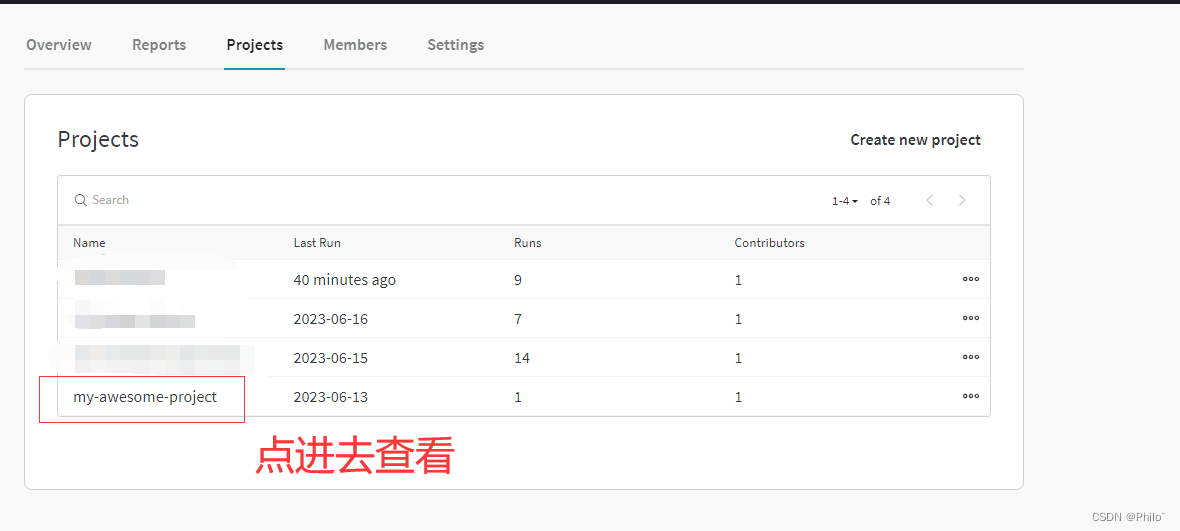
运行的结果,系统GPU使用性能啥的,应有尽有:
3 使用心得
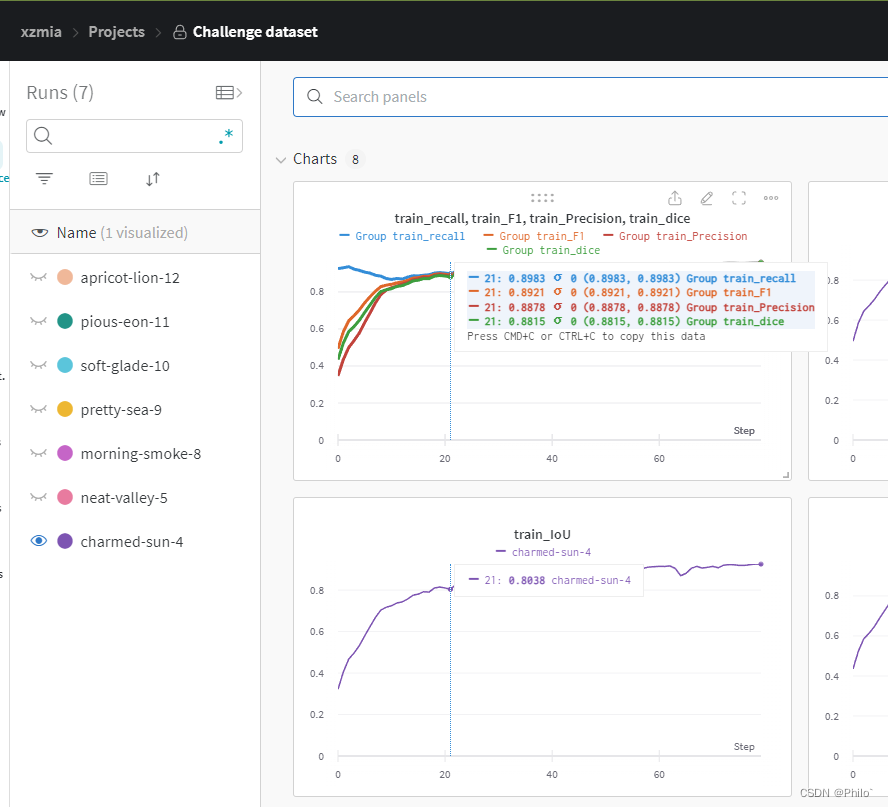
3.1 一张图展示两条线
需求: 在一张图上展示训练的损失和验证损失,或者是训练的准确度和验证的准确度等
初步解决: 将每一步的结果都放在列表中,然后使用wandb.plot.line_series()画图上传到wandb服务器上。
不推荐,数据显示不友好
最终解决: 直接wandb.log上传结果,然后再wandb服务器上挑选数据重新生成新图
大致架构:
import wandb
# 初始化wandb
wandb.init(
    # set the wandb project where this run will be logged
    project="项目名称",

    # track hyperparameters and run metadata
    config={
    "learning_rate": lr,
    ...
    }
)

# 整体嵌入架构
epochs = 100
for i in range(epochs):
    net.train():
    train_total_loss = 0
    for ... in train_loader:
        ...
        ...
        train_total_loss += loss.item()
        train_total_acc += acc(....)
    train_acc = train_total_acc/len(train_loader)

    net.eval()
    val_total_loss = 0
    for ... in val_loader:
        ...
        ...
        val_total_loss += loss.item()
        val_total_acc += acc(...)
    val_acc = val_total_acc/len(val_loader)
    wandb.log({"train_loss":train_total_loss, "val_loss":val_total_loss, "train_acc": train_acc, "val_acc":val_acc})
wandb.finish()
生成图:
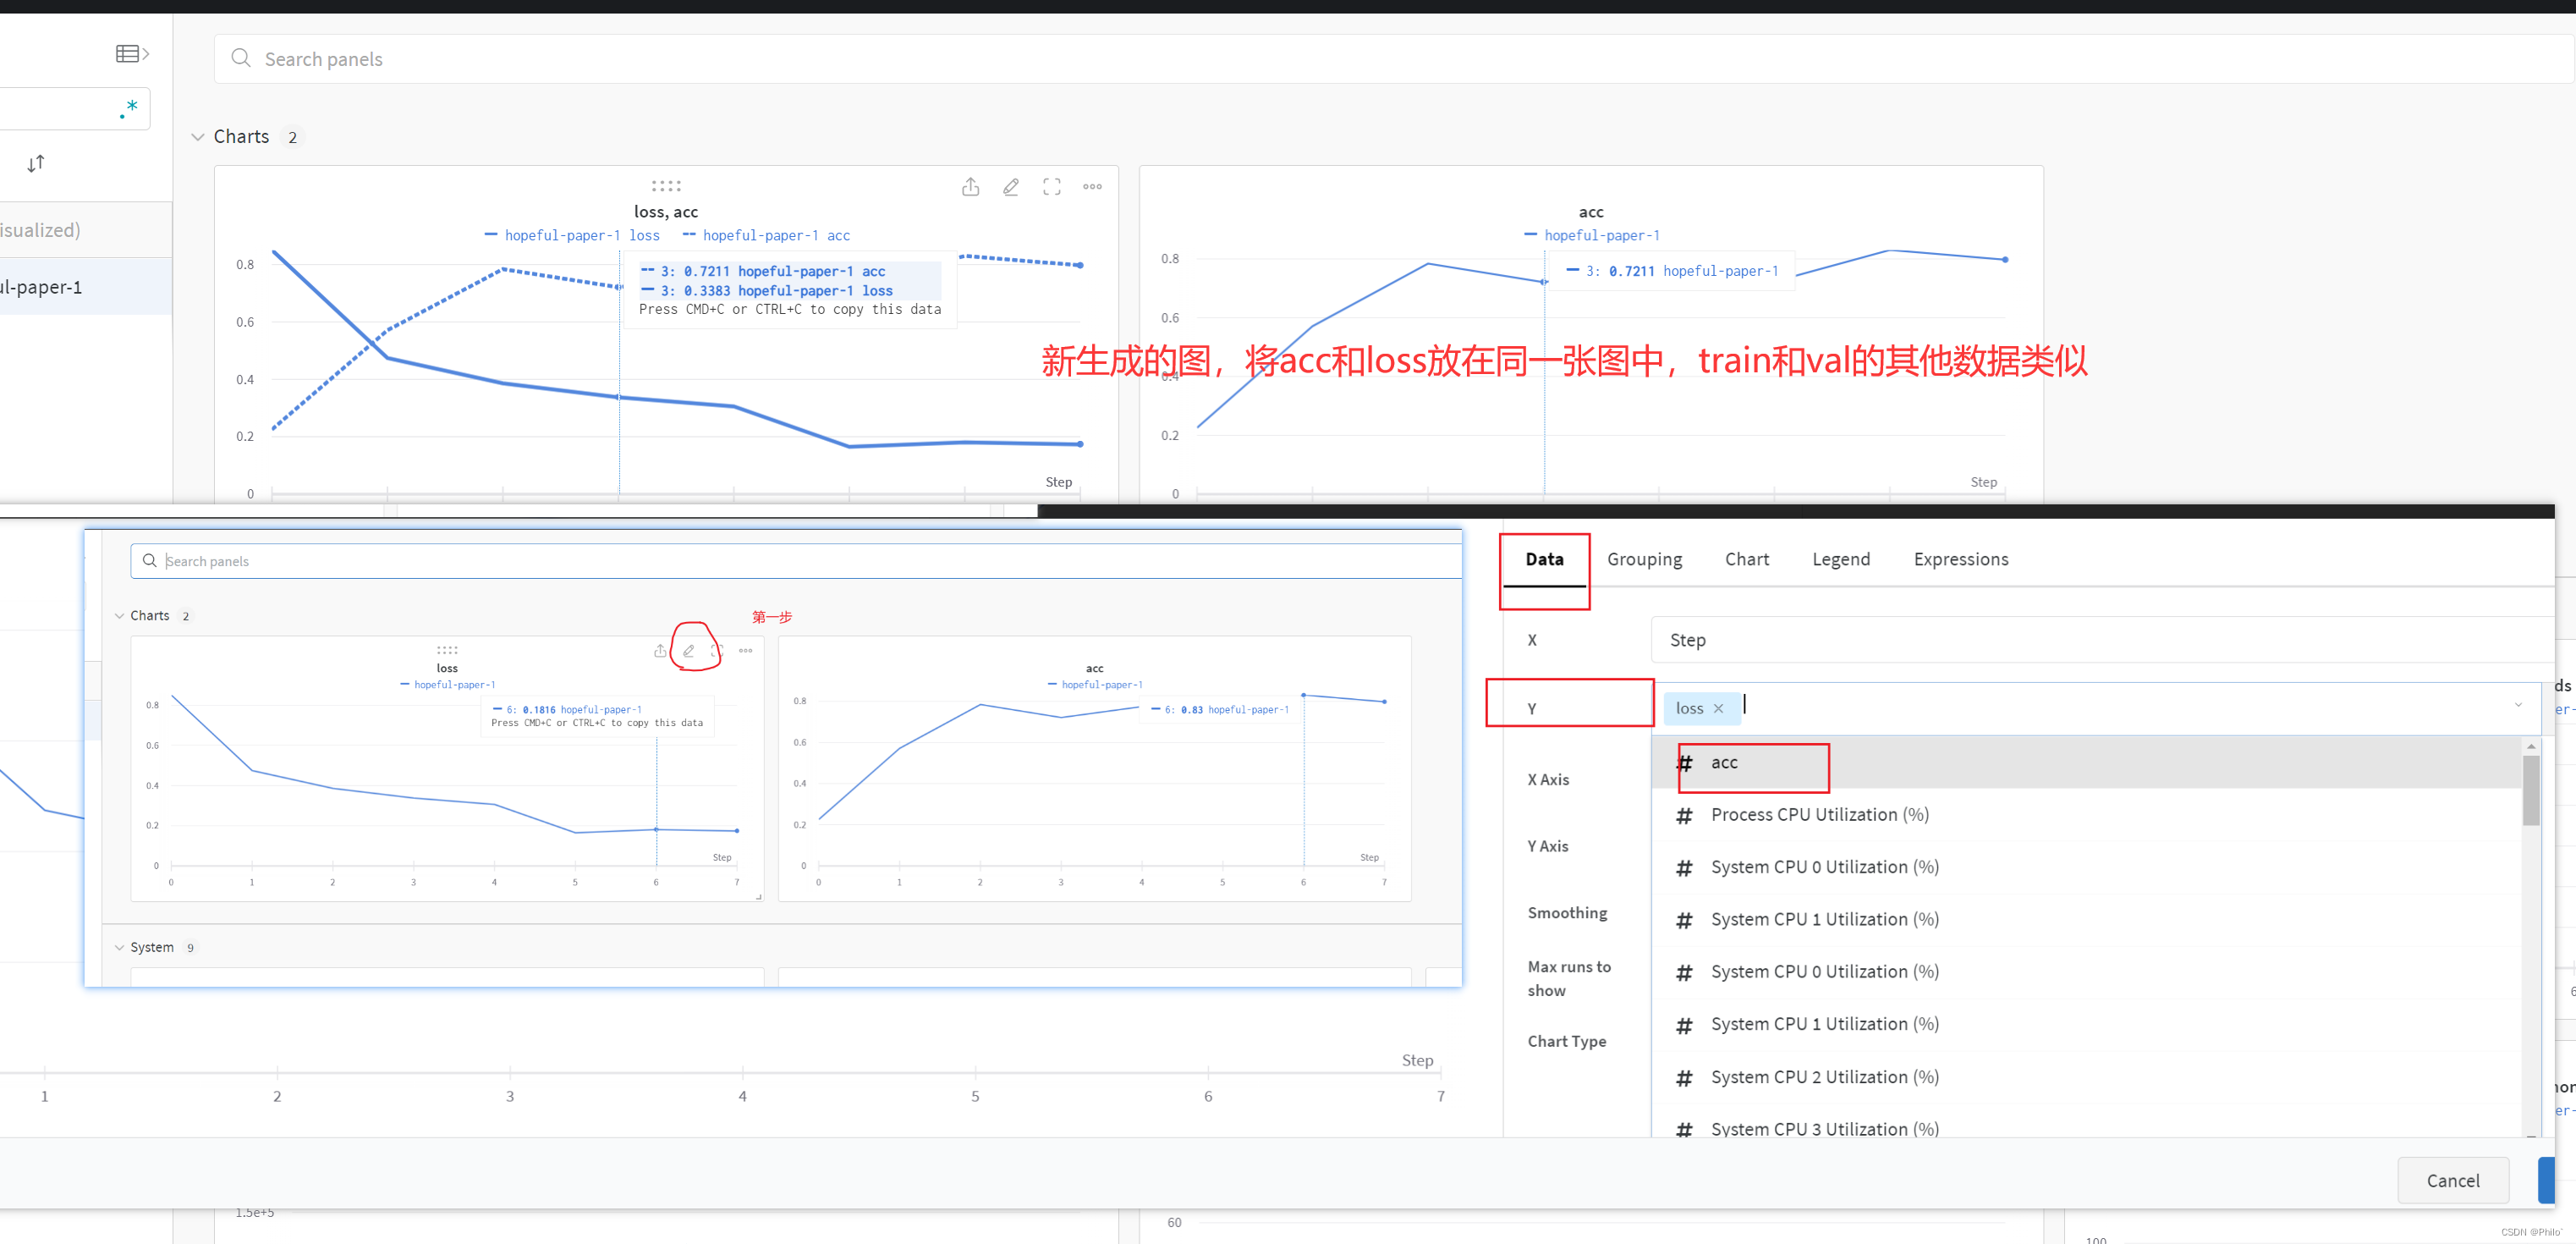
提醒:每一个epoch中最好只使用一个wandb.log。因为我们每次只是记录纵坐标,横坐标是wandb自动记录wandb.log个数的。
不过也可以自行记录纵坐标,有需要可以留言,我会解答的。
3.2 想要科学上网和wandb一起使用(离线使用)
需求: 一般情况下挂VPN会导致wandb初始化出错,不能连接到wandb服务器进行数据同步上传,因此可以采用
离线上传数据。
解决: 使用
os.environ["WANDB_API_KEY"]先离线训练,等到训练完成之后,关闭VPN,使用wandb sync命令进行上传数据
大致架构:
import os
import wandb
os.environ["WANDB_API_KEY"] = '自己的API KEY'
os.environ["WANDB_MODE"] = "offline"
在导包之后添加这两行代码,然后训练结束之后根据提示上传:
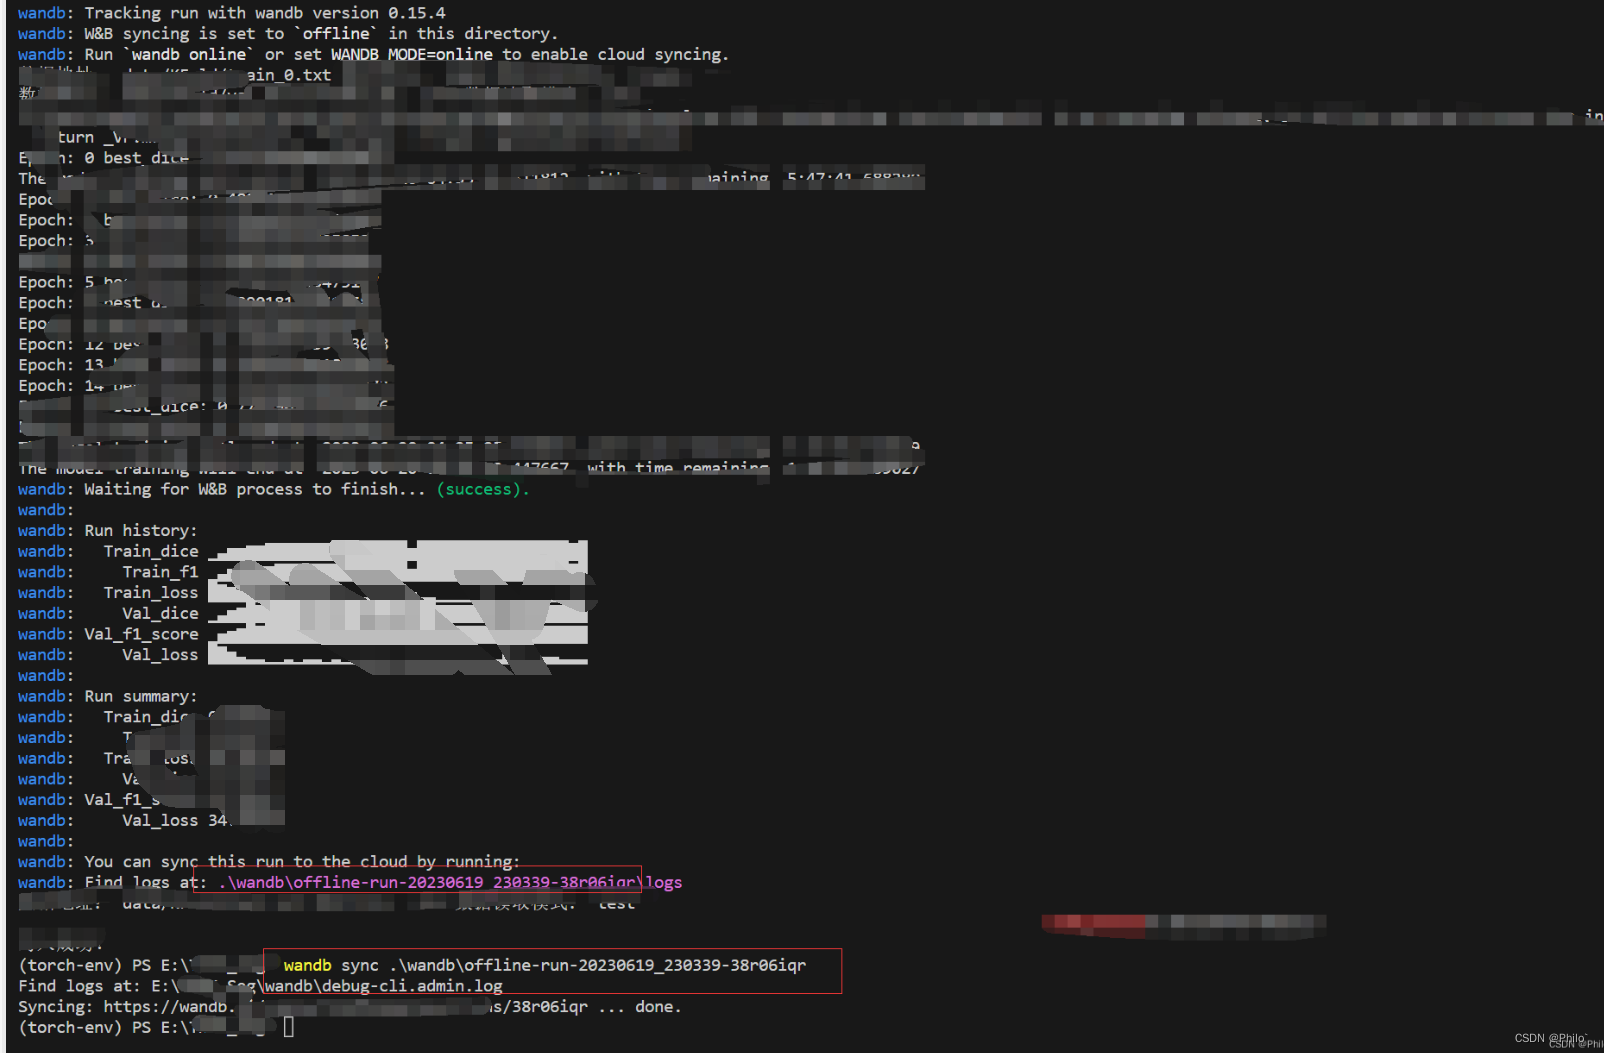
使用命令
wandb sync 数据地址上传数据
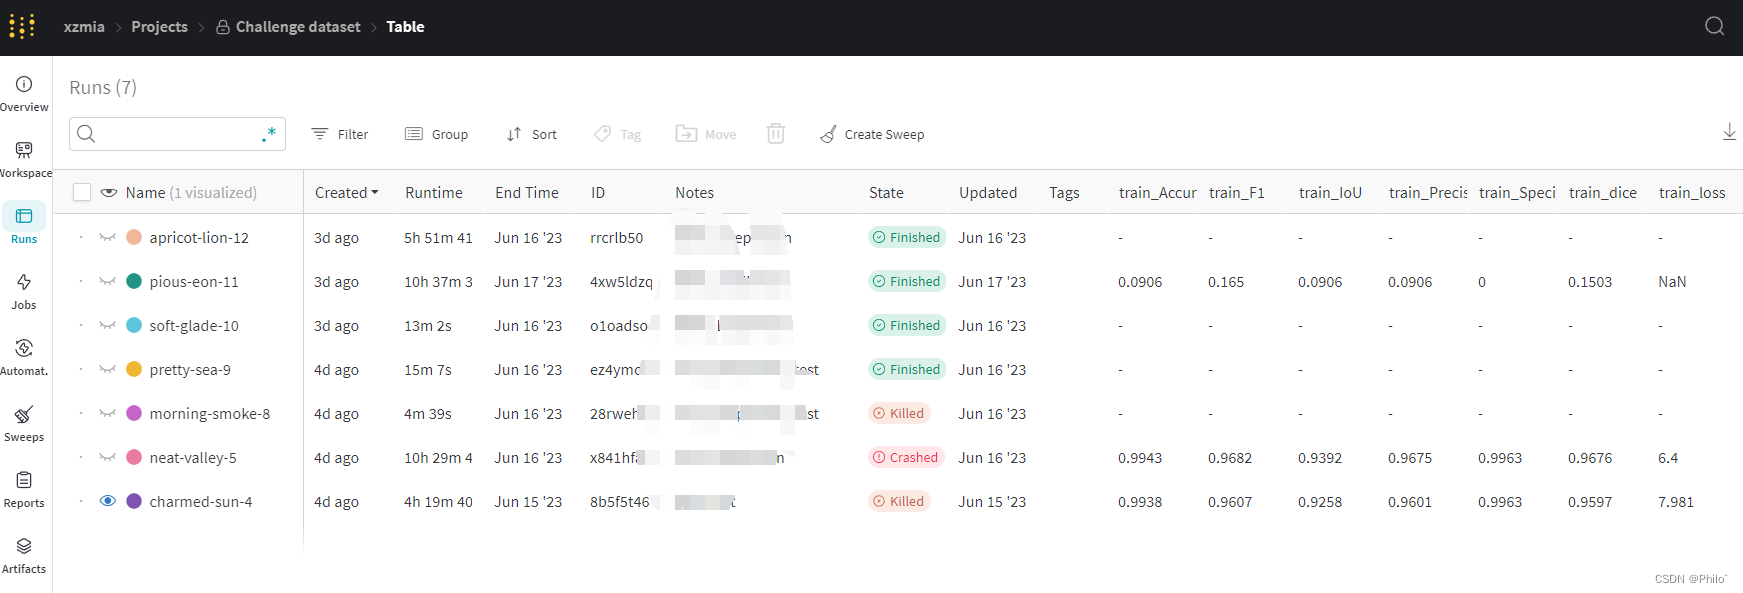
查看结果:
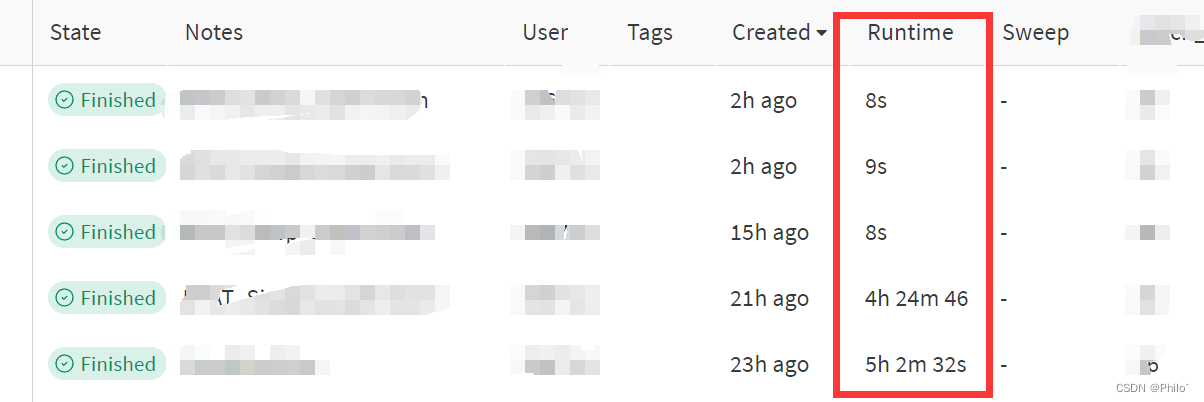
这些运行时间几秒钟的就是我离线上传的数据。
3.3 未完待续
虽然只是初步探索一下,但是发现它的功能真的是超级强大,相较于Tensoboard好用很多,后期用到其他功能也会持续更新的。
wandb操作手册: wandb tutorials


 2万+
2万+

 被折叠的 条评论
为什么被折叠?
被折叠的 条评论
为什么被折叠?
 到【灌水乐园】发言


