


1、前向过程
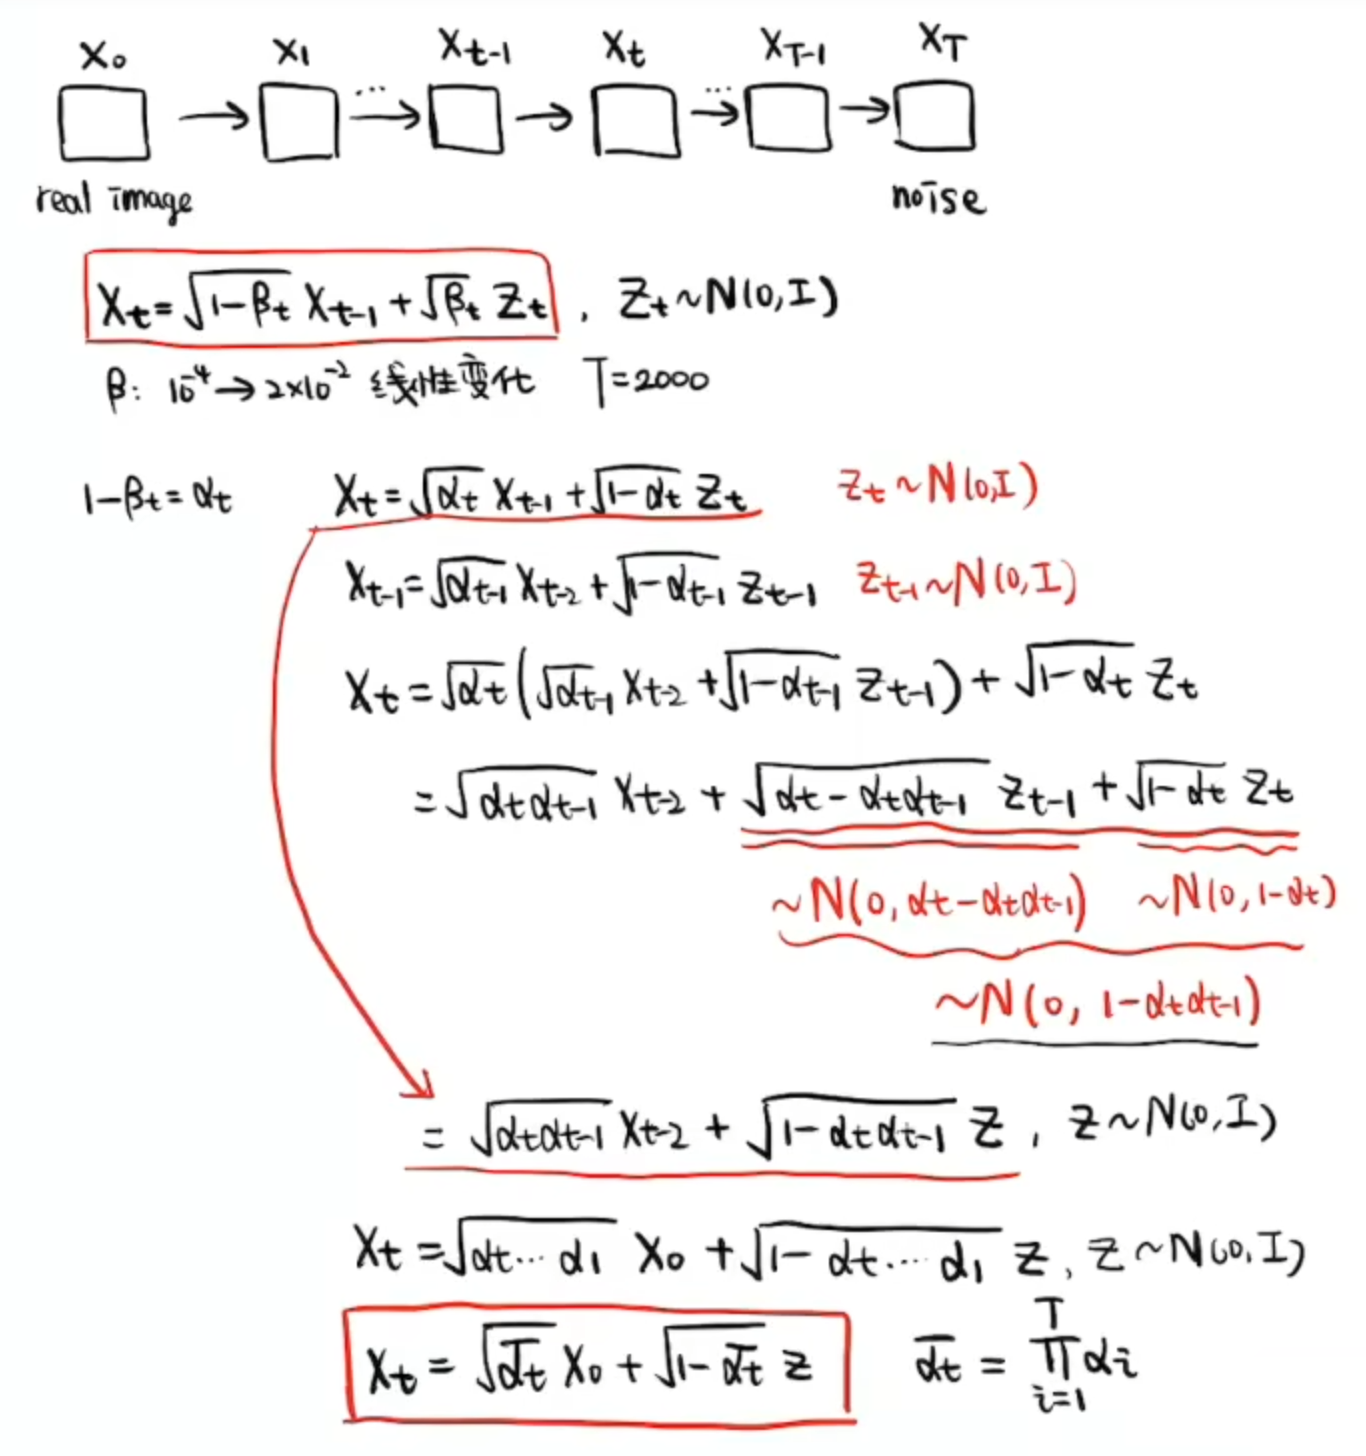
这样我们就可以由初始图像分布 直接算出某一时刻的图像分布
了
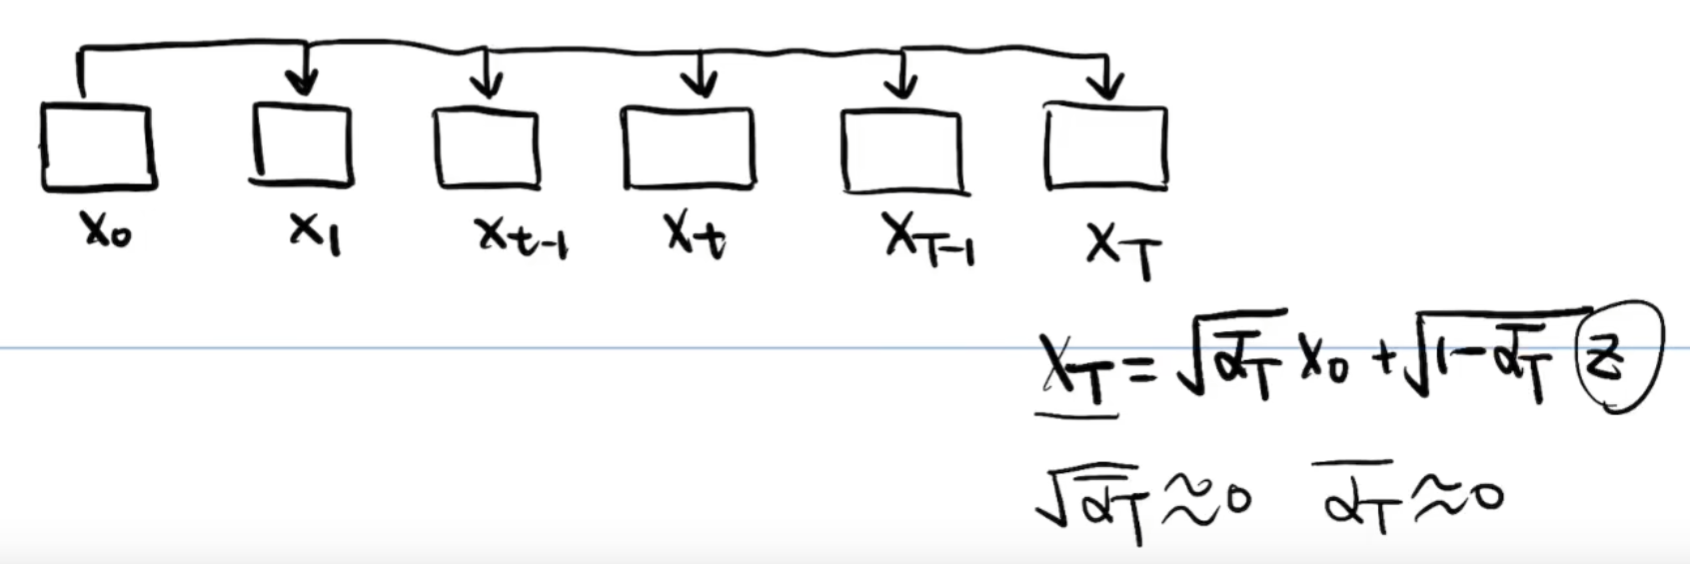
由于最后的图像 是基本上完全由噪声Z组成的,所以上述公式,应该是让
约等于 Z,这样就要求
约等于0
2、逆向过程(Revers)
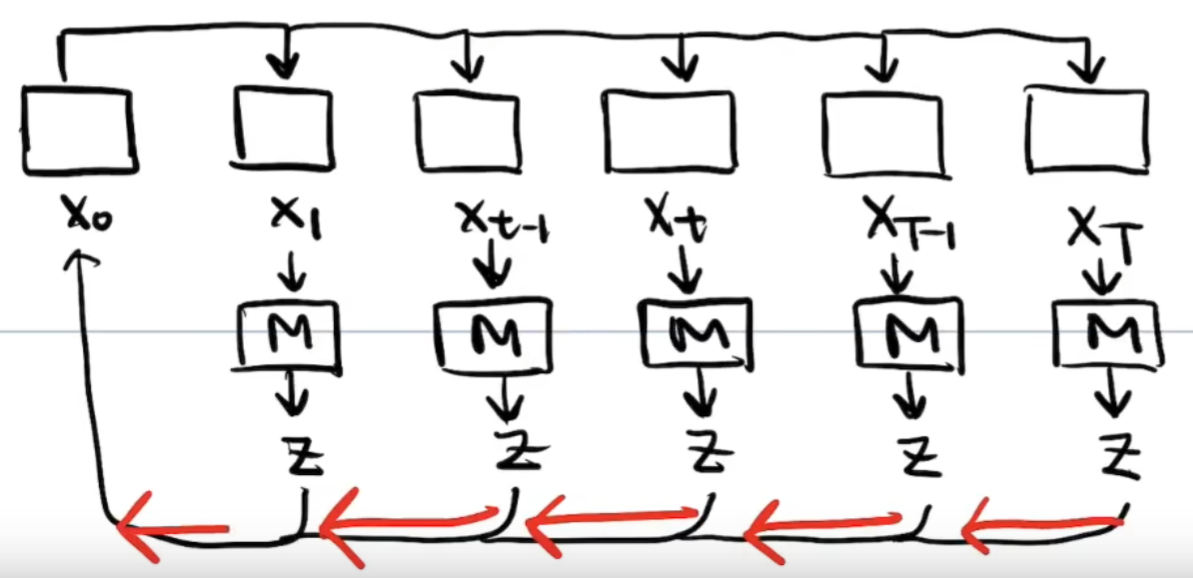
逆向过程是一个去噪的过程,由于我们无法人工算出噪声Z,所以我们通过 Model()= Z,来算出Z
然后再把这些Z去除就完成逆向过程了

这样我们就可以由初始图像分布 直接算出某一时刻的图像分布
了
由于最后的图像 是基本上完全由噪声Z组成的,所以上述公式,应该是让
约等于 Z,这样就要求
约等于0
逆向过程是一个去噪的过程,由于我们无法人工算出噪声Z,所以我们通过 Model()= Z,来算出Z
然后再把这些Z去除就完成逆向过程了
 1377
2万+
1377
2万+

 被折叠的 条评论
为什么被折叠?
被折叠的 条评论
为什么被折叠?
 到【灌水乐园】发言


