


EditorUtility 编辑器工具
转自:http://blog.csdn.net/liqiangeastsun/article/details/42174339,请查看原文,尊重楼主原创版权。
这是一个编辑器类,如果想使用它你需要把它放到工程目录下的Assets/Editor文件夹下。
编辑器类在UnityEditor命名空间下。所以当使用C#脚本时,你需要在脚本前面加上 "using UnityEditor"引用。
1.ProgressBar 进度条
在Editor文件夹中添加脚本:
-
using UnityEngine; -
using System.Collections; -
using UnityEditor; -
public class TestEditor : EditorWindow -
{ -
float secs = 10.0f; -
double startVal = 0; -
double progress = 0; -
bool isShow = false; -
[MenuItem("Examples/Cancelable Progress Bar Usage")] -
static void Init() -
{ -
var window = GetWindow(typeof(TestEditor)); -
window.Show(); -
} -
void OnGUI() -
{ -
secs = EditorGUILayout.FloatField("Time to wait:", secs); -
if (GUILayout.Button("Display bar")) -
{ -
startVal = EditorApplication.timeSinceStartup; //开始编译到现在的时间 -
isShow = !isShow; -
} -
if (GUILayout.Button("Clear bar")) -
{ -
EditorUtility.ClearProgressBar(); //清空进度条的值, 基本没什么用 -
} -
if (progress < secs && isShow == true) -
{ -
//使用这句代码,在进度条后边会有一个 关闭按钮,但是用这句话会直接卡死,切记不要用 -
// EditorUtility.DisplayCancelableProgressBar("Simple Progress Bar", "Show a progress bar for the given seconds", (float)(progress / secs)); -
//使用这句创建一个进度条, 参数1 为标题,参数2为提示,参数3为 进度百分比 0~1 之间 -
EditorUtility.DisplayProgressBar("Simple Progress Bar", "Show a progress bar for the given seconds", (float)(progress / secs)); -
} -
else { -
startVal = EditorApplication.timeSinceStartup; -
progress = 0.0f; -
return; -
} -
progress = EditorApplication.timeSinceStartup - startVal; -
} -
void OnInspectorUpdate() //更新 -
{ -
Repaint(); //重新绘制 -
} -
}
效果:

2.CollectDeepHierarchy收集深度层级
遍历对象以及子物体,以及子物体上绑定的所有组件
-
using UnityEngine; -
using System.Collections; -
using UnityEditor; -
public class Test : MonoBehaviour { //遍历对象以及子物体,以及子物体上绑定的所有组件 -
private GameObject parent; -
// Use this for initialization -
void Start () { -
Init(); -
} -
void Init() -
{ -
parent = gameObject; // 给parent赋值 为 gameObject ,在Hierarchy 中给该对象创建几个子物体 -
Object[] obj = new Object[1]; -
obj[0] = parent; //将parent添加至 数组 -
Object[] result = EditorUtility.CollectDeepHierarchy(obj); -
foreach (Object ob in result) //遍历 所有对象,得到对象本身包括子对象上绑定的所有组件 -
{ -
print(ob + " " + ob.name); // -
} -
} -
}
3.CompressTexture压缩一个纹理到指定的格式
-
using UnityEngine; -
using System.Collections; -
using UnityEditor; -
public class Test : AssetPostprocessor { // -
void OnPostprocessTexture(Texture2D T) //使用该方法压缩一个纹理到指定的格式 -
{ -
//该方法需使用 Texture2D, 使用该方法比较快速但是会降低效果 -
EditorUtility.CompressTexture(T, TextureFormat.RGB24, TextureCompressionQuality.Best); -
} -
}
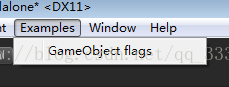
4.CreateGameObjectWithHideFlags 创建带有标识的游戏物体
在Editor文件夹下创建脚本:
-
using UnityEngine; -
using System.Collections; -
using UnityEditor; -
public class TestEditor : EditorWindow -
{ -
private string objName = "GameObject"; -
private int instanceID = 0; -
private bool create = true; -
private GameObject go = null; -
private bool hideHierarchy = true; -
[MenuItem("Examples/GameObject flags")] -
static void Init() -
{ -
TestEditor window = (TestEditor)GetWindow(typeof(TestEditor)); //初始化一个窗口 -
window.Show(); -
} -
void OnGUI() -
{ -
create = EditorGUILayout.Toggle("Create a GO:", create); //在窗口创建一个 Toggle -
GUI.enabled = create; //GUI是否可以创建 -
objName = EditorGUILayout.TextField("GameObject Name:", objName); //创建文本框 -
if (GUILayout.Button("Create")) //创建按钮 -
{ //点击按钮,创建一个GameObject -
GameObject created = EditorUtility.CreateGameObjectWithHideFlags( -
objName, -
hideHierarchy ? HideFlags.HideInHierarchy : 0); -
//HideFlags.HideInHierarchy 对象在Hierarchy 窗口隐藏 -
//HideFlags.HideInInspector 对象在Hierarchy窗口可见,点击该对象,在Inspector面板不显示任何属性 -
GameObject ccc = EditorUtility.CreateGameObjectWithHideFlags("cccc", HideFlags.HideInInspector); -
Debug.Log("Created GameObject ID: " + created.GetInstanceID()); -
} -
GUI.enabled = !create; -
EditorGUILayout.BeginHorizontal(); //开始水平布局 -
instanceID = EditorGUILayout.IntField("Instance ID:", instanceID); //创建一个 整数输入框 -
if (GUILayout.Button("Search & Update flags")) //创建一个按钮,更新flags -
{ -
go = null; -
go = (GameObject)EditorUtility.InstanceIDToObject(instanceID); //给该对象实例化一个ID -
if (go) -
go.hideFlags = hideHierarchy ? HideFlags.HideInHierarchy : 0; -
} -
EditorGUILayout.EndHorizontal(); //结束水平布局 -
if (!go) -
EditorGUILayout.LabelField("Object: ", "No object was found"); -
else -
EditorGUILayout.LabelField("Object: ", go.name); -
GUI.enabled = true; -
hideHierarchy = EditorGUILayout.Toggle("HideInHierarchy", hideHierarchy); //创建一个Toggle , -
} -
}
效果:
Unity在菜单栏创建按钮,点击按钮创建一个窗口,在窗口上创建 Toggle、TextField、button等, 在窗口创建了一个Create按钮,点击按钮创建对象

勾选 Create a Go: 的Toggle,显示Create按钮
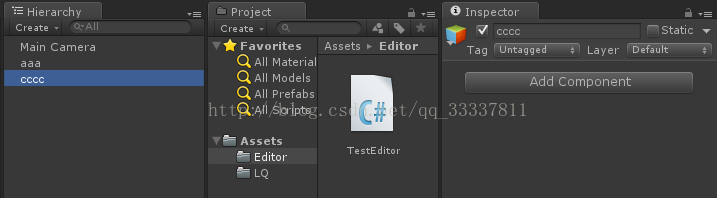
点击Create按钮,在 Hierarchy 窗口创建 对象“aaa” “ccc”

选中 “aaa”,Inspector窗口如下所示

选中 “cccc” 在,Inspector窗口如下所示,”cccc“绑定的组件在Inspector面板隐藏
5.DisplayDialog显示对话框 DisplayDialogComplex 显示复杂对话框
用于在编辑器显示消息框。
1/ DisplayDialog显示对话框(返回true/false)
ok 和 cancel 是显示在对话框按钮上的标签,如果cancel为空(默认),然只有一个按钮被显示。如果ok按钮被按下,DisplayDialog返回true。

-
//在地形的表面上放置选择的物体。 -
using UnityEngine; -
using UnityEditor; -
public class PlaceSelectionOnSurface : ScriptableObject { -
[MenuItem ("Example/Place Selection On Surface")] -
static void CreateWizard () { -
Transform[] transforms = Selection.GetTransforms(SelectionMode.Deep | -
SelectionMode.ExcludePrefab | SelectionMode.OnlyUserModifiable); -
if (transforms.Length > 0 && -
EditorUtility.DisplayDialog("Place Selection On Surface?", -
"Are you sure you want to place " + transforms.Length -
+ " on the surface?", "Place", "Do Not Place")) { -
foreach (Transform transform in transforms) { -
RaycastHit hit; -
if (Physics.Raycast(transform.position, Vector3.down, out hit)) { -
transform.position = hit.point; -
Vector3 randomized = Random.onUnitSphere; -
randomized = new Vector3(randomized.x, 0F, randomized.z); -
transform.rotation = Quaternion.LookRotation(randomized, hit.normal); -
} -
} -
} -
} -
}
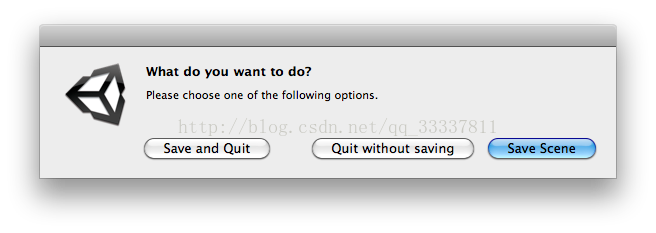
2/ DisplayDialogComplex 显示复杂对话框(返回0/1/2对应ok/cancel/alt)
-
//让你保存,保存并退出或退出不保存 -
class EditorUtilityDisplayDialogComplex extends MonoBehaviour { -
@MenuItem("Examples/Enhanced Save") -
static function Init() { -
var option = EditorUtility.DisplayDialogComplex( -
"What do you want to do?", -
"Please choose one of the following options.", -
"Save Scene", -
"Save and Quit", -
"Quit without saving"); -
switch (option) { -
// Save Scene //保存场景 -
case 0: -
EditorApplication.SaveScene(EditorApplication.currentScene); -
break; -
// Save and Quit. //保存并退出 -
case 1: -
EditorApplication.SaveScene(EditorApplication.currentScene); -
EditorApplication.Exit(0); -
break; -
// Quit Without saving. // 退出不保存 -
case 2: -
EditorApplication.Exit(0); -
break; -
default: -
Debug.LogError("Unrecognized option."); -
} -
} -
}
6.DisplayPopupMenu显示弹出菜单
static function DisplayPopupMenu (position : Rect, menuItemPath : string, command : MenuCommand) : void
菜单显示在position位置,从menuItemPath指定的子菜单生成,使用MenuCommand作为菜单上下文。
-
在Editor文件夹下创建脚本TestEditor -
using UnityEngine; -
using System.Collections; -
using UnityEditor; -
public class TestEditor : EditorWindow -
{ -
[MenuItem("Examples/Enhanced Save")] -
static void Init() -
{ -
Rect contextRect = new Rect(10, 10, 100, 100); -
EditorUtility.DisplayPopupMenu(contextRect, "Assets/", null); -
} -
}
在工具栏创建Button点击Button,在Asset下创建窗口

双击“Enbanced Save”显示如下窗口,即Asset下创建窗口

7.FocusProjectWindow焦点项目窗口
使项目窗口到前面并焦点它,这个通常在一个菜单项创建并选择一个资源之后被调用。
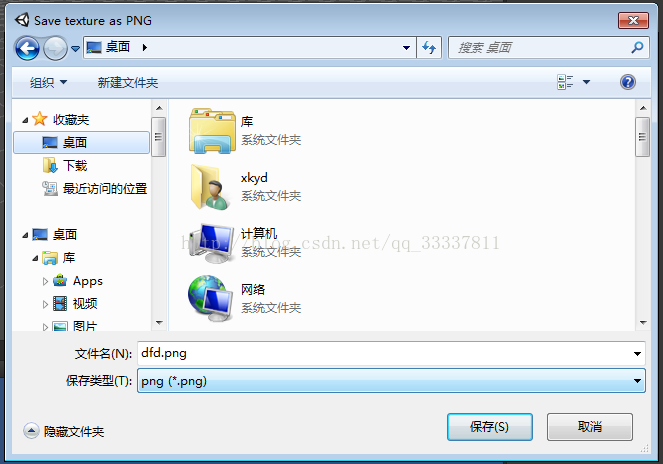
8.SaveFilePanel保存文件面板
SaveFolderPanel 保存文件夹面板
Unity编辑器之导入导出获取路径对话框:

选中一个图片,点击 “Save Texture to file”按钮:
-
在Editor文件夹下创建脚本 -
using UnityEngine; -
using System.Collections; -
using UnityEditor; -
using System.IO; -
public class TestEditor : EditorWindow -
{ -
[MenuItem("Examples/Save Texture to file")] -
static void Apply() -
{ -
Texture2D texture = Selection.activeObject as Texture2D; //选中一个图片 -
if (texture == null) -
{ //如果没选图片,显示提示对话框 -
EditorUtility.DisplayDialog( -
"Select Texture", -
"You Must Select a Texture first!", -
"Ok"); -
return; -
} -
//获取路径 -
string path = EditorUtility.SaveFilePanel( -
"Save texture as PNG", -
"", -
texture.name + ".png", -
"png"); -
if (path.Length != 0) -
{ -
// Convert the texture to a format compatible with EncodeToPNG -
if (texture.format != TextureFormat.ARGB32 && texture.format != TextureFormat.RGB24) -
{ -
Texture2D newTexture = new Texture2D(texture.width, texture.height); -
newTexture.SetPixels(texture.GetPixels(0), 0); -
texture = newTexture; -
} -
var pngData = texture.EncodeToPNG(); -
if (pngData != null) -
File.WriteAllBytes(path, pngData); -
} -
} -
}


 9713
9713


 被折叠的 条评论
为什么被折叠?
被折叠的 条评论
为什么被折叠?
 到【灌水乐园】发言


