


前言
一俩礼拜没有更新了,今天突然发现ROS 2突然有了新版本了,名为Jazzy,这更新速度与Qt有的一比。这么长时间没更新呢,一来工作上来活了,没那么多时间来继续ROS这块,二来,人懈怠了一点,见谅见谅。此篇为ROS 2中阶教程的最后一篇,博主没有实操,所贴图均为官方提供,所以整体而言,内容质量及流畅度都较差。对于对这块有需求的同学,最好还是动手跟着示例过一遍,本文只作一点点参考。
当我们需要在RViz中显示一种新的消息类型数据时,RViz可能并不能直接支持显示这些数据,目前有两种方法可以完成我们的目标:
- 转换消息类型,比如visualization_msgs/Marker
- 编写一个自定义显示项
第一种,会消耗比较多的网络数据来展现我们的数据,很灵活,但支持的类型有限,第二种就是我们今天需要了解的,虽然前期会麻烦一点点,但是支持的类型及功能比第一种强大。
本教程的所有代码都可以在这个仓库中找到。为了查看本教程中编写的插件的逐步进展,这个仓库有不同的分支(step2, step3…),你可以随着教程的进度,逐个编译并运行这些分支。
动动手
Point2D消息
我们将使用rviz_plugin_tutorial_msgs包中定义的一个示例消息进行操作:Point2D.msg:
std_msgs/Header header
float64 x
float64 y
基础插件模板
做好准备,这里有很多代码。我们可以通过名为“step1”的分支查看这段代码的完整版本。
头文件
point_display.hpp
#ifndef RVIZ_PLUGIN_TUTORIAL__POINT_DISPLAY_HPP_
#define RVIZ_PLUGIN_TUTORIAL__POINT_DISPLAY_HPP_

#include <rviz_common/message_filter_display.hpp>
#include <rviz_plugin_tutorial_msgs/msg/point2_d.hpp>

namespace rviz_plugin_tutorial
{
class PointDisplay
  : public rviz_common::MessageFilterDisplay<rviz_plugin_tutorial_msgs::msg::Point2D>
{
  Q_OBJECT

protected:
  void processMessage(const rviz_plugin_tutorial_msgs::msg::Point2D::ConstSharedPtr msg) override;
};
}  // namespace rviz_plugin_tutorial

#endif // RVIZ_PLUGIN_TUTORIAL__POINT_DISPLAY_HPP_- 我们正在实现
MessageFilterDisplay类,这个类可以与任何包含std_msgs/Header的消息一起使用。 - 该类是一个模板类,它被特化为处理
Point2D消息类型。 - 由于本教程范围之外的原因,我们需要在代码中包含
Q_OBJECT宏,以确保Qt图形用户界面(GUI)的相关部分能够正常工作(还有信号槽等机制)。 - processMessage是我们需要在后面的cpp文件中实现的唯一函数。
源文件
process_display.cpp
#include <rviz_plugin_tutorial/point_display.hpp>
#include <rviz_common/logging.hpp>

namespace rviz_plugin_tutorial
{
void PointDisplay::processMessage(const rviz_plugin_tutorial_msgs::msg::Point2D::ConstSharedPtr msg)
{
  RVIZ_COMMON_LOG_INFO_STREAM("We got a message with frame " << msg->header.frame_id);
}
}  // namespace rviz_plugin_tutorial

#include <pluginlib/class_list_macros.hpp>
PLUGINLIB_EXPORT_CLASS(rviz_plugin_tutorial::PointDisplay, rviz_common::Display)- 函数中的日志记录并不是必须的,但它可以帮助我们调试。
- 为了让RViz能够找到我们的插件,我们需要在代码中包含这个
PLUGINLIB的声明(以及下面提到的其他内容)。
package.xml
我们需要在package.xml中添加以下3个依赖项:
<depend>pluginlib</depend>
<depend>rviz_common</depend>
<depend>rviz_plugin_tutorial_msgs</depend>
rviz_common_plugins.xml
<library path="point_display">
  <class type="rviz_plugin_tutorial::PointDisplay" base_class_type="rviz_common::Display">
    <description></description>
  </class>
</library>
以上是标准的pluginlib代码:
- 库路径(library path)是我们在
CMake中分配给库的名称。 - 该类应该与上面提到的
PLUGINLIB声明相匹配。
CMakelists.txt
将下面代码添加到标准模板文件的最上面。
find_package(ament_cmake_ros REQUIRED)
find_package(pluginlib REQUIRED)
find_package(rviz_common REQUIRED)
find_package(rviz_plugin_tutorial_msgs REQUIRED)

set(CMAKE_AUTOMOC ON)
qt5_wrap_cpp(MOC_FILES
  include/rviz_plugin_tutorial/point_display.hpp
)

add_library(point_display src/point_display.cpp ${MOC_FILES})
target_include_directories(point_display PUBLIC
  $<BUILD_INTERFACE:${CMAKE_CURRENT_SOURCE_DIR}/include>
  $<INSTALL_INTERFACE:include>
)
ament_target_dependencies(point_display
  pluginlib
  rviz_common
  rviz_plugin_tutorial_msgs
)
install(TARGETS point_display
        EXPORT export_rviz_plugin_tutorial
        ARCHIVE DESTINATION lib
        LIBRARY DESTINATION lib
        RUNTIME DESTINATION bin
)
install(DIRECTORY include/
        DESTINATION include
)
install(FILES rviz_common_plugins.xml
        DESTINATION share/${PROJECT_NAME}
)
ament_export_include_directories(include)
ament_export_targets(export_rviz_plugin_tutorial)
pluginlib_export_plugin_description_file(rviz_common rviz_common_plugins.xml)
为了生成正确的Qt文件,我们需要:
- 打开CMAKE_AOTOMOC宏
- 通过调用qt5_wrap_cpp对每个包含Q_OBJECT的头文件进行包装。
- 将MOC_FILES与其他cpp文件一起包含在库中。
请注意,如果我们不包装头文件,则在运行时尝试加载插件时可能会收到错误消息,如下所示:
[rviz2]: PluginlibFactory: The plugin for class 'rviz_plugin_tutorial::PointDisplay' failed to load. Error: Failed to load library /home/ros/ros2_ws/install/rviz_plugin_tutorial/lib/libpoint_display.so. Make sure that you are calling the PLUGINLIB_EXPORT_CLASS macro in the library code, and that names are consistent between this macro and your XML. Error string: Could not load library LoadLibrary error: /home/ros/ros2_ws/install/rviz_plugin_tutorial/lib/libpoint_display.so: undefined symbol: _ZTVN20rviz_plugin_tutorial12PointDisplayE, at /tmp/binarydeb/ros-foxy-rcutils-1.1.4/src/shared_library.c:84测试一下
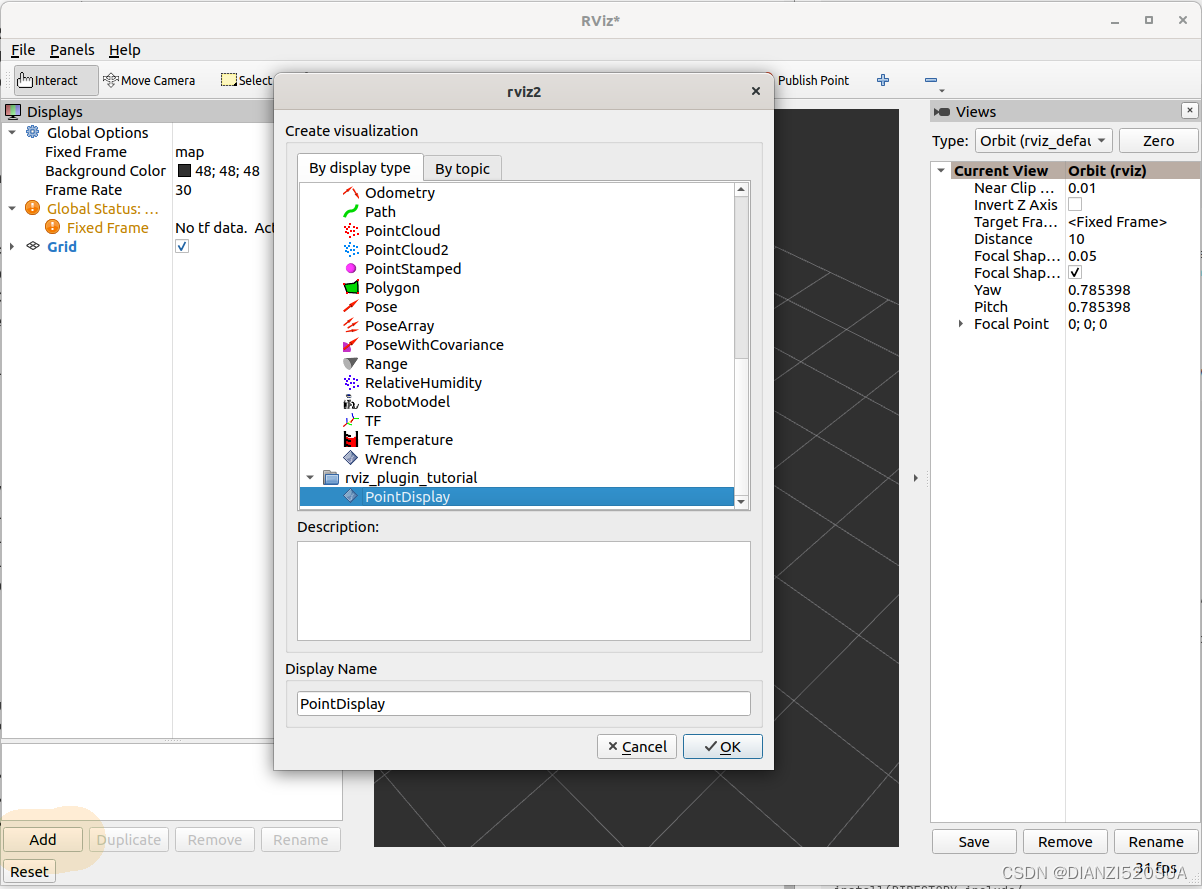
编译代码并运行rviz2。应该可以通过单击左下角的“添加”,然后选择您的包/插件来添加新插件。
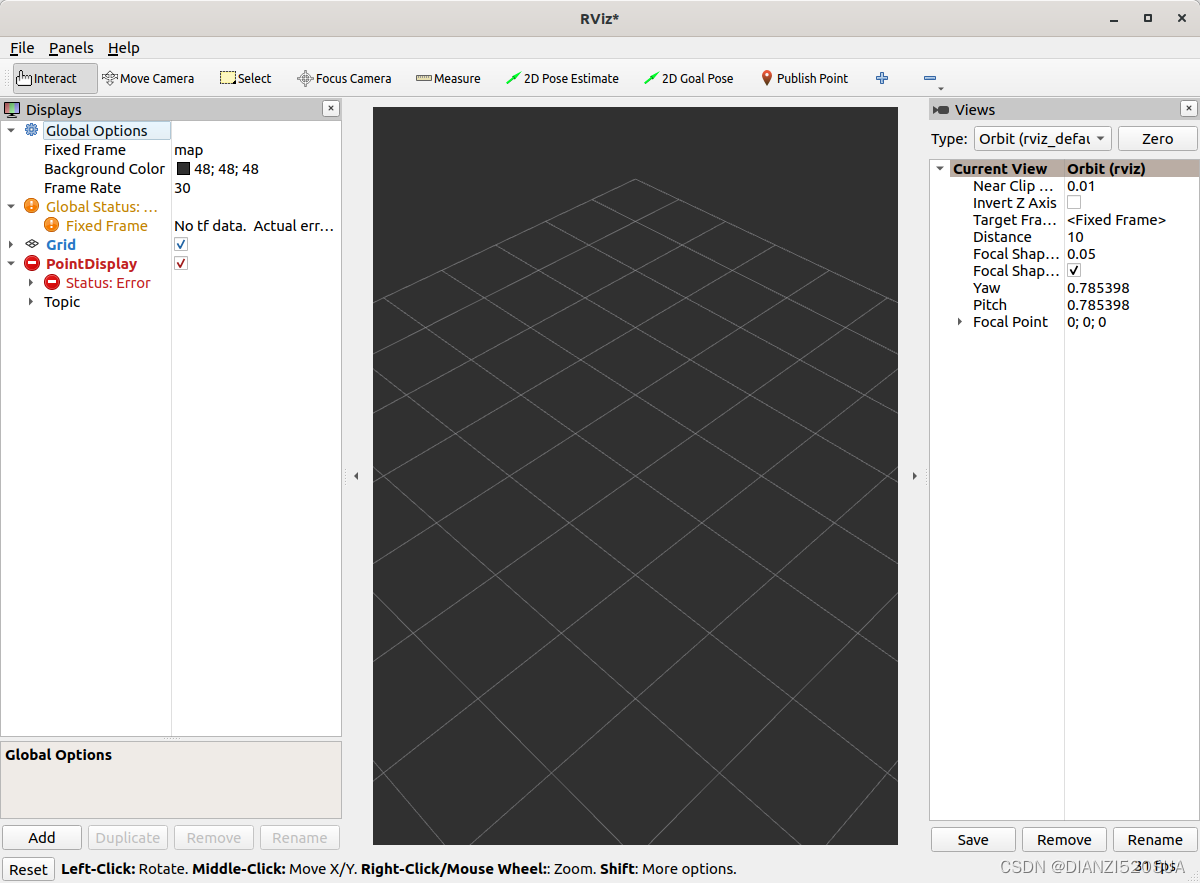
最初,显示器将处于错误状态,因为我们尚未分配主题。
如果我们设置好主题/point,它会加载成功,但依然不会显示如何内容。
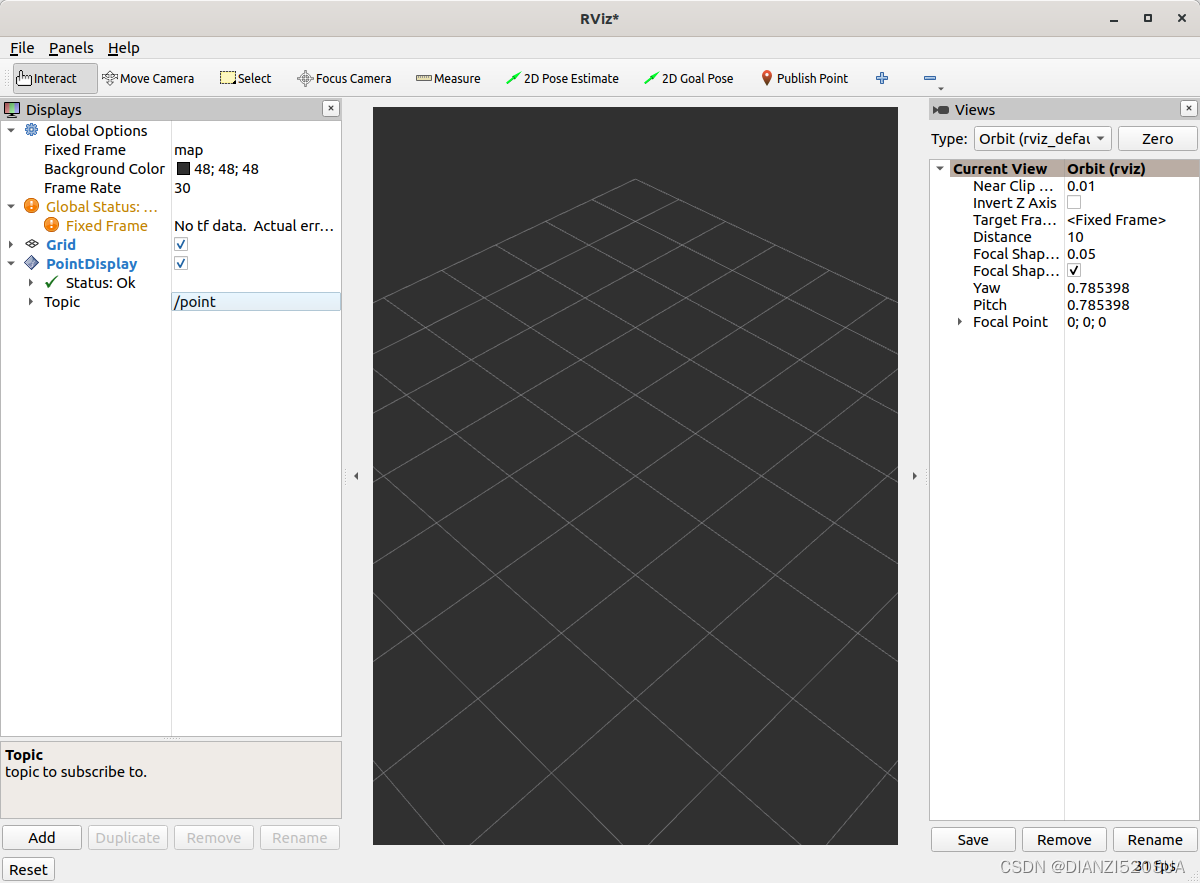
我们可以来按照下面的命令来发布消息。
$ros2 topic pub /point rviz_plugin_tutorial_msgs/msg/Point2D "{header: {frame_id: map}, x: 1, y: 2}" -r 0.5最终我们会在RViz的输出窗口看到“We got a message”这条打印语句。
可视化
我们可以在本文最上面提到的仓库连接中的step2中看到所有步骤。
首先,我们需要在rviz_rendering包的CMakeLists.txt和package.xml中添加一个依赖项。
我们需要在头文件增加3行内容。
- #include<rviz_rendering/objects/shape.hpp>-在rviz_redering包中有很多用于构建可视化的对象的选项。这里我们使用一个简单的形状。
- 在类中,我们将添加一个新的protected的虚函数:void onInitialize()override;
- 我们还添加了一个指向形状对象的指针:std::unique_ptr<rviz_rendering::shape>point_shape_;
然后在cpp文件中,我们定义onInitialize()函数:
void PointDisplay::onInitialize()
{
  MFDClass::onInitialize();
  point_shape_ =
    std::make_unique<rviz_rendering::Shape>(rviz_rendering::Shape::Type::Cube, scene_manager_,
      scene_node_);
}MFDClass被别名为(或称为“引用”于)其模板化的父类,以便于使用。- 形状对象必须在这里的
onInitialize方法中构造,而不是在构造函数中,因为如果不在这里构造,scene_manager_和scene_node_可能还没有准备好。
我们同样需要更新processMessage函数:
void PointDisplay::processMessage(const rviz_plugin_tutorial_msgs::msg::Point2D::ConstSharedPtr msg)
{
  RVIZ_COMMON_LOG_INFO_STREAM("We got a message with frame " << msg->header.frame_id);

  Ogre::Vector3 position;
  Ogre::Quaternion orientation;
  if (!context_->getFrameManager()->getTransform(msg->header, position, orientation)) {
    RVIZ_COMMON_LOG_DEBUG_STREAM("Error transforming from frame '" << msg->header.frame_id <<
        "' to frame '" << qPrintable(fixed_frame_) << "'");
  }

  scene_node_->setPosition(position);
  scene_node_->setOrientation(orientation);

  Ogre::Vector3 point_pos;
  point_pos.x = msg->x;
  point_pos.y = msg->y;
  point_shape_->setPosition(point_pos);
}- 我们需要为我们的消息获取适当的帧(坐标系),并相应地转换
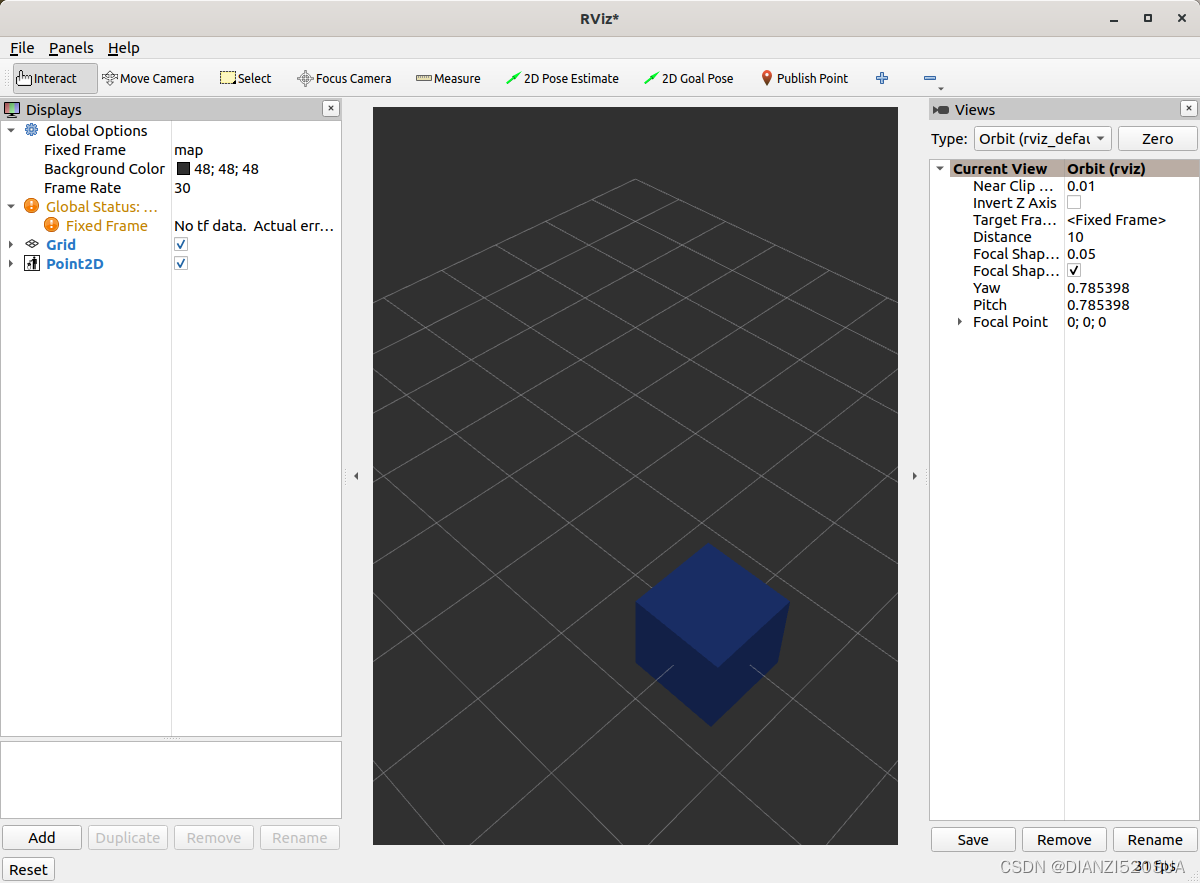
scene_node_。这样可以确保可视化不会总是相对于固定的帧(坐标系)出现。 - 我们一直在构建的实际可视化效果在最后四行代码中实现:我们将可视化的位置设置为与消息中的位置相匹配。
结果如下所示。
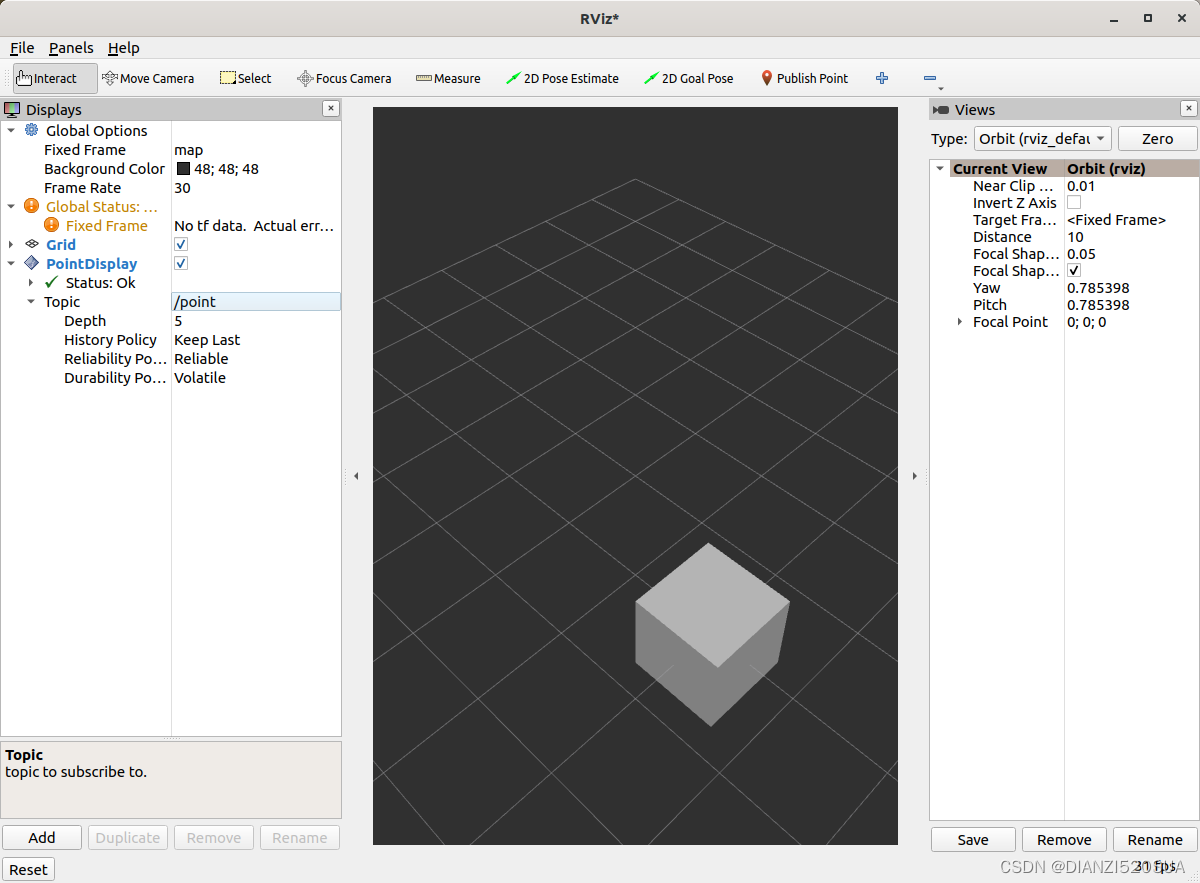
如果盒子没有出现在那个位置,可能原因有:
- 没有发布主题消息。
- 该消息在过去的2秒内未发布。
- 没有在RViz中正确设置主题。
其他选项
如果我们想让用户自定义可视化的不同属性,则需要添加rviz_common::Property对象(仓库中的step3)。
更新头文件
要包含颜色属性的头文件,我们应该添加 #include <rviz_common/properties/color_property.hpp>。颜色只是可以设置的众多属性之一。
添加updateStyle的原型,该函数在通过Qt的SIGNAL/SLOT(信号/槽)框架更改GUI时被调用:
private Q_SLOTS:
  void updateStyle();
添加一个新的属性来存储该属性本身:
std::unique_ptr<rviz_common::properties::ColorProperty> color_property_;更新cpp文件
#include <rviz_common/properties/parse_color.hpp>- 包含辅助函数,用于将属性转换为OGRE颜色。- 在onInitialize函数中添加如下内容:
-
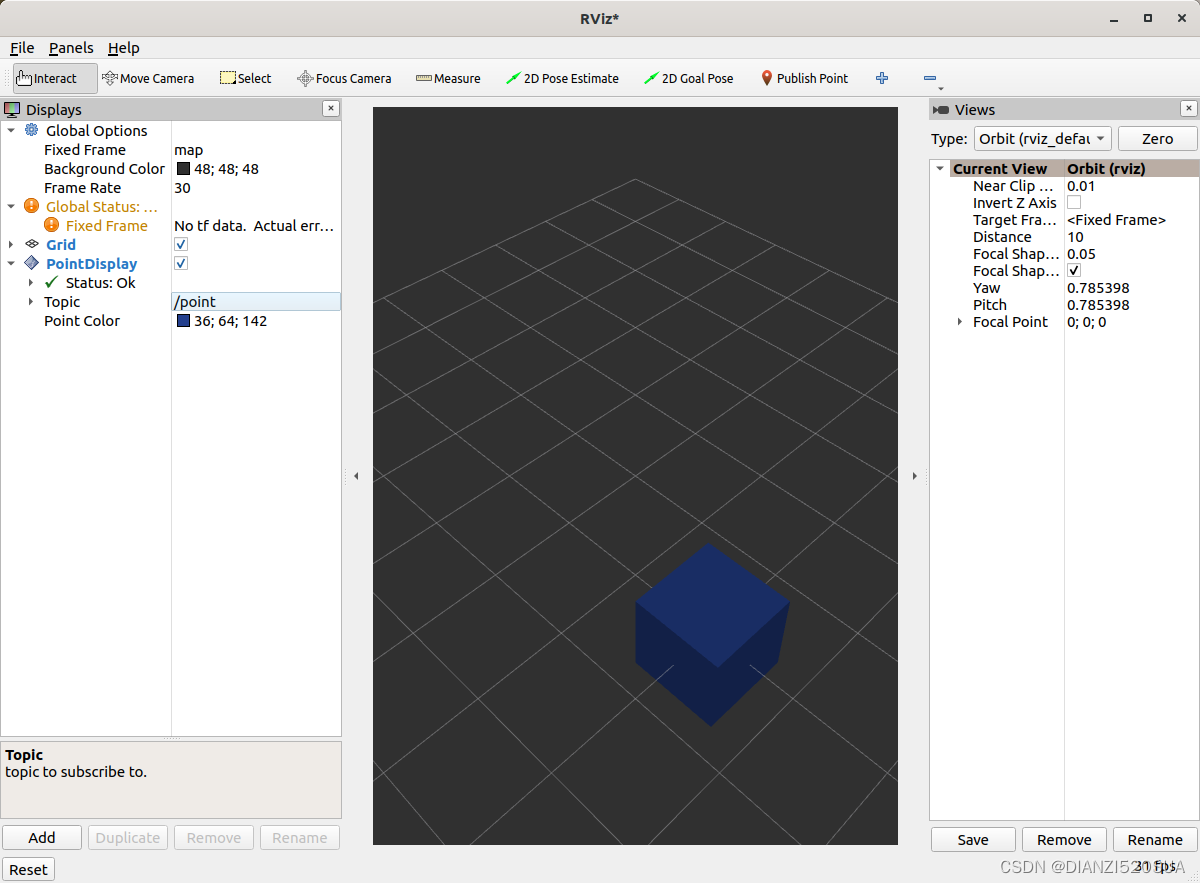
color_property_ = std::make_unique<rviz_common::properties::ColorProperty>( "Point Color", QColor(36, 64, 142), "Color to draw the point.", this, SLOT(updateStyle())); updateStyle(); - 这个对象是通过提供其名称、默认值、描述和一个回调函数来构造的。这些参数定义了对象的初始状态和行为。
- 我们直接调用
updateStyle方法,以便在属性被改变之前甚至在开始时就设置颜色。 - 我们定义这个回调函数:
void PointDisplay::updateStyle()
{
  Ogre::ColourValue color = rviz_common::properties::qtToOgre(color_property_->getColor());
  point_shape_->setColor(color);
}
最终结果如下图所示。
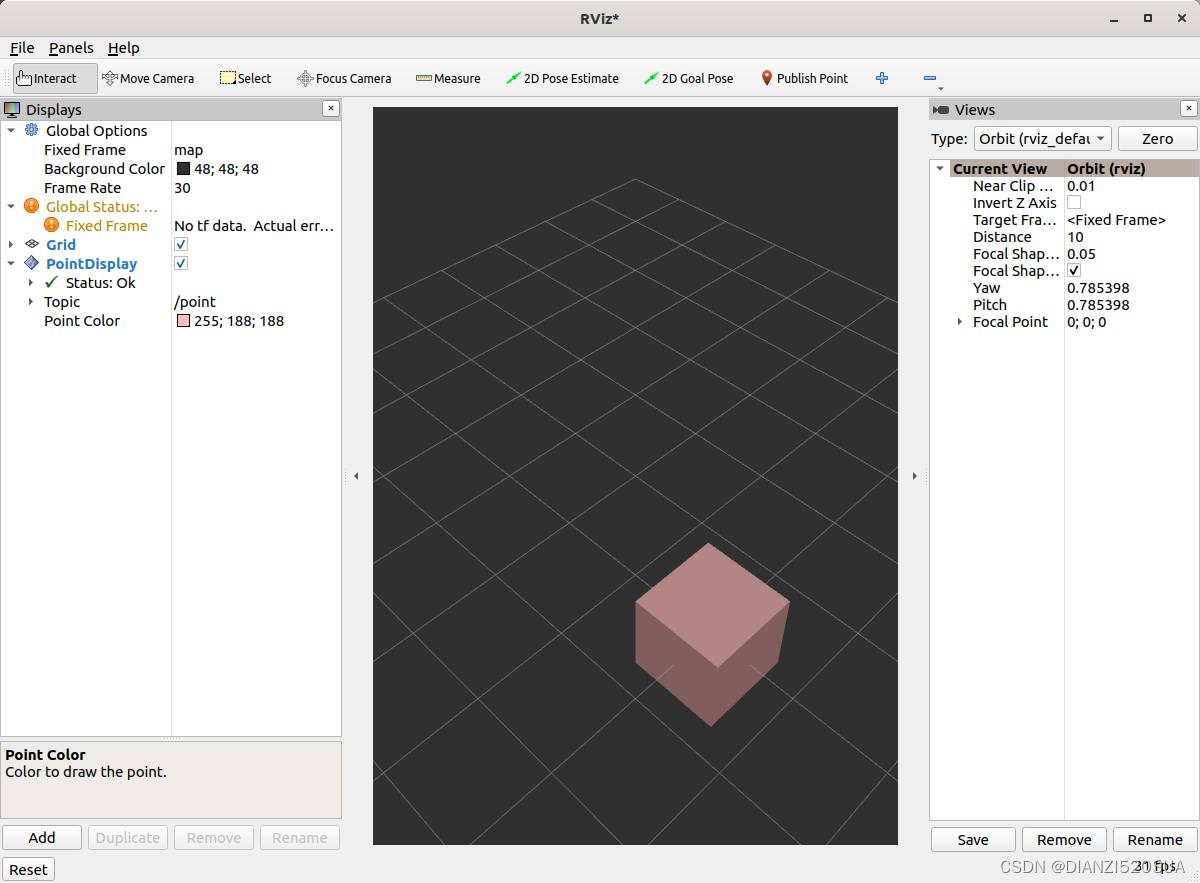
再换个粉色试试。
状态报告
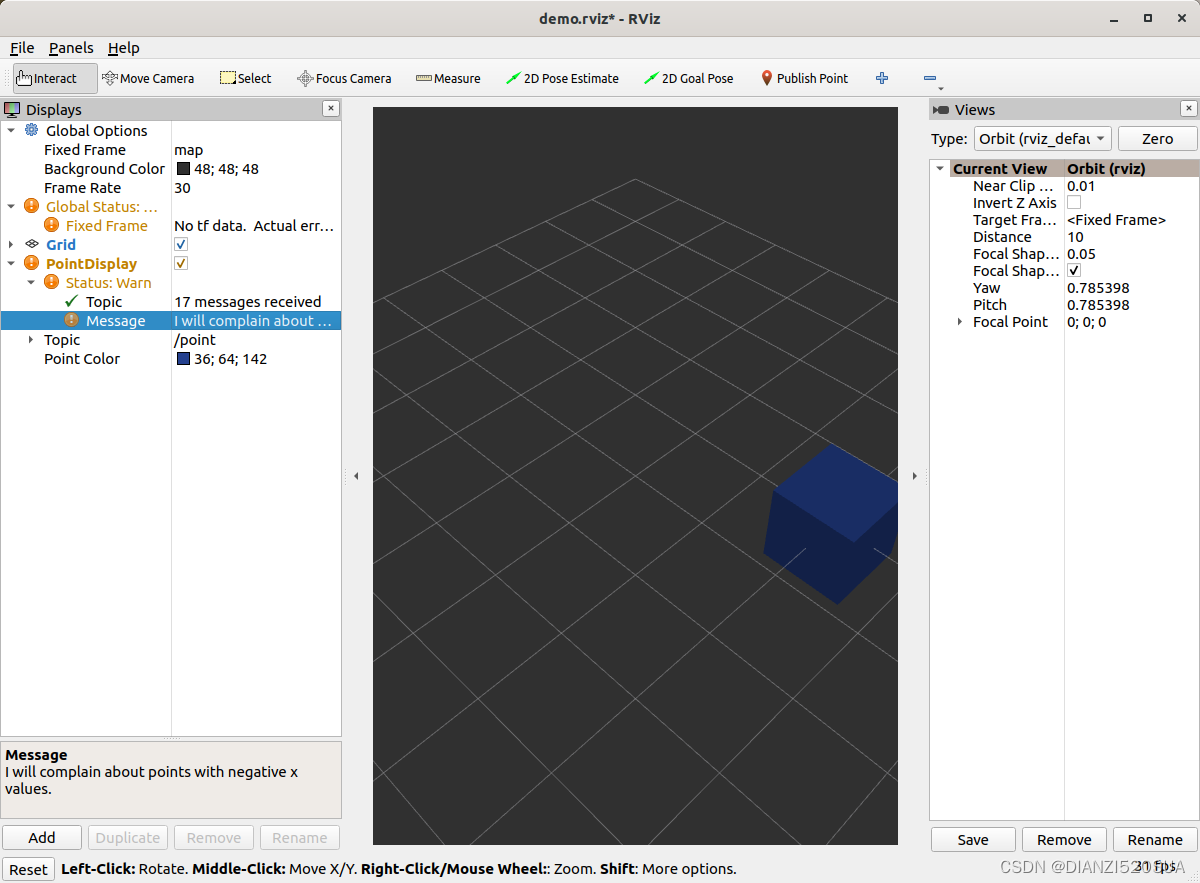
我们同样可以在RViz里显示一些状态(仓库的step4)的信息,比如当x值为负时,我们就发出状态消息。在processMessage函数中添加:
if (msg->x < 0) {
setStatus(StatusProperty::Warn, "Message",
"I will complain about points with negative x values.");
} else {
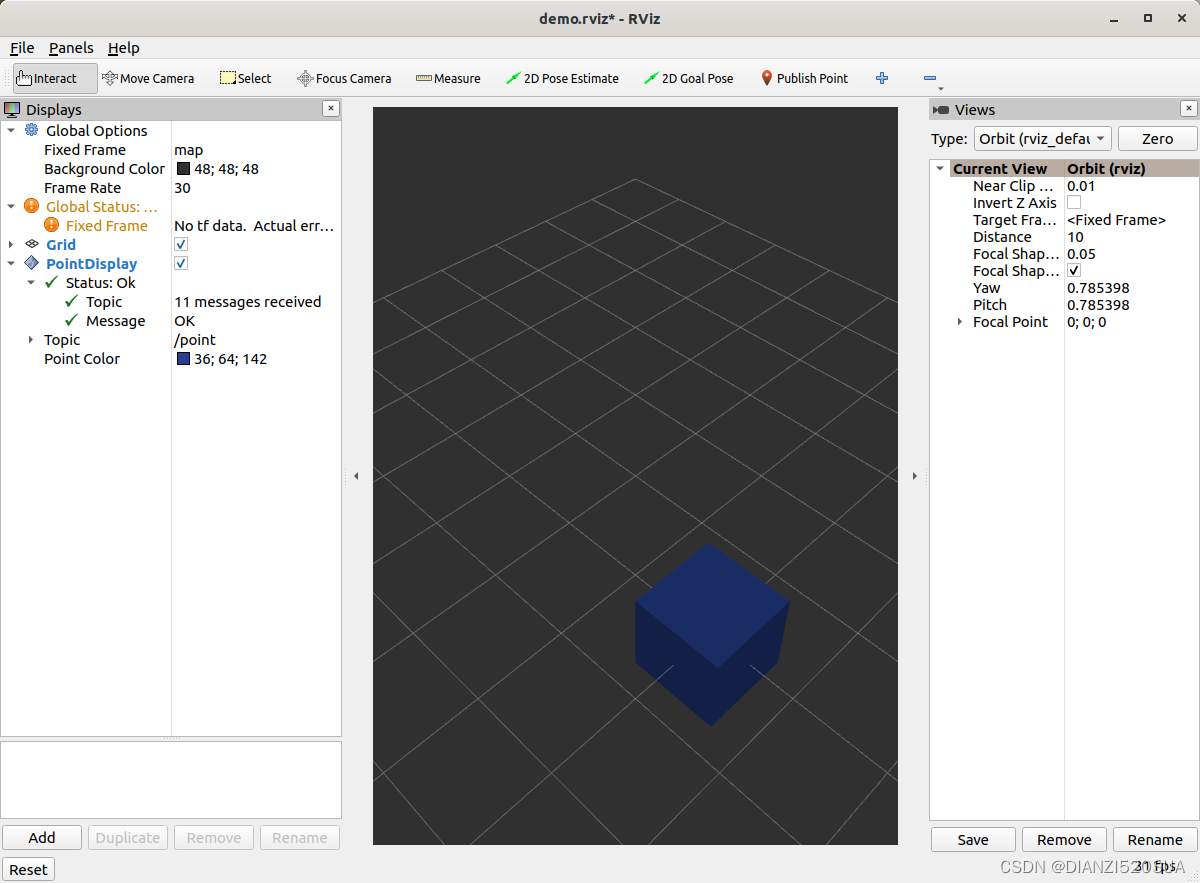
setStatus(StatusProperty::Ok, "Message", "OK");
}- 我们假设之前已经有了一个
rviz_common::properties::StatusProperty的声明。 - 可以将状态视为键值对,其中键是某个字符串(在这里我们使用"Message"),而值则是状态级别(错误/警告/正常)和描述(另一个字符串)。
精简
现在是时候稍微精简一些内容了。这样做可以让事情看起来更整洁,使用起来也更方便一些,但这不是严格必需的(仓库step5)。
首先,我们更新下插件声明:
<library path="point_display">
  <class name="Point2D" type="rviz_plugin_tutorial::PointDisplay" base_class_type="rviz_common::Display">
    <description>Tutorial to display a point</description>
    <message_type>rviz_plugin_tutorial_msgs/msg/Point2D</message_type>
  </class>
</library>- 我们向类标签中添加了一个名称字段。这会改变在RViz中显示的名称。在代码中,我们称之为
PointDisplay是有意义的,但在RViz中,我们希望简化这个名称。 - 我们在描述中加入了实际的文本。不要偷懒。
- 通过在这里声明特定的消息类型,当你尝试通过主题添加显示时,它将会为这种类型的主题建议这个插件。
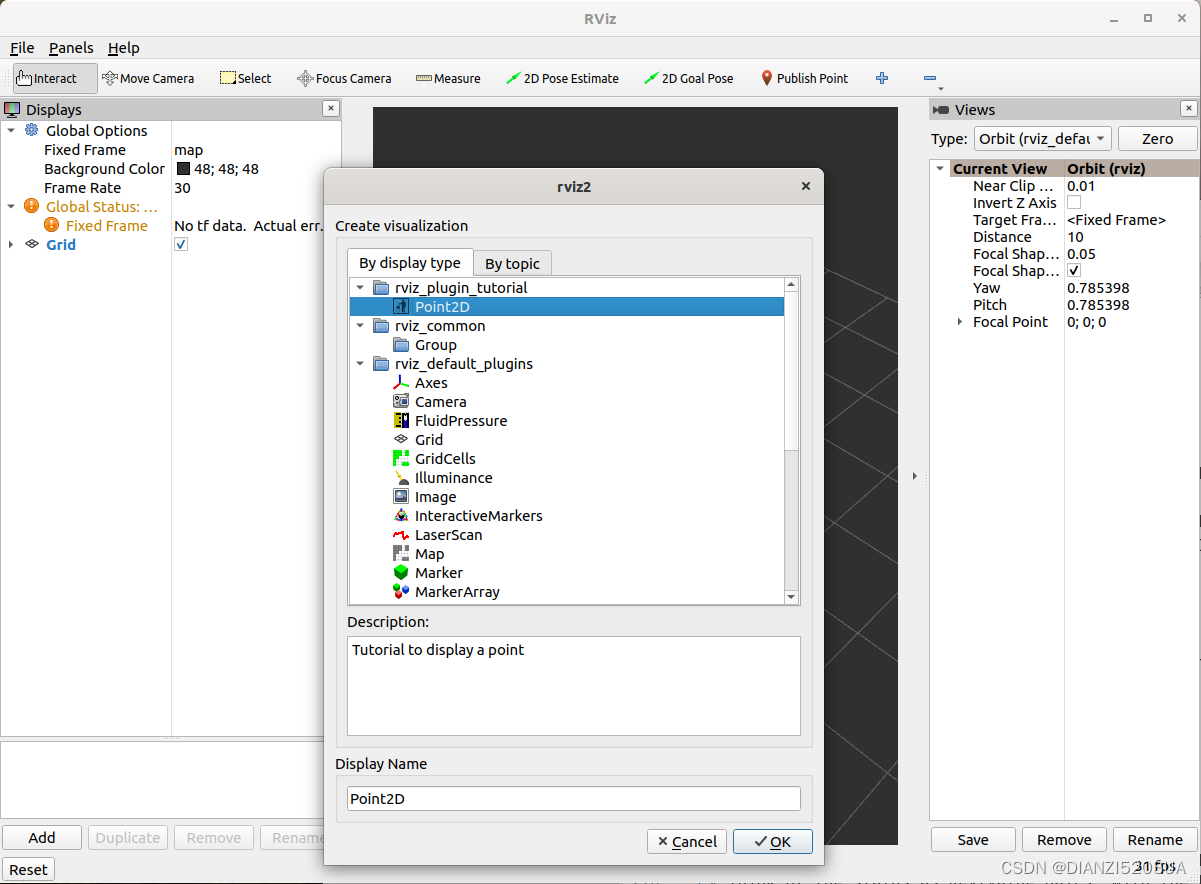
我们还为插件在icons/classes/目录下添加了一个图标文件Point2D.png。这个文件夹是硬编码的,并且文件名应该与插件声明中的名称相匹配(如果未指定,则与类的名称相匹配)[图标源]。
CMakelists.txt中添加如下内容以安装该图标文件:
install(FILES icons/classes/Point2D.png
        DESTINATION share/${PROJECT_NAME}/icons/classes
)
做完以上工作,我们再来添加显示项的时候,就会看到该显示项有个对应的图标和描述在了。
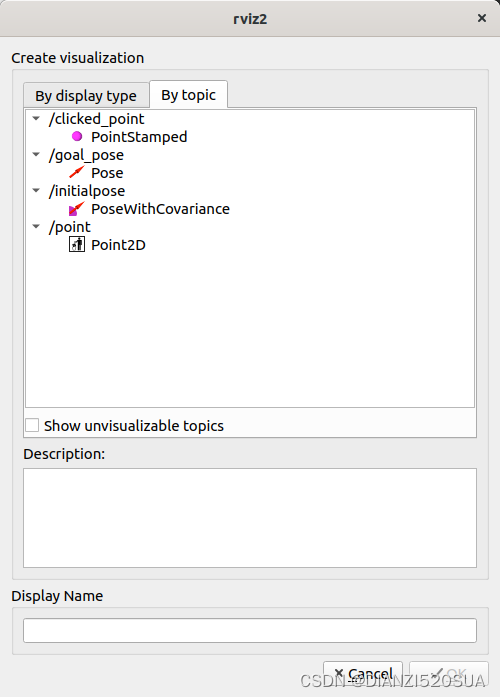
当想通过主题方式添加时,大家能看到也有对应的图标了。
最终,标准主界面上也有个一样的图标存在了。
需要注意的是,如果我们更改了插件的名称,之前的RViz配置将不再起效。
本篇完。


 1万+
1万+


 被折叠的 条评论
为什么被折叠?
被折叠的 条评论
为什么被折叠?
 到【灌水乐园】发言


