


在前面章节,只要知道方向向量和颜色,就可以知道该设置什么颜色了。那么为什么还要进行卷积呢?
原因很简单。是间接光不是颜色,是间接光不是颜色,是间接光不是颜色。
我是尽量避免写公式的,但是迟早要看到这个可怕的公式。
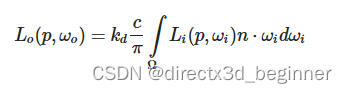
每个方向向量可以认为是wi,以前采样的颜色,在这里可以认为是L(p,wi),
而这个公式计算所有间接漫反射光的积分。
通过以往经验可知,积分必定要转换为离散和,也就是说,用N个采样数据之和代替积分。
那么,从哪里开始采样呢?以什么依据采样呢?答案是表面法线中心,从中间到两边。
从下图可以看到很好理解了。
再细化就是当作球体,经纬度,经度从0到360,纬度是0到90度。
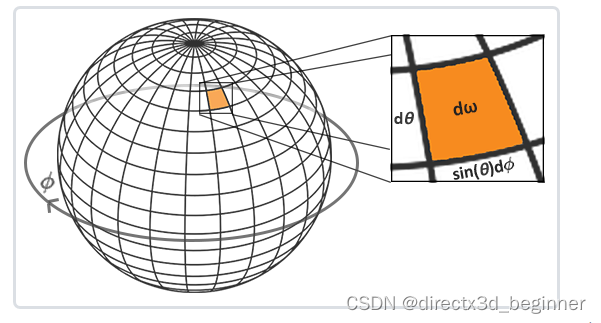
由于球的性质,采样不均衡,所以,再加个sin值调节区域采样贡献。又由于较大的角度光比较暗,再加上cos调节。如下图:


采样时,从球面坐标转到3d直角向量,再将该向量从切线空间转到世界空间,然后用该向量采样HDR环境贴图。

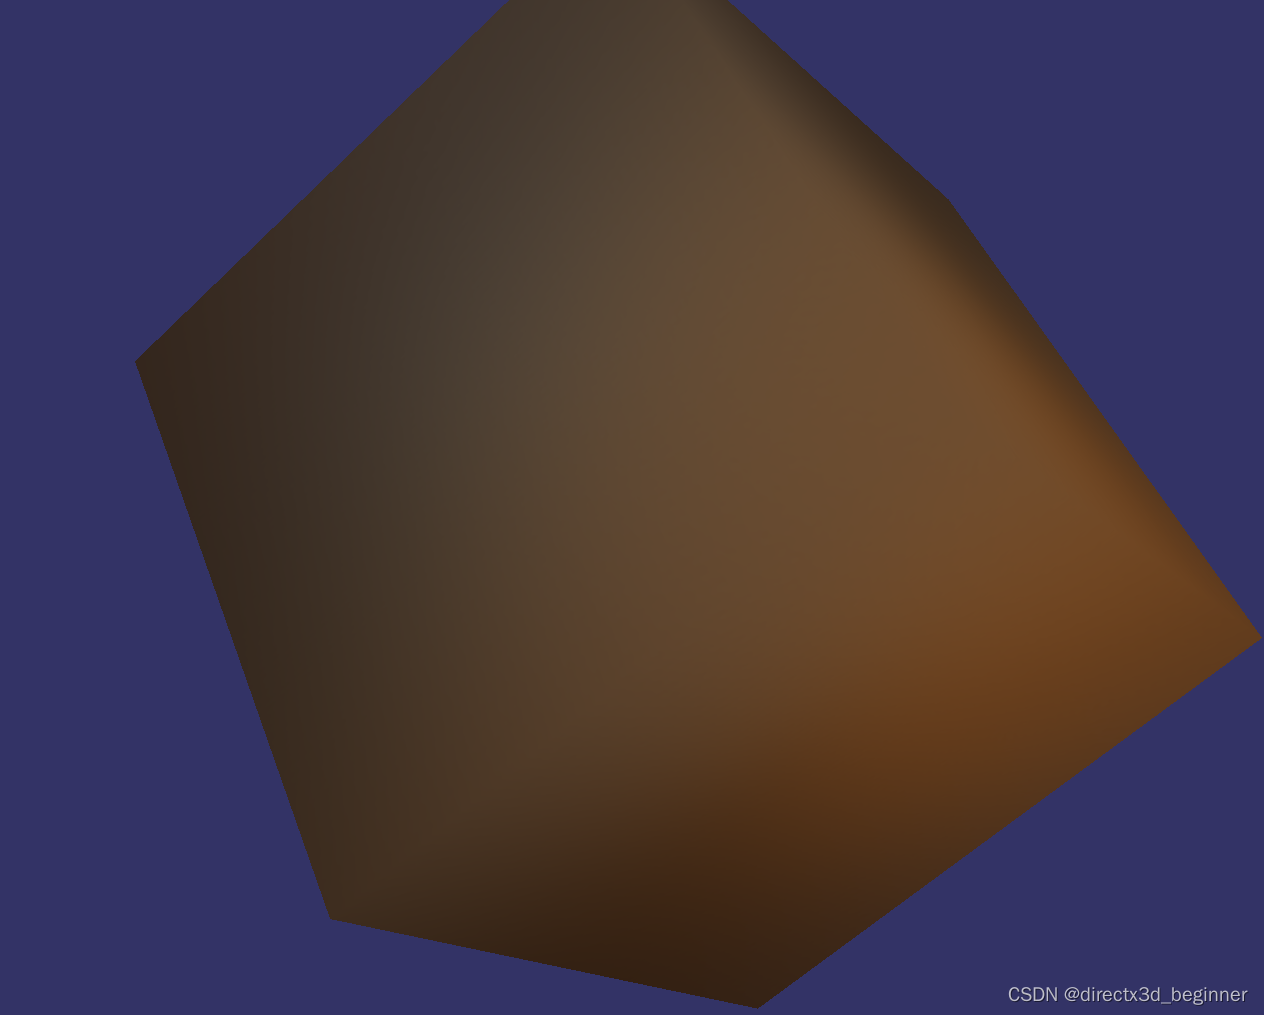
似乎看起来很复杂,但是,更复杂的还在后面,镜面IBL,哈哈,
看看采样后的运行结果
代码如下:
#include <osg/TextureCubeMap>
#include <osg/TexGen>
#include <osg/TexEnvCombine>
#include <osgUtil/ReflectionMapGenerator>
#include <osgDB/ReadFile>
#include <osgViewer/Viewer>
#include <osg/NodeVisitor>
#include <osg/ShapeDrawable>
static const char * vertexShader =
{
“in vec3 aPos;\n”
“varying vec3 WorldPos;”
“void main(void)\n”
“{\n”
“WorldPos = aPos;\n”
" gl_Position = ftransform();\n"
“}\n”
};
static const char *psShader =
{
"varying vec3 WorldPos; "
"uniform samplerCube environmentMap; "
"const float PI = 3.14159265359; "
"void main() "
"{ "
" vec3 N = normalize(WorldPos); "
" vec3 irradiance = vec3(0.0); "
" vec3 up = vec3(0.0, 1.0, 0.0); "
" vec3 right = normalize(cross(up, N)); "
" up = normalize(cross(N, right)); "
" float sampleDelta = 0.025; "
" float nrSamples = 0.0; "
" for (float phi = 0.0; phi < 2.0 * PI; phi += sampleDelta) "
" { "
" for (float theta = 0.0; theta < 0.5 * PI; theta += sampleDelta) "
" { "
" vec3 tangentSample = vec3(sin(theta) * cos(phi), sin(theta) * sin(phi), cos(theta)); "
" vec3 sampleVec = tangentSample.x * right + tangentSample.y * up + tangentSample.z * N; "
" irradiance += texture(environmentMap, sampleVec).rgb * cos(theta) * sin(theta); "
" nrSamples++; "
" } "
" } "
" irradiance = PI * irradiance * (1.0 / float(nrSamples)); "
" gl_FragColor = vec4(irradiance, 1.0); "
“}”
};
class MyNodeVisitor : public osg::NodeVisitor
{
public:
MyNodeVisitor() : osg::NodeVisitor(osg::NodeVisitor::TRAVERSE_ALL_CHILDREN)
{
}
void apply(osg::Geode& geode)
{
	int count = geode.getNumDrawables();
	for (int i = 0; i < count; i++)
	{
		osg::ref_ptr<osg::Geometry> geometry = geode.getDrawable(i)->asGeometry();
		if (!geometry.valid())
		{
			continue;
		}
		osg::Array* vertexArray = geometry->getVertexArray();
		geometry->setVertexAttribArray(1, vertexArray);

	}
	traverse(geode);
}
};
int main()
{
osg::ref_ptrosg::TextureCubeMap tcm = new osg::TextureCubeMap;
tcm->setTextureSize(512, 512);
tcm->setFilter(osg::Texture::MIN_FILTER, osg::Texture::LINEAR);
tcm->setFilter(osg::Texture::MAG_FILTER, osg::Texture::LINEAR);
tcm->setWrap(osg::Texture::WRAP_S, osg::Texture::CLAMP_TO_EDGE);
tcm->setWrap(osg::Texture::WRAP_T, osg::Texture::CLAMP_TO_EDGE);
tcm->setWrap(osg::Texture::WRAP_R, osg::Texture::CLAMP_TO_EDGE);
std::string strImagePosX = "D:/delete/Right face camera.bmp";
osg::ref_ptr<osg::Image> imagePosX = osgDB::readImageFile(strImagePosX);
tcm->setImage(osg::TextureCubeMap::POSITIVE_X, imagePosX);
std::string strImageNegX = "D:/delete/Left face camera.bmp";
osg::ref_ptr<osg::Image> imageNegX = osgDB::readImageFile(strImageNegX);
tcm->setImage(osg::TextureCubeMap::NEGATIVE_X, imageNegX);

std::string strImagePosY = "D:/delete/Front face camera.bmp";;
osg::ref_ptr<osg::Image> imagePosY = osgDB::readImageFile(strImagePosY);
tcm->setImage(osg::TextureCubeMap::POSITIVE_Y, imagePosY);
std::string strImageNegY = "D:/delete/Back face camera.bmp";;
osg::ref_ptr<osg::Image> imageNegY = osgDB::readImageFile(strImageNegY);
tcm->setImage(osg::TextureCubeMap::NEGATIVE_Y, imageNegY);

std::string strImagePosZ = "D:/delete/Top face camera.bmp";
osg::ref_ptr<osg::Image> imagePosZ = osgDB::readImageFile(strImagePosZ);
tcm->setImage(osg::TextureCubeMap::POSITIVE_Z, imagePosZ);
std::string strImageNegZ = "D:/delete/Bottom face camera.bmp";
osg::ref_ptr<osg::Image> imageNegZ = osgDB::readImageFile(strImageNegZ);
tcm->setImage(osg::TextureCubeMap::NEGATIVE_Z, imageNegZ);

osg::ref_ptr<osg::Box> box = new osg::Box(osg::Vec3(0, 0, 0), 1);
osg::ref_ptr<osg::ShapeDrawable> drawable = new osg::ShapeDrawable(box);
osg::ref_ptr<osg::Geode> geode = new osg::Geode;
geode->addDrawable(drawable);
MyNodeVisitor nv;
geode->accept(nv);
osg::ref_ptr<osg::StateSet> stateset = geode->getOrCreateStateSet();
stateset->setTextureAttributeAndModes(0, tcm, osg::StateAttribute::OVERRIDE | osg::StateAttribute::ON);

//shader

osg::ref_ptr<osg::Shader> vs1 = new osg::Shader(osg::Shader::VERTEX, vertexShader);
osg::ref_ptr<osg::Shader> ps1 = new osg::Shader(osg::Shader::FRAGMENT, psShader);
osg::ref_ptr<osg::Program> program1 = new osg::Program;
program1->addShader(vs1);
program1->addShader(ps1);
program1->addBindAttribLocation("aPos", 1);

osg::ref_ptr<osg::Uniform> tex0Uniform = new osg::Uniform("environmentMap", 0);
stateset->addUniform(tex0Uniform);
stateset->setAttribute(program1, osg::StateAttribute::ON);

osg::ref_ptr<osgViewer::Viewer> viewer = new osgViewer::Viewer;
viewer->setSceneData(geode);
viewer->realize();
return viewer->run();
}


 858
858


 被折叠的 条评论
为什么被折叠?
被折叠的 条评论
为什么被折叠?
 到【灌水乐园】发言


