


CT-ICP部署以及运行复现过程
0.下载资源,并按照github原网址的过程进行。
源码网址:https://github.com/jedeschaud/ct_icp
所有的步骤按照readme.md中的步骤进行,在此基础上添加里自己在此过程遇到的问题及解决办法。
1.查看所需要的各个部分的版本。
版本要求:
GCC >= 7.5, clang >= 8.01,cmake >= 3.14
查看gcc版本,gcc -v查看
(base) xiaoduan@fighter:~/source1/CT-ICP/pyLiDAR-SLAM$ gcc --version
gcc (Ubuntu 9.4.0-1ubuntu1~20.04.1) 9.4.0
Copyright (C) 2019 Free Software Foundation, Inc.
This is free software; see the source for copying conditions.  There is NO
warranty; not even for MERCHANTABILITY or FITNESS FOR A PARTICULAR PURPOSE.
cmake --vesion查看cmake版本
(base) xiaoduan@fighter:~/source1/CT-ICP/pyLiDAR-SLAM$ cmake --version
cmake version 3.16.1

CMake suite maintained and supported by Kitware (kitware.com/cmake).
2.安装clang编译器
安装clang参考下面网址安装:https://blog.csdn.net/xujianjun229/article/details/128902018#commentBox
的前面部分进行的。
依次输入一下三条命令:
sudo apt-get install llvm
sudo apt-get install clang
clang -v
产看版本的结果为:
clang version 10.0.0-4ubuntu1
Target: x86_64-pc-linux-gnu
Thread model: posix
InstalledDir: /usr/bin
Found candidate GCC installation: /usr/bin/../lib/gcc/x86_64-linux-gnu/7
Found candidate GCC installation: /usr/bin/../lib/gcc/x86_64-linux-gnu/7.5.0
Found candidate GCC installation: /usr/bin/../lib/gcc/x86_64-linux-gnu/8
Found candidate GCC installation: /usr/bin/../lib/gcc/x86_64-linux-gnu/9
Found candidate GCC installation: /usr/lib/gcc/x86_64-linux-gnu/7
Found candidate GCC installation: /usr/lib/gcc/x86_64-linux-gnu/7.5.0
Found candidate GCC installation: /usr/lib/gcc/x86_64-linux-gnu/8
Found candidate GCC installation: /usr/lib/gcc/x86_64-linux-gnu/9
Selected GCC installation: /usr/bin/../lib/gcc/x86_64-linux-gnu/9
Candidate multilib: .;@m64
Selected multilib: .;@m64
Found CUDA installation: /usr/lib/cuda, version 10.1
至此,所有的基本要求已经符合。
3.进行超级构建
3.1标准进行
依次执行以下命令来安装所有依赖:
mkdir .cmake-build-superbuild && cd .cmake-build-superbuild     #< Creates the cmake folder
cmake ../superbuild                                             #< (1) Configure step
cmake --build . --config Release                                #< Build step (Downloads and install the dependencies), add -DWITH_VIZ3D=ON to install with the GUI
cmake . -DWITH_VIZ3D=ON         #构建可视化
所有的命令执行完毕之后,如果一切正常,则应创建一个目录install,其中还会出现一个superbuild_import.cmake文件。
(此步骤进行之前,建议下载viz3d并执行pip install . 进行安装,这样可以避免后面会出现的一些问题)
3.2构建过程中遇到的问题
- 在第三句命令运行时出现问题了应该和连接外网有关,尝试了一下午决定忽略。
主要一直卡在:
git clone https://ceres-solver.googlesource.com/ceres-solveratal: unable to access ‘https://ceres-solver.googlesource.com/ceres-solver/’: Failed to connect to ceres-solver.googlesource.com port 443: 连接超
- 第二天早上来到之后还是决定试一试,因为在这儿忽略之后可能会出现其他一系列的问题。
调整网一直没能成功,于是就开始找文件中的clone语句,最终找到路径如下所示
在文件夹 .cmake-build-superbuild/MappingResearchKEU_superbuild/src/MappingResearchKEU_superbuild下gedit 打开CMakeLists.txt文件,进行以下改动
//更改前:
# INSTALL Ceres
if (WITH_CERES)
    message(INFO "${LOG_PREFIX}Generating Ceres dependency")

    ExternalProject_Add(
            Ceres
            PREFIX Ceres

            GIT_REPOSITORY https://ceres-solver.googlesource.com/ceres-solver  //!!!!需要改动的地方
            GIT_TAG 2.0.0

//更改后:
# INSTALL Ceres
if (WITH_CERES)
    message(INFO "${LOG_PREFIX}Generating Ceres dependency")

    ExternalProject_Add(
            Ceres
            PREFIX Ceres

            GIT_REPOSITORY https://github.com/ceres-solver/ceres-solver
            GIT_TAG 2.0.0
然后就成功了,还好没放弃。
4.构建并安装CT-ICP库
4.1标准进行
执行以下命令:
# Inside the main directory
mkdir cmake-build-release && cd  cmake-build-release                  #< Create the build directory
cmake .. -DCMAKE_BUILD_TYPE=Release                                   #< (2) Configure with the desired options (specify arguments with -D<arg_name>=<arg_value>), add -DWITH_VIZ3D=ON to install with the GUI
cmake --build . --target install --config Release --parallel 12       #< Build and Install the project
cmake . -DWITH_VIZ3D=ON         #构建可视化
注意: 第一行命令应该在此项目的主文件下进行。
如果一切正常,则超级构建目录中应该会出现一个子目录<SUPERBUILD_INSTALL_DIR>/CT_ICP/lib/cmake。 可以使用位于的配置文件在 cmake 中加载库项目,或使用 ROS 或指定的可执行文件。CT_ICP
4.2遇到的问题及解决办法
- 第二行命令运行时又出现错误:
CMake Error at cmake/external.cmake:13 (get_target_property):
  INTERFACE_LIBRARY targets may only have whitelisted properties.  The
  property "IMPORTED_RELEASE_LOCATION" is not allowed.
Call Stack (most recent call first):
  CMakeLists.txt:51 (include)


INFO /home/xiaoduan/project/lidar/ct_icp-master/install/Ceres/lib/libceres.so.2.0.0
INFO /home/xiaoduan/project/lidar/ct_icp-master/install/glog/lib/libglog.so.0.5.0
CMake Error at cmake/external.cmake:13 (get_target_property):
  INTERFACE_LIBRARY targets may only have whitelisted properties.  The
  property "IMPORTED_RELEASE_LOCATION" is not allowed.
Call Stack (most recent call first):
  CMakeLists.txt:51 (include)


INFO /home/xiaoduan/project/lidar/ct_icp-master/install/yaml-cpp/lib/libyaml-cpp.so.0.6.3
CMake Error at cmake/external.cmake:13 (get_target_property):
  INTERFACE_LIBRARY targets may only have whitelisted properties.  The
  property "IMPORTED_RELEASE_LOCATION" is not allowed.
Call Stack (most recent call first):
  CMakeLists.txt:51 (include)


INFO /home/xiaoduan/project/lidar/ct_icp-master/install/tinyply/lib/libtinyply.so
INFO -- [CT-ICP] -- Appending to the INSTALL RPATH the RPATH to the external libraries:
		[:/home/xiaoduan/project/lidar/ct_icp-master/install/Ceres/lib:/home/xiaoduan/project/lidar/ct_icp-master/install/glog/lib:/home/xiaoduan/project/lidar/ct_icp-master/install/yaml-cpp/lib:/home/xiaoduan/project/lidar/ct_icp-master/install/tinyply/lib]
INFO [CT_ICP] -- "WITH_GTSAM=OFF gtsam dependent targets will not be built"
-- Configuring incomplete, errors occurred!
See also "/home/xiaoduan/project/lidar/ct_icp-master/cmake-build-release/CMakeFiles/CMakeOutput.log".
See also "/home/xiaoduan/project/lidar/ct_icp-master/cmake-build-release/CMakeFiles/CMakeError.log".
在网上搜了好多种方法都不好用,也没看明白,然后又在camke官网上搜索,甚至没有搜到IMPORTED_RELEASE_LOCATION。
试了好多种方式,发现每次搜索出来的都是IMPORTED_LOCATION_RELEASE,于是将cmake/external.cmake:13文件中的内容进行了修改。但是,事实证明,并没有效果。
接着按照以下网址对cmake进行了升级
https://blog.csdn.net/weixin_45860565/article/details/127869813
然后问题就解决了。最后一行命令直接成功,比较顺利。
现在cmake的版本为3.22.1
- 执行了cmake … --DWITH_VIZ3D=ON,然后就出现了以下问题。
CMake Error at install/superbuild_import.cmake:35 (find_package):
  Could not find a package configuration file provided by "viz3d" with any of
  the following names:

    viz3dConfig.cmake
    viz3d-config.cmake

  Add the installation prefix of "viz3d" to CMAKE_PREFIX_PATH or set
  "viz3d_DIR" to a directory containing one of the above files.  If "viz3d"
  provides a separate development package or SDK, be sure it has been
  installed.
Call Stack (most recent call first):
  install/superbuild_import.cmake:101 (SLAM_DEFAULT_FIND_PACKAGE)
  cmake/superbuild_utils.cmake:27 (include)
  CMakeLists.txt:49 (SLAM_INCLUDE_SUPERBUILD)
调试没调试好,所幸删除cmake-build-release并重新执行了一遍D步骤。
然后进入到文件夹ct_icp-master/.cmake-build-superbuild/MappingResearchKEU_superbuild/src/MappingResearchKEU_superbuild-build/viz3d/src/viz3d中,执行命令./install.sh进行了安装
然后再从第三步执行一遍。
- 在执行第二句时,出现错误:
CMake Error at /opt/ros/noetic/share/catkin/cmake/empy.cmake:30 (message):
  Unable to find either executable 'empy' or Python module 'em'...  try
  installing the package 'python3-empy'
Call Stack (most recent call first):
  /opt/ros/noetic/share/catkin/cmake/all.cmake:164 (include)
  /opt/ros/noetic/share/catkin/cmake/catkinConfig.cmake:20 (include)
  CMakeLists.txt:64 (find_package)
按照下面两个网站的内容进行解决
https://blog.csdn.net/gongdiwudu/article/details/124430036
https://blog.csdn.net/zkk9527/article/details/125558478
5.构建 CT-ICP 的 ROS 包装
5.1标准进行
- 安装共享库,执行以下命令:
cd ros/roscore
mkdir cmake-build-release && cd  cmake-build-release                  #< Create the build directory
cmake .. -DCMAKE_BUILD_TYPE=Release                                   #< (2) Configure with the desired options (specify arguments with -D<arg_name>=<arg_value>)
cmake --build . --target install --config Release --parallel 12       #< Build and Install the ROSCore library
- 新建一个工作空间,catkin_ws。并在里面建立一个src文件,执行以下命令:
mkdir -p catkin_ws/src
- 将项目与自己的空间连接到一起
cd <path-to-your-catkin-workspace>/src                              #< Move to the Catkin Workspace's src directory
ln -s <path-to-ct_icp-git-project>/ros/catkin_ws/ct_icp_odometry ct_icp_odometry        #< Make a symbolic link to the `catkin_ws` folder
ln -s <path-to-ct_icp-git-project>/ros/catkin_ws/slam_roscore slam_roscore        #< Make a symbolic link to the `catkin_ws` folder
cd ..                                                               #< Move back to the root of the catkin workspace
catkin_make -DSUPERBUILD_INSTALL_DIR=<path-to-superbuild-install-dir>
如果安装成功,并且在获取工作区的 devel 目录后,您应该能够启动 已安装的 ROS 节点。
包装定义以下节点:
ct_icp_dataset_node:发布从磁盘读取ct_icp不同数据集的点云的节点。
ct_icp_odometry_node:运行ct_icp测程的主测程节点。
注意: 这里的的工作空间和项目没有包含和被包含的关系。
运行测试:
roslaunch ct_icp_odometry launch_slam_dataset.launch dataset_path:=/home/xiaoduan/Desktop/dataset/KITTI/KITTI_raw dataset:=KITTI_raw sequence:=00
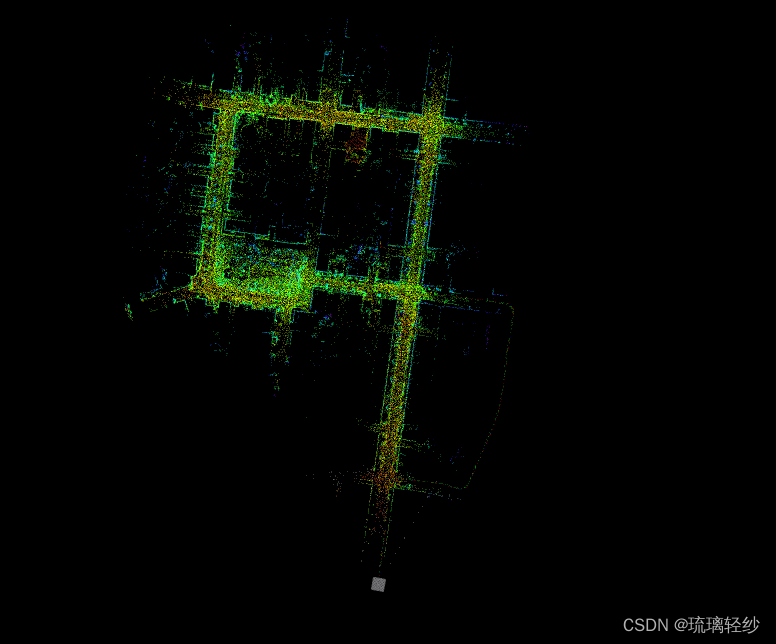
测试结果:
测试过程中的一个截图,最终留下的是一个轨迹图。
运行篇
1、使用脚本(在ct-icp数据集上)
此时感觉不用ros也能跑出来,于是就直接使用脚本跑,可以运行成功。
执行命令:
./run_odometry -c /home/xiaoduan/project/lidar/ct_icp-master/config/odometry/driving_config.yaml
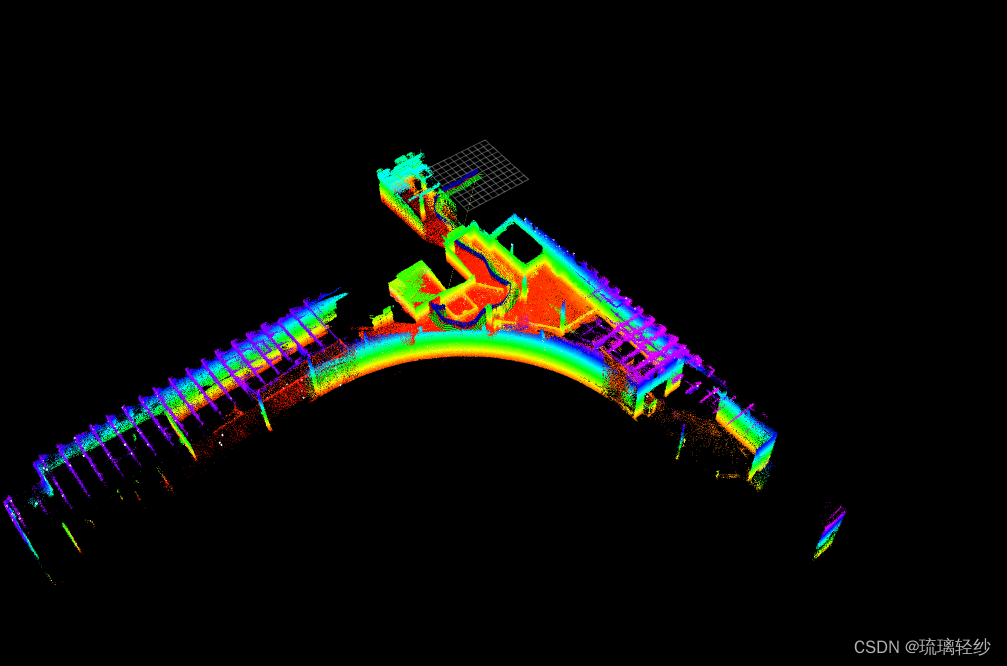
脚本测试结果:

2.使用可控系统(ROS)
完成 ROS 安装后,使用 Rosbag推出测程计,例如:ros/catkin_ws/ct_icp_odometry/launch
roslaunch ct_icp_odometry lidar_odometry_subt.launch rosbag:=/home/xiaoduan/Desktop/dataset/a_lvl_1.bag
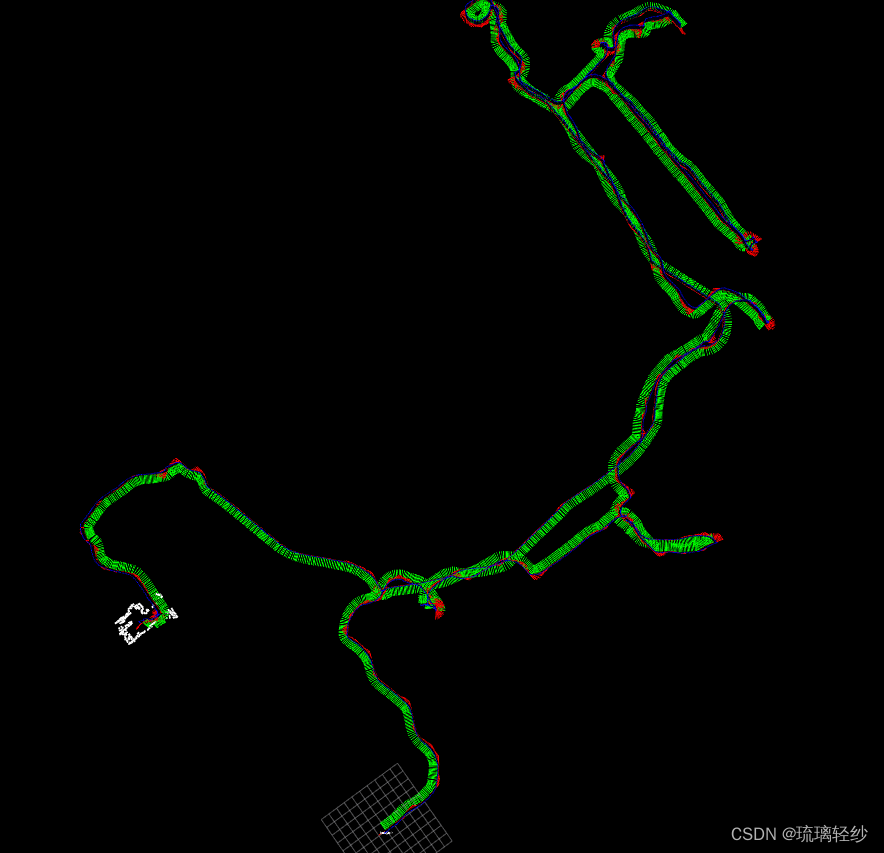
运行结果:


写在最后:
整个大体的步骤大体就有以下几个过程。
下载viz3d并执行pip install . 进行安装
git
cd
执行超级构建
对cmake进行手动升级
执行构建slam库
执行构建ros库
独立建立工作空间,与git的地址不同
进行节点创立
完成
然后进行运行


 320
320


 被折叠的 条评论
为什么被折叠?
被折叠的 条评论
为什么被折叠?
 到【灌水乐园】发言


