


【ROS2硬件控制】1.课程及开发平台介绍_哔哩哔哩_bilibili
动手学ROS2
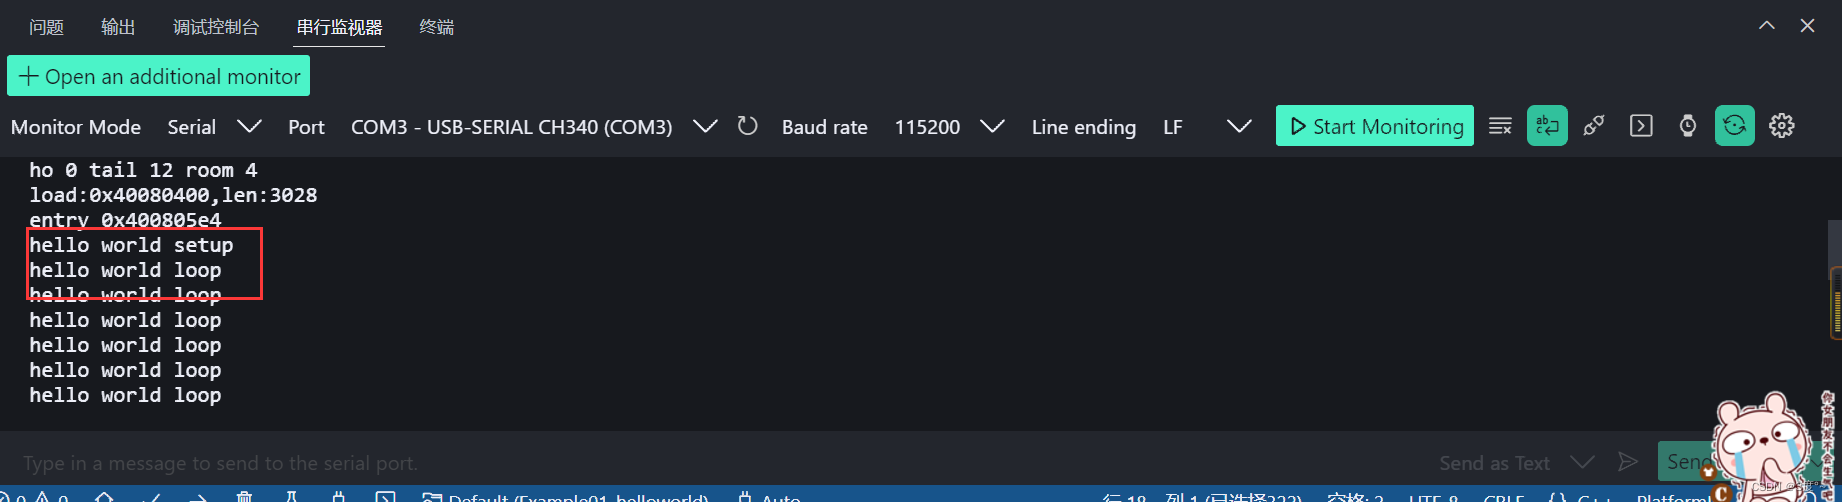
串口输出helloworld工程
#include <Arduino.h>

// put function declarations here:

void setup() {
  // put your setup code here, to run once:
  Serial.begin(115200);
  Serial.printf("hello world setup\n");
}

void loop() {
  // put your main code here, to run repeatedly:
  Serial.printf("hello world loop\n");
  delay(1000);

}
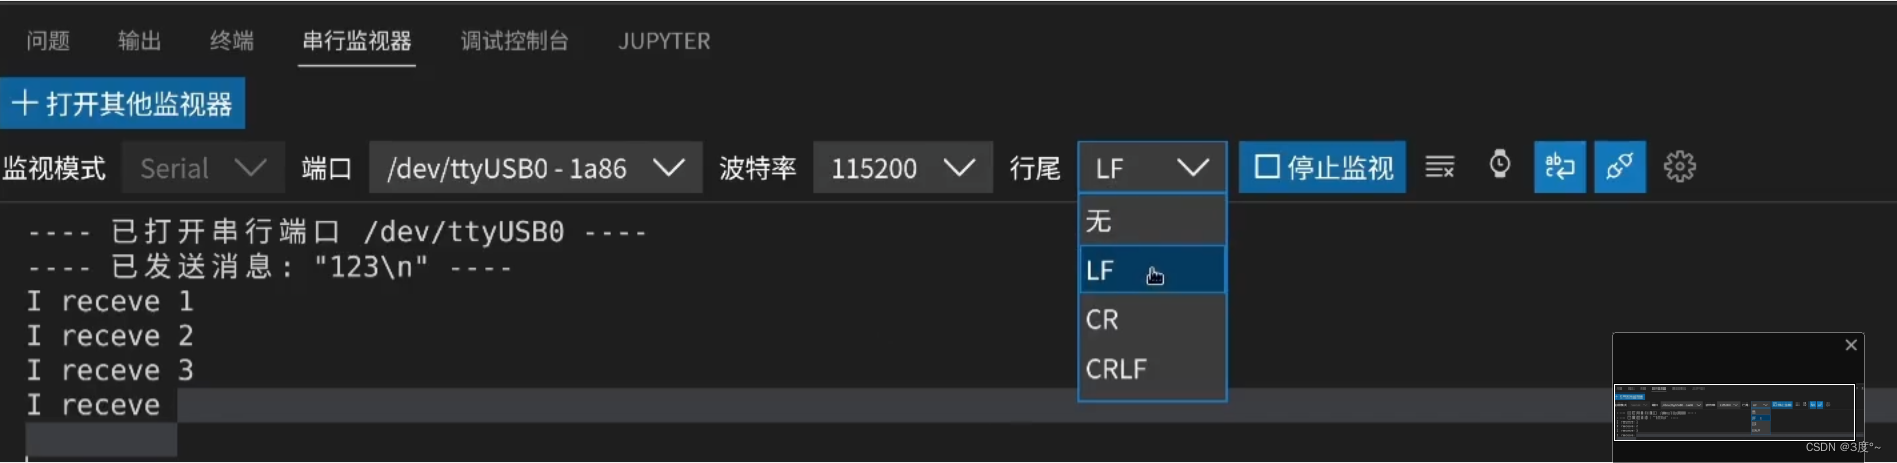
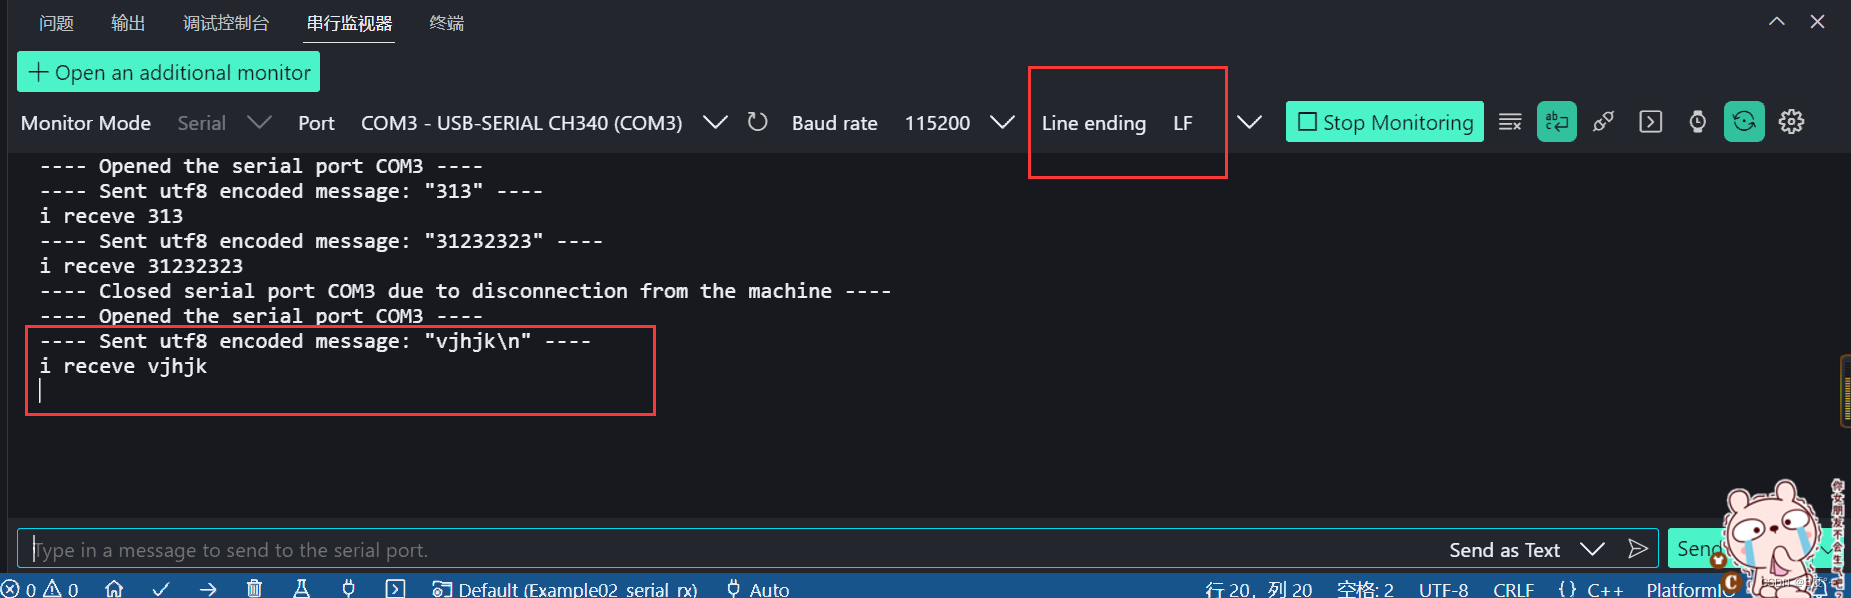
串口通讯接收实验
Serial.available() 的意思是:返回串口缓冲区中当前剩余的字符个数。一般用这个函数来判断串口的缓冲区有无数据,当Serial.available()>0时,说明串口接收到了数据,可以读取;
Serial.read()指从串口的缓冲区取出并读取一个Byte的数据,比如有设备通过串口向Arduino发送数据了,我们就可以用Serial.read()来读取发送的数据。
#include <Arduino.h>
// put function declarations here:
void setup()
{
// put your setup code here, to run once:
Serial.begin(115200);
}
void loop()
{
// put your main code here, to run repeatedly:
if (Serial.available())
{
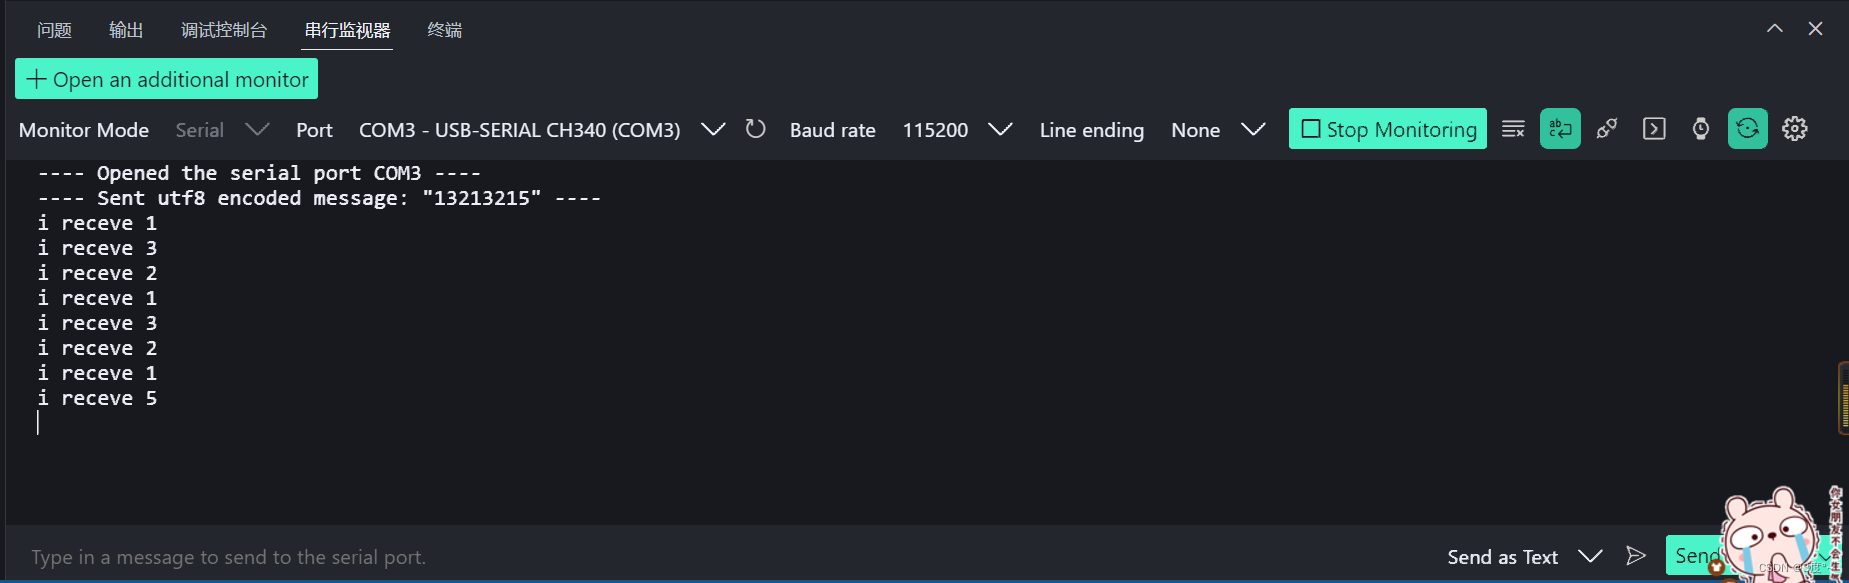
int c = Serial.read(); // 一次性接收一个字符
// String c = Serial.readString();
if (c != -1)
{
Serial.printf("i receve %c\n", c);
}
}
}
// put function definitions here:
#include <Arduino.h>
// put function declarations here:
void setup()
{
// put your setup code here, to run once:
Serial.begin(115200);
}
void loop()
{
// put your main code here, to run repeatedly:
if (Serial.available())
{
// int c = Serial.read(); // 一次性接收一个字符
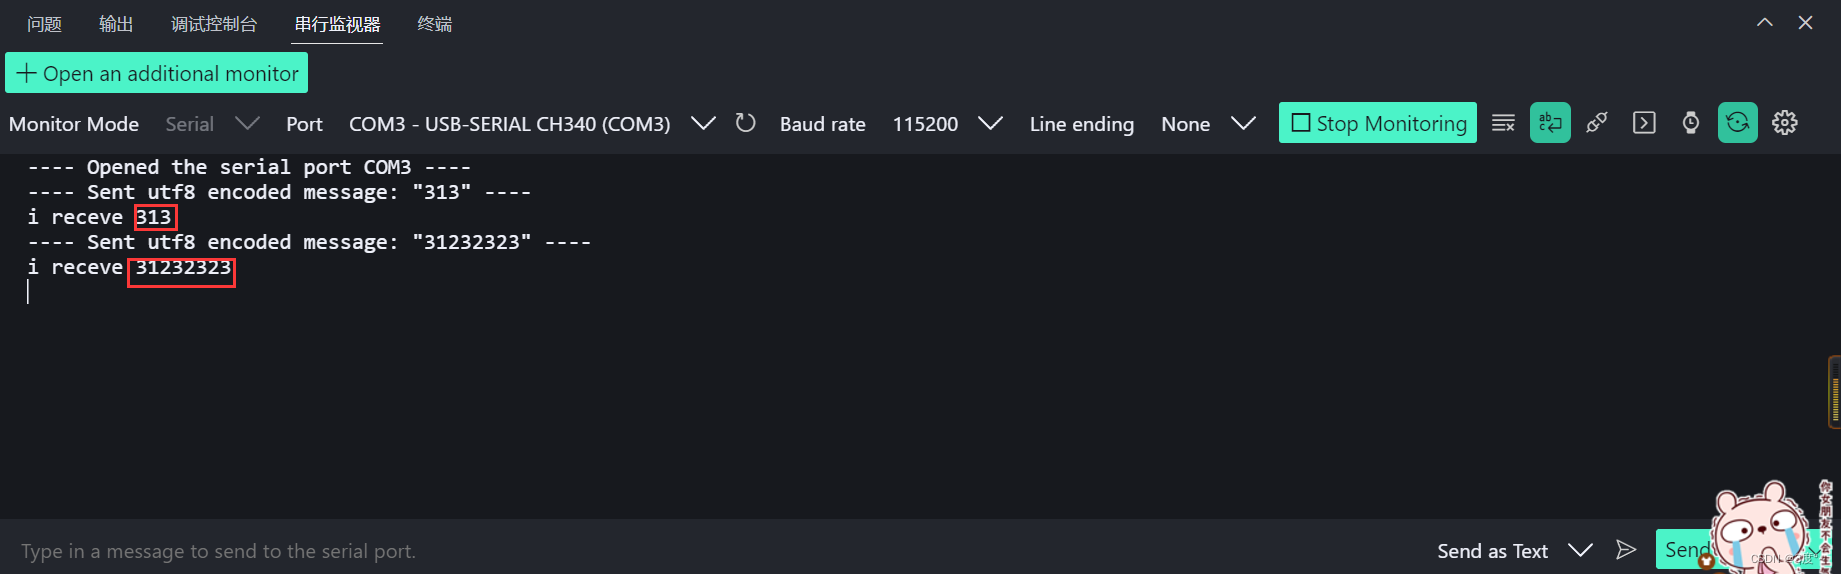
String c = Serial.readString(); // 接受字符串,但是由于不知道什么时候结束,所以反映会慢一点
// if (c != -1)
// {
// Serial.printf("i receve %c\n", c);
Serial.printf("i receve %s\n", c);
// }
}
}
// put function definitions here:
#include <Arduino.h>

// put function declarations here:

void setup()
{
  // put your setup code here, to run once:
  Serial.begin(115200);
}

void loop()
{
  // put your main code here, to run repeatedly:
  if (Serial.available())
  {
    // int c = Serial.read();  // 一次性接收一个字符
    // String c = Serial.readString();  // 接受字符串,但是由于不知道什么时候结束,所以反映会慢一点
    String c = Serial.readStringUntil('\n');  // 接受字符串,直到遇到换行终止,反应快速

    // if (c != -1)
    // {
    // Serial.printf("i receve %c\n", c);
    Serial.printf("i receve %s\n", c);

    // }
  }
}

// put function definitions here:
完成点灯-GPIO控制
 LED闪烁代码
#include <Arduino.h>

// put function declarations here:
#define LED_PIN 2
void setup() {
  // put your setup code here, to run once:
  pinMode(LED_PIN, OUTPUT);
}

void loop() {
  // put your main code here, to run repeatedly:
  digitalWrite(LED_PIN, LOW);
  delay(1000);
  digitalWrite(LED_PIN, HIGH);
  delay(1000);
}

// put function definitions here:
通过串口控制LED
#include <Arduino.h>

// put function declarations here:
#define LED_PIN 2
void setup()
{
  // put your setup code here, to run once:
  Serial.begin(115200); // 初始化串口
  pinMode(LED_PIN, OUTPUT);
  digitalWrite(LED_PIN, HIGH); // 关闭LED

}

void loop()
{
  // put your main code here, to run repeatedly:
  if (Serial.available())
  {
    String command = Serial.readStringUntil('\n');
    if (command == "on")
    {
      digitalWrite(LED_PIN, LOW);  // 打开LED
    }
    else if (command == "off")
    {
      digitalWrite(LED_PIN, HIGH); // 关闭LED
    }
  }
}

// put function definitions here:
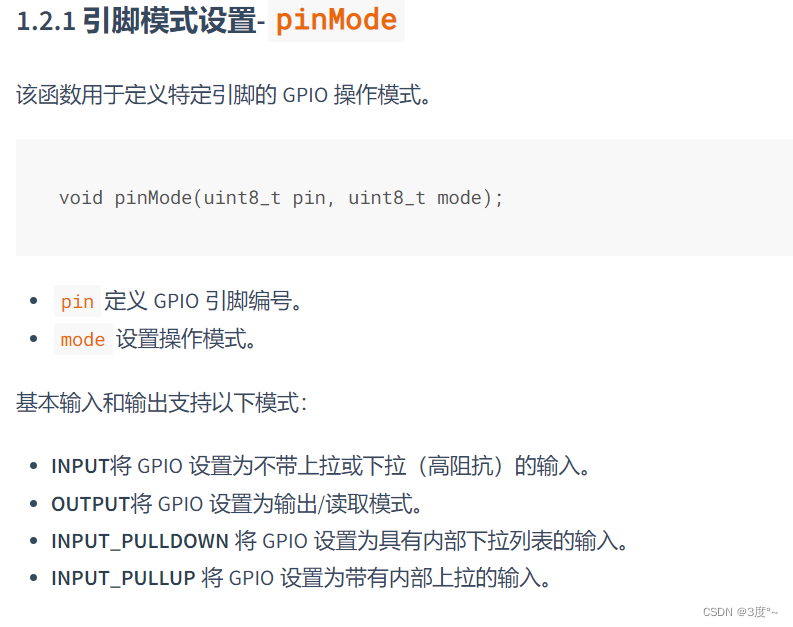
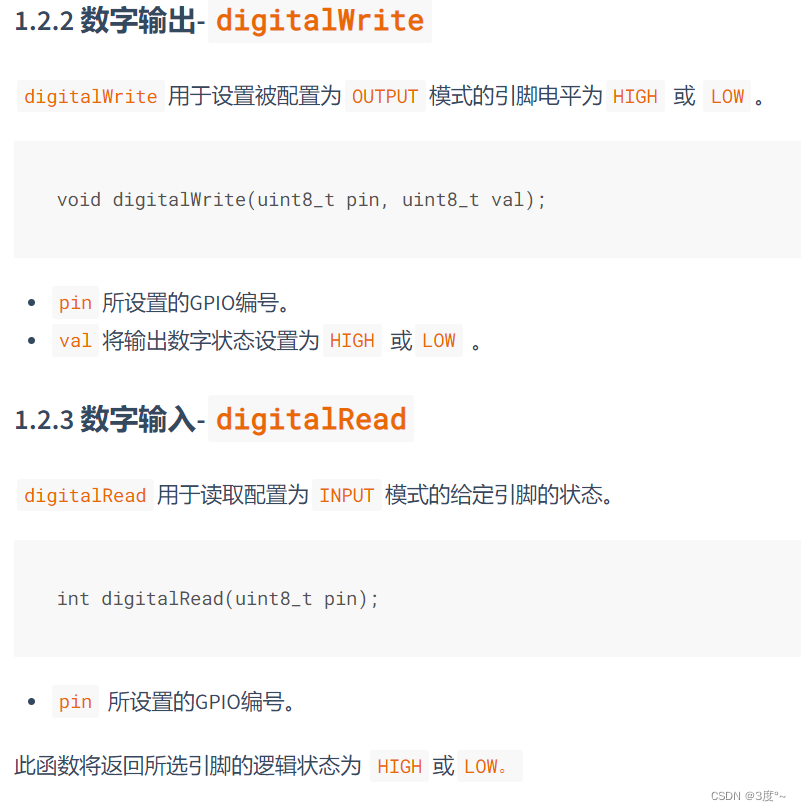
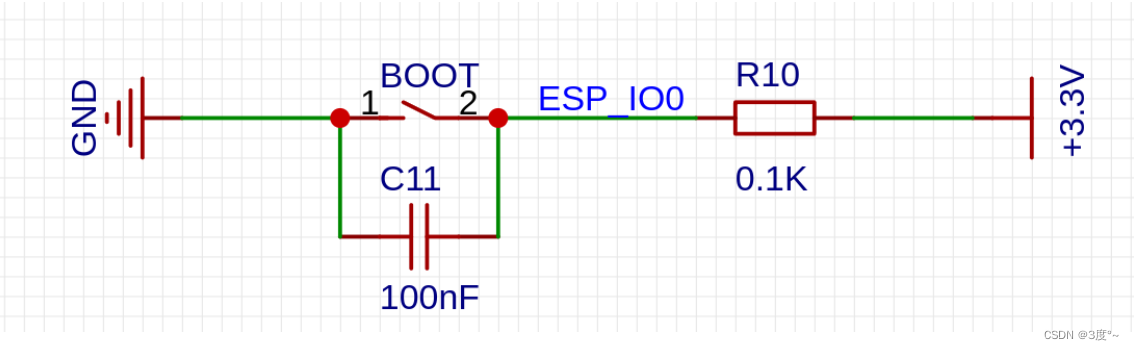
使用按键-GPIO输入
#include <Arduino.h>

// put function declarations here:
#define LED_PIN 2
#define KEY_PIN 0

bool status = false; // 初始化为关闭状态

void setup()
{
  // put your setup code here, to run once:
  Serial.begin(115200);
  pinMode(LED_PIN, OUTPUT);
  pinMode(KEY_PIN, INPUT);
}

void loop()
{

  if (digitalRead(KEY_PIN) == LOW)
  {
    delay(50);                       // 防止误触
    if (digitalRead(KEY_PIN) == LOW) // 按键被按下了
    {
      status = !status; // 状态取反
      while (digitalRead(KEY_PIN) == LOW)
        ;
    }
  }

  if (status == true)
  {
    digitalWrite(LED_PIN, LOW);
  }
  else
  {
    digitalWrite(LED_PIN, HIGH);
  }
}

// put function definitions here:
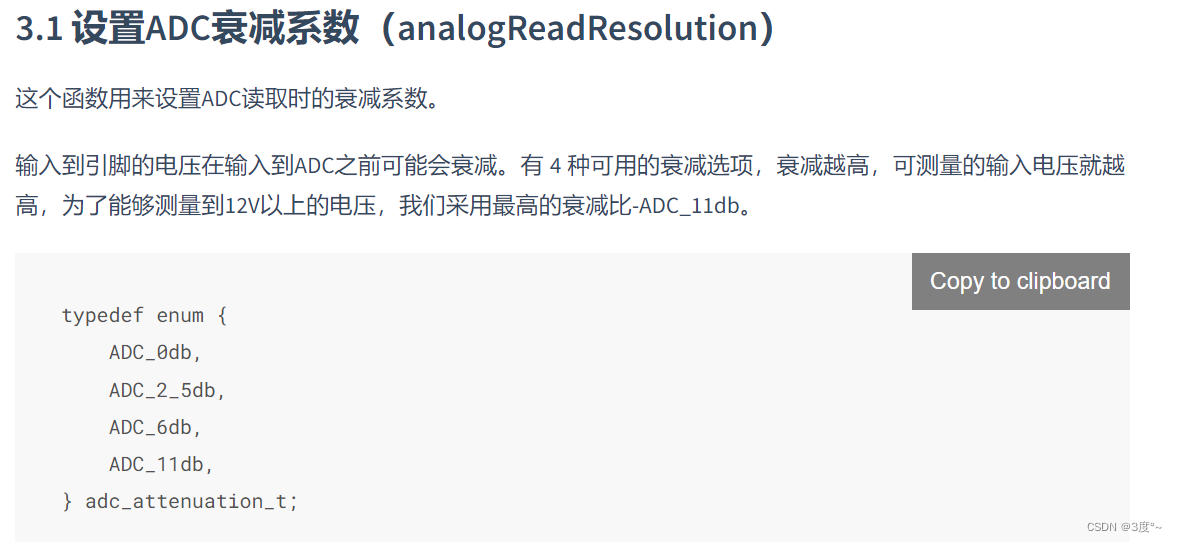
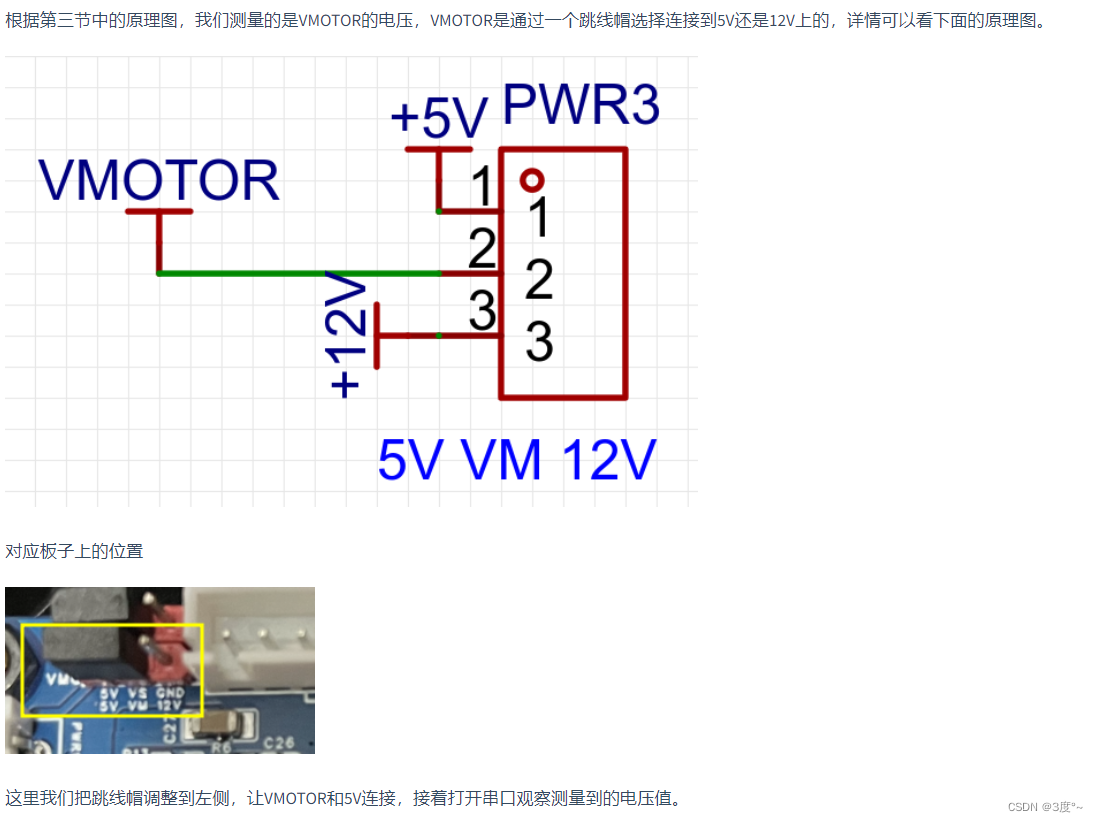
电池电压的测量-学会使用ADC

#include <Arduino.h>
// put function declarations here:
#define ADC_PIN 34
void setup() {
// put your setup code here, to run once:
Serial.begin(115200);
pinMode(ADC_PIN, INPUT);
analogSetAttenuation(ADC_11db); // 设置衰减系数,默认ADC_11db
}
void loop() {
// put your main code here, to run repeatedly:
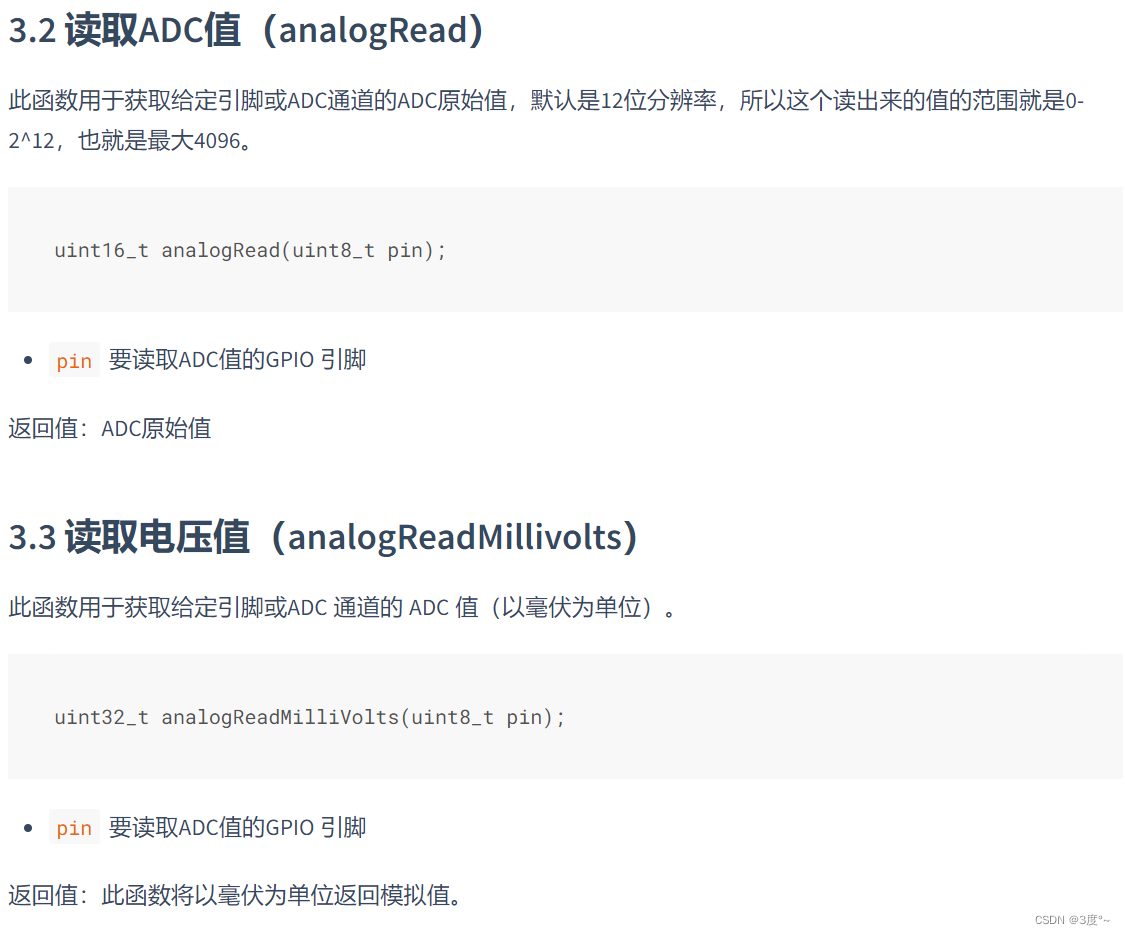
int analogValue = analogRead(ADC_PIN);
int analogvolts = analogReadMilliVolts(ADC_PIN); //模拟电压值
float realvolts = 5.02 *((float)analogvolts * 1e-3);
Serial.printf("analog:%d volts:%dmV real:%fV \n", analogValue, analogvolts, realvolts);
delay(1000);
}
// put function definitions here:
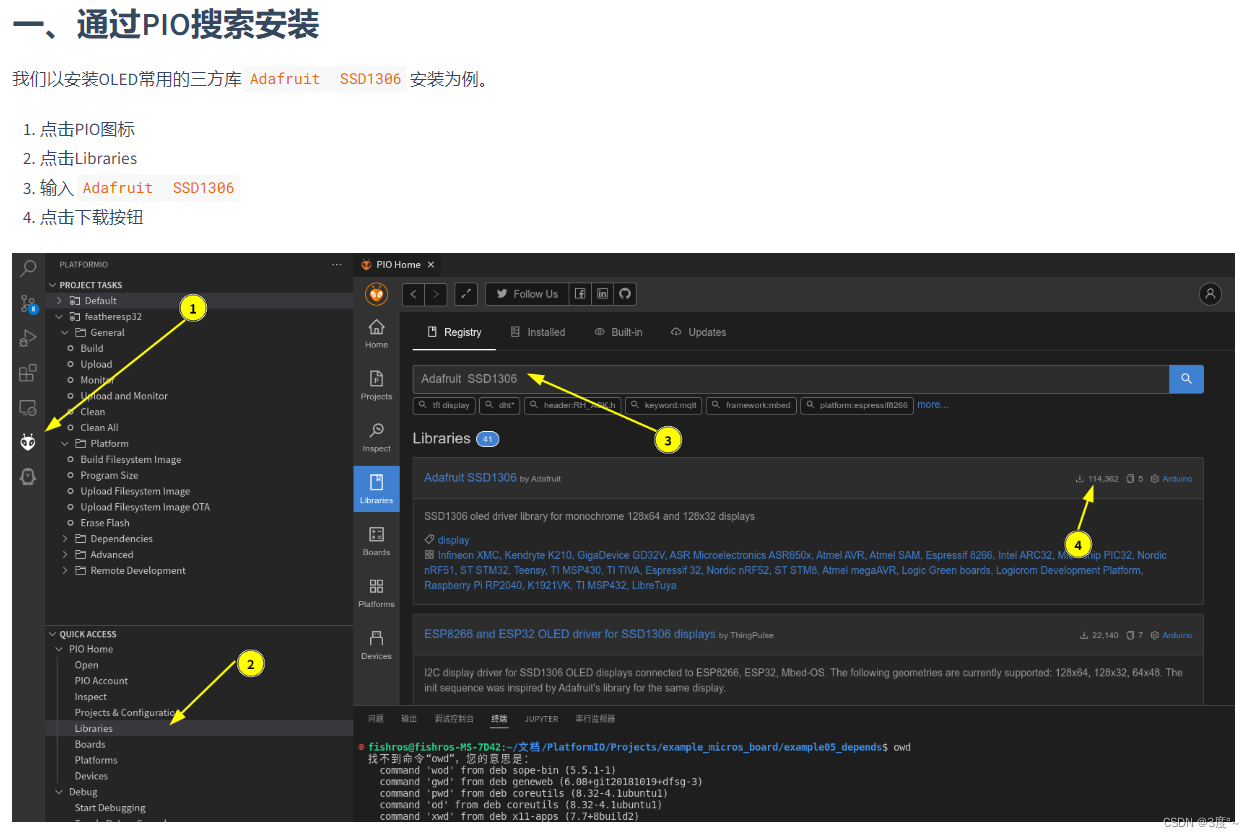
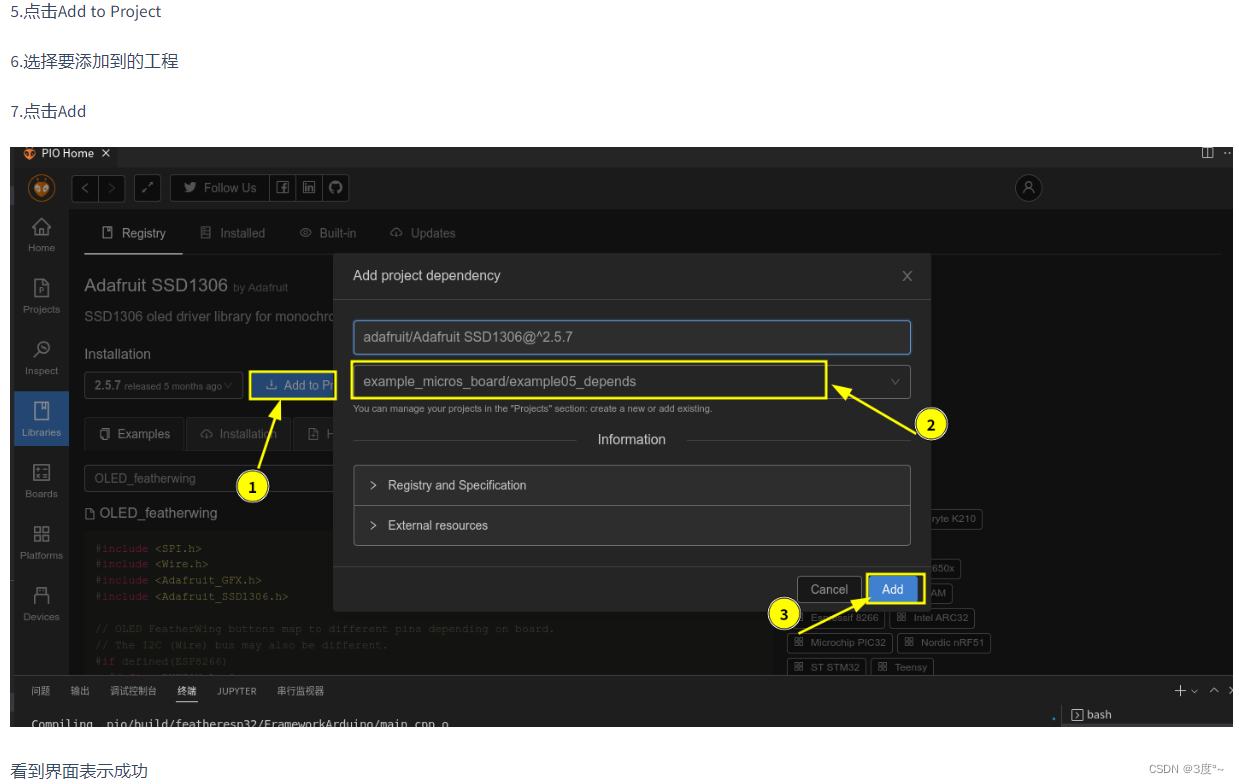
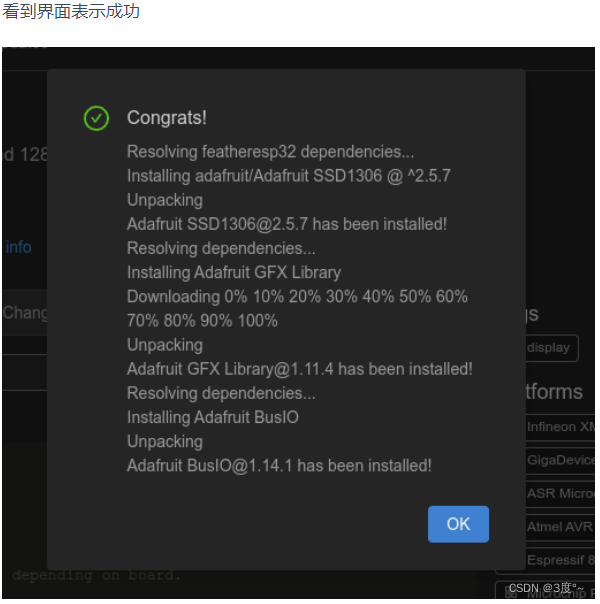
学会安装第三方库

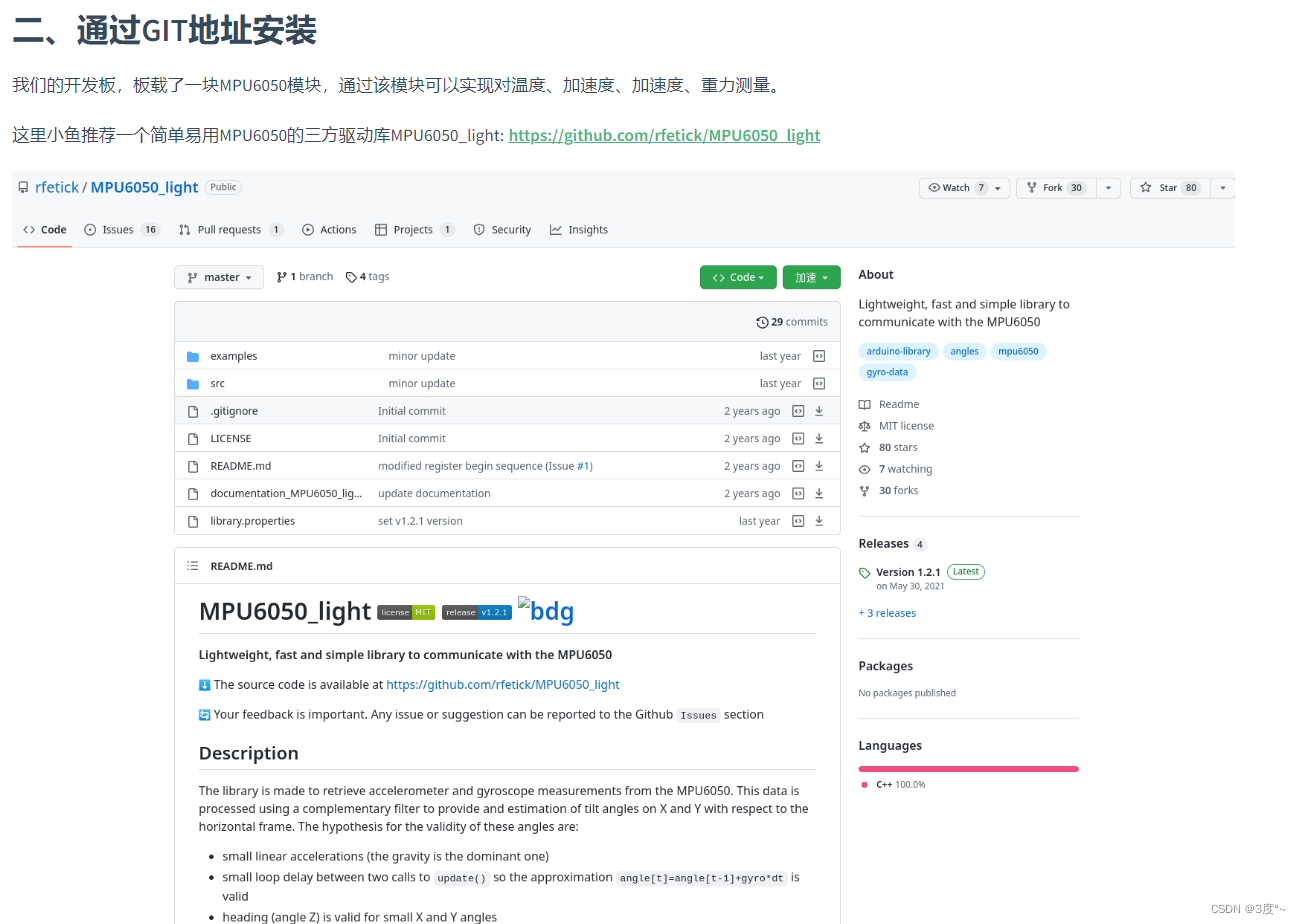
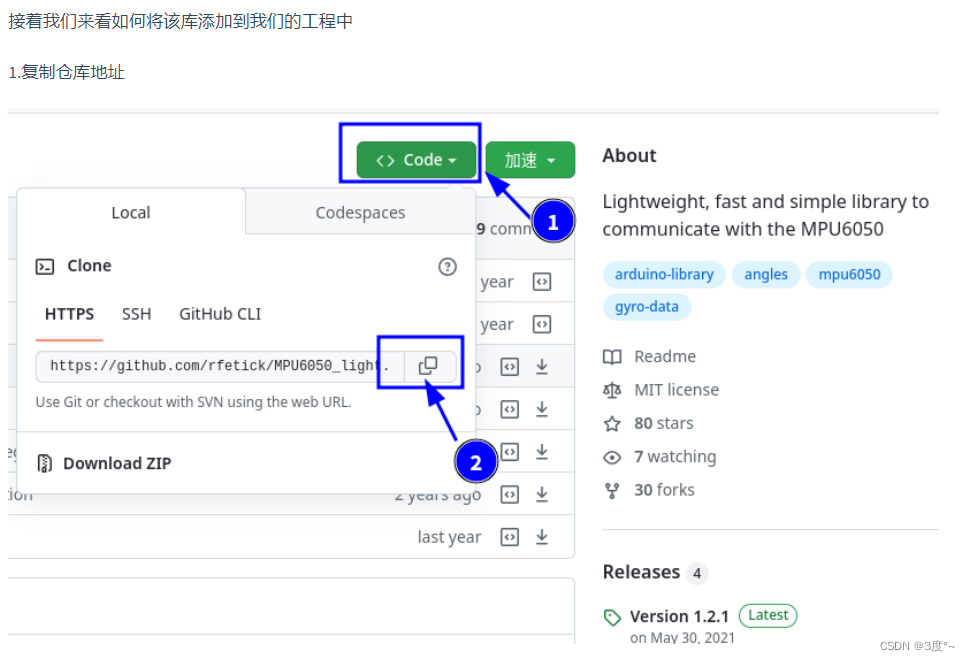

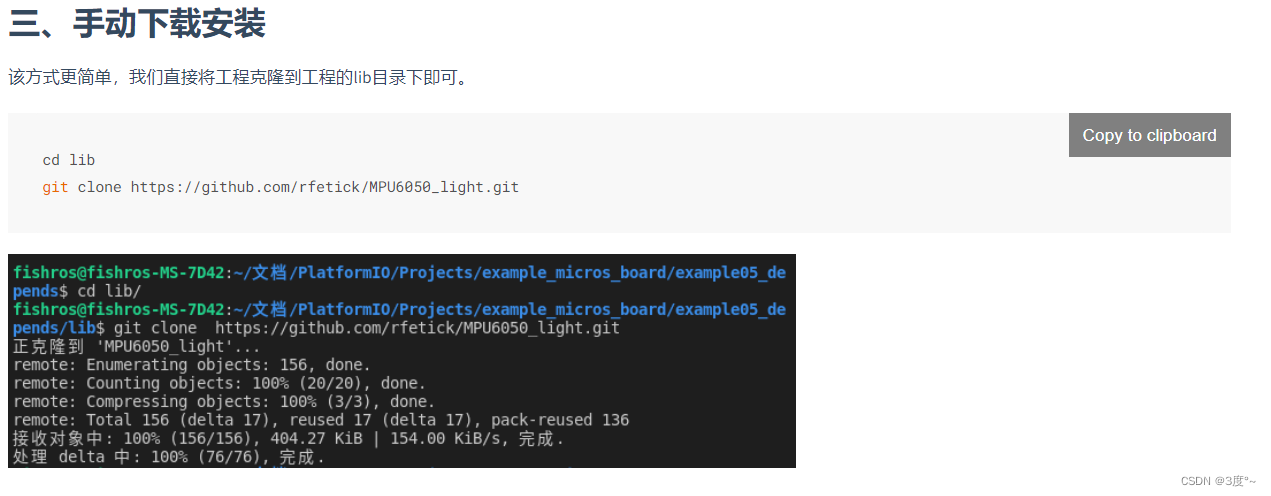
使用开源库驱动IMU
/* Get all possible data from MPU6050
* Accelerometer values are given as multiple of the gravity [1g = 9.81 m/s²]
* Gyro values are given in deg/s
* Angles are given in degrees
* Note that X and Y are tilt angles and not pitch/roll.
*
* License: MIT
*/
#include "Wire.h"
#include <MPU6050_light.h>
MPU6050 mpu(Wire);
long timer = 0;
void setup() {
Serial.begin(115200);
Wire.begin(18, 19);
byte status = mpu.begin();
Serial.print(F("MPU6050 status: "));
Serial.println(status);
while(status!=0){ } // stop everything if could not connect to MPU6050
Serial.println(F("Calculating offsets, do not move MPU6050"));
delay(1000);
mpu.calcOffsets(true,true); // gyro and accelero
Serial.println("Done!\n");
}
void loop() {
mpu.update();
if(millis() - timer > 1000){ // print data every second
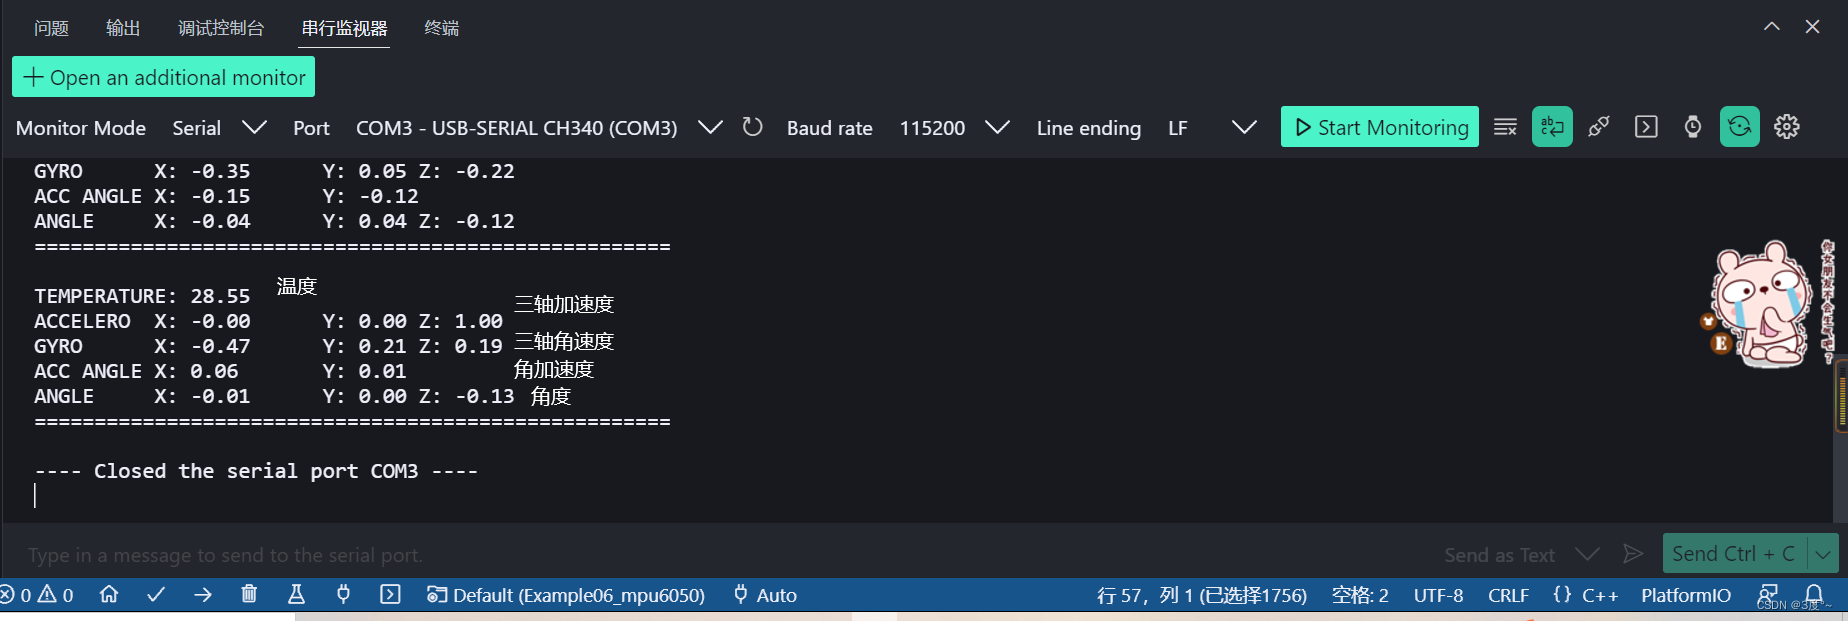
Serial.print(F("TEMPERATURE: "));Serial.println(mpu.getTemp());
Serial.print(F("ACCELERO X: "));Serial.print(mpu.getAccX());
Serial.print("\tY: ");Serial.print(mpu.getAccY());
Serial.print("\tZ: ");Serial.println(mpu.getAccZ());
Serial.print(F("GYRO X: "));Serial.print(mpu.getGyroX());
Serial.print("\tY: ");Serial.print(mpu.getGyroY());
Serial.print("\tZ: ");Serial.println(mpu.getGyroZ());
Serial.print(F("ACC ANGLE X: "));Serial.print(mpu.getAccAngleX());
Serial.print("\tY: ");Serial.println(mpu.getAccAngleY());
Serial.print(F("ANGLE X: "));Serial.print(mpu.getAngleX());
Serial.print("\tY: ");Serial.print(mpu.getAngleY());
Serial.print("\tZ: ");Serial.println(mpu.getAngleZ());
Serial.println(F("=====================================================\n"));
timer = millis();
}
}
OLED屏幕
#include <Arduino.h>
#include "Wire.h"
#include "Adafruit_GFX.h"
#include "Adafruit_SSD1306.h"
// #include "IMU.h"

// put function declarations here:
Adafruit_SSD1306 display;
// MPU6050 mpu(Wire); // 初始化MPU6050对象
// IMU imu(mpu);      // 初始化IMU对象
// imu_t imu_data;
// unsigned long timer = 0;

void setup() {
  // put your setup code here, to run once:
  Serial.begin(115200);
  display.begin(18, 19);
  display = Adafruit_SSD1306(128, 64, &Wire);
  display.begin(SSD1306_SWITCHCAPVCC, 0x3c);
  display.clearDisplay();
  display.setTextSize(2);
  display.setCursor(0, 0);
  display.setTextColor(SSD1306_WHITE);
  display.println("hello oled");
  display.display();
}

void loop() {
  // put your main code here, to run repeatedly:
  // imu.update();
  // delay(10);
  // if ((millis() - timer) > 100)
  // {
  //   imu.getImuData(imu_data); // 获取IMU数据结构体
  //   Serial.printf("imu:\teuler(%f,%f,%f)\n",
  //                 imu_data.angle_euler.x, imu_data.angle_euler.y, imu_data.angle_euler.z);
  //   Serial.printf("imu:\torientation(%f,%f,%f,%f)\n",
  //                 imu_data.orientation.w, imu_data.orientation.x, imu_data.orientation.y, imu_data.orientation.z);
  //   display.clearDisplay();
  //   display.setCursor(0,0);
  //   display.print("X=");   // 输出X
  //   display.println(mpu.getAngleX());
  //   display.print("Y="); // 输出Y
  //   display.println(mpu.getAngleY());
  //   display.print("Z="); // 输出Z
  //   display.println(mpu.getAngleZ());
  //   display.display();
  //   timer = millis();
  // }
}

// put function definitions here:
#include <Arduino.h>
#include "Wire.h"
// put function declarations here:
uint8_t cmd_ssd1315[] = {0xae, 0x00, 0x10, 0x40, 0x81, 0xcf, 0xa1, 0xc8, 0xa6, 0xa8,
                         0x3f, 0xd3, 0x00, 0xd5, 0x80, 0xd9, 0xf1, 0xda, 0x12, 0xdb,
                         0x40, 0x20, 0x00, 0x8d, 0x14, 0xa4, 0xa6, 0xaf};
void setup() {
  // put your setup code here, to run once:
  Wire.begin(18, 19);
  Wire.beginTransmission(0x3c);
  for (int i = 0; i < 28; i++)
  {
    Wire.write(cmd_ssd1315[i]);
  }
  Wire.endTransmission();

}

void loop() {
  // put your main code here, to run repeatedly:
}

// put function definitions here:


 2345
2345

 被折叠的 条评论
为什么被折叠?
被折叠的 条评论
为什么被折叠?
 到【灌水乐园】发言


