使用Unity全新输入系统可以方便地让我们的项目进行跨平台。
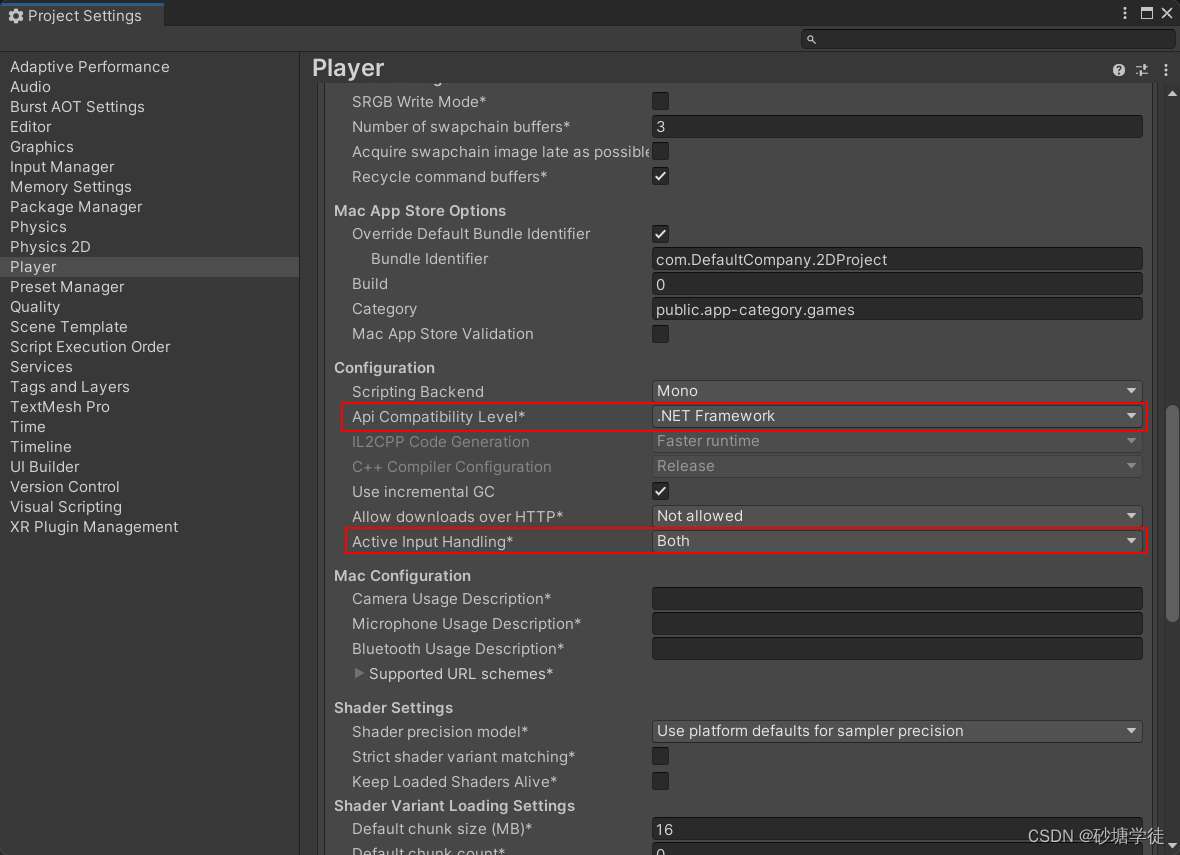
第一步:设置Project Settings
依次单击 Edit | Project Settings | Player ,然后展开 Other Settings ,将 Api Compatibility Level 设置为 .Net Framework ,再将 Active Input Handling 设置为 Both 或 Input System Package(New) ,之后Unity会提示重启,单击确定。
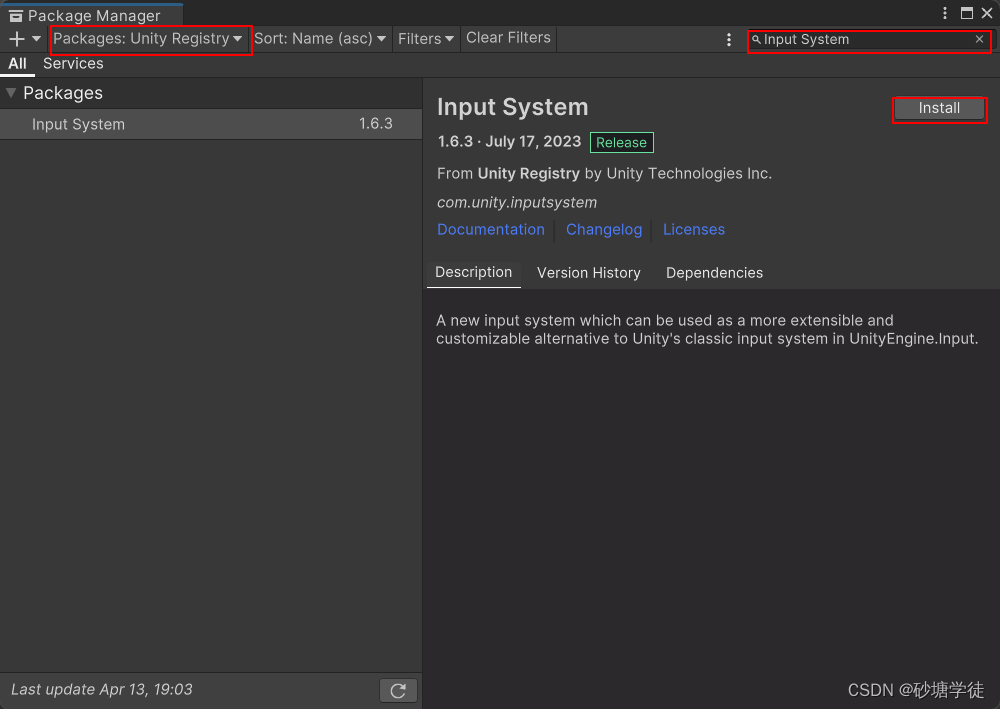
第二步:导入Input System
依次单击 Window | Package Manager ,选择 Packages 为 Unity Registry ,然后搜索 Input System ,然后将其下载到项目中。
第三步:生成玩家专属的Input System脚本
关于使用Unity全新输入系统的方法有多个,这里介绍其中一种。
选中场景的任何一个物体,单击 Inspector 面板里的 Add Component 为其添加 Player Input ,然后单击该组件下的 Create Actions... 按钮,选择保存路径,即可生成一个配置文件,我将其命名为 PlayerInputControl ,然后可将原先物体挂载的 Player Input 移除。
选中之前生成的配置文件,勾选 Inspector 面板里的 Generate C# Class ,然后点击 Apply ,就会生成一个对应的Input System脚本,该脚本名与配置文件同名。
第四步:使用Unity全新输入系统
要在其它脚本利用Unity全新输入系统来监听玩家输入,首先要创建该Input System脚本的实例对象(这里我的Input System脚本名为PlayerInputControl),然后记住一定要调用Enable()方法来启用它,以下提供了一个使用Input System的标准模板。
using System.Collections;
using System.Collections.Generic;
using UnityEngine;
public class Player : MonoBehaviour
{
// 玩家单例
public static GameObject Instance;
// 将其设置为public以便在其它脚本共用该输入系统
[HideInInspector]
public PlayerInputControl inputControl;
// 用于保存玩家的[移动]输入
private Vector2 moveVector;
private void Awake()
{
if (Instance == null)
Instance = gameObject;
else
Destroy(gameObject);
inputControl = new PlayerInputControl();
}
// Update is called once per frame
void Update()
{
Move();
print(moveVector);
}
private void OnEnable()
{
inputControl.Enable();
}
private void OnDisable()
{
inputControl.Disable();
}
// 监听玩家[移动]输入
private void Move()
{
moveVector= inputControl.Player.Move.ReadValue<Vector2>().normalized;
}
}