


系统搭建
- 系统搭建 :IDE+GCC+CMAKE
OpenCV的安装
cmake
sudo apt-get install cmake
其他环境依赖
-
sudo apt install build-essential -
sudo apt-get install build-essential libgtk2.0-dev libavcodec-dev libavformat-dev libjpeg.dev libtiff5.dev libswscale-dev libjasper-dev -
不安装会报这个错误
OpenCV(4.6.0) /home/dell/下载/opencv-4.6.0/modules/highgui/src/window.cpp:1250: error: (-2:Unspecified error) The function is not implemented. Rebuild the library with Windows, GTK+ 2.x or Cocoa support. If you are on Ubuntu or Debian, install libgtk2.0-dev and pkg-config, then re-run cmake or configure script in function 'cvNamedWindow'
error
- E: 无法定位软件包 libjasper-dev
解决(换源重新安装)
-
sudo add-apt-repository "deb http://security.ubuntu.com/ubuntu xenial-security main" -
sudo apt update -
由于没有公钥,无法验证下列签名: NO_PUBKEY 40976EAF437D05B5 NO_PUBKEY 3B4FE6AC
-
sudo apt-key adv --recv-keys --keyserver keyserver.ubuntu.com 40976EAF437D05B5 3B4FE6ACC0B21F32
下载源码
-
git to slow try this : https://musetransfer.com/s/51uvmgitl 请点击链接获取《无主题 - opencv-4.6.0.zip》, 有效期至2月20日
-
https://musetransfer.com/s/103q0zpkj 请点击链接获取《无主题 - opencv_contrib-4.6.0.zip》, 有效期至2月28日
安装
unzip opencv-4.6.0.zipunzip opencv_contrib-4.6.0.zipcd opencv-4.6.0/sudo mkdir buildcd buildsudo cmake -D CMAKE_BUILD_TYPE=Release -D CMAKE_INSTALL_PREFIX=/usr/local
或sudo cmake -D CMAKE_BUILD_TYPE=Release -D CMAKE_INSTALL_PREFIX=/usr/local -D OPENCV_EXTRA_MODULES_PATH= **/opencv_contrib-4.6.0/modules/ ..
error
- 如果报错
CMake Error: The source directory "/home/dell/下载/opencv-4.6.0/build" does not appear to contain CMakeLists.txt.使用sudo cmake /home/dell/下载/opencv-4.6.0/ -DCMAKE_BUILD_TYPE=Release -DCMAKE_INSTALL_PREFIX=/usr/local
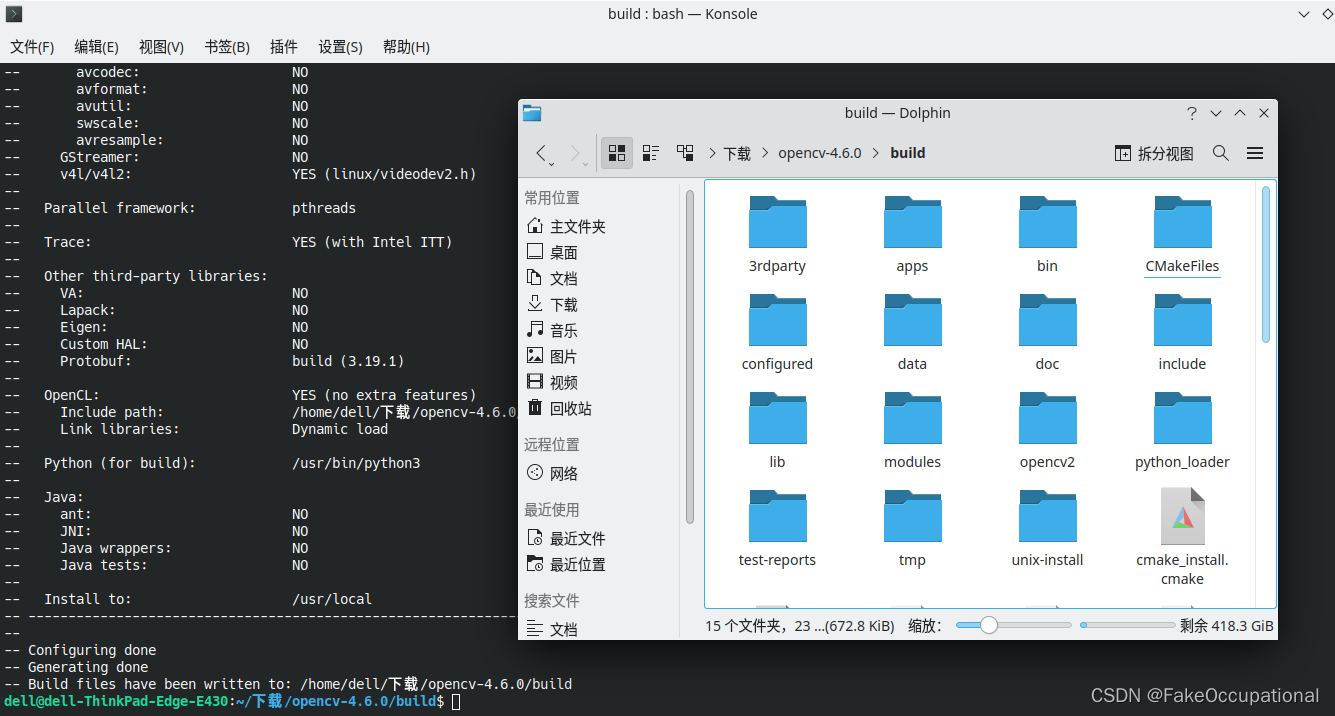
sudo make或sudo make -j4j为变异是使用的核心数量,这一步非常slowsudo make install
-- Installing: /usr/local/share/opencv4/lbpcascades/lbpcascade_profileface.xml
-- Installing: /usr/local/share/opencv4/lbpcascades/lbpcascade_silverware.xml
-- Installing: /usr/local/bin/opencv_annotation
-- Set runtime path of "/usr/local/bin/opencv_annotation" to "/usr/local/lib"
-- Installing: /usr/local/bin/opencv_visualisation
-- Set runtime path of "/usr/local/bin/opencv_visualisation" to "/usr/local/lib"
-- Installing: /usr/local/bin/opencv_interactive-calibration
-- Set runtime path of "/usr/local/bin/opencv_interactive-calibration" to "/usr/local/lib"
-- Installing: /usr/local/bin/opencv_version
-- Set runtime path of "/usr/local/bin/opencv_version" to "/usr/local/lib"
-- Installing: /usr/local/bin/opencv_model_diagnostics
-- Set runtime path of "/usr/local/bin/opencv_model_diagnostics" to "/usr/local/lib"
环境变量
sudo vim /etc/ld.so.conf.d/opencv.confi/usr/local/lib+ esc + :wq + enter

sudo ldconfigsudo vim /etc/bash.bashrc
PKG_CONFIG_PATH=$PKG_CONFIG_PATH:/usr/local/lib/pkgconfig
export PKG_CONFIG_PATH
sudo updatedb
或者按照这种方式配置
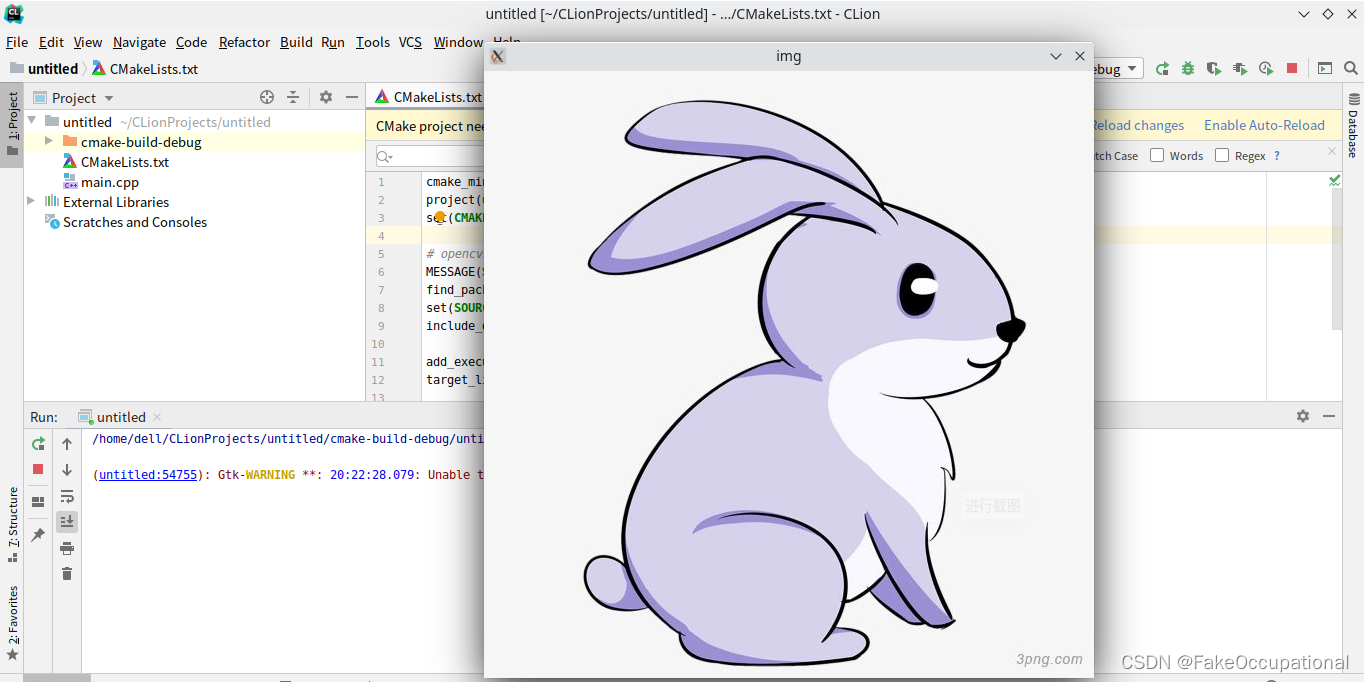
测试
cmake_minimum_required(VERSION 3.15)
project(untitled)
set(CMAKE_CXX_STANDARD 14)

MESSAGE(STATUS "Project: untitled")               #打印相关消息消息
find_package(OpenCV REQUIRED)# 通过find_package引入非官方的库(该方式只对支持cmake编译安装的库有效)
set(SOURCE_FILES main.cpp)
include_directories(${OpenCV_INCLUDE_DIRS})

add_executable(untitled main.cpp)
target_link_libraries(untitled ${OpenCV_LIBS})
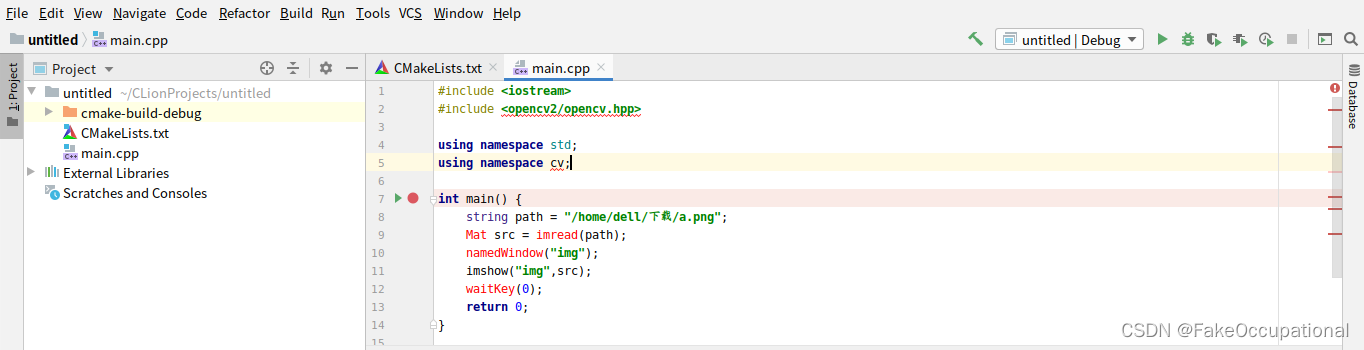
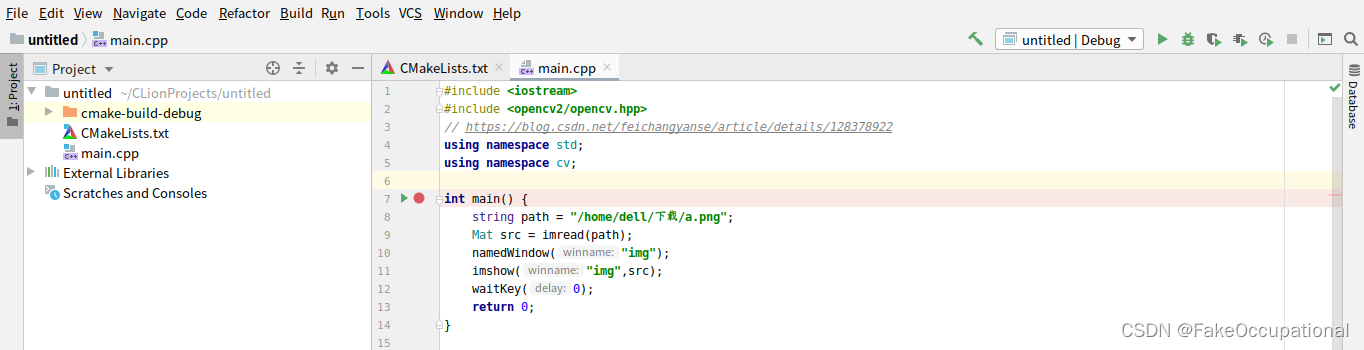
#include <iostream>
#include <opencv2/opencv.hpp>
using namespace std;
using namespace cv;

int main() {
    string path = "/home/dell/下载/a.png";
    Mat src = imread(path);
    namedWindow("img");
    imshow("img",src);
    waitKey(0);
    return 0;
}
- 重启一下就ok了
- 结果
onnx
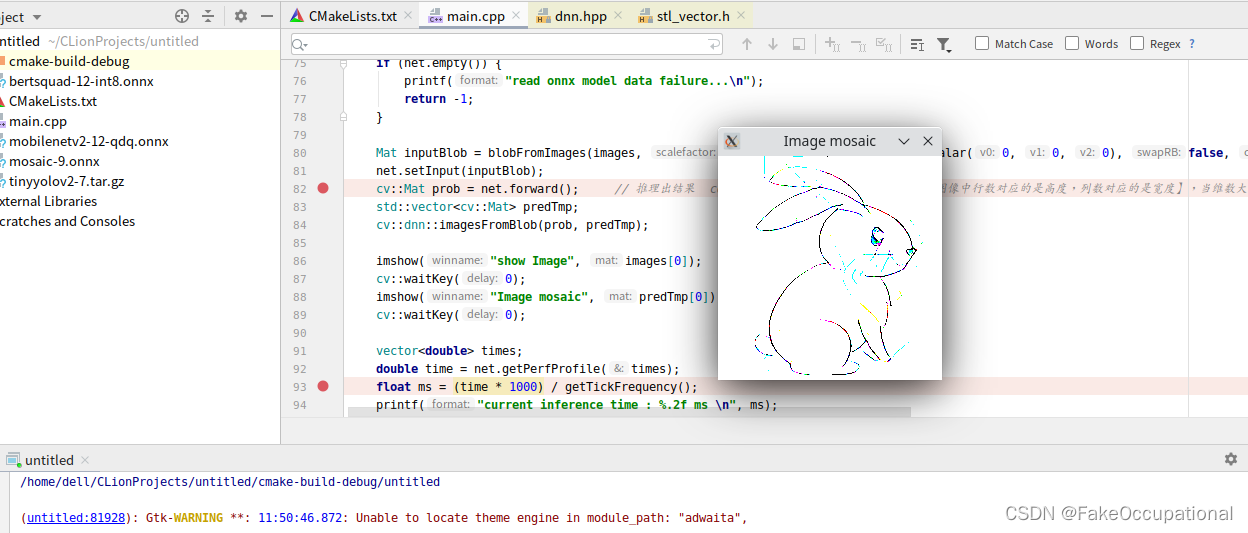
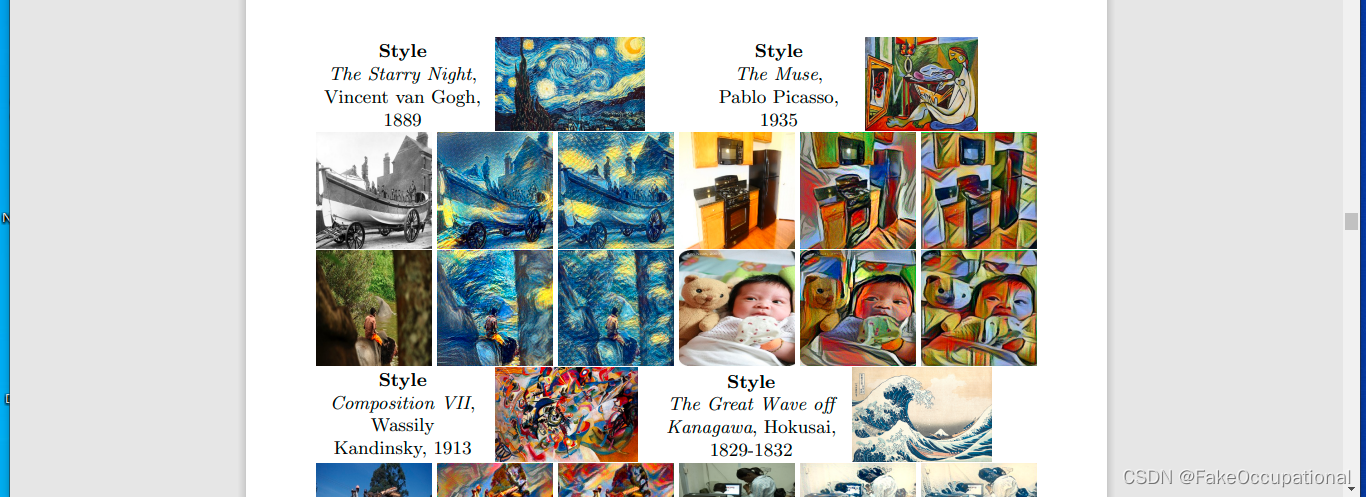
效果风格转换
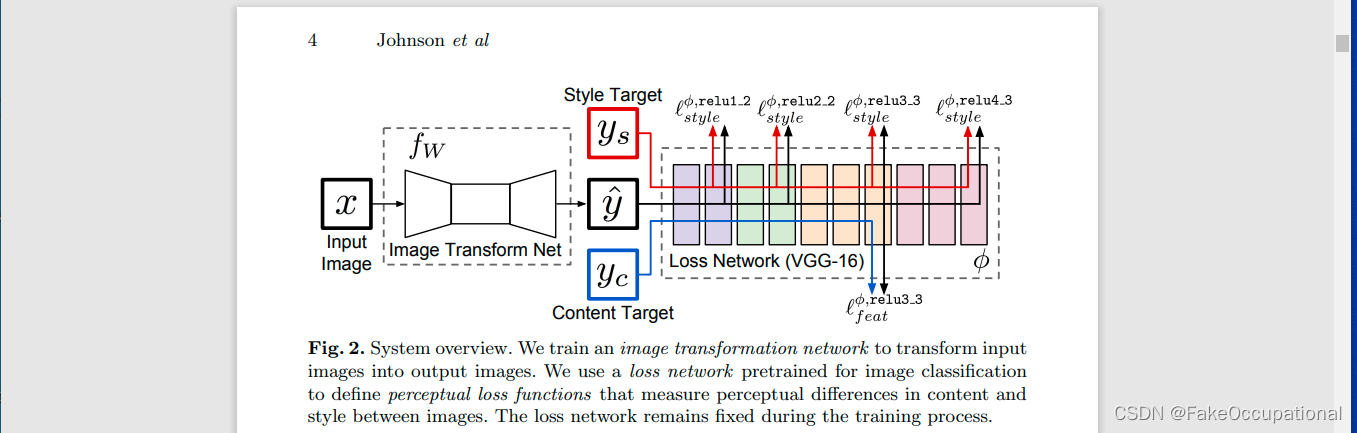
网络的论文和ONNX下载

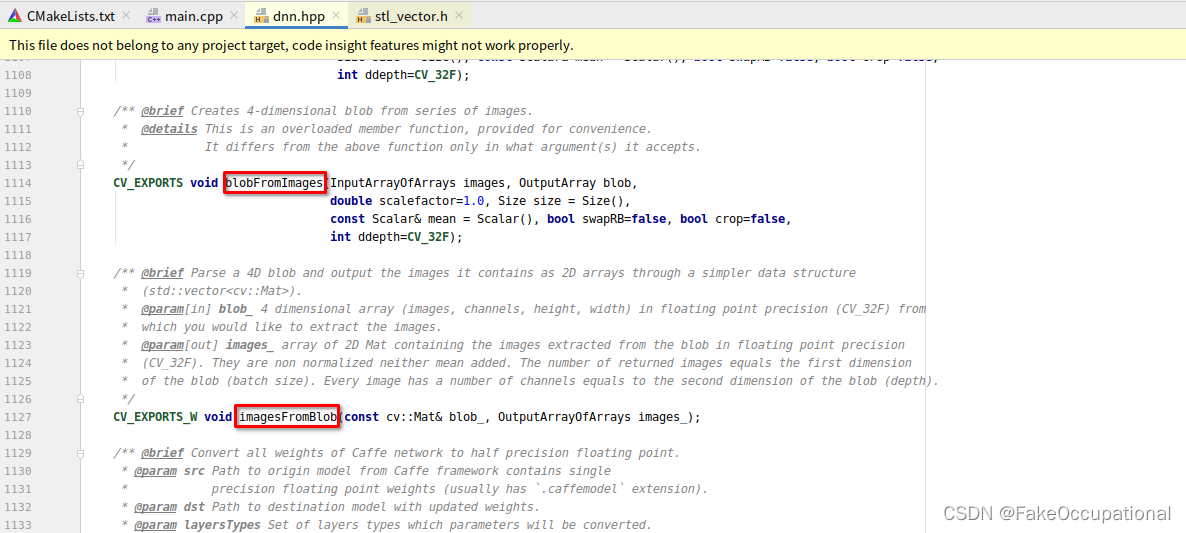
blobFromImages(blobFromImage) + imagesFromBlob
处理图像到blob,[0, 255] ->[0, 1],大小,RGB->BGR和转换forward的blob到图像。
网络传播整体代码
cmake_minimum_required(VERSION 3.15)
project(untitled)
set(CMAKE_CXX_STANDARD 14)

MESSAGE(STATUS "Project: untitled")
find_package(OpenCV REQUIRED)
set(SOURCE_FILES main.cpp)
include_directories(${OpenCV_INCLUDE_DIRS})

add_executable(untitled main.cpp)
target_link_libraries(untitled ${OpenCV_LIBS})
#include <opencv2/opencv.hpp>
#include <opencv2/dnn.hpp>
#include <iostream>
#include <fstream>

using namespace cv;
using namespace cv::dnn;
using namespace std;


// 图像处理  标准化处理
void PreProcess(const Mat& image, Mat& image_blob)
{
    Mat input;
    image.copyTo(input);


    //数据处理 标准化
    std::vector<Mat> channels, channel_p;
    split(input, channels);
    Mat R, G, B;
    B = channels.at(0);
    G = channels.at(1);
    R = channels.at(2);

    B = (B / 255. - 0.406) / 0.225;
    G = (G / 255. - 0.456) / 0.224;
    R = (R / 255. - 0.485) / 0.229;

    channel_p.push_back(R);
    channel_p.push_back(G);
    channel_p.push_back(B);

    Mat outt;
    merge(channel_p, outt);
    image_blob = outt;
}


String bin_model = "/home/dell/CLionProjects/untitled/mosaic-9.onnx";
int main(int argc, char** argv) {
    //数据处理
    Mat test = Mat::zeros(10,10, CV_64FC1 );
    Mat image1 = imread("/home/dell/下载/a.png");
    resize(image1, image1, Size(256, 256), INTER_AREA);
    image1.convertTo(image1, CV_32FC3);// convertTo()数据类型CV_32FC3
    PreProcess(image1, image1);

    vector<Mat> images;
    images.push_back(image1);images.push_back(image1);


    int w = 224;int h = 224;

    // 加载网络
    cv::dnn::Net net = cv::dnn::readNetFromONNX(bin_model);  // 加载训练好的识别模型  net = cv2.dnn.readNetFromONNX('**.onnx')
    net.setPreferableBackend(cv::dnn::DNN_BACKEND_OPENCV);
    net.setPreferableTarget(cv::dnn::DNN_TARGET_CPU);
    if (net.empty()) {
        printf("read onnx model data failure...\n");
        return -1;
    }

    Mat inputBlob = blobFromImages(images, 1.0, Size(w, h), Scalar(0, 0, 0), false, true);
    net.setInput(inputBlob);
    cv::Mat prob = net.forward();     // 推理出结果  cols,rows 矩阵的行数,列数【注意,在图像中行数对应的是高度,列数对应的是宽度】,当维数大于2时,均为-1;
    std::vector<cv::Mat> predTmp;
    cv::dnn::imagesFromBlob(prob, predTmp);

    imshow("show Image", images[0]);
    cv::waitKey(0);
    imshow("Image mosaic", predTmp[0]);
    cv::waitKey(0);

    vector<double> times;
    double time = net.getPerfProfile(times);
    float ms = (time * 1000) / getTickFrequency();
    printf("current inference time : %.2f ms \n", ms);

    return 0;
}
CG

代码 onnx+ opdncv+vgg16
// https://blog.csdn.net/qq_44747572/article/details/121467657
// /home/dell/下载/opencv-4.6.0/samples/data/dnn/classification_classes_ILSVRC2012.txt

#include <opencv2/opencv.hpp>
#include <opencv2/dnn.hpp>
#include <iostream>
#include <fstream>

using namespace cv;
using namespace cv::dnn;
using namespace std;


// 图像处理  标准化处理
void PreProcess(const Mat& image, Mat& image_blob)
{
    Mat input;
    image.copyTo(input);


    //数据处理 标准化
    std::vector<Mat> channels, channel_p;
    split(input, channels);
    Mat R, G, B;
    B = channels.at(0);
    G = channels.at(1);
    R = channels.at(2);

    B = (B / 255. - 0.406) / 0.225;
    G = (G / 255. - 0.456) / 0.224;
    R = (R / 255. - 0.485) / 0.229;

    channel_p.push_back(R);
    channel_p.push_back(G);
    channel_p.push_back(B);

    Mat outt;
    merge(channel_p, outt);
    image_blob = outt;
}

std::vector<String> readClassNames(string labels_txt_file)
{
    std::vector<String> classNames;

    std::ifstream fp(labels_txt_file);
    if (!fp.is_open())
    {
        printf("could not open file...\n");
        exit(-1);
    }
    std::string name;
    while (!fp.eof())
    {
        std::getline(fp, name);
        if (name.length())
            classNames.push_back(name);
    }
    fp.close();
    return classNames;
}

String bin_model = "/home/dell/下载/vgg16.onnx";
String labels_txt_file = "/home/dell/下载/opencv-4.6.0/samples/data/dnn/classification_classes_ILSVRC2012.txt";
vector<String> readClassNames();                  // string对象作为vector对象
int main(int argc, char** argv) {
    Mat image1 = imread("/home/dell/下载/a.png");

    //用于显示
    vector<Mat>Showimages;
    Showimages.push_back(image1);
    //处理image1
    resize(image1, image1, Size(256, 256), INTER_AREA);
    image1.convertTo(image1, CV_32FC3);
    PreProcess(image1, image1);         //标准化处理

    //将image1和image2合并到images
    vector<Mat> images;
    images.push_back(image1);
    images.push_back(image1);
    vector<String> labels = readClassNames(labels_txt_file);

    int w = 224;
    int h = 224;

    // 加载网络
    cv::dnn::Net net = cv::dnn::readNetFromONNX(bin_model);  // 加载训练好的识别模型

    if (net.empty()) {
        printf("read onnx model data failure...\n");
        return -1;
    }
    Mat inputBlob = blobFromImages(images, 1.0, Size(w, h), Scalar(0, 0, 0), false, true);

    // 执行图像分类
    net.setInput(inputBlob);
    cv::Mat prob = net.forward();     // 推理出结果
    cout << prob.cols<< endl;
    vector<double> times;
    double time = net.getPerfProfile(times);
    float ms = (time * 1000) / getTickFrequency();
    printf("current inference time : %.2f ms \n", ms);
    // 得到最可能分类输出

    for (int n = 0; n < prob.rows; n++) {
        Point classNumber;
        double classProb;
        Mat probMat = prob(Rect(0, n, 1000, 1)).clone();
        Mat result = probMat.reshape(1, 1);
        minMaxLoc(result, NULL, &classProb, NULL, &classNumber);
        int classidx = classNumber.x;
        printf("\n current image classification : %s, possible : %.2f\n", labels.at(classidx).c_str(), classProb);

        // 显示文本
        putText(Showimages[n], labels.at(classidx), Point(10, 20), FONT_HERSHEY_SIMPLEX, 0.6, Scalar(0, 0, 255), 1, 1);
        imshow("Image Classification", Showimages[n]);
        waitKey(0);

    }
    return 0;
}


 被折叠的 条评论
为什么被折叠?
被折叠的 条评论
为什么被折叠?
 到【灌水乐园】发言


