


参考链接:cartographer接入2D雷达laser+imu实时建图_cartographer imu_Astrophily的博客-CSDN博客
激光雷达型号:Slamtec A1 【安装与使用见前文】
IMU型号:WHT901B-485
imu使用说明:深圳维特智能科技有限公司
1.安装使用IMU
1.1 安装ROS IMU依赖项
sudo apt-get install ros-melodic-imu-tools ros-melodic-rviz-imu-plugin1.2 使用维特智能官网 下载对应的示例程序【ubuntu18.04火狐浏览器看不到下载地址】

ubuntu中要解压rar文件 要下载对应功能包
链接:Ubuntu下解压rar压缩文件_ubuntu解压rar文件_沉醉,于风中的博客-CSDN博客
1.3 编译与安装IMU功能包
cd wit_ros_ws //加入工作空间
catkin_make   //编译
cd /src/scripts
sudo chmod 777 *.py修改参数:在wit_imu.launch文件中default类型normal改为modbus

重新编译会报错:

解决:
pip3 install modbus_tk测试:查看imu数据
端口1:
sudo chmod 777 /dev/ttyUsb0  //给imu端口权限
roslaunch wit_os_imu wit_imu.launch
端口2:
cd wit_ros_ws/src/scripts
python get_imu_rpy.py测试结果--imu话题:/wit/imu
2.修改cartographer参数
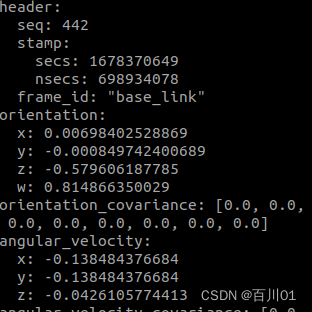
补充:查看话题的 frame_id
rostopic echo /topic | grep frame_id2.1修改revo_lds.lua [~/car2_ws/src/cartographer_ros/cartographer_ros/configuration_files下]
修改内容:
   tracking_frame =“ base_link”
    published_frame= “base_link”
   provide_odom_frame = true
   TRAJECTORY_BUILDER_2D.use_imu_data =true
2.2 修改backpack_2d.urdf【~/car2_ws/src/cartographer_ros/cartographer_ros/urdf下】
更改后文件内容:
<robot name="cartographer_backpack_2d">
  <material name="orange">
    <color rgba="1.0 0.5 0.2 1" />
  </material>
  <material name="gray">
    <color rgba="0.2 0.2 0.2 1" />
  </material>

  <link name="imu_link">
    <visual>
      <origin xyz="0 0 0" />
      <geometry>
        <box size="0.06 0.04 0.02" />
      </geometry>
      <material name="orange" />
    </visual>
  </link>

  <link name="laser">
    <visual>
      <origin xyz="0 0 0" />
      <geometry>
        <cylinder length="0.05" radius="0.03" />
      </geometry>
      <material name="gray" />
    </visual>
  </link>

  <link name="base_link" />

  <joint name="imu_link_joint" type="fixed">
    <parent link="base_link" />
    <child link="imu_link" />
    <origin xyz="0 0 0" />
  </joint>

  <joint name="laser_joint" type="fixed">
    <parent link="base_link" />
    <child link="laser" />
    <origin xyz="0.1007 0 0.0558" />
  </joint>

</robot>
2.3 修改demo_revo_lds.launch【~/car2_ws/src/cartographer_ros/cartographer_ros/launch下】
更改后内容如下:
<launch>
  <param name="/use_sim_time" value="false" />

  <param name="robot_description"
    textfile="$(find cartographer_ros)/urdf/backpack_2d.urdf" />

 <node name="robot_state_publisher" pkg="robot_state_publisher"
    type="robot_state_publisher" />

  <node name="cartographer_node" pkg="cartographer_ros"
      type="cartographer_node" args="
          -configuration_directory $(find cartographer_ros)/configuration_files
          -configuration_basename revo_lds.lua"
      output="screen">
    <remap from="scan" to="scan" />
    <remap from="imu" to="/wit/imu" />
  </node>

  <node name="cartographer_occupancy_grid_node" pkg="cartographer_ros"
      type="cartographer_occupancy_grid_node" args="-resolution 0.05" />

  <node name="rviz" pkg="rviz" type="rviz" required="true"
      args="-d $(find cartographer_ros)/configuration_files/demo_2d.rviz" />
</launch>
3.测试
3.1 给端口权限【多个接口时,要在节点中更改默认节点名】
sudo chmod 777 /dev/ttyUSB0  //激光
sudo chmod 777 /dev/ttyUSB1  //IMU
3.2 启动激光雷达节点
cd  Slamtec
source ./devel/setup.bash
roslaunch  rplidar_ros rplidar.launch
3.3 启动IMU节点
cd wit_ros_ws
source ./devel/setup/bash
roslaunch wit_ros_imu  wit_imu.launch
3.4 启动cartographer demo
cd car2_ws
source ./devel/setup.bash
roslaunch cartographer_ros demo_revo_lds.launch
4.测试结果:
1.rqt_grapher

2.tf-tree


 1421
1421


 被折叠的 条评论
为什么被折叠?
被折叠的 条评论
为什么被折叠?
 到【灌水乐园】发言


