


今天做一个画图程序,类似给一个白纸,
然后用类似印章的图形点哪里就在哪里出现。
Unity在处理Texture2D上只有对像素进行操作,
所以要用到GL的一些方法,执行效率可能会更高。
代码比较简单,直接贴上应该能看懂。
using System.Collections;
using System.Collections.Generic;
using UnityEngine;

//复制一个Texture到另外一个Texture.
public class CDrawTexture : MonoBehaviour
{
    Material nowMat;
    Texture2D nowTexture;   //当前纹理
    RectInt nowWH;  //宽高

    Color clearColor = new Color(0f, 0f, 0f, 0f);   //清除的色值
    public void InitDrawTexture()
    {
        nowMat = PrefabList.inst.SpriteDefault;
    }

    public Texture2D CreateNewTexture(int w, int h)
    {
        Clear();
        nowWH = new RectInt(0, 0, w, h);
        nowTexture = new Texture2D(w, h);

        FillColor(nowTexture, clearColor);
        return nowTexture;
    }

    public void Clear()
    {
        if (nowTexture != null)
        {
            DestroyImmediate(nowTexture);
        }
    }


    public Texture2D CopyTexture(Texture2D source,Vector3 penpos)
    {
        RenderTexture renderTexture = RenderTexture.GetTemporary(nowWH.width, nowWH.height);
        RenderTexture.active = renderTexture;

        //清空 GL
        GL.Clear(false, true, clearColor);

        //把source渲染到GL
        RenderGLStuff(nowWH.width, nowWH.height, nowMat, nowTexture, nowWH.width, nowWH.height, -new Vector3(nowWH.width, nowWH.height,0f)/2);
        //把目标渲染到GL
        RenderGLStuff(nowWH.width, nowWH.height, nowMat, source, source.width, source.height, penpos * globalData.pixUnit);

        //读取 RenderTexture 到材质 nowTexture
        nowTexture.ReadPixels(new Rect(0, 0, nowWH.width, nowWH.height), 0, 0);
        nowTexture.Apply();
        RenderTexture.active = null;
        RenderTexture.ReleaseTemporary(renderTexture);
        return nowTexture;
    }


    //把某个颜色填充
    static void FillColor(Texture2D t, Color c)
    {
        RenderTexture renderTexture = RenderTexture.GetTemporary(t.width, t.height);
        RenderTexture.active = renderTexture;
        GL.Clear(false, true, c);
        //读取 RenderTexture 到材质 nowTexture
        t.ReadPixels(new Rect(0, 0, t.width, t.height), 0, 0);
        t.Apply();
        RenderTexture.active = null;
        RenderTexture.ReleaseTemporary(renderTexture);
    }


    /// <summary>
    /// 把一个Texture复制到另外一个Texture
    /// </summary>
    /// <param name="width">目标纹理大小</param>
    /// <param name="height">目标纹理大小</param>
    /// <param name="material"></param>
    /// <param name="source">复制的纹理</param>
    /// <param name="sw">复制的纹理宽</param>
    /// <param name="sh">复制的纹理高</param>
    /// <param name="penpos">鼠标位置</param>
    static void RenderGLStuff(int width, int height, Material material, Texture2D source, float sw, float sh, Vector3 penpos)
    {
        material.SetPass(0);
        GL.PushMatrix();//GL入栈
        GL.LoadPixelMatrix(0, width, height, 0);
        Graphics.DrawTexture(new Rect(0, 0, 0, 0), source);
        GL.LoadOrtho(); //转换为正交投影变换
        GL.Begin(GL.QUADS);
        float szWidth = sw / width;
        float szHeight = sh / height;
        Vector2 at = new Vector2((penpos.x + width / 2f) / width, (penpos.y + height / 2f) / height);
        GL.TexCoord2(0, 0); GL.Vertex3(at.x + 0f, at.y + 0f, 0f);   //设置纹理和顶点坐标
        GL.TexCoord2(1, 0); GL.Vertex3(at.x + szWidth, at.y + 0f, 0f);
        GL.TexCoord2(1, 1); GL.Vertex3(at.x + szWidth, at.y + szHeight, 0f);
        GL.TexCoord2(0, 1); GL.Vertex3(at.x + 0f, at.y + szHeight, 0f);
        GL.End();
        GL.PopMatrix(); //GL出栈
    }
}
在其他脚本调用:
public void PaintXY(Vector3 pos)
    {
        if (nowTool == null)
            return;
        pos.z = Mathf.Abs(nowMaskObj.transform.position.z - myCamera.transform.position.z);
        Vector3 at = myCamera.ScreenToWorldPoint(pos);
        Vector3 lo = nowMaskObj.transform.InverseTransformPoint(at);


        gameRoot.inst.drawTexture.CopyTexture(PrefabList.inst.tPen,lo);
        //Debug.Log("PaintXY :" + lo );
        checkValue = true;
    }
下面是写代码中遇到的一些知识点,总结在下面。
如果只是对纹理的复制,可以用下面的方法
        if (SystemInfo.copyTextureSupport == UnityEngine.Rendering.CopyTextureSupport.None)
        {
            //High GC allocs here
            Color[] pixelBuffer = source.GetPixels((int)rect.x, (int)rect.y, (int)rect.width, (int)rect.height);
            nowTexture.SetPixels(pixelBuffer);
            nowTexture.Apply();
        }
        else
        {
            Graphics.CopyTexture(source, 0, 0, (int)rect.x, (int)rect.y, (int)rect.width, (int)rect.height, nowTexture, 0, 0, 0, 0);
        }
另外关于Graphics.DrawTexture的一些高级用法,也研究了下,并做一些记录。
public static void DrawTexture(Rect screenRect, Texture texture, Material mat = null, int pass = -1);
public static void DrawTexture(Rect screenRect, Texture texture, int leftBorder, int rightBorder, int topBorder, int bottomBorder, Material mat = null, int pass = -1);
public static void DrawTexture(Rect screenRect, Texture texture, Rect sourceRect, int leftBorder, int rightBorder, int topBorder, int bottomBorder, Material mat = null, int pass = -1);
public static void DrawTexture(Rect screenRect, Texture texture, Rect sourceRect, int leftBorder, int rightBorder, int topBorder, int bottomBorder, Color color, Material mat = null, int pass = -1);
Parameters

screenRect	Rectangle on the screen to use for the texture. In pixel coordinates with (0,0) in the upper-left corner.
texture	Texture to draw.
sourceRect	Region of the texture to use. In normalized coordinates with (0,0) in the bottom-left corner.
leftBorder	Number of pixels from the left that are not affected by scale.
rightBorder	Number of pixels from the right that are not affected by scale.
topBorder	Number of pixels from the top that are not affected by scale.
bottomBorder	Number of pixels from the bottom that are not affected by scale.
color	Color that modulates the output. The neutral value is (0.5, 0.5, 0.5, 0.5). Set as vertex color for the shader.
mat	Custom Material that can be used to draw the texture. If null is passed, a default material with the Internal-GUITexture.shader is used.
pass	If -1 (default), draws all passes in the material. Otherwise, draws given pass only.
这里的sourRect参数可以实现复制纹理中的部分,例如图集中的一块。
但是这里要注意,在这里踩了大坑。一直搞不对,原来这个参数的范围是0~1之间的。 文档中竟然只字未提,可恶,只是说0,0点是左下角。下来的4个Border应该是9宫格用法了,没用上,直接写0就好了。
下面是一个测试例子。
using System.Collections;
using System.Collections.Generic;
using UnityEngine;

public class NewBehaviourScript : MonoBehaviour
{
    Rect rect = new Rect(1034, 644, 445, 606);
    Rect nowWH = new Rect(0, 0, 445, 606);

    public Texture2D nowTexture;   //当前纹理

    public SpriteRenderer sprite;
	public Texture2D source;
    // Start is called before the first frame update
    void Start()
    {
        nowTexture = new Texture2D((int)nowWH.width, (int)nowWH.height, TextureFormat.ARGB32, false);
        Sprite nowMaskSprite = Sprite.Create(nowTexture, new Rect(0, 0, nowTexture.width, nowTexture.height), new Vector2(0.5f, 0.5f));
        sprite.sprite = nowMaskSprite;

    }


    void OnGUI()

    {

        if (Event.current.type.Equals(EventType.Repaint))
        {
            //Graphics.DrawTexture(new Rect(0f, 0f, 800, 800), text);
            RenderTexture renderTexture = RenderTexture.GetTemporary((int)nowWH.width, (int)nowWH.height, 0);

            RenderTexture.active = renderTexture;

            //清空 GL
            GL.Clear(false, true, Color.clear);

            Rect x = new Rect(rect.x / source.width, ((source.height - rect.y- rect.height) / source.height), (rect.width ) / source.width, rect.height/ source.height);

            GL.PushMatrix();//GL入栈
                            //使用Graphics类直接进行Texture绘制时,由于属于直接绘制到平面上,
                            //所以需要转换到平面像素空间内,所以需要用到LoadPixelMatrix方法
            GL.LoadPixelMatrix(0, nowWH.width, nowWH.height,0);// (int)(r.x*r.width/2048), r.width, r.height, (int)(r.y * r.height / 2048));

            //x = new Rect(0f, 0f, 1f, 1f);
            Graphics.DrawTexture(nowWH, source, x, 0, 0, 0, 0);

            GL.PopMatrix(); //GL出栈
            Rect s = new Rect(0f, 0f, 1f, 1f);
            nowTexture.ReadPixels(nowWH, 0, 0);
            nowTexture.Apply();
            RenderTexture.active = null;
            RenderTexture.ReleaseTemporary(renderTexture);
        }
    }
}
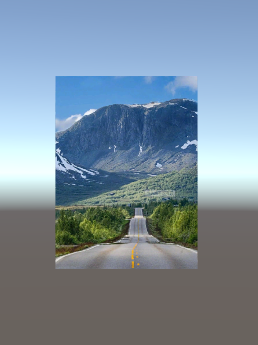
source是我做的一个测试图。

new Rect(1034, 644, 445, 606);
这个区域就是想获得的图片
运行效果


 1140
1140


 被折叠的 条评论
为什么被折叠?
被折叠的 条评论
为什么被折叠?
 到【灌水乐园】发言


