


系列文章目录
前言
一、tf2 简介
1.1 安装 demo
让我们先安装演示软件包及其依赖项。
sudo apt-get install ros-foxy-turtle-tf2-py ros-foxy-tf2-tools ros-foxy-tf-transformations1.2 运行 demo
现在我们已经安装了 turtle_tf2_py 教程包,让我们运行演示。首先,打开一个新的终端并为 ROS 2 安装源代码,这样 ros2 命令就能正常运行。然后运行以下命令:
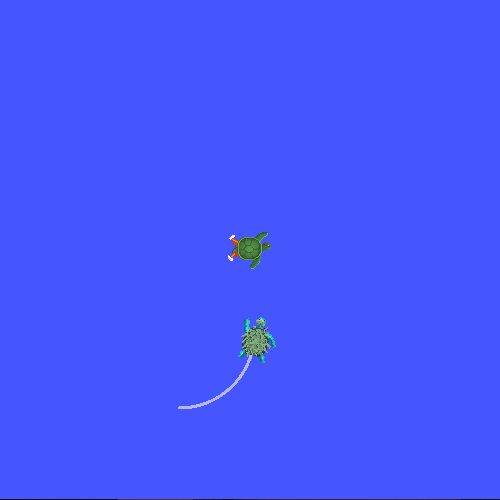
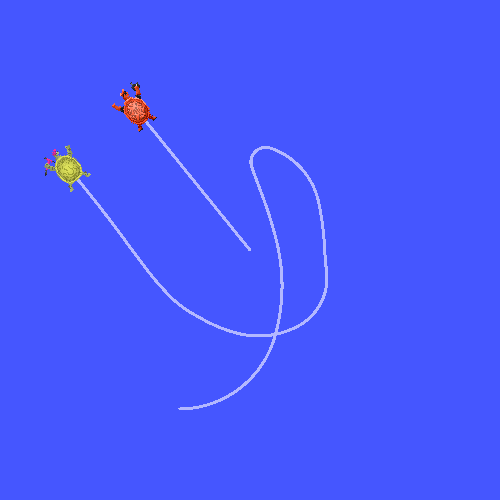
ros2 launch turtle_tf2_py turtle_tf2_demo.launch.py您会看到海龟模拟器从两只海龟开始。
在第二个终端窗口中输入以下命令:
ros2 run turtlesim turtle_teleop_key启动海龟模拟器后,您可以使用键盘上的方向键在海龟模拟器中驱动中央海龟,选择第二个终端窗口,这样就可以捕捉到您驱动海龟的按键。
你可以看到,一只乌龟不断移动,跟随着你驾驶的乌龟。
1.3 这是怎么回事?
本演示使用 tf2 库创建了三个坐标系:世界坐标系、乌龟 1 坐标系和乌龟 2 坐标系。本教程使用 tf2 广播器发布乌龟坐标系帧,使用 tf2 监听器计算乌龟坐标系帧的差值,并移动一只乌龟跟随另一只乌龟。
1.4 tf2 工具
现在让我们来看看如何使用 tf2 制作这个演示。我们可以使用 tf2_tools 查看 tf2 在幕后所做的工作。
1.4.1 使用 view_frames
view_frames 可以创建 tf2 通过 ROS 广播的坐标系图。
ros2 run tf2_tools view_frames.py你会看到
Listening to tf data during 5 seconds...
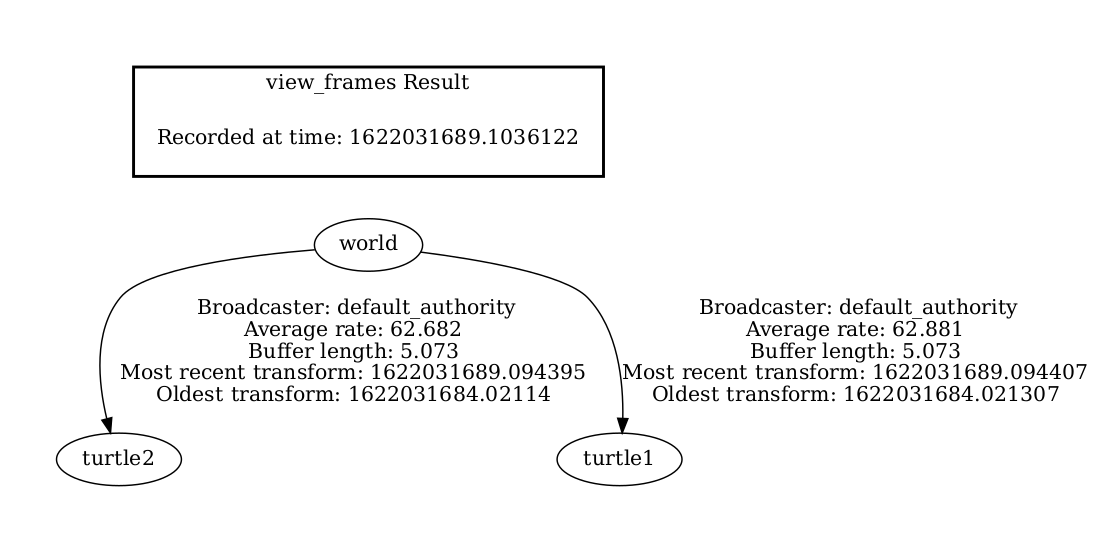
Generating graph in frames.pdf file...在这里,一个 tf2 监听器正在监听通过 ROS 广播的坐标系帧,并绘制一棵树,显示这些坐标系帧是如何连接起来的。要查看树状图,请使用您最喜欢的 PDF 浏览器打开生成的 frames.pdf。

在这里,我们可以看到 tf2 广播的三个坐标系:world、turtle1 和 turtle2。view_frames 还会报告一些诊断信息,如何时收到了最旧和最近的坐标系变换,以及 tf2 坐标系发布到 tf2 的速度,以便调试。
1.4.2 使用 tf2_echo
tf2_echo 报告通过 ROS 广播的任意两个坐标系之间的变换。
使用方法:
ros2 run tf2_ros tf2_echo [source_frame] [target_frame]让我们来看看乌龟 2 坐标系相对于乌龟 1 坐标系的变换,这相当于:
ros2 run tf2_ros tf2_echo turtle2 turtle1当 tf2_echo 监听器接收到通过 ROS 2 广播的坐标系时,您将看到显示的变换。
At time 1622031731.625364060
- Translation: [2.796, 1.039, 0.000]
- Rotation: in Quaternion [0.000, 0.000, 0.202, 0.979]
At time 1622031732.614745114
- Translation: [1.608, 0.250, 0.000]
- Rotation: in Quaternion [0.000, 0.000, 0.032, 0.999]
当您驾驶乌龟四处游动时,您会看到变换随着两只乌龟的相对移动而发生变化。
1.4.3 rviz 和 tf2
rviz 是一种可视化工具,可用于检查 tf2 的坐标系。让我们使用 rviz 来查看我们的乌龟坐标系。 让我们使用 -d 选项在 turtle_rviz.rviz 配置文件中启动 rviz:
ros2 run rviz2 rviz2 -d $(ros2 pkg prefix --share turtle_tf2_py)/rviz/turtle_rviz.rviz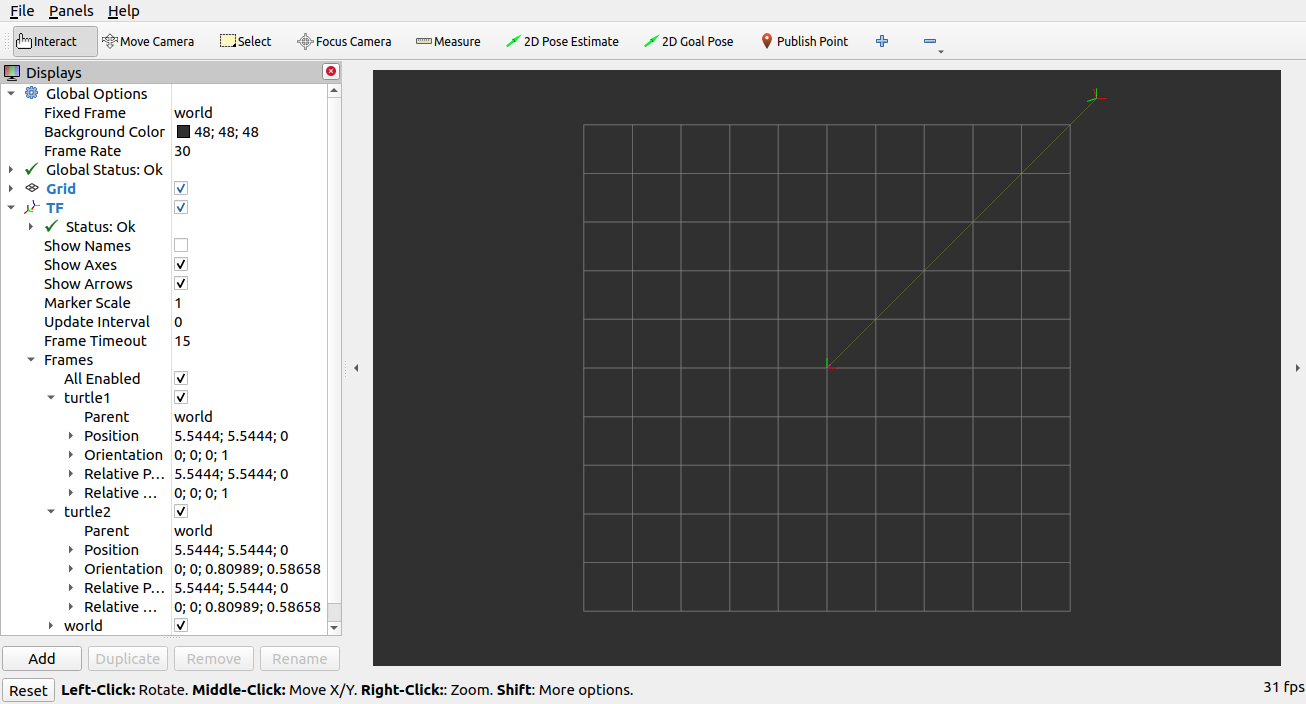
在侧边栏中,您可以看到 tf2 播放的坐标系帧。当你驾驶乌龟四处游动时,你会在 rviz 中看到坐标系移动。
二、编写静态广播器(C++)
2.1 背景
发布静态变换对于定义机器人底座与其传感器或非移动部件之间的关系非常有用。例如,在激光扫描仪中心的坐标系中对激光扫描测量进行推理是最简单的。
这是一个涵盖静态变换基础知识的独立教程,由两部分组成。在第一部分中,我们将编写向 tf2 发布静态变换的代码;在第二部分中,我们将讲解如何使用 tf2_ros 中的命令行 static_transform_publisher 可执行工具。
在接下来的两个教程中,我们将编写代码来重现 tf2 入门教程中的演示。之后,下面的教程将重点使用更高级的 tf2 功能来扩展演示。
2.2 先决条件
在前面的教程中,您学习了如何创建工作区和创建软件包。
2.3 任务
2.3.1 创建软件包
首先,我们将创建一个包,该包将用于本教程和后续教程。名为 learning_tf2_cpp 的软件包将依赖于 geometry_msgs、rclcpp、tf2、tf2_ros 和 turtlesim。本教程的代码存储在此处。
打开一个新的终端,为 ROS 2 安装提供源代码,这样 ros2 命令就能正常运行。导航至工作区的 rc 文件夹,创建一个新软件包:
ros2 pkg create --build-type ament_cmake --dependencies geometry_msgs rclcpp tf2 tf2_ros turtlesim -- learning_tf2_cpp您的终端将返回一条信息,确认已创建 learning_tf2_cpp 软件包及其所有必要的文件和文件夹。
2.3.2 编写静态广播程序 node
首先创建源文件。在 src/learning_tf2_cpp/src 目录下输入以下命令,下载静态广播器的示例代码:
wget https://raw.githubusercontent.com/ros/geometry_tutorials/ros2/turtle_tf2_cpp/src/static_turtle_tf2_broadcaster.cpp使用您喜欢的文本编辑器打开文件。
#include <memory>

#include "geometry_msgs/msg/transform_stamped.hpp"
#include "rclcpp/rclcpp.hpp"
#include "tf2/LinearMath/Quaternion.h"
#include "tf2_ros/static_transform_broadcaster.h"

class StaticFramePublisher : public rclcpp::Node
{
public:
  explicit StaticFramePublisher(char * transformation[])
  : Node("static_turtle_tf2_broadcaster")
  {
    tf_static_broadcaster_ = std::make_shared<tf2_ros::StaticTransformBroadcaster>(this);

    // Publish static transforms once at startup
    this->make_transforms(transformation);
  }

private:
  void make_transforms(char * transformation[])
  {
    geometry_msgs::msg::TransformStamped t;

    t.header.stamp = this->get_clock()->now();
    t.header.frame_id = "world";
    t.child_frame_id = transformation[1];

    t.transform.translation.x = atof(transformation[2]);
    t.transform.translation.y = atof(transformation[3]);
    t.transform.translation.z = atof(transformation[4]);
    tf2::Quaternion q;
    q.setRPY(
      atof(transformation[5]),
      atof(transformation[6]),
      atof(transformation[7]));
    t.transform.rotation.x = q.x();
    t.transform.rotation.y = q.y();
    t.transform.rotation.z = q.z();
    t.transform.rotation.w = q.w();

    tf_static_broadcaster_->sendTransform(t);
  }

  std::shared_ptr<tf2_ros::StaticTransformBroadcaster> tf_static_broadcaster_;
};

int main(int argc, char * argv[])
{
  auto logger = rclcpp::get_logger("logger");

  // Obtain parameters from command line arguments
  if (argc != 8) {
    RCLCPP_INFO(
      logger, "Invalid number of parameters\nusage: "
      "$ ros2 run learning_tf2_cpp static_turtle_tf2_broadcaster "
      "child_frame_name x y z roll pitch yaw");
    return 1;
  }

  // As the parent frame of the transform is `world`, it is
  // necessary to check that the frame name passed is different
  if (strcmp(argv[1], "world") == 0) {
    RCLCPP_INFO(logger, "Your static turtle name cannot be 'world'");
    return 1;
  }

  // Pass parameters and initialize node
  rclcpp::init(argc, argv);
  rclcpp::spin(std::make_shared<StaticFramePublisher>(argv));
  rclcpp::shutdown();
  return 0;
}
2.3.2.1 查看代码
现在让我们来看看将静态乌龟姿势发布到 tf2 的相关代码。第一行包含所需的头文件。首先,我们包含 geometry_msgs/msg/transform_stamped.hpp,以访问 TransformStamped 消息类型,并将其发布到变换树中。
#include "geometry_msgs/msg/transform_stamped.hpp"之后,rclcpp 将被包含,以便使用其 rclcpp::Node 类。
#include "rclcpp/rclcpp.hpp"tf2::Quaternion 是一个四元数类,它提供了将欧拉角转换为四元数以及反之亦然的便捷函数。我们还包含了 tf2_ros/static_transform_broadcaster.h,以便使用 StaticTransformBroadcaster 轻松发布静态变换。
#include "tf2/LinearMath/Quaternion.h"
#include "tf2_ros/static_transform_broadcaster.h"
StaticFramePublisher 类的构造函数以 static_turtle_tf2_broadcaster 名称初始化节点。然后创建 StaticTransformBroadcaster,它将在启动时发送一个静态变换。
tf_static_broadcaster_ = std::make_shared<tf2_ros::StaticTransformBroadcaster>(this);

this->make_transforms(transformation);
在这里,我们创建了一个 TransformStamped 对象,一旦填充完成,它将成为我们要发送的信息。在传递实际变换值之前,我们需要给它提供适当的元数据。
- 我们需要给正在发布的变换加一个时间戳,并用当前时间(this->get_clock()->now()
- 然后,我们需要设置所创建部件的父坐标系名称,在本例中为 world。
- 最后,我们需要设置所创建部件的子坐标系名称
geometry_msgs::msg::TransformStamped t;

t.header.stamp = this->get_clock()->now();
t.header.frame_id = "world";
t.child_frame_id = transformation[1];
在这里,我们将填充乌龟的 6D 姿态(平移和旋转)。
t.transform.translation.x = atof(transformation[2]);
t.transform.translation.y = atof(transformation[3]);
t.transform.translation.z = atof(transformation[4]);
tf2::Quaternion q;
q.setRPY(
  atof(transformation[5]),
  atof(transformation[6]),
  atof(transformation[7]));
t.transform.rotation.x = q.x();
t.transform.rotation.y = q.y();
t.transform.rotation.z = q.z();
t.transform.rotation.w = q.w();
最后,我们使用 sendTransform() 函数广播静态变换。
tf_static_broadcaster_->sendTransform(t);2.3.2.2 添加依赖项
向后一级导航至 src/learning_tf2_cpp 目录,这里已为您创建了 CMakeLists.txt 和 package.xml 文件。
用文本编辑器打开 package.xml。
如创建软件包教程所述,确保填写 <description>、<maintainer> 和 <license> 标记:
<description>Learning tf2 with rclcpp</description>
<maintainer email="you@email.com">Your Name</maintainer>
<license>Apache License 2.0</license>
确保保存该文件。
2.3.2.3 CMakeLists.txt
将可执行文件添加到 CMakeLists.txt,并命名为 static_turtle_tf2_broadcaster,稍后将与 ros2 run 一起使用。
add_executable(static_turtle_tf2_broadcaster src/static_turtle_tf2_broadcaster.cpp)
ament_target_dependencies(
   static_turtle_tf2_broadcaster
   geometry_msgs
   rclcpp
   tf2
   tf2_ros
)
最后,添加 install(TARGETS...) 部分,以便 ros2 run 可以找到你的可执行文件:
install(TARGETS
   static_turtle_tf2_broadcaster
   DESTINATION lib/${PROJECT_NAME})
2.3.3 Build
在构建之前,最好在工作区的根目录下运行 rosdep,以检查是否有缺失的依赖项:
rosdep install -i --from-path src --rosdistro foxy -y还是在工作区的根目录下,构建新软件包:
colcon build --packages-select learning_tf2_cpp打开一个新终端,导航到工作区的根目录,然后获取设置文件:
. install/setup.bash2.3.4 运行
现在运行 static_turtle_tf2_broadcaster 节点:
ros2 run learning_tf2_cpp static_turtle_tf2_broadcaster mystaticturtle 0 0 1 0 0 0这将为 mystaticturtle 设置一个乌龟姿势广播,使其漂浮在离地面 1 米高的地方。
现在我们可以通过回显 tf_static 主题来检查静态变换是否已发布
ros2 topic echo --qos-reliability reliable --qos-durability transient_local /tf_static如果一切顺利,您应该看到一个单一的静态变换
transforms:
- header:
   stamp:
      sec: 1622908754
      nanosec: 208515730
   frame_id: world
child_frame_id: mystaticturtle
transform:
   translation:
      x: 0.0
      y: 0.0
      z: 1.0
   rotation:
      x: 0.0
      y: 0.0
      z: 0.0
      w: 1.0
2.4 发布静态变换的正确方法
本教程旨在展示如何使用 StaticTransformBroadcaster 发布静态变换。tf2_ros 提供了一个名为 static_transform_publisher 的可执行文件,既可以作为命令行工具使用,也可以作为节点添加到启动文件中。
使用以米为单位的 x/y/z 偏移量和以弧度为单位的滚动/俯仰/偏航,向 tf2 发布静态坐标变换。在我们的例子中,roll/pitch/yaw 分别指围绕 x/y/z 轴的旋转。
ros2 run tf2_ros static_transform_publisher x y z yaw pitch roll frame_id child_frame_id使用以米为单位的 x/y/z 偏移和四元数,向 tf2 发布静态坐标变换。
ros2 run tf2_ros static_transform_publisher x y z qx qy qz qw frame_id child_frame_idstatic_transform_publisher 既可作为手动使用的命令行工具,也可用于在启动文件中设置静态变换。例如
from launch import LaunchDescription
from launch_ros.actions import Node

def generate_launch_description():
    return LaunchDescription([
        Node(
            package='tf2_ros',
            executable='static_transform_publisher',
            arguments = ['0', '0', '1', '0', '0', '0', 'world', 'mystaticturtle']
        ),
    ])
2.5 内容摘要
在本教程中,您将了解静态变换如何用于定义坐标系之间的静态关系,例如神秘海龟与世界坐标系的关系。此外,您还了解了静态变换如何通过将数据与通用坐标系相关联来帮助理解传感器数据(如激光扫描仪的数据)。最后,你们编写了自己的节点来向 tf2 发布静态变换,并学习了如何使用 static_transform_publisher 可执行文件和启动文件来发布所需的静态变换。
三、编写广播器(C++)
3.1 教程背景
在接下来的两篇教程中,我们将编写代码来重现 tf2 入门教程中的演示。之后,接下来的教程将重点使用更高级的 tf2 功能来扩展演示,包括在转换查找和时间旅行中使用超时。
3.2 前提条件
本教程假定您已掌握 ROS 2 的工作知识,并已完成 tf2 入门教程和 tf2 静态广播器教程(C++)。在之前的教程中,您学习了如何创建工作区和创建软件包。您还创建了 learning_tf2_cpp 软件包,我们将在此基础上继续学习。
3.3 任务
3.3.1 编写广播器节点
让我们先创建源文件。转到我们在上一教程中创建的 learning_tf2_cpp 包。在 src 目录中输入以下命令,下载示例 broadcastcaster 代码:
wget https://raw.githubusercontent.com/ros/geometry_tutorials/ros2/turtle_tf2_cpp/src/turtle_tf2_broadcaster.cpp使用您喜欢的文本编辑器打开文件。
#include <functional>
#include <memory>
#include <sstream>
#include <string>

#include "geometry_msgs/msg/transform_stamped.hpp"
#include "rclcpp/rclcpp.hpp"
#include "tf2/LinearMath/Quaternion.h"
#include "tf2_ros/transform_broadcaster.h"
#include "turtlesim/msg/pose.hpp"

class FramePublisher : public rclcpp::Node
{
public:
  FramePublisher()
  : Node("turtle_tf2_frame_publisher")
  {
    // Declare and acquire `turtlename` parameter
    turtlename_ = this->declare_parameter<std::string>("turtlename", "turtle");

    // Initialize the transform broadcaster
    tf_broadcaster_ =
      std::make_unique<tf2_ros::TransformBroadcaster>(*this);

    // Subscribe to a turtle{1}{2}/pose topic and call handle_turtle_pose
    // callback function on each message
    std::ostringstream stream;
    stream << "/" << turtlename_.c_str() << "/pose";
    std::string topic_name = stream.str();

    subscription_ = this->create_subscription<turtlesim::msg::Pose>(
      topic_name, 10,
      std::bind(&FramePublisher::handle_turtle_pose, this, std::placeholders::_1));
  }

private:
  void handle_turtle_pose(const std::shared_ptr<turtlesim::msg::Pose> msg)
  {
    geometry_msgs::msg::TransformStamped t;

    // Read message content and assign it to
    // corresponding tf variables
    t.header.stamp = this->get_clock()->now();
    t.header.frame_id = "world";
    t.child_frame_id = turtlename_.c_str();

    // Turtle only exists in 2D, thus we get x and y translation
    // coordinates from the message and set the z coordinate to 0
    t.transform.translation.x = msg->x;
    t.transform.translation.y = msg->y;
    t.transform.translation.z = 0.0;

    // For the same reason, turtle can only rotate around one axis
    // and this why we set rotation in x and y to 0 and obtain
    // rotation in z axis from the message
    tf2::Quaternion q;
    q.setRPY(0, 0, msg->theta);
    t.transform.rotation.x = q.x();
    t.transform.rotation.y = q.y();
    t.transform.rotation.z = q.z();
    t.transform.rotation.w = q.w();

    // Send the transformation
    tf_broadcaster_->sendTransform(t);
  }

  rclcpp::Subscription<turtlesim::msg::Pose>::SharedPtr subscription_;
  std::unique_ptr<tf2_ros::TransformBroadcaster> tf_broadcaster_;
  std::string turtlename_;
};

int main(int argc, char * argv[])
{
  rclcpp::init(argc, argv);
  rclcpp::spin(std::make_shared<FramePublisher>());
  rclcpp::shutdown();
  return 0;
}
3.3.1.1 查看代码
现在,我们来看看将乌龟姿势发布到 tf2 的相关代码。首先,我们定义并获取一个参数 turtlename,它指定了乌龟的名称,例如 turtle1 或 turtle2。
turtlename_ = this->declare_parameter<std::string>("turtlename", "turtle");之后,节点订阅主题 turtleX/pose,并对每条传入信息运行函数 handle_turtle_pose。
subscription_ = this->create_subscription<turtlesim::msg::Pose>(
  topic_name, 10,
  std::bind(&FramePublisher::handle_turtle_pose, this, _1));
现在,我们创建一个 TransformStamped 对象,并赋予它相应的元数据。
- 我们需要给正在发布的变换加上一个时间戳,我们只需调用 this->get_clock()->now() 就可以给它加上当前时间戳。这将返回节点使用的当前时间。
- 然后,我们需要设置所创建部件的父坐标系名称,在本例中为 world。
- 最后,我们需要设置所创建部件的子节点名称,在本例中就是乌龟本身的名称。
乌龟姿势信息的处理函数会广播乌龟的平移和旋转,并将其发布为从 "世界 "坐标系到 "乌龟 X "坐标系的变换。
geometry_msgs::msg::TransformStamped t;

// Read message content and assign it to
// corresponding tf variables
t.header.stamp = this->get_clock()->now();
t.header.frame_id = "world";
t.child_frame_id = turtlename_.c_str();
在这里,我们将三维乌龟姿势中的信息复制到三维变换中。
// Turtle only exists in 2D, thus we get x and y translation
// coordinates from the message and set the z coordinate to 0
t.transform.translation.x = msg->x;
t.transform.translation.y = msg->y;
t.transform.translation.z = 0.0;

// For the same reason, turtle can only rotate around one axis
// and this why we set rotation in x and y to 0 and obtain
// rotation in z axis from the message
tf2::Quaternion q;
q.setRPY(0, 0, msg->theta);
t.transform.rotation.x = q.x();
t.transform.rotation.y = q.y();
t.transform.rotation.z = q.z();
t.transform.rotation.w = q.w();
最后,我们将构建的变换传递给 TransformBroadcaster 的 sendTransform 方法,该方法将负责广播。
// Send the transformation
tf_broadcaster_->sendTransform(t);
3.3.1.2 CMakeLists.txt
返回一级到 learning_tf2_cpp 目录,这里有 CMakeLists.txt 和 package.xml 文件。
现在打开 CMakeLists.txt,添加可执行文件,并将其命名为 turtle_tf2_broadcaster,稍后将与 ros2 run 一起使用。
add_executable(turtle_tf2_broadcaster src/turtle_tf2_broadcaster.cpp)
ament_target_dependencies(
    turtle_tf2_broadcaster
    geometry_msgs
    rclcpp
    tf2
    tf2_ros
    turtlesim
)
最后,添加 install(TARGETS...) 部分,以便 ros2 run 可以找到你的可执行文件:
install(TARGETS
    turtle_tf2_broadcaster
    DESTINATION lib/${PROJECT_NAME})
3.3.2 编写启动文件
现在为该演示创建一个启动文件。使用文本编辑器在 launch 文件夹中新建一个名为 turtle_tf2_demo.launch.py 的文件,并添加以下几行:
from launch import LaunchDescription
from launch_ros.actions import Node


def generate_launch_description():
    return LaunchDescription([
        Node(
            package='turtlesim',
            executable='turtlesim_node',
            name='sim'
        ),
        Node(
            package='learning_tf2_cpp',
            executable='turtle_tf2_broadcaster',
            name='broadcaster1',
            parameters=[
                {'turtlename': 'turtle1'}
            ]
        ),
    ])
3.3.2.1 检查代码
首先,我们从 launch 和 launch_ros 包中导入所需的模块。需要注意的是,launch 是一个通用的启动框架(非 ROS 2 专用),而 launch_ros 则有 ROS 2 专用的东西,比如我们在这里导入的节点。
from launch import LaunchDescription
from launch_ros.actions import Node
现在,我们运行节点,启动海龟模拟,并使用我们的 turtle_tf2_broadcaster 节点向 tf2 广播 turtle1 的状态。
Node(
    package='turtlesim',
    executable='turtlesim_node',
    name='sim'
),
Node(
    package='learning_tf2_cpp',
    executable='turtle_tf2_broadcaster',
    name='broadcaster1',
    parameters=[
        {'turtlename': 'turtle1'}
    ]
),
3.3.2.2 添加依赖项
返回一级到 learning_tf2_cpp 目录,这里有 CMakeLists.txt 和 package.xml 文件。
用文本编辑器打开 package.xml。在启动文件的导入语句中添加下列依赖项:
<exec_depend>launch</exec_depend>
<exec_depend>launch_ros</exec_depend>
这将在执行代码时声明额外所需的 launch 和 launch_ros 依赖项。
确保保存该文件。
3.3.2.3 CMakeLists.txt
重新打开 CMakeLists.txt,添加一行,以便安装 launch/ 文件夹中的启动文件。
install(DIRECTORY launch
  DESTINATION share/${PROJECT_NAME})
3.3.3 构建
在工作区根目录下运行 rosdep,检查是否缺少依赖项。
rosdep install -i --from-path src --rosdistro foxy -y在工作区的根目录下,构建更新后的软件包:
colcon build --packages-select learning_tf2_cpp打开一个新终端,导航到工作区的根目录,然后获取设置文件:
. install/setup.bash3.3.4 运行
现在运行启动文件,启动 turtlesim 模拟节点和 turtle_tf2_broadcaster 节点:
ros2 launch learning_tf2_cpp turtle_tf2_demo.launch.py在第二个终端窗口中键入以下命令:
ros2 run turtlesim turtle_teleop_key现在您将看到海龟模拟已经开始,您可以控制一只海龟。
现在,使用 tf2_echo 工具来检查乌龟姿势是否真正广播到了 tf2:
ros2 run tf2_ros tf2_echo world turtle1这会显示第一只乌龟的姿势。使用方向键绕着乌龟行驶(确保你的 turtle_teleop_key 终端窗口处于活动状态,而不是模拟器窗口)。在控制台输出中,你会看到类似下面的内容:
At time 1625137663.912474878
- Translation: [5.276, 7.930, 0.000]
- Rotation: in Quaternion [0.000, 0.000, 0.934, -0.357]
At time 1625137664.950813527
- Translation: [3.750, 6.563, 0.000]
- Rotation: in Quaternion [0.000, 0.000, 0.934, -0.357]
At time 1625137665.906280726
- Translation: [2.320, 5.282, 0.000]
- Rotation: in Quaternion [0.000, 0.000, 0.934, -0.357]
At time 1625137666.850775673
- Translation: [2.153, 5.133, 0.000]
- Rotation: in Quaternion [0.000, 0.000, -0.365, 0.931]
如果运行 tf2_echo,在世界和乌龟 2 之间进行变换,应该不会看到变换,因为第二只乌龟还没有出现。不过,一旦我们在下一个教程中添加了第二只乌龟,乌龟 2 的姿势就会广播到 tf2。
3.4 小结
在本教程中,您将学习如何向 tf2 广播机器人的姿势(乌龟的位置和方向),以及如何使用 tf2_echo 工具。要实际使用广播到 tf2 的变换,您应该继续学习下一教程,了解如何创建 tf2 监听器。
四、编写监听器(C++)
4.1 背景介绍
在之前的教程中,我们创建了一个 tf2 广播器,将乌龟的姿势发布到 tf2。
在本教程中,我们将创建一个 tf2 监听器,开始使用 tf2。
4.2 前提条件
本教程假定您已完成 tf2 静态广播器教程(C++)和 tf2 广播器教程(C++)。在上一教程中,我们创建了一个 learning_tf2_cpp 包,我们将在此基础上继续学习。
4.3 任务
4.3.1 编写监听器节点
首先创建源文件。转到我们在上一教程中创建的 learning_tf2_cpp 包。在 src 目录中输入以下命令下载监听器示例代码:
wget https://raw.githubusercontent.com/ros/geometry_tutorials/ros2/turtle_tf2_cpp/src/turtle_tf2_listener.cpp使用您喜欢的文本编辑器打开文件。
#include <chrono>
#include <functional>
#include <memory>
#include <string>

#include "geometry_msgs/msg/transform_stamped.hpp"
#include "geometry_msgs/msg/twist.hpp"
#include "rclcpp/rclcpp.hpp"
#include "tf2/exceptions.h"
#include "tf2_ros/transform_listener.h"
#include "tf2_ros/buffer.h"
#include "turtlesim/srv/spawn.hpp"

using namespace std::chrono_literals;

class FrameListener : public rclcpp::Node
{
public:
  FrameListener()
  : Node("turtle_tf2_frame_listener"),
    turtle_spawning_service_ready_(false),
    turtle_spawned_(false)
  {
    // Declare and acquire `target_frame` parameter
    target_frame_ = this->declare_parameter<std::string>("target_frame", "turtle1");

    tf_buffer_ =
      std::make_unique<tf2_ros::Buffer>(this->get_clock());
    tf_listener_ =
      std::make_shared<tf2_ros::TransformListener>(*tf_buffer_);

    // Create a client to spawn a turtle
    spawner_ =
      this->create_client<turtlesim::srv::Spawn>("spawn");

    // Create turtle2 velocity publisher
    publisher_ =
      this->create_publisher<geometry_msgs::msg::Twist>("turtle2/cmd_vel", 1);

    // Call on_timer function every second
    timer_ = this->create_wall_timer(
      1s, std::bind(&FrameListener::on_timer, this));
  }

private:
  void on_timer()
  {
    // Store frame names in variables that will be used to
    // compute transformations
    std::string fromFrameRel = target_frame_.c_str();
    std::string toFrameRel = "turtle2";

    if (turtle_spawning_service_ready_) {
      if (turtle_spawned_) {
        geometry_msgs::msg::TransformStamped t;

        // Look up for the transformation between target_frame and turtle2 frames
        // and send velocity commands for turtle2 to reach target_frame
        try {
          t = tf_buffer_->lookupTransform(
            toFrameRel, fromFrameRel,
            tf2::TimePointZero);
        } catch (const tf2::TransformException & ex) {
          RCLCPP_INFO(
            this->get_logger(), "Could not transform %s to %s: %s",
            toFrameRel.c_str(), fromFrameRel.c_str(), ex.what());
          return;
        }

        geometry_msgs::msg::Twist msg;

        static const double scaleRotationRate = 1.0;
        msg.angular.z = scaleRotationRate * atan2(
          t.transform.translation.y,
          t.transform.translation.x);

        static const double scaleForwardSpeed = 0.5;
        msg.linear.x = scaleForwardSpeed * sqrt(
          pow(t.transform.translation.x, 2) +
          pow(t.transform.translation.y, 2));

        publisher_->publish(msg);
      } else {
        RCLCPP_INFO(this->get_logger(), "Successfully spawned");
        turtle_spawned_ = true;
      }
    } else {
      // Check if the service is ready
      if (spawner_->service_is_ready()) {
        // Initialize request with turtle name and coordinates
        // Note that x, y and theta are defined as floats in turtlesim/srv/Spawn
        auto request = std::make_shared<turtlesim::srv::Spawn::Request>();
        request->x = 4.0;
        request->y = 2.0;
        request->theta = 0.0;
        request->name = "turtle2";

        // Call request
        using ServiceResponseFuture =
          rclcpp::Client<turtlesim::srv::Spawn>::SharedFuture;
        auto response_received_callback = [this](ServiceResponseFuture future) {
            auto result = future.get();
            if (strcmp(result->name.c_str(), "turtle2") == 0) {
              turtle_spawning_service_ready_ = true;
            } else {
              RCLCPP_ERROR(this->get_logger(), "Service callback result mismatch");
            }
          };
        auto result = spawner_->async_send_request(request, response_received_callback);
      } else {
        RCLCPP_INFO(this->get_logger(), "Service is not ready");
      }
    }
  }

  // Boolean values to store the information
  // if the service for spawning turtle is available
  bool turtle_spawning_service_ready_;
  // if the turtle was successfully spawned
  bool turtle_spawned_;
  rclcpp::Client<turtlesim::srv::Spawn>::SharedPtr spawner_{nullptr};
  rclcpp::TimerBase::SharedPtr timer_{nullptr};
  rclcpp::Publisher<geometry_msgs::msg::Twist>::SharedPtr publisher_{nullptr};
  std::shared_ptr<tf2_ros::TransformListener> tf_listener_{nullptr};
  std::unique_ptr<tf2_ros::Buffer> tf_buffer_;
  std::string target_frame_;
};

int main(int argc, char * argv[])
{
  rclcpp::init(argc, argv);
  rclcpp::spin(std::make_shared<FrameListener>());
  rclcpp::shutdown();
  return 0;
}
4.3.1.1 检查代码
要了解催生乌龟背后的服务是如何工作的,请参阅编写一个简单的服务和客户端(C++)教程。
现在,让我们来看看与访问坐标系变换相关的代码。tf2_ros 包含一个 TransformListener 头文件实现,它使接收变换的任务变得更容易。
#include "tf2_ros/transform_listener.h"在这里,我们创建一个 TransformListener 对象。一旦创建了监听器,它就会开始通过线路接收 tf2 变换,并将其缓冲长达 10 秒。
tf_listener_ =
  std::make_shared<tf2_ros::TransformListener>(*tf_buffer_);
最后,我们查询监听器以获取特定的变换。我们使用以下参数调用 lookup_transform 方法:
- 目标坐标系
- 源坐标系
- 我们想要变换的时间
如果提供 tf2::TimePointZero(),我们将获得最新的可用变换。所有这些都包裹在一个 try-catch 块中,以处理可能出现的异常。
t = tf_buffer_->lookupTransform(
  toFrameRel, fromFrameRel,
  tf2::TimePointZero);
4.3.1.2 CMakeLists.txt
返回一级到 learning_tf2_cpp 目录,这里有 CMakeLists.txt 和 package.xml 文件。
现在打开 CMakeLists.txt,添加可执行文件,并将其命名为 turtle_tf2_listener,稍后将与 ros2 run 一起使用。
add_executable(turtle_tf2_listener src/turtle_tf2_listener.cpp)
ament_target_dependencies(
    turtle_tf2_listener
    geometry_msgs
    rclcpp
    tf2
    tf2_ros
    turtlesim
)
最后,添加 install(TARGETS...) 部分,以便 ros2 run 可以找到你的可执行文件:
install(TARGETS
    turtle_tf2_listener
    DESTINATION lib/${PROJECT_NAME})
4.3.2 更新启动文件
用文本编辑器打开名为 turtle_tf2_demo.launch.py 的启动文件,在启动说明中添加两个新节点,添加一个启动参数,并添加导入。生成的文件应该如下所示
from launch import LaunchDescription
from launch.actions import DeclareLaunchArgument
from launch.substitutions import LaunchConfiguration

from launch_ros.actions import Node


def generate_launch_description():
    return LaunchDescription([
        Node(
            package='turtlesim',
            executable='turtlesim_node',
            name='sim'
        ),
        Node(
            package='learning_tf2_cpp',
            executable='turtle_tf2_broadcaster',
            name='broadcaster1',
            parameters=[
                {'turtlename': 'turtle1'}
            ]
        ),
        DeclareLaunchArgument(
            'target_frame', default_value='turtle1',
            description='Target frame name.'
        ),
        Node(
            package='learning_tf2_cpp',
            executable='turtle_tf2_broadcaster',
            name='broadcaster2',
            parameters=[
                {'turtlename': 'turtle2'}
            ]
        ),
        Node(
            package='learning_tf2_cpp',
            executable='turtle_tf2_listener',
            name='listener',
            parameters=[
                {'target_frame': LaunchConfiguration('target_frame')}
            ]
        ),
    ])
这将声明一个 target_frame 启动参数,为我们将生成的第二只海龟启动广播器,并启动监听器来订阅这些转换。
4.3.3 生成
在工作区根目录下运行 rosdep,检查是否存在缺失的依赖项。
rosdep install -i --from-path src --rosdistro foxy -y在工作区的根目录下,构建更新后的软件包:
colcon build --packages-select learning_tf2_cpp打开一个新终端,导航到工作区的根目录,然后获取设置文件:
. install/setup.bash4.3.4 运行
现在你可以开始完整的乌龟演示了:
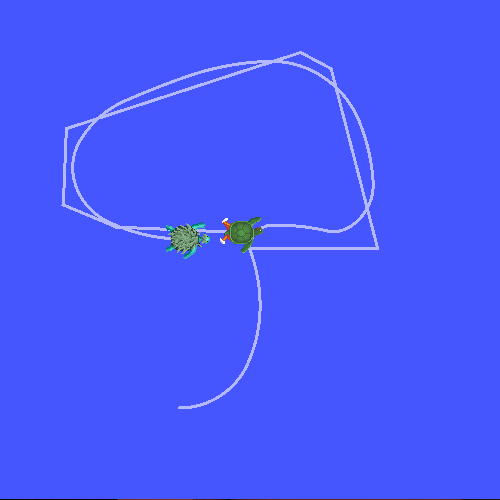
ros2 launch learning_tf2_cpp turtle_tf2_demo.launch.py你会看到海龟模拟器上有两只海龟。在第二个终端窗口中键入以下命令:
ros2 run turtlesim turtle_teleop_key要查看是否成功,只需使用箭头键绕过第一只乌龟(确保您的终端窗口处于活动状态,而不是模拟器窗口),您就会看到第二只乌龟跟在第一只乌龟后面!
4.4 总结
在本教程中,你学会了如何使用 tf2 访问坐标系变换。你还完成了自己编写的 turtlesim 演示,这是你在 tf2 入门教程中首次尝试。
五、添加坐标系 (C++)
5.1 背景介绍
在之前的教程中,我们通过编写 tf2 广播器和 tf2 监听器重现了乌龟演示。本教程将教您如何在变换树中添加额外的固定坐标系和动态坐标系。事实上,在 tf2 中添加坐标系与创建 tf2 广播器非常相似,但本示例将向您展示 tf2 的一些额外功能。
对于许多与变换相关的任务,在局部坐标系内思考更为容易。例如,在以激光扫描仪为中心的坐标系中推理激光扫描测量是最简单的。tf2 允许您为系统中的每个传感器、部件或关节定义一个局部坐标系。当从一个坐标系转换到另一个坐标系时,tf2 会处理所有引入的隐藏中间帧转换。
5.2 tf2 树
tf2 建立的是坐标系树形结构,因此不允许在坐标系结构中出现闭合循环。这意味着一个坐标系只有一个父系,但可以有多个子系。目前,我们的 tf2 树包含三个坐标系:world、turtle1 和 turtle2。两个乌龟坐标系是世界坐标系的子坐标系。如果我们想在 tf2 中添加一个新的坐标系,现有的三个坐标系中需要有一个是父坐标系,新的坐标系将成为它的子坐标系。
5.3 任务
5.3. 1 编写固定坐标系框架 broadcaster
在我们的乌龟示例中,我们将添加一个新的坐标系 carrot1,它将是乌龟 1 的子坐标系。该坐标系将作为第二只乌龟的目标。
首先创建源文件。转到我们在之前教程中创建的 learning_tf2_cpp 包。输入以下命令下载固定坐标系广播器代码:
wget https://raw.githubusercontent.com/ros/geometry_tutorials/ros2/turtle_tf2_cpp/src/fixed_frame_tf2_broadcaster.cpp现在打开名为 fixed_frame_tf2_broadcaster.cpp 的文件。
#include <chrono>
#include <functional>
#include <memory>

#include "geometry_msgs/msg/transform_stamped.hpp"
#include "rclcpp/rclcpp.hpp"
#include "tf2_ros/transform_broadcaster.h"

using namespace std::chrono_literals;

class FixedFrameBroadcaster : public rclcpp::Node
{
public:
  FixedFrameBroadcaster()
  : Node("fixed_frame_tf2_broadcaster")
  {
    tf_broadcaster_ = std::make_shared<tf2_ros::TransformBroadcaster>(this);
    timer_ = this->create_wall_timer(
      100ms, std::bind(&FixedFrameBroadcaster::broadcast_timer_callback, this));
  }

private:
  void broadcast_timer_callback()
  {
    geometry_msgs::msg::TransformStamped t;

    t.header.stamp = this->get_clock()->now();
    t.header.frame_id = "turtle1";
    t.child_frame_id = "carrot1";
    t.transform.translation.x = 0.0;
    t.transform.translation.y = 2.0;
    t.transform.translation.z = 0.0;
    t.transform.rotation.x = 0.0;
    t.transform.rotation.y = 0.0;
    t.transform.rotation.z = 0.0;
    t.transform.rotation.w = 1.0;

    tf_broadcaster_->sendTransform(t);
  }

rclcpp::TimerBase::SharedPtr timer_;
  std::shared_ptr<tf2_ros::TransformBroadcaster> tf_broadcaster_;
};

int main(int argc, char * argv[])
{
  rclcpp::init(argc, argv);
  rclcpp::spin(std::make_shared<FixedFrameBroadcaster>());
  rclcpp::shutdown();
  return 0;
}
代码与 tf2 广播员教程示例非常相似,唯一的区别是这里的变换不会随时间而改变。
5.3.1.1 检查代码
让我们来看看这段代码中的关键行。在这里,我们创建了一个新的变换,从父代乌龟 1 到新的子代胡萝卜 1。胡萝卜 1 的坐标系在 Y 轴上比乌龟 1 的坐标系偏移 2 米。
geometry_msgs::msg::TransformStamped t;

t.header.stamp = this->get_clock()->now();
t.header.frame_id = "turtle1";
t.child_frame_id = "carrot1";
t.transform.translation.x = 0.0;
t.transform.translation.y = 2.0;
t.transform.translation.z = 0.0;
5.3.1.2 CMakeLists.txt
返回一级到 learning_tf2_cpp 目录,CMakeLists.txt 和 package.xml 文件就在该目录下。
现在打开 CMakeLists.txt,添加可执行文件并命名为 fixed_frame_tf2_broadcaster。
add_executable(fixed_frame_tf2_broadcaster src/fixed_frame_tf2_broadcaster.cpp)
ament_target_dependencies(
    fixed_frame_tf2_broadcaster
    geometry_msgs
    rclcpp
    tf2_ros
)
最后,添加 install(TARGETS...) 部分,以便 ros2 run 可以找到你的可执行文件:
install(TARGETS
    fixed_frame_tf2_broadcaster
    DESTINATION lib/${PROJECT_NAME})
5.3.1.3 编写启动文件
现在,让我们为这个示例创建一个启动文件。用文本编辑器新建一个名为 turtle_tf2_fixed_frame_demo.launch.py 的文件,并添加以下几行:
import os

from ament_index_python.packages import get_package_share_directory

from launch import LaunchDescription
from launch.actions import IncludeLaunchDescription
from launch.launch_description_sources import PythonLaunchDescriptionSource

from launch_ros.actions import Node


def generate_launch_description():
    demo_nodes = IncludeLaunchDescription(
        PythonLaunchDescriptionSource([os.path.join(
            get_package_share_directory('learning_tf2_cpp'), 'launch'),
            '/turtle_tf2_demo.launch.py']),
        )

    return LaunchDescription([
        demo_nodes,
        Node(
            package='learning_tf2_cpp',
            executable='fixed_frame_tf2_broadcaster',
            name='fixed_broadcaster',
        ),
    ])
这个启动文件导入了所需的软件包,然后创建了一个 demo_nodes 变量,用于存储我们在上一个教程的启动文件中创建的节点。
代码的最后一部分将使用我们的 fixed_frame_tf2_broadcaster 节点将固定的胡萝卜 1 坐标系添加到海龟模拟世界中。
Node(
    package='learning_tf2_cpp',
    executable='fixed_frame_tf2_broadcaster',
    name='fixed_broadcaster',
),
5.3.1.4 构建
在工作区根目录下运行 rosdep,检查是否存在缺失的依赖项。
rosdep install -i --from-path src --rosdistro foxy -y在工作区的根目录下,构建更新后的软件包:
colcon build --packages-select learning_tf2_cpp打开一个新终端,导航到工作区的根目录,然后获取设置文件:
. install/setup.bash5.3.1.5 运行
现在你可以开始海龟广播员演示了:
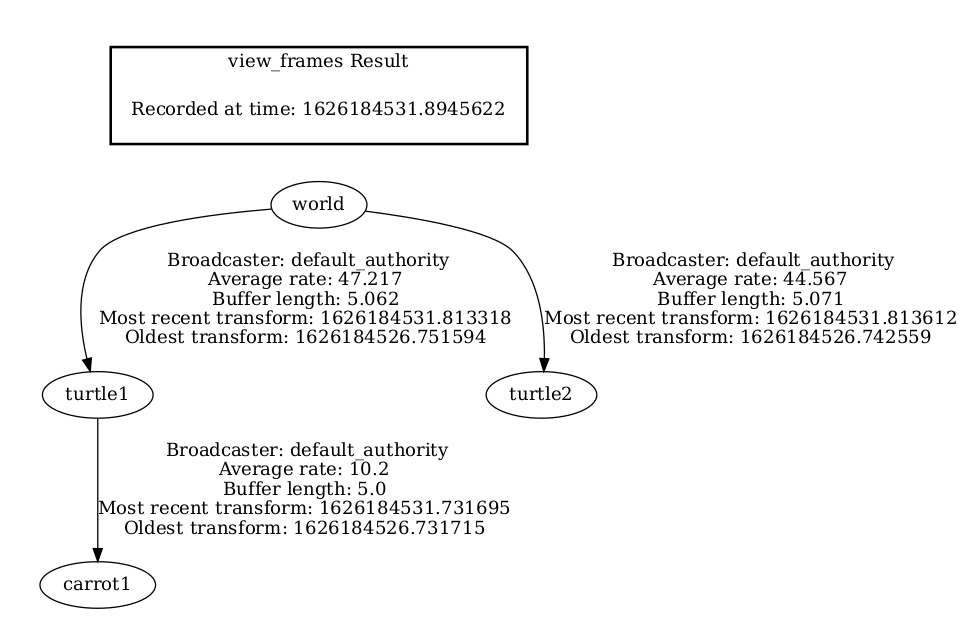
ros2 launch learning_tf2_cpp turtle_tf2_fixed_frame_demo.launch.py您应该注意到,新的 carrot1 坐标系出现在了转换树中。
如果你驾驶第一只乌龟四处走动,你应该会注意到,尽管我们添加了一个新的坐标系,但行为与之前的教程相比并没有改变。这是因为添加额外的坐标系并不会影响其他坐标系,我们的监听器仍在使用之前定义的坐标系。
因此,如果我们想让第二只乌龟跟随胡萝卜而不是第一只乌龟,就需要更改 target_frame 的值。这有两种方法。一种方法是直接从控制台向启动文件传递 target_frame 参数:
ros2 launch learning_tf2_cpp turtle_tf2_fixed_frame_demo.launch.py target_frame:=carrot1第二种方法是更新启动文件。为此,请打开 turtle_tf2_fixed_frame_demo.launch.py 文件,并通过 launch_arguments 参数添加 "target_frame":"carrot1 "参数。
def generate_launch_description():
    demo_nodes = IncludeLaunchDescription(
        ...,
        launch_arguments={'target_frame': 'carrot1'}.items(),
        )
现在重建软件包,重启 turtle_tf2_fixed_frame_demo.launch.py,你会看到第二只乌龟跟在胡萝卜后面,而不是第一只乌龟!
5.3.2 编写动态坐标系框架广播器
我们在本教程中发布的额外坐标系是一个固定的坐标系,不会随时间而改变与父坐标系的关系。但是,如果你想发布一个动态坐标系,你可以编写广播器代码来随时间改变坐标系。让我们改变胡萝卜 1 的坐标系,使其相对于乌龟 1 的坐标系随时间变化。现在输入以下命令下载动态坐标系广播器代码:
wget https://raw.githubusercontent.com/ros/geometry_tutorials/ros2/turtle_tf2_cpp/src/dynamic_frame_tf2_broadcaster.cpp现在打开名为 dynamic_frame_tf2_broadcaster.cpp 的文件:
#include <chrono>
#include <functional>
#include <memory>

#include "geometry_msgs/msg/transform_stamped.hpp"
#include "rclcpp/rclcpp.hpp"
#include "tf2_ros/transform_broadcaster.h"

using namespace std::chrono_literals;

const double PI = 3.141592653589793238463;

class DynamicFrameBroadcaster : public rclcpp::Node
{
public:
  DynamicFrameBroadcaster()
  : Node("dynamic_frame_tf2_broadcaster")
  {
    tf_broadcaster_ = std::make_shared<tf2_ros::TransformBroadcaster>(this);
    timer_ = this->create_wall_timer(
      100ms, std::bind(&DynamicFrameBroadcaster::broadcast_timer_callback, this));
  }

private:
  void broadcast_timer_callback()
  {
    rclcpp::Time now = this->get_clock()->now();
    double x = now.seconds() * PI;

    geometry_msgs::msg::TransformStamped t;
    t.header.stamp = now;
    t.header.frame_id = "turtle1";
    t.child_frame_id = "carrot1";
    t.transform.translation.x = 10 * sin(x);
    t.transform.translation.y = 10 * cos(x);
    t.transform.translation.z = 0.0;
    t.transform.rotation.x = 0.0;
    t.transform.rotation.y = 0.0;
    t.transform.rotation.z = 0.0;
    t.transform.rotation.w = 1.0;

    tf_broadcaster_->sendTransform(t);
  }

  rclcpp::TimerBase::SharedPtr timer_;
  std::shared_ptr<tf2_ros::TransformBroadcaster> tf_broadcaster_;
};

int main(int argc, char * argv[])
{
  rclcpp::init(argc, argv);
  rclcpp::spin(std::make_shared<DynamicFrameBroadcaster>());
  rclcpp::shutdown();
  return 0;
}
5.3.2.1 检查代码
我们没有固定定义 x 和 y 的偏移量,而是在当前时间上使用 sin() 和 cos() 函数,这样 carrot1 的偏移量就会不断变化。
double x = now.seconds() * PI;
...
t.transform.translation.x = 10 * sin(x);
t.transform.translation.y = 10 * cos(x);
5.3.2.2 CMakeLists.txt
返回一级到 learning_tf2_cpp 目录,这里有 CMakeLists.txt 和 package.xml 文件。
现在打开 CMakeLists.txt,添加可执行文件并命名为 dynamic_frame_tf2_broadcaster。
add_executable(dynamic_frame_tf2_broadcaster src/dynamic_frame_tf2_broadcaster.cpp)
ament_target_dependencies(
    dynamic_frame_tf2_broadcaster
    geometry_msgs
    rclcpp
    tf2_ros
)
最后,添加 install(TARGETS...) 部分,以便 ros2 run 可以找到你的可执行文件:
install(TARGETS
    dynamic_frame_tf2_broadcaster
    DESTINATION lib/${PROJECT_NAME})
5.3.2.3 编写启动文件
要测试这段代码,请创建一个新的启动文件 turtle_tf2_dynamic_frame_demo.launch.py,并粘贴以下代码:
import os

from ament_index_python.packages import get_package_share_directory

from launch import LaunchDescription
from launch.actions import IncludeLaunchDescription
from launch.launch_description_sources import PythonLaunchDescriptionSource

from launch_ros.actions import Node


def generate_launch_description():
    demo_nodes = IncludeLaunchDescription(
        PythonLaunchDescriptionSource([os.path.join(
            get_package_share_directory('learning_tf2_cpp'), 'launch'),
            '/turtle_tf2_demo.launch.py']),
        launch_arguments={'target_frame': 'carrot1'}.items(),
        )

    return LaunchDescription([
        demo_nodes,
        Node(
            package='learning_tf2_cpp',
            executable='dynamic_frame_tf2_broadcaster',
            name='dynamic_broadcaster',
        ),
    ])
5.3.2.4 构建
在工作区根目录下运行 rosdep,检查是否缺少依赖项。
rosdep install -i --from-path src --rosdistro foxy -y在工作区的根目录下,构建更新后的软件包:
colcon build --packages-select learning_tf2_cpp打开一个新终端,导航到工作区的根目录,然后获取设置文件:
. install/setup.bash5.3.2.5 运行
现在可以开始动态坐标系演示了:
ros2 launch learning_tf2_cpp turtle_tf2_dynamic_frame_demo.launch.py你应该看到,第二只乌龟正跟着胡萝卜的位置不断变化。
5.4 内容摘要
在本教程中,您了解了 tf2 变换树、其结构和功能。您还了解到在局部坐标系中思考是最简单的,并学会了为局部坐标系添加额外的固定和动态坐标系。
六、 使用时间 (C++)
6.1 背景介绍
在之前的教程中,我们通过编写 tf2 广播器和 tf2 监听器重现了乌龟演示。我们还学习了如何在变换树中添加新坐标系,并了解了 tf2 如何跟踪坐标系树。该树会随时间变化,tf2 会为每次变换(默认情况下最多 10 秒)存储时间快照。到目前为止,我们使用 lookupTransform() 函数访问 tf2 树中最新的可用变换,却不知道该变换是在什么时间记录的。本教程将教你如何获取特定时间的变换。
6.2 任务
6.2.1 tf2 和时间
让我们回到添加坐标系教程的结尾。转到 learning_tf2_cpp 包。打开 turtle_tf2_listener.cpp,查看 lookupTransform() 调用:
transformStamped = tf_buffer_->lookupTransform(
   toFrameRel,
   fromFrameRel,
   tf2::TimePointZero);
您可以看到,我们通过调用 tf2::TimePointZero 指定了一个等于 0 的时间。
注意
tf2 软件包有自己的时间类型 tf2::TimePoint,它不同于 rclcpp::Time。包 tf2_ros 中的许多 API 会自动在 rclcpp::Time 和 tf2::TimePoint 之间进行转换。
这里可以使用 rclcpp::Time(0, 0, this->get_clock()->get_clock_type()) ,但无论如何它都会被转换为 tf2::TimePointZero。
对于 tf2 来说,时间 0 意味着缓冲区中 "最新可用 "的变换。现在,修改这一行以获取当前时间的变换,即 this->get_clock()->now():
rclcpp::Time now = this->get_clock()->now();
transformStamped = tf_buffer_->lookupTransform(
   toFrameRel,
   fromFrameRel,
   now);
现在尝试运行启动文件。
ros2 launch learning_tf2_cpp turtle_tf2_demo.launch.py你会发现它失败了,输出类似下面的内容:
[INFO] [1629873136.345688064] [listener]: Could not transform turtle1 to turtle2: Lookup would
require extrapolation into the future.  Requested time 1629873136.345539 but the latest data
is at time 1629873136.338804, when looking up transform from frame [turtle1] to frame [turtle2]
它会告诉你,坐标系不存在,或者数据在未来。
要理解为什么会出现这种情况,我们需要了解缓冲区是如何工作的。首先,每个监听器都有一个缓冲区,用来存储来自不同 tf2 广播器的所有坐标变换。其次,当广播者发送变换时,变换需要一段时间(通常是几毫秒)才能进入缓冲区。因此,当您在 "now "时间请求坐标系变换时,应等待几毫秒,等待该信息到达。
6.2.2 等待变换
tf2 提供了一个很好的工具,可以等待变换出现。使用方法是在 lookupTransform() 中添加一个超时参数。要解决这个问题,请按下图所示编辑代码(添加最后一个超时参数):
rclcpp::Time now = this->get_clock()->now();
transformStamped = tf_buffer_->lookupTransform(
   toFrameRel,
   fromFrameRel,
   now,
   50ms);
lookupTransform() 可以接受四个参数,其中最后一个参数是可选的超时时间。在超时之前,它会阻塞一段时间。
6.2.3 检查结果
现在可以运行启动文件了。
ros2 launch learning_tf2_cpp turtle_tf2_demo.launch.py你应该注意到,lookupTransform() 实际上会阻塞,直到两只海龟之间的变换可用(这通常需要几毫秒)。一旦超时(本例中为 50 毫秒),只有在变换仍不可用时才会引发异常。
6.3 小结
在本教程中,您将学习如何在特定时间戳获取变换,以及如何在使用 lookupTransform() 函数时等待变换在 tf2 树上可用。
七、时间旅行(C++)
7.1 教程背景
在上一篇教程中,我们讨论了 tf2 和时间的基础知识。本教程将让我们更进一步,揭示一个强大的 tf2 技巧:时间旅行。简而言之,tf2 库的主要功能之一是能够在时间和空间上转换数据。
tf2 的时间旅行功能在各种任务中都很有用,比如长时间监控机器人的姿势,或者制造一个跟随者机器人,跟随领导者的 "脚步"。我们将使用时间旅行功能来回溯时间,并对乌龟 2 进行编程,使其跟随在胡萝卜 1 后面 5 秒钟。
7.2 时间旅行
首先,让我们回到上一个教程 "使用时间 "的结尾。进入你的 learning_tf2_cpp 软件包。
现在,我们不再让第二只乌龟前往胡萝卜现在所在的位置,而是让第二只乌龟前往第一只胡萝卜 5 秒前所在的位置。将 turtle_tf2_listener.cpp 文件中的 lookupTransform() 调用编辑为
rclcpp::Time when = this->get_clock()->now() - rclcpp::Duration(5, 0);
t = tf_buffer_->lookupTransform(
    toFrameRel,
    fromFrameRel,
    when,
    50ms);
现在,如果你运行这个程序,在最初的 5 秒钟里,第二只乌龟不知道该去哪里,因为我们还没有 5 秒钟的胡萝卜姿势历史记录。但这 5 秒钟之后会发生什么呢?让我们试一试:
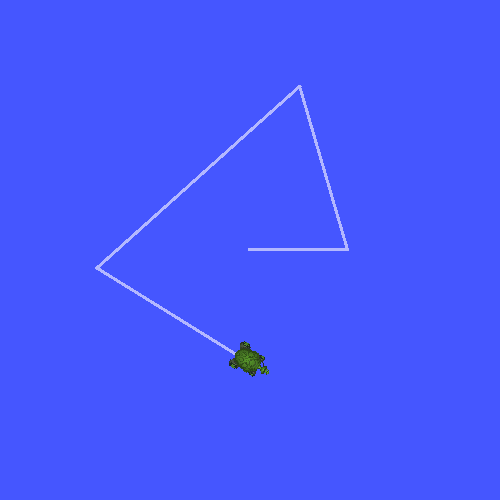
ros2 launch learning_tf2_cpp turtle_tf2_fixed_frame_demo.launch.py
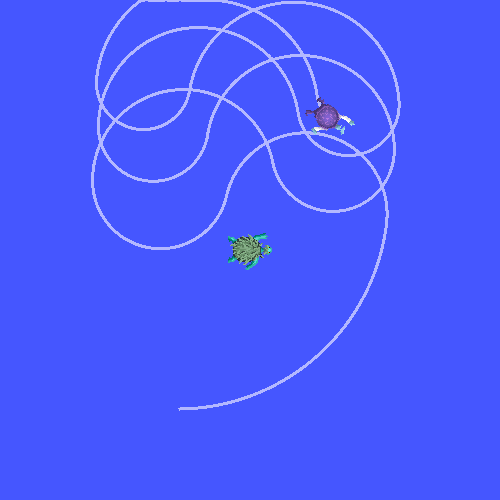
现在你应该注意到,你的乌龟正在不受控制地到处乱跑,就像这张截图一样。让我们来了解一下这种行为背后的原因。
- 在代码中,我们向 tf2 提出了以下问题: "相对于乌龟 2,5 秒钟前胡萝卜 1 的姿势是什么?这意味着我们根据第二只乌龟 5 秒钟前的位置以及第一只胡萝卜 5 秒钟前的位置来控制它。
- 然而,我们真正想问的是 "相对于乌龟 2 的当前位置,5 秒钟前胡萝卜 1 的姿势是什么?
7.3 lookupTransform() 的高级应用程序接口
为了向 tf2 提出这个特定问题,我们将使用高级 API,它能让我们明确说明何时获取指定的变换。这可以通过调用带有附加参数的 lookupTransform() 方法来实现。您现在的代码将如下所示
rclcpp::Time now = this->get_clock()->now();
rclcpp::Time when = now - rclcpp::Duration(5, 0);
t = tf_buffer_->lookupTransform(
    toFrameRel,
    now,
    fromFrameRel,
    when,
    "world",
    50ms);
lookupTransform() 的高级应用程序接口需要六个参数:
- 目标坐标系
- 要转换的时间
- 源坐标系
- 评估源坐标系帧的时间
- 不随时间变化的坐标系帧,此处为世界帧
- 等待目标坐标系可用的时间
总之,tf2 会在后台执行以下操作。在过去帧,它计算从胡萝卜 1 到世界帧的变换。在世界坐标系中,tf2 从过去时空旅行到现在时空。在当前时间,tf2 会计算从世界到乌龟 2 的变换。
7.4 检查结果
让我们再次运行模拟,这次使用高级时间旅行 API:
ros2 launch learning_tf2_cpp turtle_tf2_fixed_frame_demo.launch.py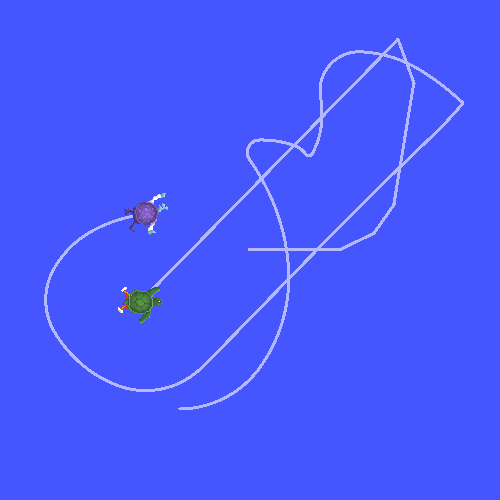
是的,第二只乌龟被引导到 5 秒钟前第一只胡萝卜所在的位置!
7.5 总结
在本教程中,您看到了 tf2 的一个高级功能。通过使用先进的 lookupTransform() API,tf2 可以回溯时间并在乌龟的旧姿势和当前姿势之间进行坐标系转换。
八、四元数基础知识
8.1 四元数背景
四元数是方位的 4 元组表示法,比旋转矩阵更简洁。四元数对于分析涉及三维旋转的情况非常有效。四元数广泛应用于机器人、量子力学、计算机视觉和三维动画。
您可以在维基百科上了解有关基本数学概念的更多信息。您还可以观看由 3blue1brown 制作的可探索视频系列《可视化四元数》。
在本教程中,您将了解四元数和转换方法在 ROS 2 中的工作原理。
8.2 先决条件
不过,这并不是硬性要求,你可以坚持使用任何其他最适合你的几何转换库。您可以参考 transforms3d、scipy.spatial.transform、pytransform3d、numpy-quaternion 或 blender.mathutils 等库。
8.3 四元数的组成
ROS 2 使用四元数来跟踪和应用旋转。一个四元数有 4 个分量(x、y、z、w)。在 ROS 2 中,w 是最后一个分量,但在某些库(如 Eigen)中,w 可以放在第一个位置。常用的单位四元数是(0, 0, 0, 1),它不会产生 x/y/z 轴的旋转,创建方法如下:
#include <tf2/LinearMath/Quaternion.h>
...

tf2::Quaternion q;
// Create a quaternion from roll/pitch/yaw in radians (0, 0, 0)
q.setRPY(0, 0, 0);
// Print the quaternion components (0, 0, 0, 1)
RCLCPP_INFO(this->get_logger(), "%f %f %f %f",
            q.x(), q.y(), q.z(), q.w());
四元数的大小应始终为一。如果数值错误导致四元数的大小不是 1,ROS 2 将发出警告。为避免这些警告,请对四元数进行归一化处理:
q.normalize();8.4 ROS 2 中的四元数类型
ROS 2 使用两种四元数数据类型:tf2::Quaternion(四元数)和等价的 geometry_msgs::msg::Quaternion(四元数)。要在 C++ 中对它们进行转换,请使用 tf2_geometry_msgs 的方法。
8.4.1 C++
#include <tf2_geometry_msgs/tf2_geometry_msgs.hpp>
...

tf2::Quaternion tf2_quat, tf2_quat_from_msg;
tf2_quat.setRPY(roll, pitch, yaw);
// Convert tf2::Quaternion to geometry_msgs::msg::Quaternion
geometry_msgs::msg::Quaternion msg_quat = tf2::toMsg(tf2_quat);

// Convert geometry_msgs::msg::Quaternion to tf2::Quaternion
tf2::convert(msg_quat, tf2_quat_from_msg);
// or
tf2::fromMsg(msg_quat, tf2_quat_from_msg);
8.4.2 Python
from geometry_msgs.msg import Quaternion
...

# Create a list of floats, which is compatible with tf2
# Quaternion methods
quat_tf = [0.0, 1.0, 0.0, 0.0]

# Convert a list to geometry_msgs.msg.Quaternion
msg_quat = Quaternion(x=quat_tf[0], y=quat_tf[1], z=quat_tf[2], w=quat_tf[3])
8.5 四元数运算
8.5.1 先用 RPY 思考,然后转换成四元数
我们很容易想到轴的旋转,但很难想到四元数。一个建议是用滚动(围绕 X 轴)、俯仰(围绕 Y 轴)和偏航(围绕 Z 轴)来计算目标旋转,然后转换成四元数。
# quaternion_from_euler method is available in turtle_tf2_py/turtle_tf2_py/turtle_tf2_broadcaster.py
q = quaternion_from_euler(1.5707, 0, -1.5707)
print(f'The quaternion representation is x: {q[0]} y: {q[1]} z: {q[2]} w: {q[3]}.')
8.5.2 应用四元数旋转
要将一个四元数的旋转应用于一个姿势,只需将姿势的前一个四元数乘以代表所需旋转的四元数即可。乘法的顺序很重要。
C++
#include <tf2_geometry_msgs/tf2_geometry_msgs.hpp>
...

tf2::Quaternion q_orig, q_rot, q_new;

q_orig.setRPY(0.0, 0.0, 0.0);
// Rotate the previous pose by 180* about X
q_rot.setRPY(3.14159, 0.0, 0.0);
q_new = q_rot * q_orig;
q_new.normalize();
Python
q_orig = quaternion_from_euler(0, 0, 0)
# Rotate the previous pose by 180* about X
q_rot = quaternion_from_euler(3.14159, 0, 0)
q_new = quaternion_multiply(q_rot, q_orig)
8.5.3 反转四元数
反转四元数的简单方法是否定 w 分量:
q[3] = -q[3]8.5.4 相对旋转
假设有两个来自同一坐标系的四元数 q_1 和 q_2。你想找到能以如下方式将 q_1 转换为 q_2 的相对旋转,即 q_r:
q_2 = q_r * q_1您可以用求解矩阵方程的方法来求解 q_r。反转 q_1 并将两边右乘。同样,乘法的顺序也很重要:
q_r = q_2 * q_1_inverse下面是一个用 python 获取从上一个机器人姿态到当前机器人姿态的相对旋转的示例:
def quaternion_multiply(q0, q1):
    """
    Multiplies two quaternions.

    Input
    :param q0: A 4 element array containing the first quaternion (q01, q11, q21, q31)
    :param q1: A 4 element array containing the second quaternion (q02, q12, q22, q32)

    Output
    :return: A 4 element array containing the final quaternion (q03,q13,q23,q33)

    """
    # Extract the values from q0
    w0 = q0[0]
    x0 = q0[1]
    y0 = q0[2]
    z0 = q0[3]

    # Extract the values from q1
    w1 = q1[0]
    x1 = q1[1]
    y1 = q1[2]
    z1 = q1[3]

    # Computer the product of the two quaternions, term by term
    q0q1_w = w0 * w1 - x0 * x1 - y0 * y1 - z0 * z1
    q0q1_x = w0 * x1 + x0 * w1 + y0 * z1 - z0 * y1
    q0q1_y = w0 * y1 - x0 * z1 + y0 * w1 + z0 * x1
    q0q1_z = w0 * z1 + x0 * y1 - y0 * x1 + z0 * w1

    # Create a 4 element array containing the final quaternion
    final_quaternion = np.array([q0q1_w, q0q1_x, q0q1_y, q0q1_z])

    # Return a 4 element array containing the final quaternion (q02,q12,q22,q32)
    return final_quaternion

q1_inv[0] = prev_pose.pose.orientation.x
q1_inv[1] = prev_pose.pose.orientation.y
q1_inv[2] = prev_pose.pose.orientation.z
q1_inv[3] = -prev_pose.pose.orientation.w # Negate for inverse

q2[0] = current_pose.pose.orientation.x
q2[1] = current_pose.pose.orientation.y
q2[2] = current_pose.pose.orientation.z
q2[3] = current_pose.pose.orientation.w

qr = quaternion_multiply(q2, q1_inv)
8.6 内容摘要
在本教程中,您了解了四元数的基本概念及其相关数学运算,如反转和旋转。您还了解了四元数在 ROS 2 中的使用示例以及两个独立四元数类之间的转换方法。


 800
800


 被折叠的 条评论
为什么被折叠?
被折叠的 条评论
为什么被折叠?
 到【灌水乐园】发言


