CloudCompare——计算点云的KD树并可视化

1.功能概述

  使用Tools>Sand box (research)>compute kd-tree访问此工具。
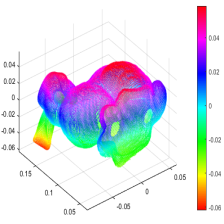
  该功能可以用于论文写作中的KD树绘图。
在这里插入图片描述

2.完整操作

在这里插入图片描述

3.算法源码

static double s_kdTreeMaxErrorPerCell = 0.1;
void MainWindow::doActionComputeKdTree()
{
	ccGenericPointCloud* cloud = nullptr;

	if ( haveOneSelection() )
	{
		ccHObject* ent = m_selectedEntities.back();
		bool lockedVertices;
		cloud = ccHObjectCaster::ToGenericPointCloud(ent,&lockedVertices);
		if (lockedVertices)
		{
			ccUtils::DisplayLockedVerticesWarning(ent->getName(),true);
			return;
		}
	}

	if (!cloud)
	{
		ccLog::Error("Selected one and only one point cloud or mesh!");
		return;
	}

	bool ok;
	s_kdTreeMaxErrorPerCell = QInputDialog::getDouble(this, "Compute Kd-tree", "Max error per leaf cell:", s_kdTreeMaxErrorPerCell, 1.0e-6, 1.0e6, 6, &ok);
	if (!ok)
		return;

	ccProgressDialog pDlg(true, this);

	//computation
	QElapsedTimer eTimer;
	eTimer.start();
	ccKdTree* kdtree = new ccKdTree(cloud);

	if (kdtree->build(s_kdTreeMaxErrorPerCell, CCLib::DistanceComputationTools::MAX_DIST_95_PERCENT, 4, 1000, &pDlg))
	{
		qint64 elapsedTime_ms = eTimer.elapsed();

		ccConsole::Print("[doActionComputeKdTree] Timing: %2.3f s",static_cast<double>(elapsedTime_ms)/1.0e3);
		cloud->setEnabled(true); //for mesh vertices!
		cloud->addChild(kdtree);
		kdtree->setDisplay(cloud->getDisplay());
		kdtree->setVisible(true);
		kdtree->prepareDisplayForRefresh();
#ifdef QT_DEBUG
		kdtree->convertCellIndexToSF();
#else
		kdtree->convertCellIndexToRandomColor();
#endif

		addToDB(kdtree);

		refreshAll();
		updateUI();
	}
	else
	{
		ccLog::Error("An error occurred!");
		delete kdtree;
		kdtree = nullptr;
	}
}

4.相关代码

[1] C++代码: PCL KD树的使用

[2] python代码: Open3D KDTree的使用

[3] matlab代码:matlab KD树的使用

[4] Open3D (C++) KD tree的使用

计算法向量可以使用 pcl::NormalEstimation 类,可视化可以使用 pcl::visualization::PCLVisualizer 类。 以下是一个简单的示例代码: ```cpp #include <iostream> #include <pcl/point_types.h> #include <pcl/features/normal_3d.h> #include <pcl/io/pcd_io.h> #include <pcl/visualization/pcl_visualizer.h> int main(int argc, char** argv) { // Load point cloud data from file pcl::PointCloud<pcl::PointXYZ>::Ptr cloud(new pcl::PointCloud<pcl::PointXYZ>); pcl::io::loadPCDFile<pcl::PointXYZ>("cloud.pcd", *cloud); // Estimate normals pcl::NormalEstimation<pcl::PointXYZ, pcl::Normal> ne; ne.setInputCloud(cloud); pcl::search::KdTree<pcl::PointXYZ>::Ptr tree(new pcl::search::KdTree<pcl::PointXYZ>()); ne.setSearchMethod(tree); pcl::PointCloud<pcl::Normal>::Ptr cloud_normals(new pcl::PointCloud<pcl::Normal>); ne.setRadiusSearch(0.03); // set the radius of the sphere for normal estimation ne.compute(*cloud_normals); // Visualize the point cloud and its normals pcl::visualization::PCLVisualizer viewer("Point Cloud Viewer"); viewer.setBackgroundColor(0.0, 0.0, 0.0); viewer.addPointCloud<pcl::PointXYZ>(cloud, "cloud"); viewer.setPointCloudRenderingProperties(pcl::visualization::PCL_VISUALIZER_POINT_SIZE, 1, "cloud"); viewer.addPointCloudNormals<pcl::PointXYZ, pcl::Normal>(cloud, cloud_normals, 10, 0.05, "normals"); viewer.spin(); return 0; } ``` 在这个例子中,我们首先从文件中加载点云数据,然后使用 pcl::NormalEstimation 类估计点云的法向量。接着,我们使用 pcl::visualization::PCLVisualizer 类将点云和法向量可视化。在可视化中,我们使用 addPointCloud() 函数将点云添加到可视化窗口中,并使用 setPointCloudRenderingProperties() 函数设置点云的大小。然后,我们使用 addPointCloudNormals() 函数将法向量添加到点云中,并设置法向量的长度和大小。最后,我们使用 spin() 函数显示可视化窗口并等待用户交互。 注意,在使用 PCL 可视化库时,可能需要在编译时链接对应的库文件。例如,在 Ubuntu 系统中,可以使用以下命令编译上述代码: ``` g++ -o main main.cpp -I/usr/include/pcl-1.8 -lpcl_visualization -lboost_system ``` 其中 -I 指定了 PCL 库的头文件路径,-l 指定了需要链接的库文件。
评论
添加红包

请填写红包祝福语或标题

红包个数最小为10个

红包金额最低5元

当前余额3.43前往充值 >
需支付:10.00
成就一亿技术人!
领取后你会自动成为博主和红包主的粉丝 规则
hope_wisdom
发出的红包

打赏作者

点云侠

你的鼓励将是我创作的最大动力

¥1 ¥2 ¥4 ¥6 ¥10 ¥20
扫码支付:¥1
获取中
扫码支付

您的余额不足,请更换扫码支付或充值

打赏作者

实付
使用余额支付
点击重新获取
扫码支付
钱包余额 0

抵扣说明:

1.余额是钱包充值的虚拟货币,按照1:1的比例进行支付金额的抵扣。
2.余额无法直接购买下载,可以购买VIP、付费专栏及课程。

余额充值