


一、提要
本文介绍了 Python 中的音频库 Pyaudio,安装、使用。安装分两个部分:
- pyaudio---此为python脚本部分
- portaudio---此为python脚本调用的动态库,用c++写
将以上两个部分同时安装妥善,才能最后完成。
二、pyaudio是个什么?
pyaudio是一个音频处理库,可以在Python中进行音频的录制和播放。它是基于PortAudio库开发的,并提供了方便易用的Python接口,支持跨平台使用。通过pyaudio,用户可以实现音频的采集、处理和播放等功能。
三、源码资源获取
2.1 在pypi.org网站上,获取pyaudio的软件包。
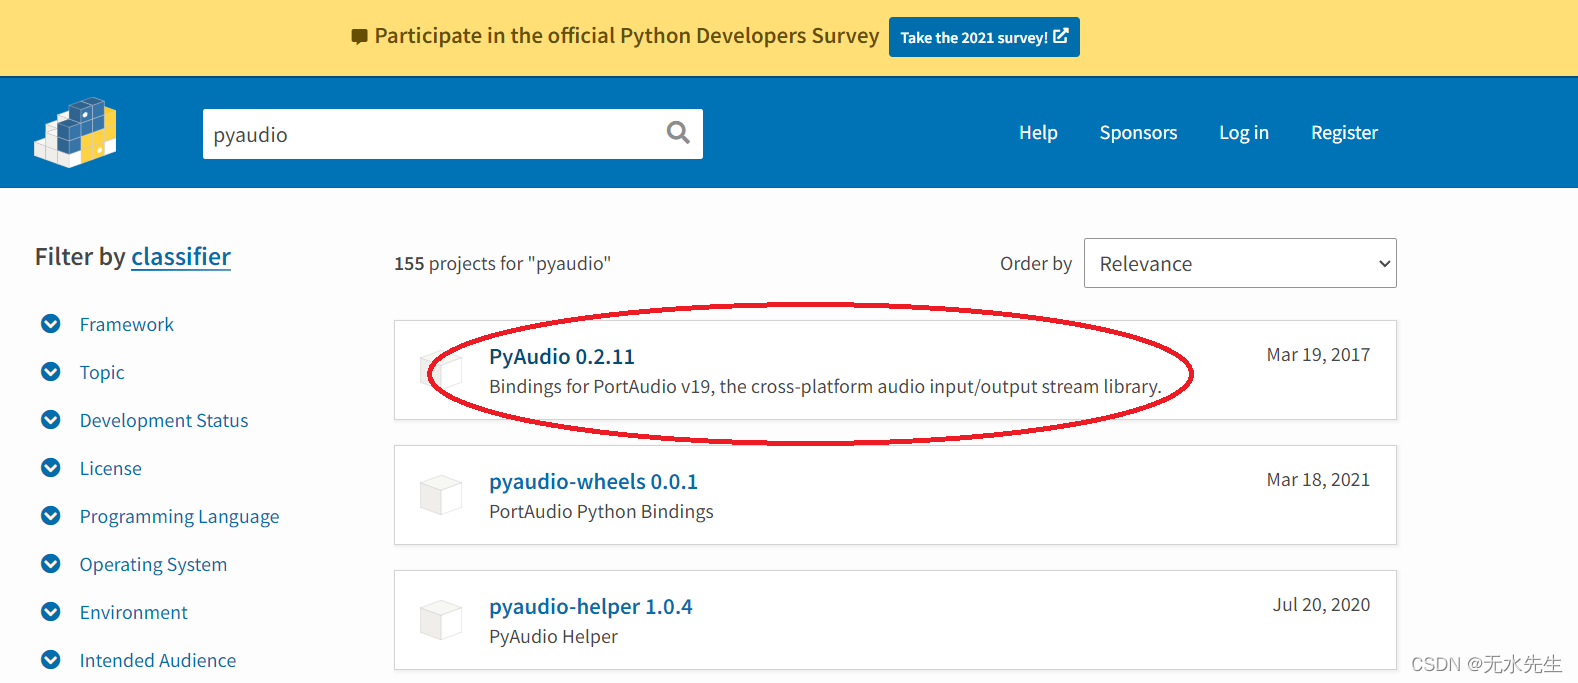
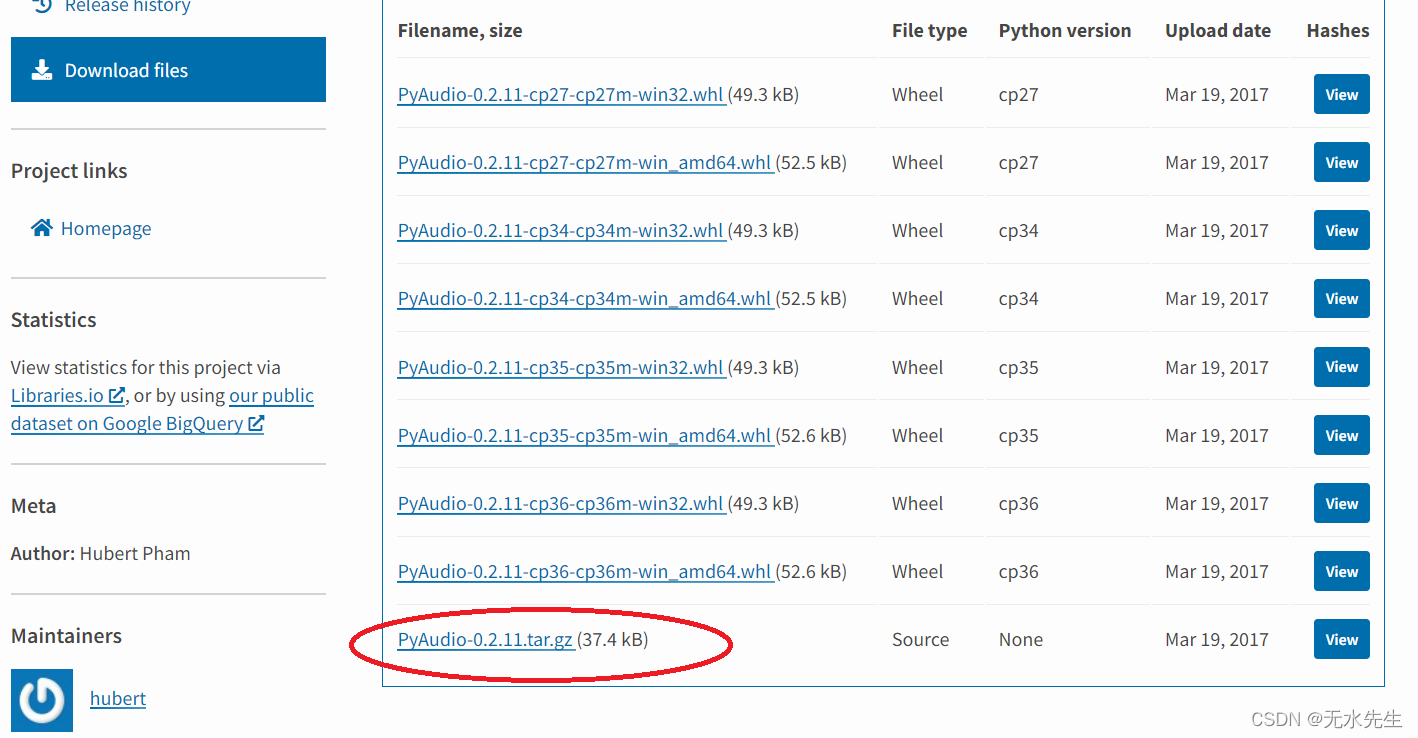
或下在相同网站下载whel文件。
2.2 编译portaudio的源码资源
下载portaudio:PortAudio - an Open-Source Cross-Platform Audio API
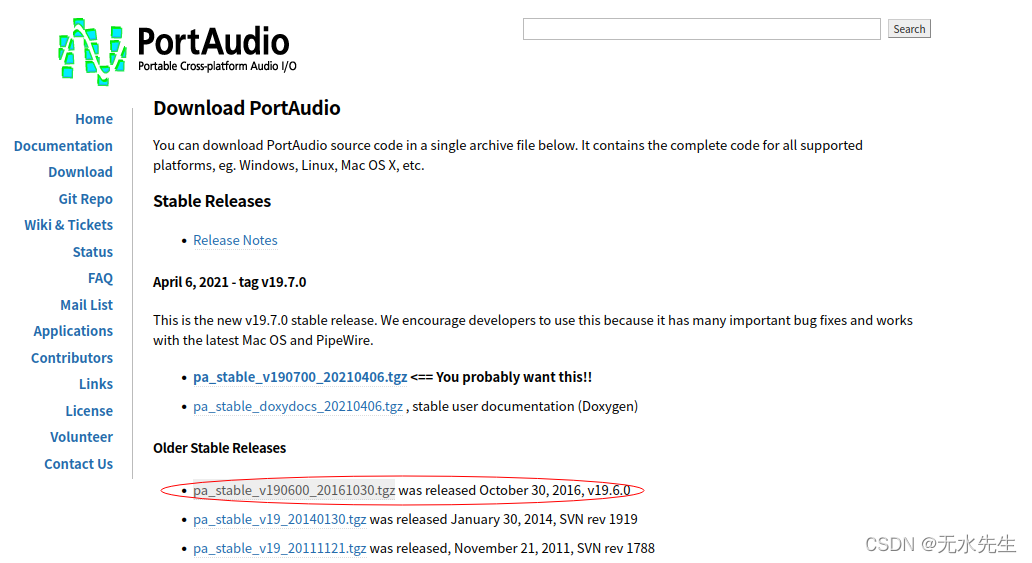
cd ~/Downloads
./configure --prefix=/usr/local/bin && make && sudo make install
以上安装portaudio成功。
四、安装pyaudio
因为ubuntu内有一个默认python3,在装anaconda3后,又有一个python3,使用:
pip install --target=~/anaconda3/lib/python3.6/site-packages pyaudio进行安装。
安装 Pyaudio 的问题
如果您使用的是 Windows,则在尝试安装 Pyaudio 时可能会遇到一些错误。为了修复此问题和“Pyaudio 模块未找到错误”,您需要在命令提示符中执行以下 2 个步骤。
pip install pipwinpipwin install pyaudio
这是让它发挥作用的最简单方法。
五、使用案例
5.1 最简单使用例子
以下是一个简单的PyAudio使用案例,用于录制音频并将其保存到本地文件:
import pyaudio
import wave

# 设置参数
chunk = 1024
sample_format = pyaudio.paInt16
channels = 2
fs = 44100
seconds = 5
filename = "output.wav"

# 初始化PyAudio对象
p = pyaudio.PyAudio()

# 开始录音
stream = p.open(format=sample_format,
                channels=channels,
                rate=fs,
                frames_per_buffer=chunk,
                input=True)
frames = []
for i in range(0, int(fs / chunk * seconds)):
    data = stream.read(chunk)
    frames.append(data)

# 结束录音
stream.stop_stream()
stream.close()
p.terminate()

# 保存录音结果
wf = wave.open(filename, 'wb')
wf.setnchannels(channels)
wf.setsampwidth(p.get_sample_size(sample_format))
wf.setframerate(fs)
wf.writeframes(b''.join(frames))
wf.close()
该例程将会录制5秒钟的音频,并将其保存到名为“output.wav”的文件中。
5.2 Python pyaudio – 录制和播放声音
Pyaudio 是 PortAudio 的 Python 绑定,PortAudio 是一个用于音频输入和输出的跨平台库。这基本上意味着我们可以使用 Pyaudio 在所有平台和操作系统(例如 Windows、Mac 和 Linux)上录制和播放声音。
在尝试我们将教您的任何命令和功能之前,请务必下载并安装 pyaudio 库。
5.3 使用 PyAudio 播放音频
您可能已经注意到,但我们需要的不仅仅是 pyaudio 模块。我们需要一些支持模块,例如wave. 如果您按照我们的指示安装了 Pyaudio,这些模块将自动安装。
下面的代码非常不言自明,尤其是在注释的帮助下。
import pyaudio
import wave

filename = 'background.wav'

# Defines a chunk size of 1024 samples per data frame.
chunk = 1024

# Open sound file  in read binary form.
file = wave.open(filename, 'rb')

# Initialize PyAudio
p = pyaudio.PyAudio()

# Creates a Stream to which the wav file is written to.
# Setting output to "True" makes the sound be "played" rather than recorded
stream = p.open(format = p.get_format_from_width(file.getsampwidth()),
                channels = file.getnchannels(),
                rate = file.getframerate(),
                output = True)

# Read data in chunks
data = file.readframes(chunk)

# Play the sound by writing the audio data to the stream
while data != '':
    stream.write(data)
    data = file.readframes(chunk)

# Stop, Close and terminate the stream
stream.stop_stream()
stream.close()
p.terminate()
要创建流,您需要定义某些内容,例如通道数、采样率等。使用类似命令file.getnchannels()从文件中提取相关数据并使用它来创建适当的音频流。
这里实际上并不需要该stop_stream()函数,因为当代码到达其位置时,流已经完成。这是一个有用的函数,可以知道您是否想在中途停止流或其他什么。
5.4 使用 PyAudio 录制声音
如果我们反转上一节中所做的事情,我们可以“录制”音频。
import pyaudio
import wave

chunk = 1024      # Each chunk will consist of 1024 samples
sample_format = pyaudio.paInt16      # 16 bits per sample
channels = 2      # Number of audio channels
fs = 44100        # Record at 44100 samples per second
time_in_seconds = 3
filename = "soundsample.wav"

p = pyaudio.PyAudio()  # Create an interface to PortAudio

print('-----Now Recording-----')

#Open a Stream with the values we just defined
stream = p.open(format=sample_format,
                channels = channels,
                rate = fs,
                frames_per_buffer = chunk,
                input = True)

frames = []  # Initialize array to store frames

# Store data in chunks for 3 seconds
for i in range(0, int(fs / chunk * time_in_seconds)):
    data = stream.read(chunk)
    frames.append(data)

# Stop and close the Stream and PyAudio
stream.stop_stream()
stream.close()
p.terminate()

print('-----Finished Recording-----')

# Open and Set the data of the WAV file
file = wave.open(filename, 'wb')
file.setnchannels(channels)
file.setsampwidth(p.get_sample_size(sample_format))
file.setframerate(fs)

#Write and Close the File
file.writeframes(b''.join(frames))
file.close()
正如您所看到的,这次我们在开始处定义了自己的通道、样本和格式(代码的开头),稍后我们在打开和创建 WAV 文件(代码的结尾)时使用它们。中间是在我们设置的持续时间(3 秒)内录制音频的部分。
现在尝试自己运行代码。当出现“录音”提示时,开始说话。三秒钟后,一个 wav 文件将出现在与包含您的声音的脚本相同的位置。恭喜,您刚刚学会了如何制作录音机。
其他声音库:


 954
954

 被折叠的 条评论
为什么被折叠?
被折叠的 条评论
为什么被折叠?
 到【灌水乐园】发言


