


这是之前的做法 https://blog.csdn.net/maxiaosheng521/article/details/121854323
比较简单粗暴,效果是所有的透明材质都不应用后期,这次是通过custom stencil 设置为111 过滤掉指定透明材质的后期渲染流程
代码和思路说明 https://github.com/HeartlessLD/UE4CustomtranslucencyNoPost-
实现对指定透明材质物体不应用后期效果 (在SceneCapture中捕捉的对象也不受效果)
说明 受限于目前对引擎的了解 这种修改方式绝对不是最优的方法
使用说明:
使用ue4.26源码版引擎 大概率4.27也可以 4.25应该是不行
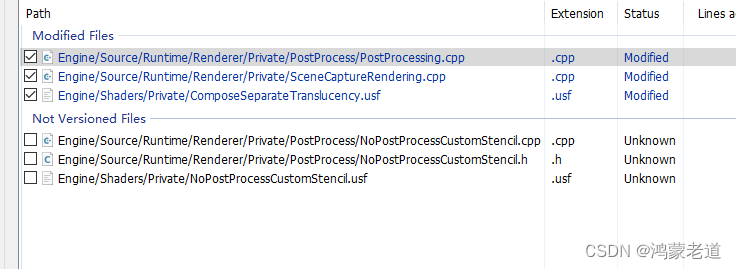
引擎文件拷贝对应的文件进行覆盖
ComposeSeparateTranslucency.usf NoPostProcessCustomStencil.usf放到UnrealEngine\Engine\Shaders\Private中
ConsoleVariables.ini 调试shader 使用 如果不需要调试查看shader可以不用
NoPostProcessCustomStencil.h .cpp 放到UnrealEngine\Engine\Source\Runtime\Renderer\Private
项目设置
Custom Depth-Stencil Pass EnableWithStencil
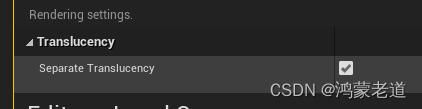
Separate Translucency enable

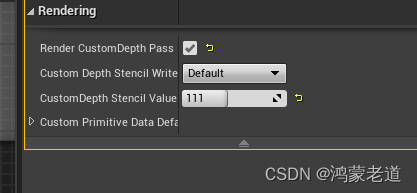
将想要设置不受影响的物体 属性 RenderCustomDepthPass enable
customDepth Stencil Value 111 (这里设置111 是针对后期材质中 只针对111 进行处理 非111的透明材质 保持原样)
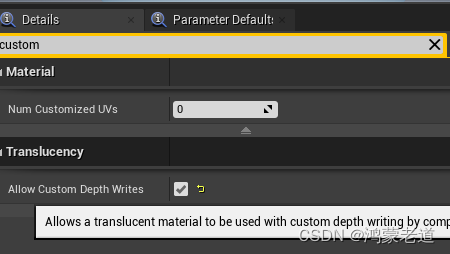
透明材质要开启 Allow Custom Depth Write
这里面说一下大概思路(可能有错误 仅供参考)
文件中所有///>nopost的地方都是修改的内容,具体的逻辑可以自己看
首先自定义一条Pass 放在后期的最后进行渲染,
这里参考 https://zhuanlan.zhihu.com/p/407093510
///>nopost
PassSequence.SetEnabled(EPass::NoPostProcess, true);
在Post之前对透明物体进行渲染处理时,在合成透明的shader中过滤掉111的透明,
ComposeSeparateTranslucency.usf
uint CustomStencil = CustomStencilTexture.Load(int3(SvPosition.xy, 0)) STENCIL_COMPONENT_SWIZZLE;

if(CustomStencil == 111 && SeparateTranslucencySample.a != 1)
	OutColor.rgb = SceneColorSample.rgb;
else
	OutColor.rgb = SceneColorSample.rgb * SeparateTranslucencySample.a * SeparateModulationSample.rgb + SeparateTranslucencySample.rgb;
在最后的自定义Pass中添加上111的透明图片
	///>nopost
	if(PassSequence.IsEnabled(EPass::NoPostProcess))
	{
		FNoPostProcessInputs PassInputs;
		PassSequence.AcceptOverrideIfLastPass(EPass::NoPostProcess, PassInputs.OverrideOutput);
		PassInputs.SceneColor = SceneColor;
		PassInputs.SeparateTransluscency = SeparateTranslucency;
		SceneColor = AddNoPostProcessPass(GraphBuilder, View, PassInputs, SceneColor.Texture, *Inputs.SeparateTranslucencyTextures, (*Inputs.SceneTextures)->CustomStencilTexture);


	}
NoPostProcessCustomStencil.usf
	if(CustomStencil == 111 && SeparateTranslucencySample.a != 1)
		OutColor.rgb = SceneColorSample.rgb * SeparateTranslucencySample.a * SeparateModulationSample.rgb + SeparateTranslucencySample.rgb;
	else
		OutColor.rgb = SceneColorSample.rgb;
这里提一嘴 SceneCapture2D默认是不会讲透明物体放在SeparateTranslucency单独的纹理中的,需要单独开启一下
SceneCaptureRendering.cpp
///>nopost
SceneRenderer->ViewFamily.EngineShowFlags.SeparateTranslucency = 1;
以上 大体思路就是这样


 2754
2754

 被折叠的 条评论
为什么被折叠?
被折叠的 条评论
为什么被折叠?
 到【灌水乐园】发言


