


https://www.cnblogs.com/shangchele/p/7328473.html
ROS数据可视化rviz简明笔记
----
- 标记:发送基本形状(C ++)
显示如何使用visualization_msgs / Marker消息将基本形状(立方体,球体,圆柱体,箭头)发送到rviz。
- 标记:点和线(C ++)
教导如何使用visualization_msgs / Marker消息将点和线发送到rviz。
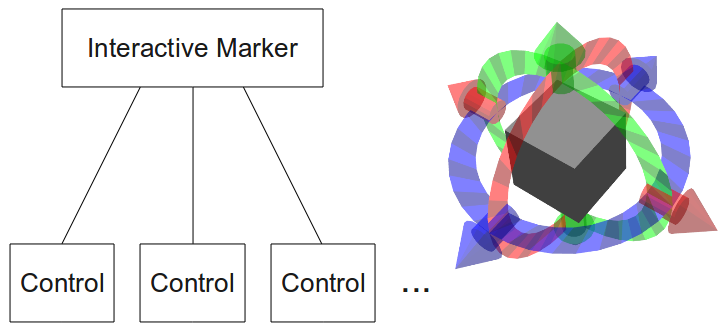
- 交互式标记:入门
本教程解释什么是交互式标记,并教你一些基本的概念。
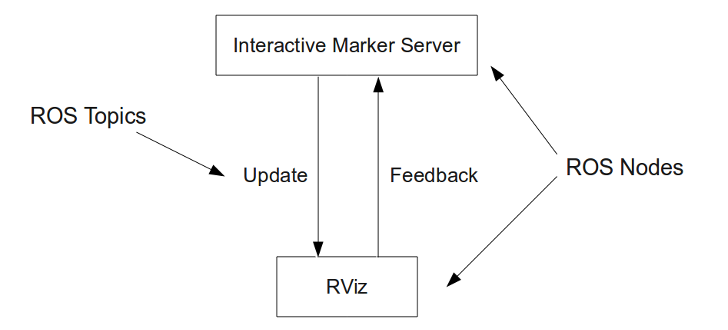
- 交互式标记:编写简单的交互式标记服务器
本教程介绍如何设置管理单个交互式标记的极简主义服务器。
- 交互式标记:基本控件
本教程解释basic_controls教程代码如何工作。
- 插件:新显示类型
如何编写一个插件,为RViz添加一个新的显示功能。
- 插件:新的可停靠面板
如何编写一个插件,添加一个新类型的可停靠Panel小部件到RViz。
- 插件:新工具类型
如何编写一个插件,为RViz添加一个新工具。
- Librviz:将RViz纳入自定义GUI
如何使用RViz可视化窗口小部件编写应用程序。
- Rviz in Stereo
教你如何设置Rviz在3D立体声渲染。
----
[html] view plaincopyprint?
- $ tree -L 3
- .
- ├── interactive_marker_tutorials
- │ ├── CHANGELOG.rst
- │ ├── CMakeLists.txt
- │ ├── package.xml
- │ ├── scripts
- │ │ ├── basic_controls.py
- │ │ ├── cube.py
- │ │ ├── menu.py
- │ │ └── simple_marker.py
- │ └── src
- │ ├── basic_controls.cpp
- │ ├── cube.cpp
- │ ├── menu.cpp
- │ ├── point_cloud.cpp
- │ ├── pong.cpp
- │ ├── selection.cpp
- │ └── simple_marker.cpp
- ├── librviz_tutorial
- │ ├── CHANGELOG.rst
- │ ├── CMakeLists.txt
- │ ├── package.xml
- │ ├── rosdoc.yaml
- │ └── src
- │ ├── doc
- │ ├── main.cpp
- │ ├── myviz.cpp
- │ └── myviz.h
- ├── rviz_plugin_tutorials
- │ ├── CHANGELOG.rst
- │ ├── CMakeLists.txt
- │ ├── icons
- │ │ └── classes
- │ ├── media
- │ │ └── flag.dae
- │ ├── package.xml
- │ ├── plugin_description.xml
- │ ├── rosdoc.yaml
- │ ├── scripts
- │ │ └── send_test_msgs.py
- │ └── src
- │ ├── doc
- │ ├── drive_widget.cpp
- │ ├── drive_widget.h
- │ ├── flag.h
- │ ├── imu_display.cpp
- │ ├── imu_display.h
- │ ├── imu_visual.cpp
- │ ├── imu_visual.h
- │ ├── plant_flag_tool.cpp
- │ ├── plant_flag_tool.h
- │ ├── teleop_panel.cpp
- │ └── teleop_panel.h
- ├── rviz_python_tutorial
- │ ├── CHANGELOG.rst
- │ ├── CMakeLists.txt
- │ ├── config.myviz
- │ ├── doc-src
- │ │ ├── conf.py
- │ │ ├── index.rst
- │ │ ├── myviz.png
- │ │ └── tutorialformatter.py
- │ ├── myviz.py
- │ ├── package.xml
- │ └── rosdoc.yaml
- ├── visualization_marker_tutorials
- │ ├── CHANGELOG.rst
- │ ├── CMakeLists.txt
- │ ├── package.xml
- │ └── src
- │ ├── basic_shapes.cpp
- │ └── points_and_lines.cpp
- └── visualization_tutorials
- ├── CHANGELOG.rst
- ├── CMakeLists.txt
- └── package.xml
- 18 directories, 57 files
----
1 标记:基本形状,点,线等
补充阅读:
1 DisplayTypes/Marker:http://wiki.ros.org/rviz/DisplayTypes/Marker
2 rviz/UserGuide:http://wiki.ros.org/rviz/UserGuide
3 tf/tf2:http://wiki.ros.org/tf http://wiki.ros.org/tf2
代码解析等参考如下:
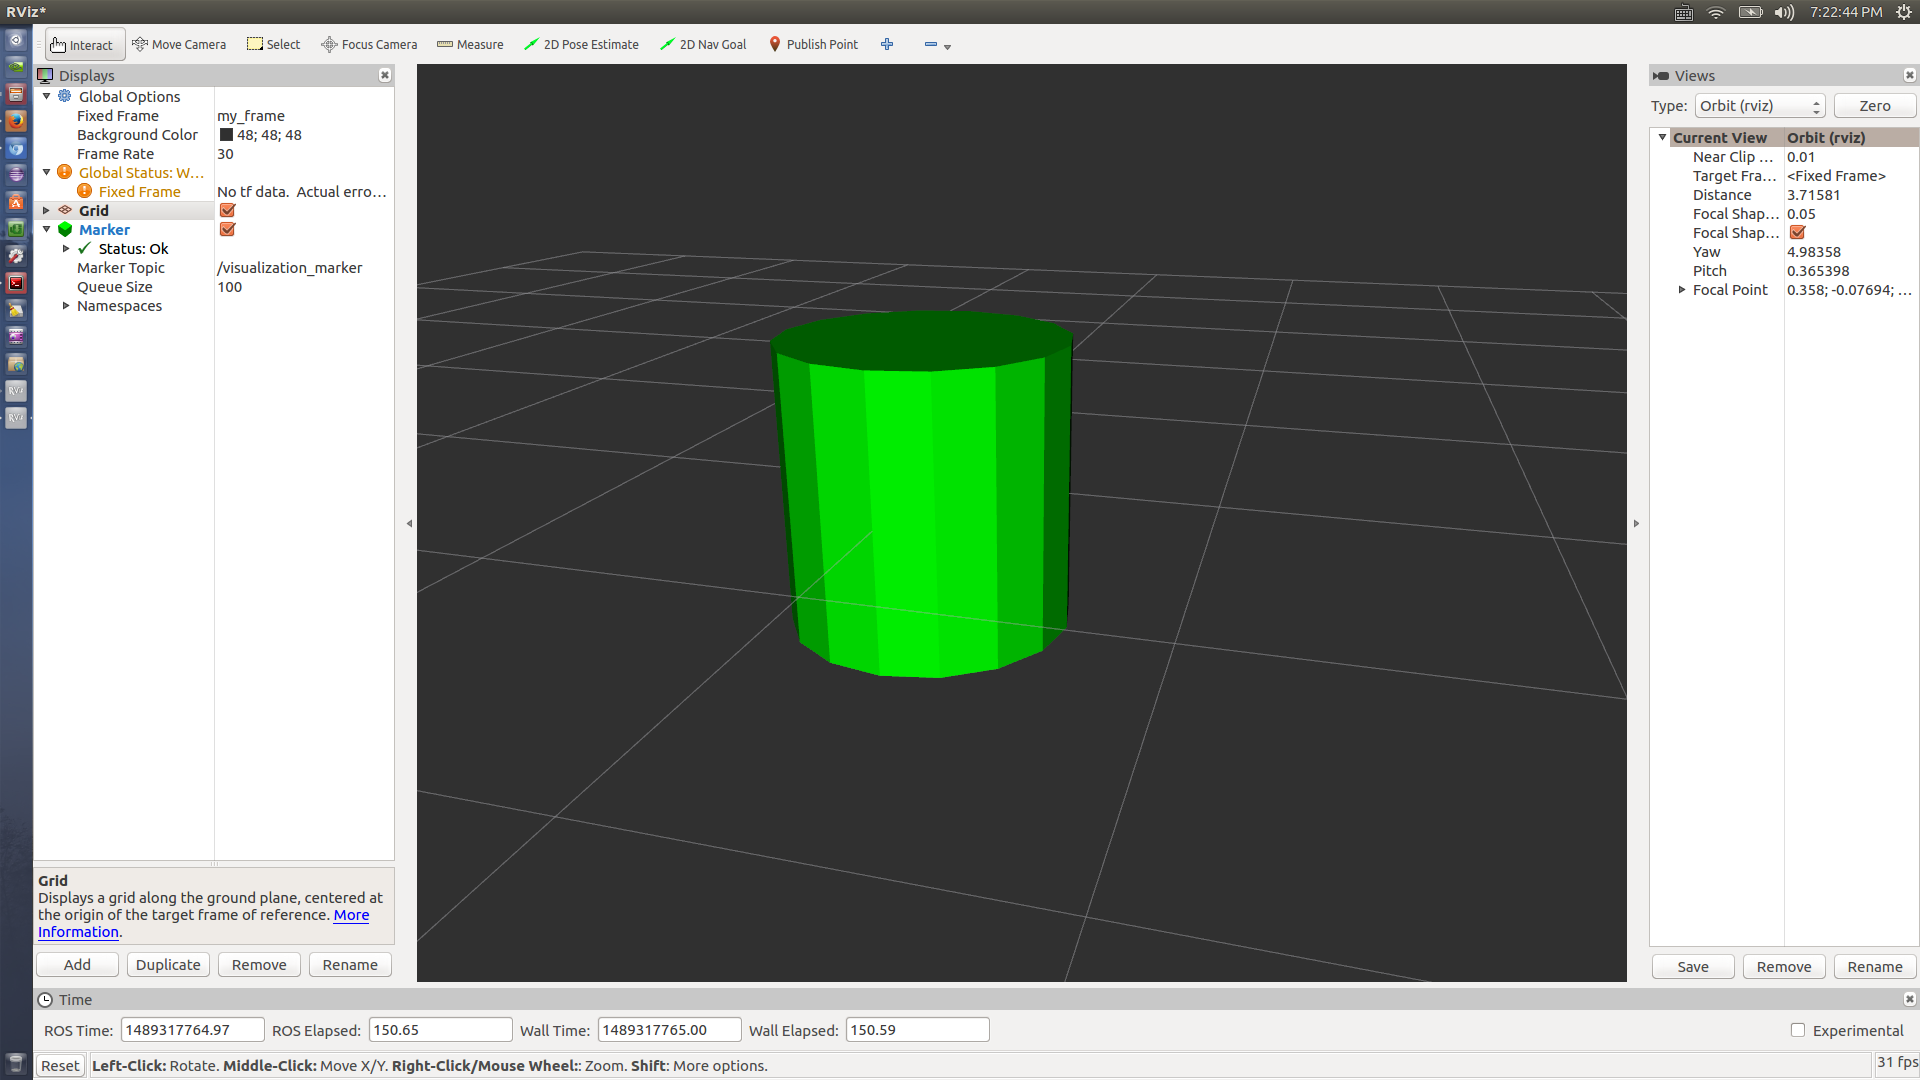
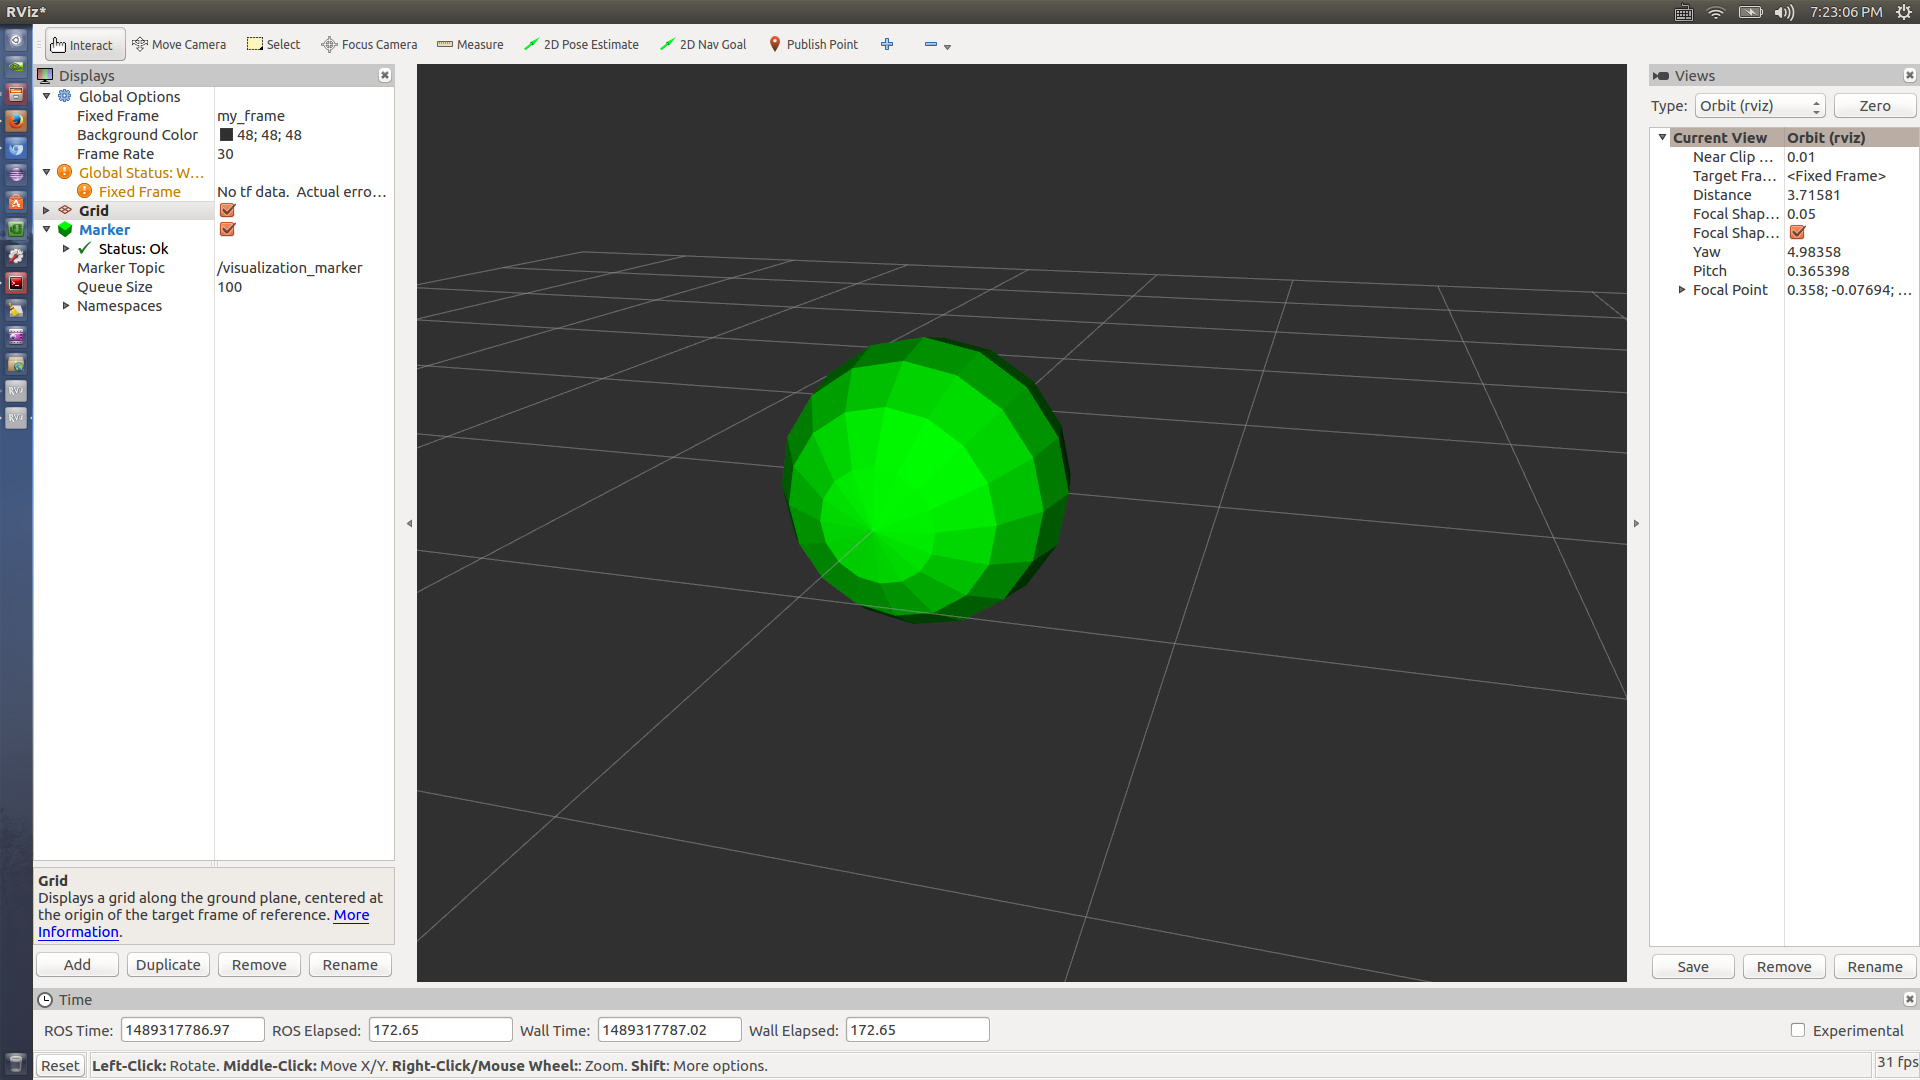
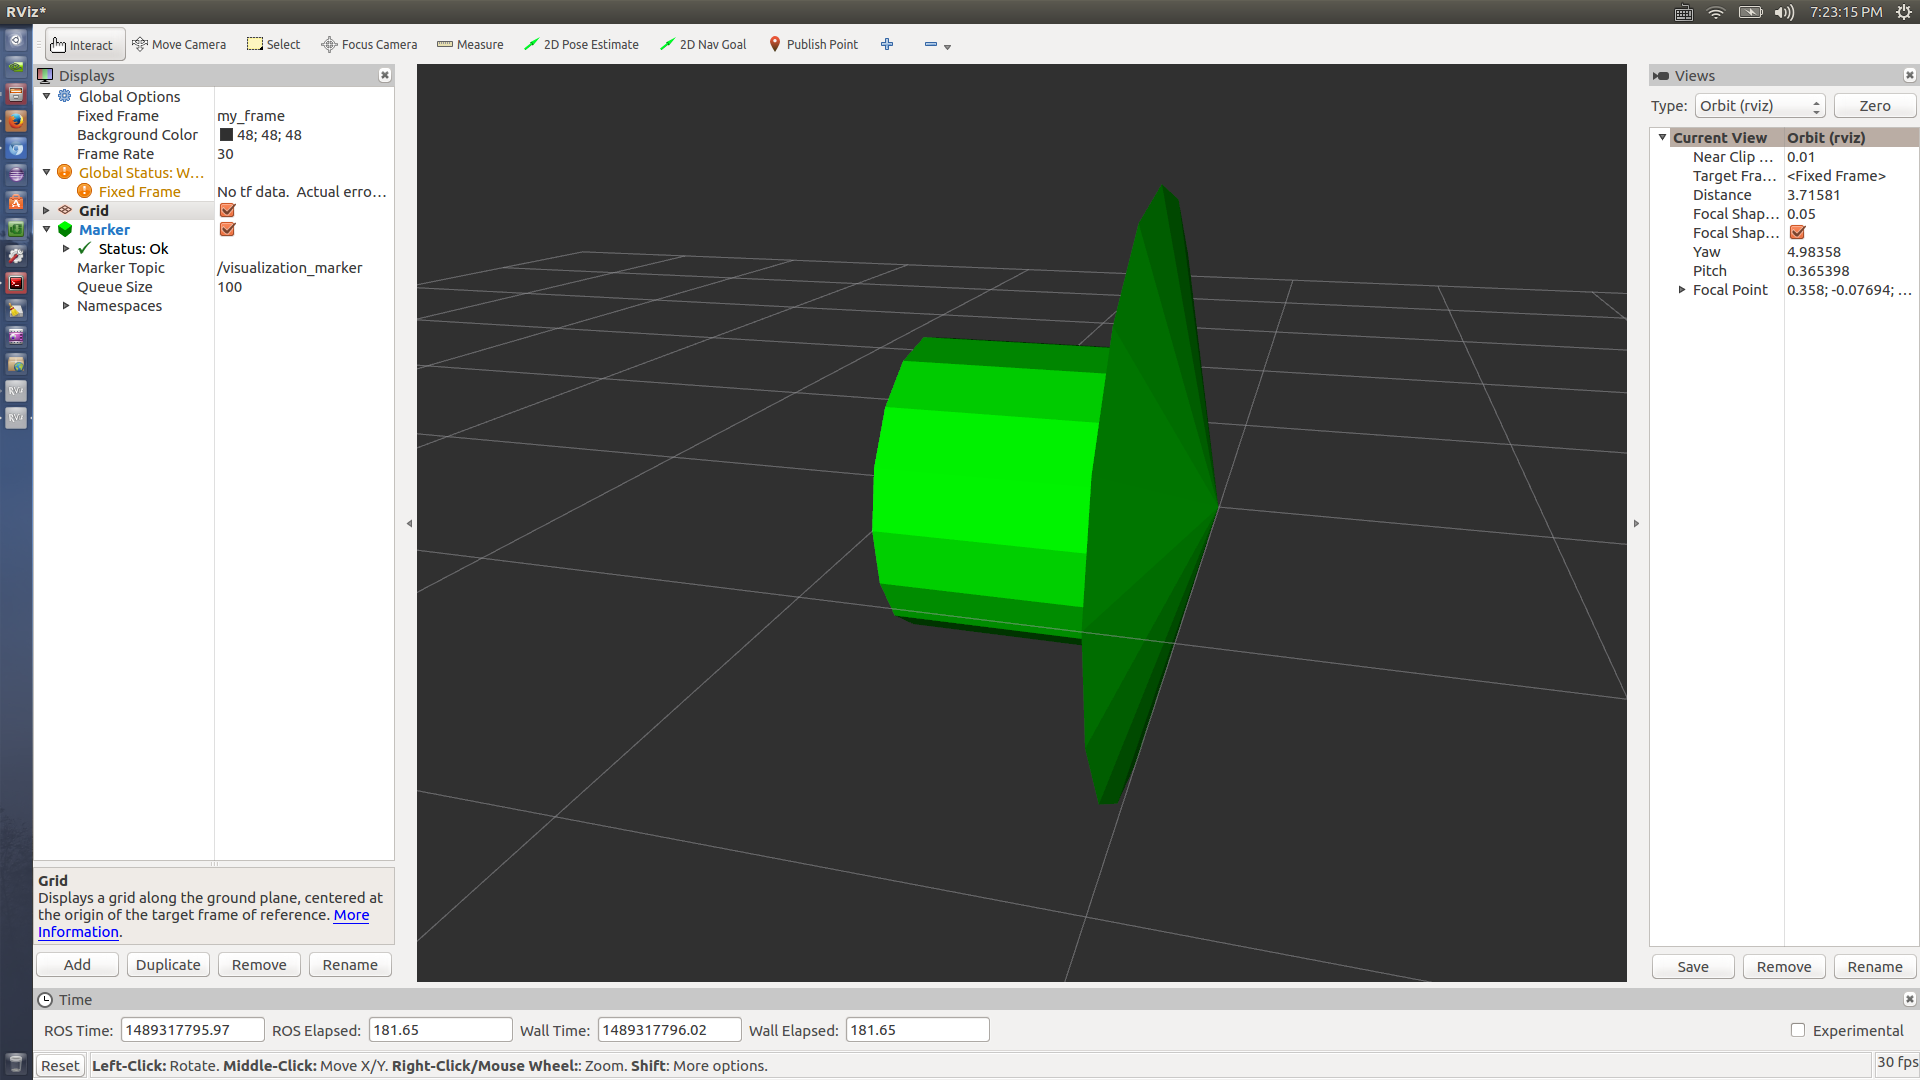
使用命令和效果,如下:
$ rosrun visualization_marker_tutorials basic_shapes
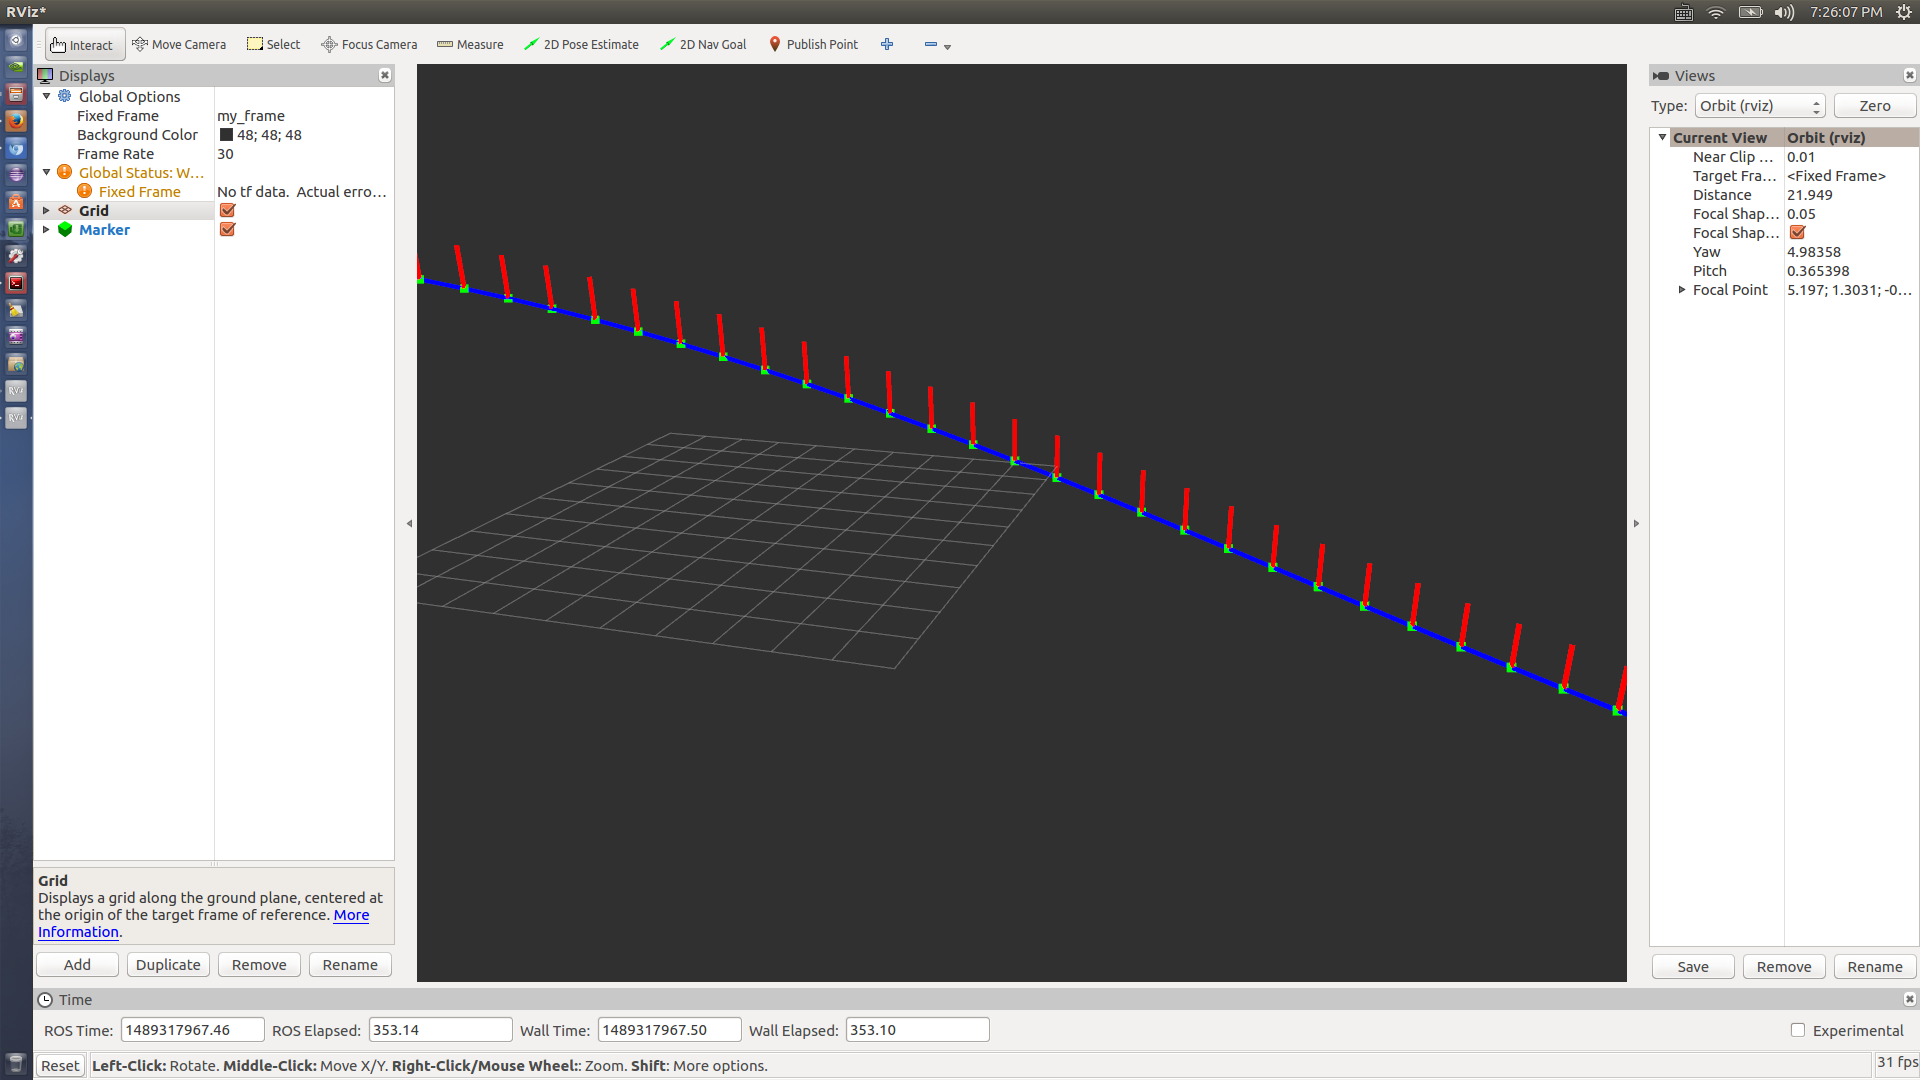
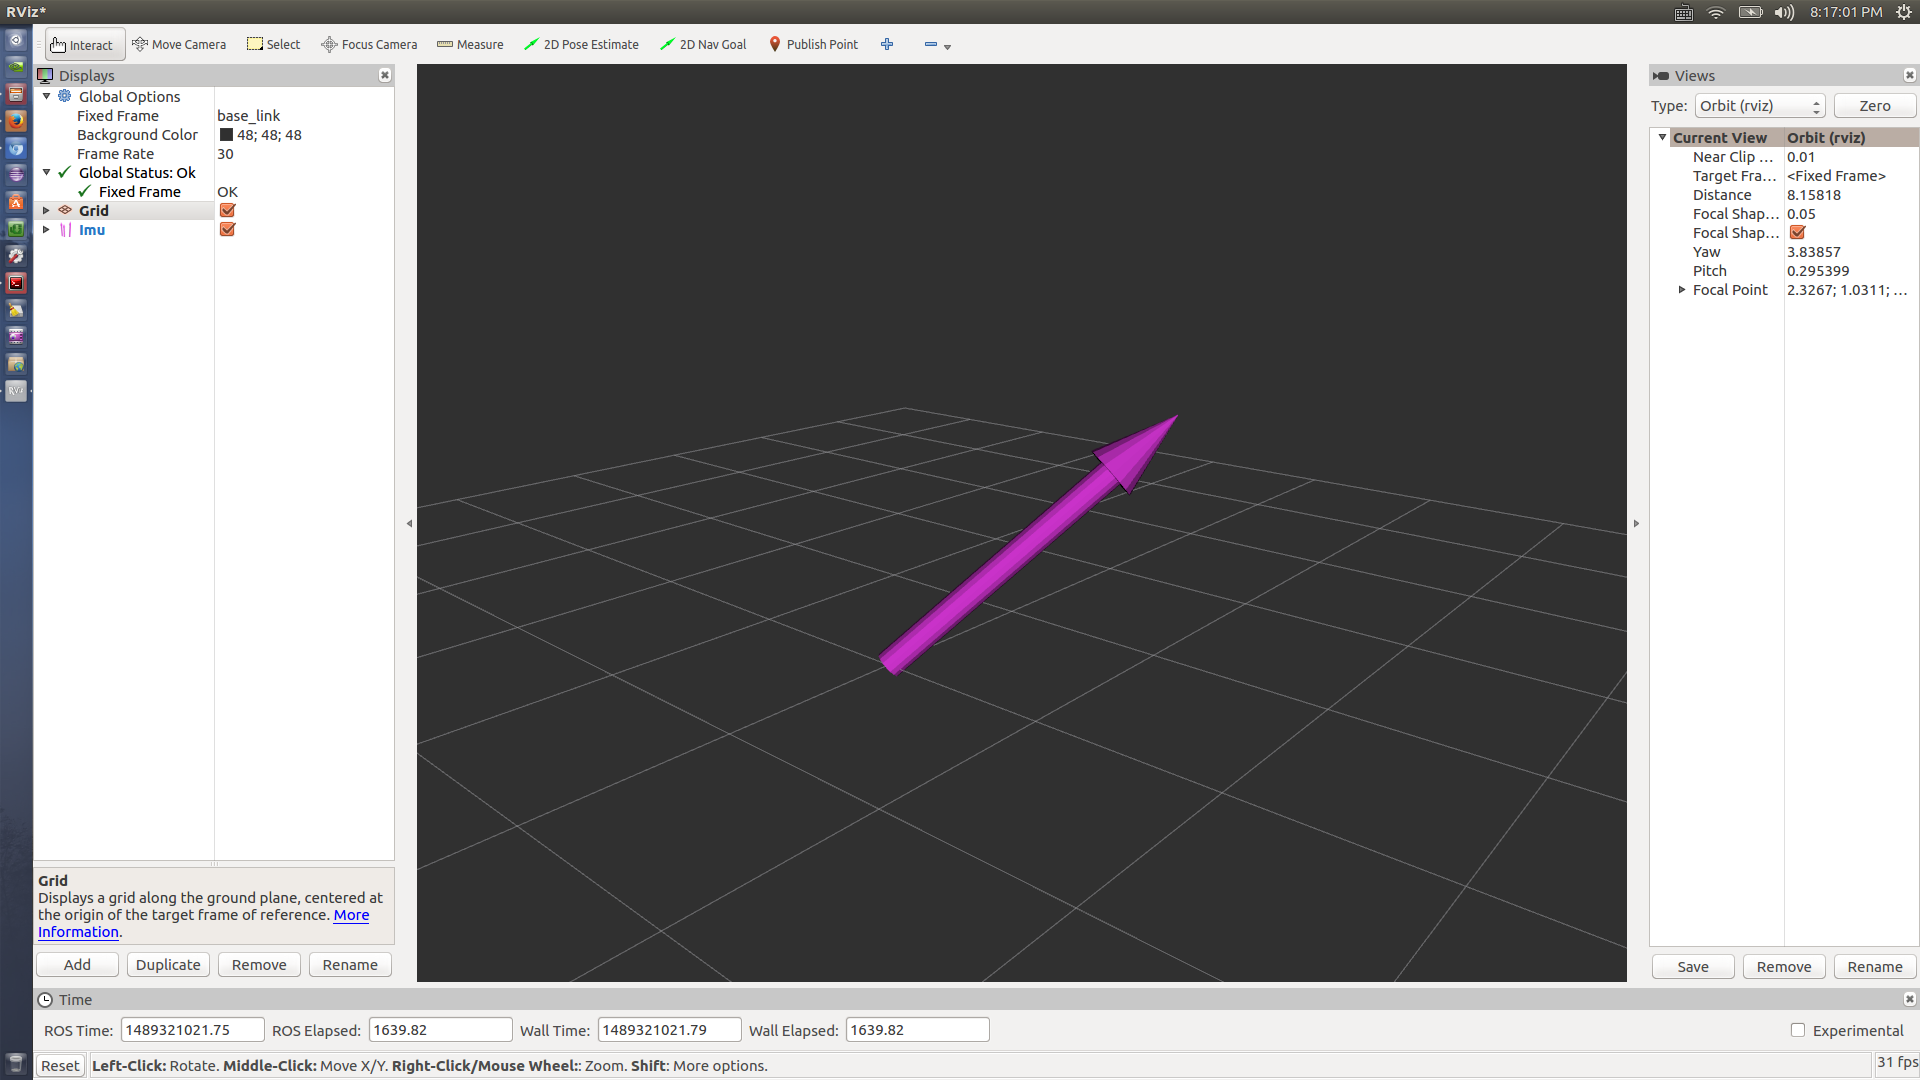
在rviz中,添加Marker,修改Fixed Frame为my_frame,可见如下不断变化的基本图形:

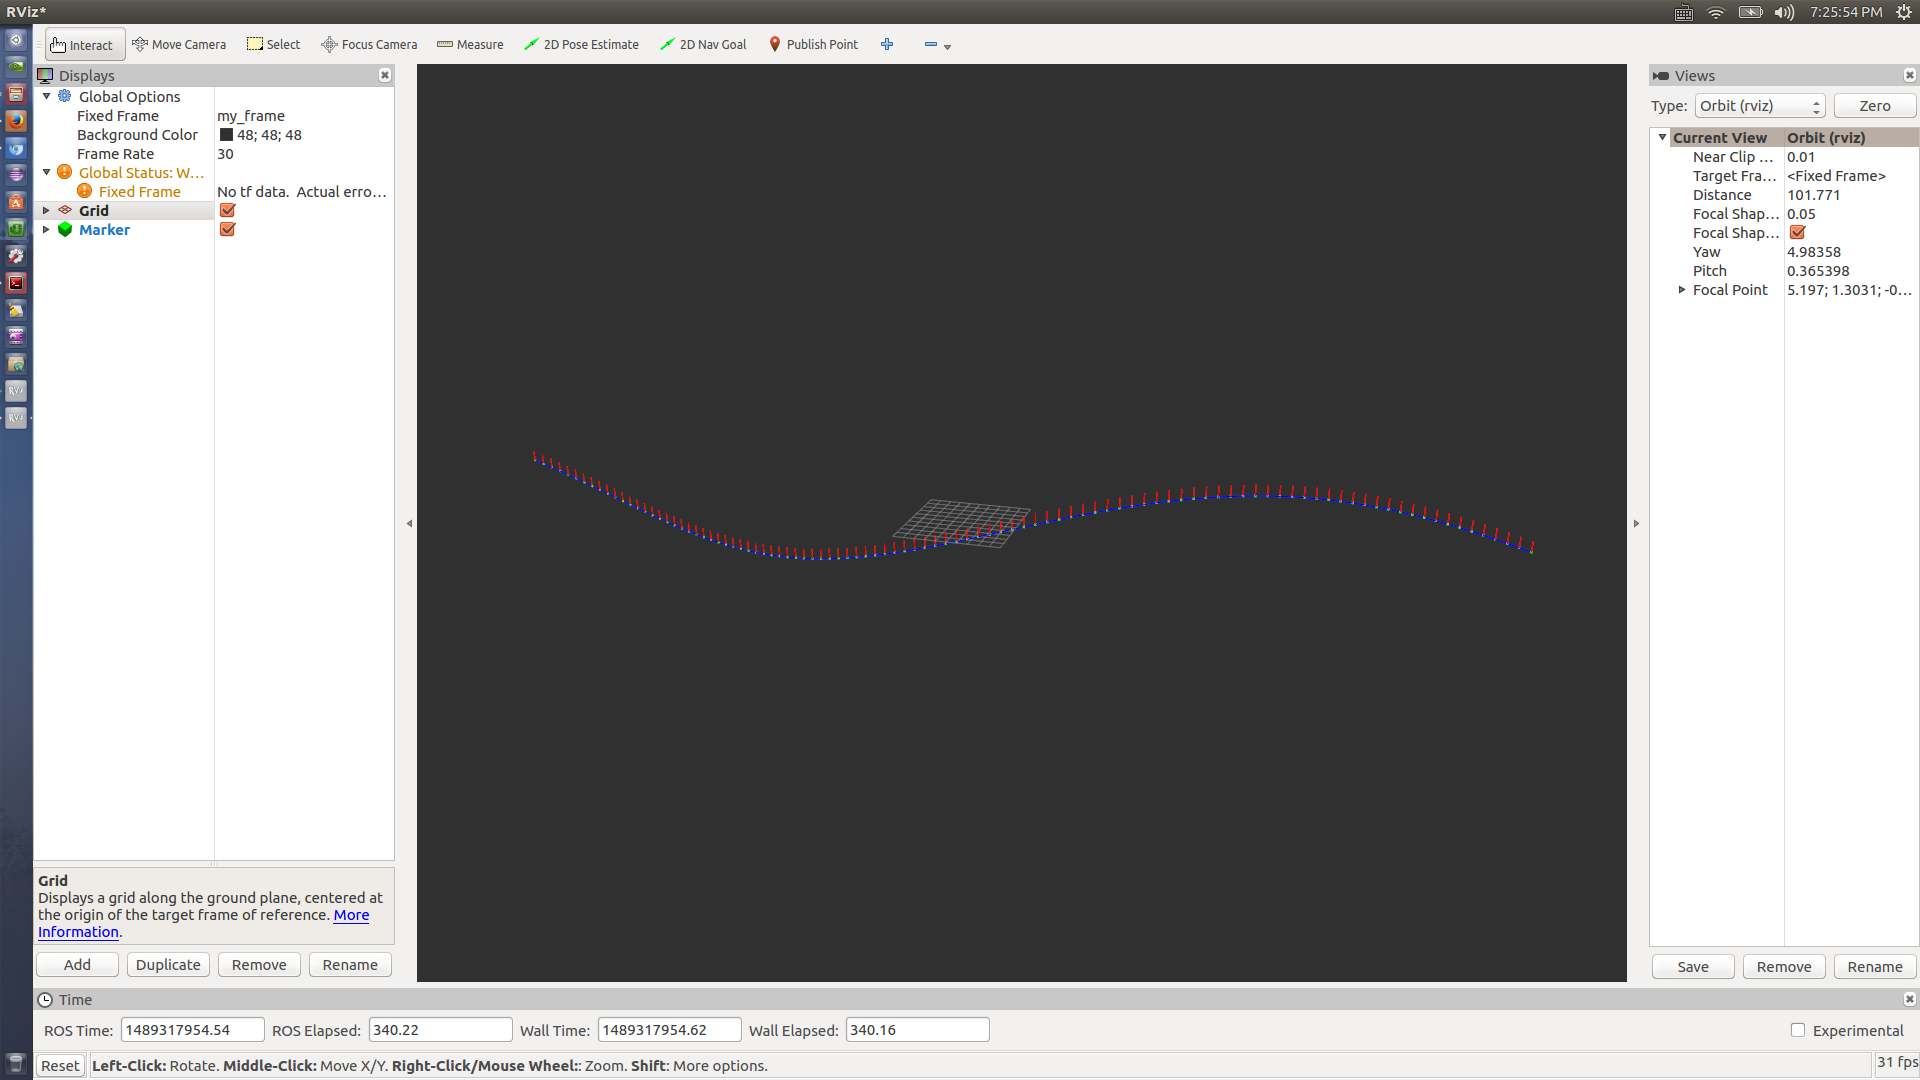
$ rosrun visualization_marker_tutorials points_and_lines
----
2 交互式标记
这部分都分为C++和Python两种语言介绍。
这里需要注意,Fixed Frame为base_link等。
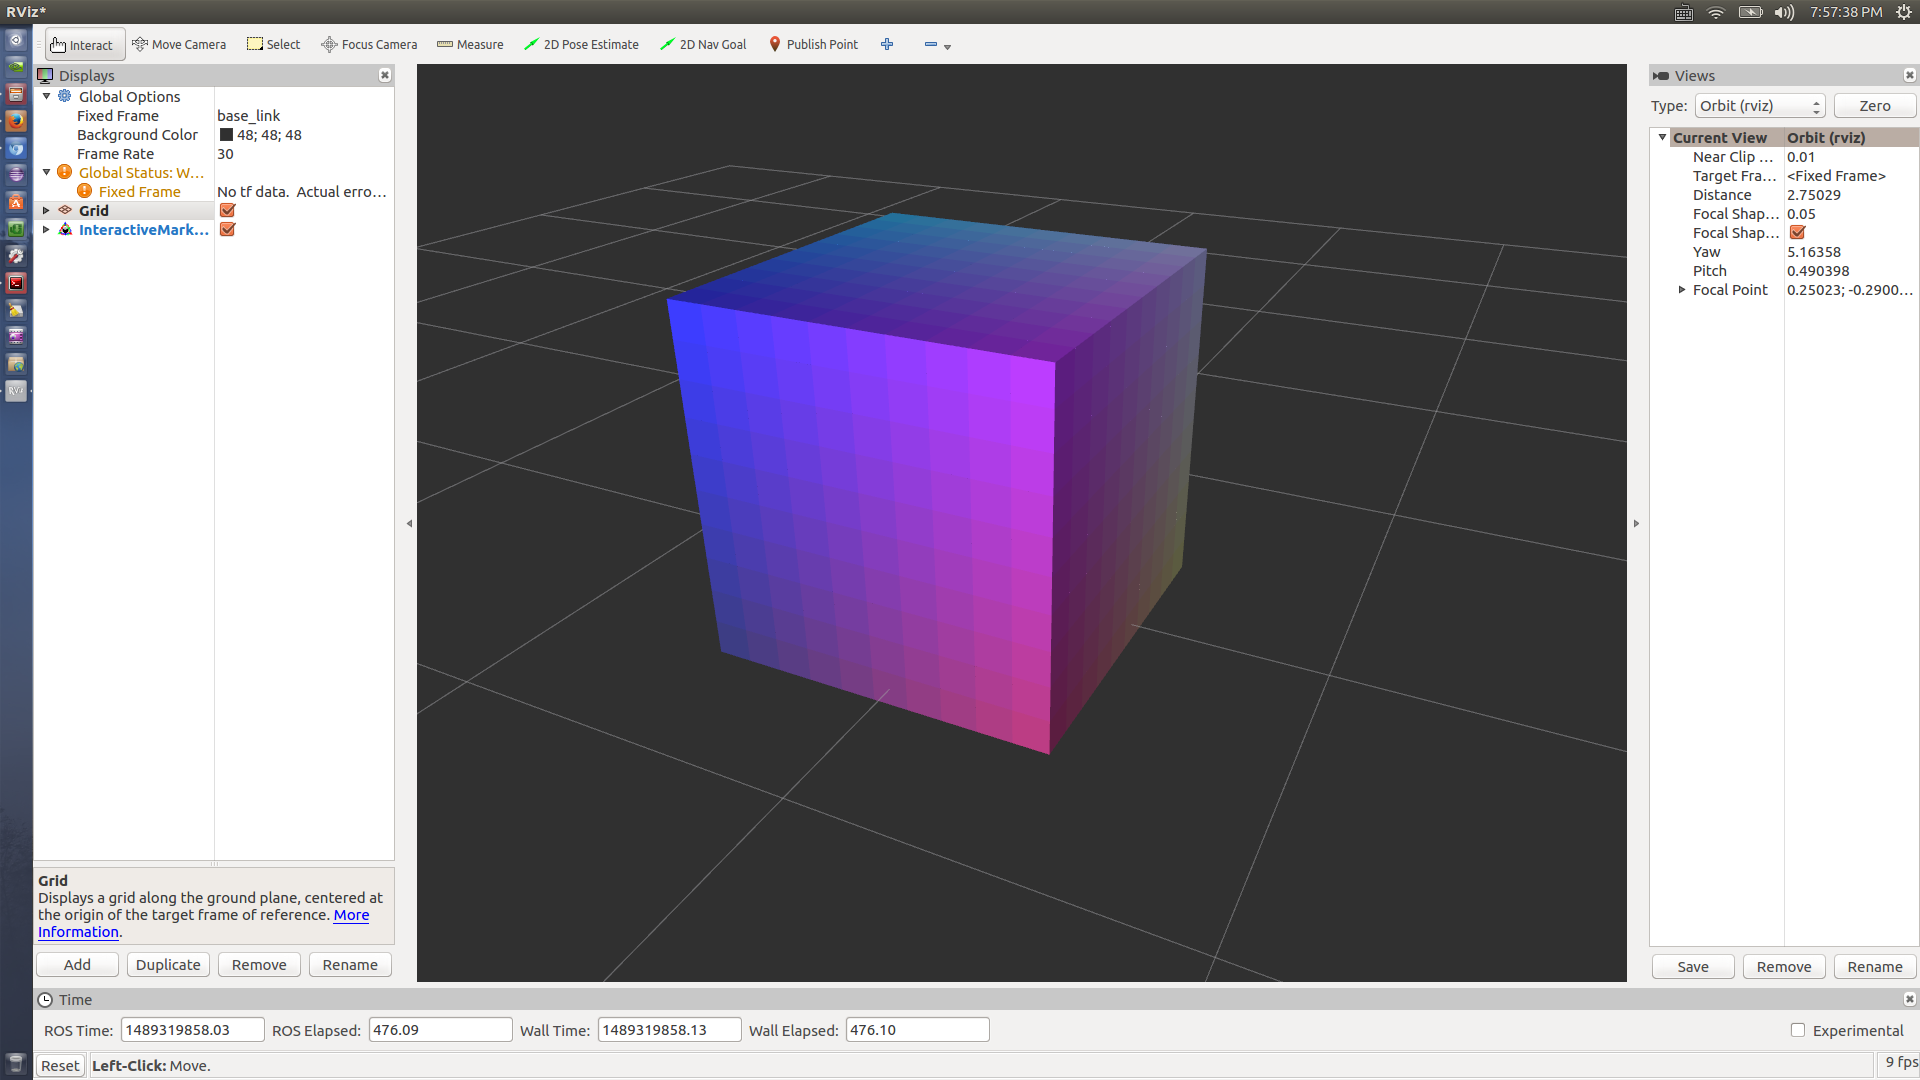
这里以simple_marker为例:
python:
[python] view plaincopyprint?
- import rospy
- from interactive_markers.interactive_marker_server import *
- from visualization_msgs.msg import *
- def processFeedback(feedback):
- p = feedback.pose.position
- print feedback.marker_name + " is now at " + str(p.x) + ", " + str(p.y) + ", " + str(p.z)
- if __name__=="__main__":
- rospy.init_node("simple_marker")
- # create an interactive marker server on the topic namespace simple_marker
- server = InteractiveMarkerServer("simple_marker")
- # create an interactive marker for our server
- int_marker = InteractiveMarker()
- int_marker.header.frame_id = "base_link"
- int_marker.name = "my_marker"
- int_marker.description = "Simple 1-DOF Control"
- # create a grey box marker
- box_marker = Marker()
- box_marker.type = Marker.CUBE
- box_marker.scale.x = 0.45
- box_marker.scale.y = 0.45
- box_marker.scale.z = 0.45
- box_marker.color.r = 0.0
- box_marker.color.g = 0.5
- box_marker.color.b = 0.5
- box_marker.color.a = 1.0
- # create a non-interactive control which contains the box
- box_control = InteractiveMarkerControl()
- box_control.always_visible = True
- box_control.markers.append( box_marker )
- # add the control to the interactive marker
- int_marker.controls.append( box_control )
- # create a control which will move the box
- # this control does not contain any markers,
- # which will cause RViz to insert two arrows
- rotate_control = InteractiveMarkerControl()
- rotate_control.name = "move_x"
- rotate_control.interaction_mode = InteractiveMarkerControl.MOVE_AXIS
- # add the control to the interactive marker
- int_marker.controls.append(rotate_control);
- # add the interactive marker to our collection &
- # tell the server to call processFeedback() when feedback arrives for it
- server.insert(int_marker, processFeedback)
- # 'commit' changes and send to all clients
- server.applyChanges()
- rospy.spin()
C++:
[cpp] view plaincopyprint?
- #include <ros/ros.h>
- #include <interactive_markers/interactive_marker_server.h>
- void processFeedback(
- const visualization_msgs::InteractiveMarkerFeedbackConstPtr &feedback )
- {
- ROS_INFO_STREAM( feedback->marker_name << " is now at "
- << feedback->pose.position.x << ", " << feedback->pose.position.y
- << ", " << feedback->pose.position.z );
- }
- int main(int argc, char** argv)
- {
- ros::init(argc, argv, "simple_marker");
- // create an interactive marker server on the topic namespace simple_marker
- interactive_markers::InteractiveMarkerServer server("simple_marker");
- // create an interactive marker for our server
- visualization_msgs::InteractiveMarker int_marker;
- int_marker.header.frame_id = "base_link";
- int_marker.header.stamp=ros::Time::now();
- int_marker.name = "my_marker";
- int_marker.description = "Simple 1-DOF Control";
- // create a grey box marker
- visualization_msgs::Marker box_marker;
- box_marker.type = visualization_msgs::Marker::CUBE;
- box_marker.scale.x = 0.45;
- box_marker.scale.y = 0.45;
- box_marker.scale.z = 0.45;
- box_marker.color.r = 0.5;
- box_marker.color.g = 0.5;
- box_marker.color.b = 0.5;
- box_marker.color.a = 1.0;
- // create a non-interactive control which contains the box
- visualization_msgs::InteractiveMarkerControl box_control;
- box_control.always_visible = true;
- box_control.markers.push_back( box_marker );
- // add the control to the interactive marker
- int_marker.controls.push_back( box_control );
- // create a control which will move the box
- // this control does not contain any markers,
- // which will cause RViz to insert two arrows
- visualization_msgs::InteractiveMarkerControl rotate_control;
- rotate_control.name = "move_x";
- rotate_control.interaction_mode =
- visualization_msgs::InteractiveMarkerControl::MOVE_AXIS;
- // add the control to the interactive marker
- int_marker.controls.push_back(rotate_control);
- // add the interactive marker to our collection &
- // tell the server to call processFeedback() when feedback arrives for it
- server.insert(int_marker, &processFeedback);
- // 'commit' changes and send to all clients
- server.applyChanges();
- // start the ROS main loop
- ros::spin();
- }
--
可以比较一下,然后输入下面命令:
$ rosrun interactive_marker_tutorials simple_marker
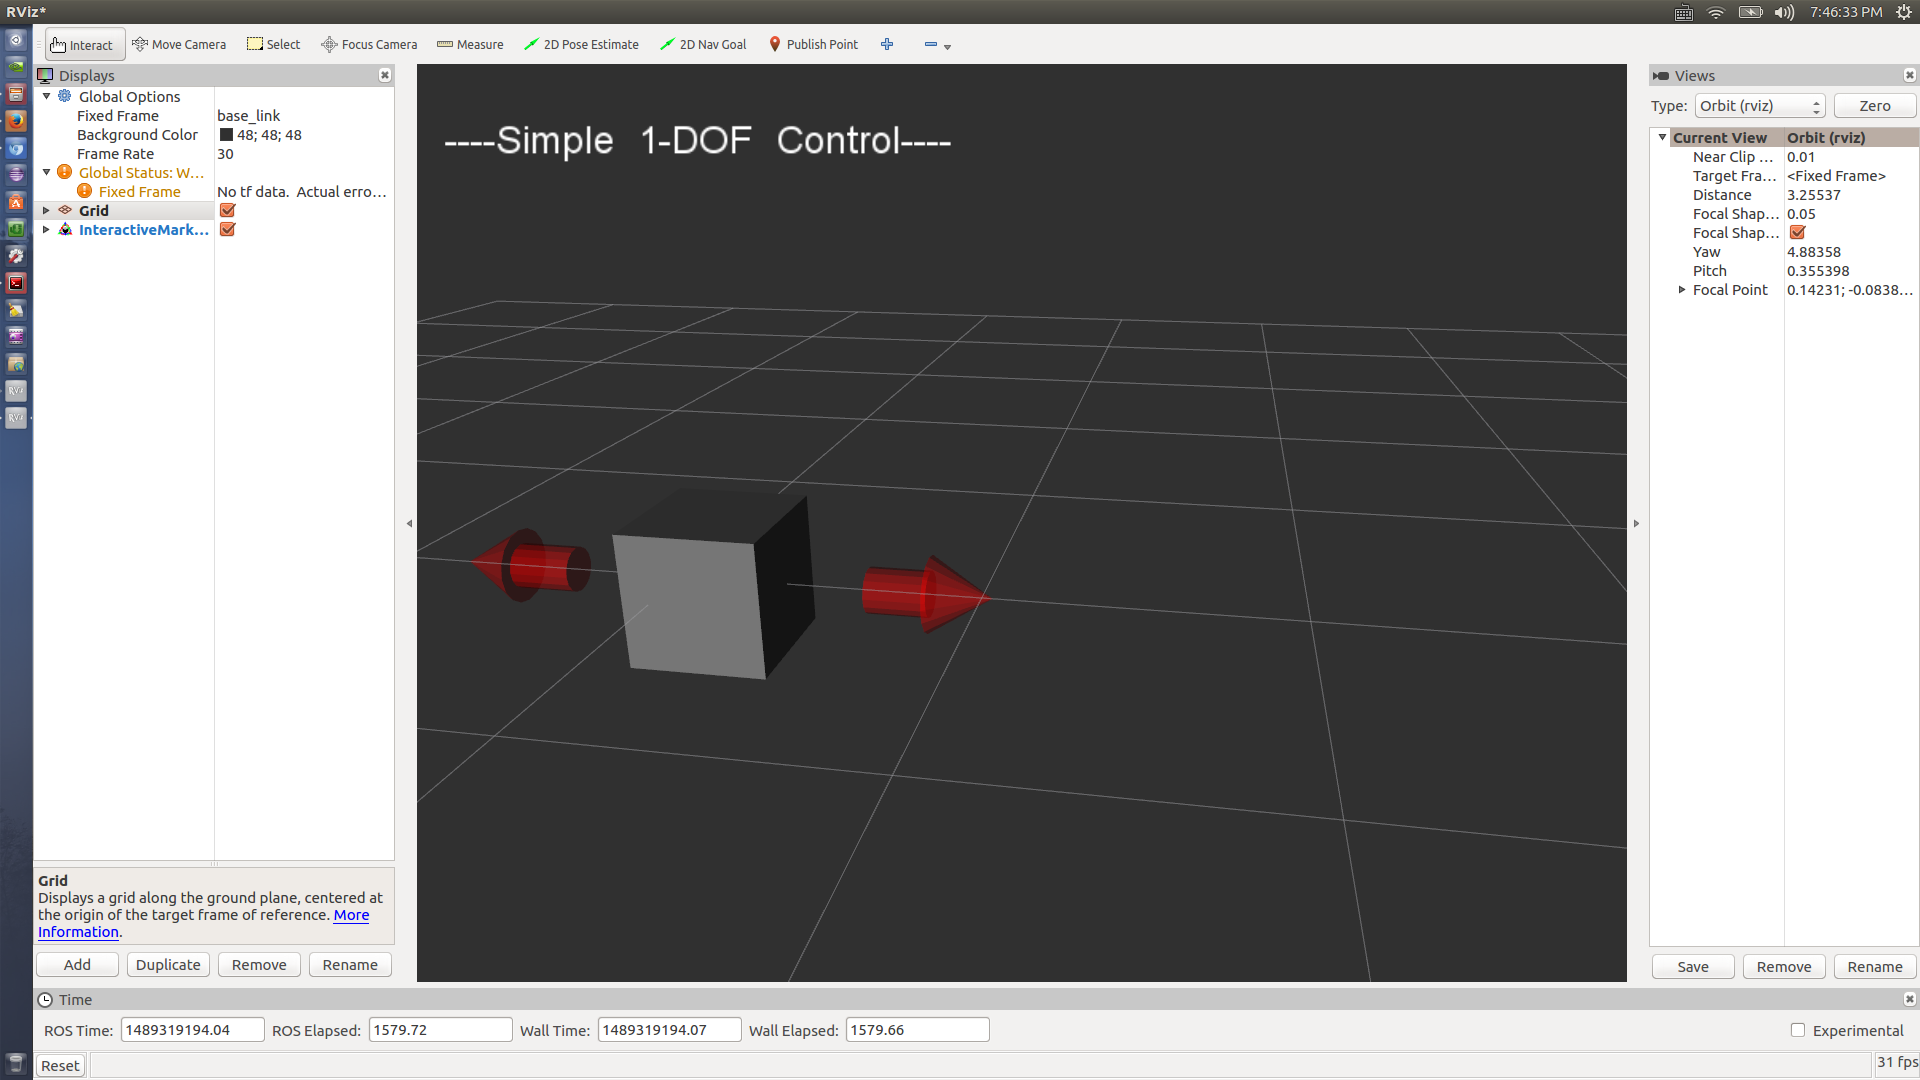
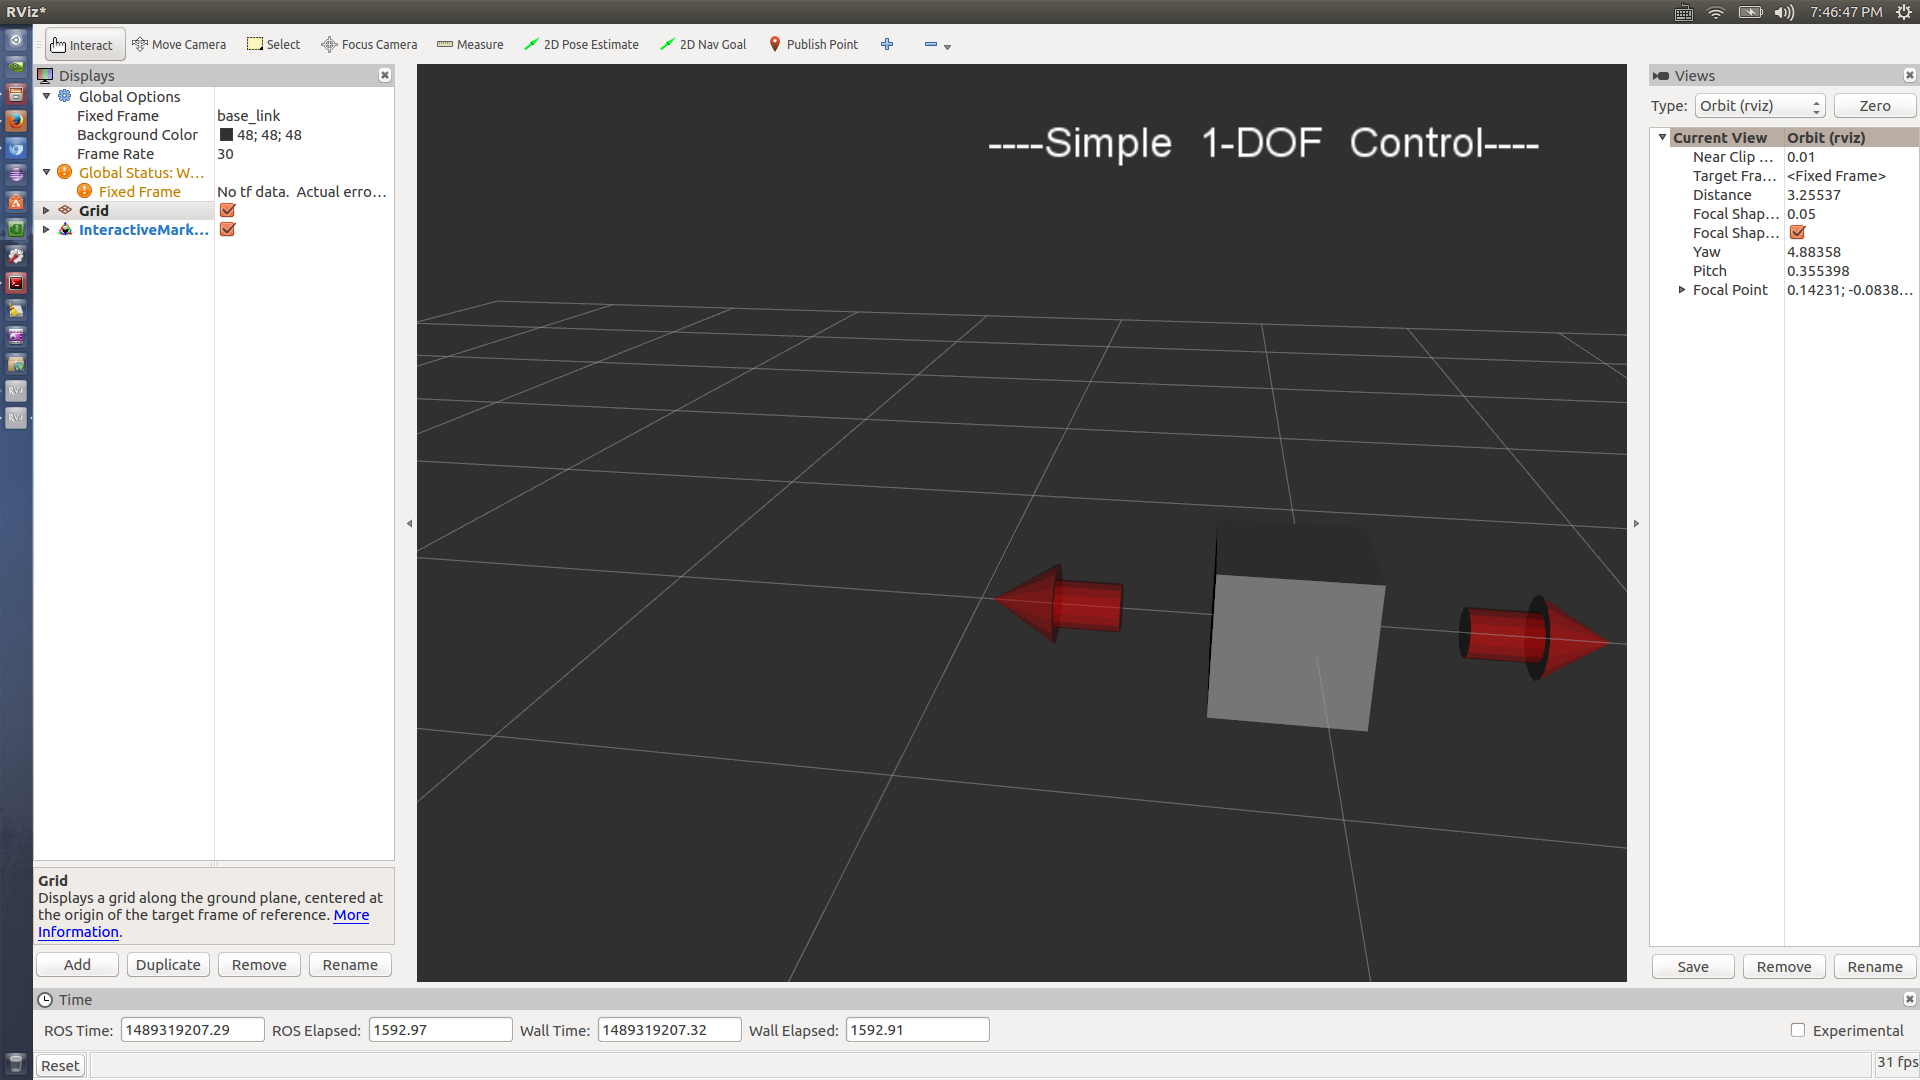
-
定义一个函数processFeedback,通过打印出位置来处理来自RViz的反馈消息。
- 初始化roscpp。
- 创建交互式标记服务器对象。
- 设置交互式标记并将其添加到服务器的集合。
- 输入ROS消息循环。
注意,当调用insert时,服务器对象将在内部只将新标记推入等待列表。一旦你调用applyChanges,它将它包含在它的公开可见的交互式标记集,并发送到所有连接的客户端。
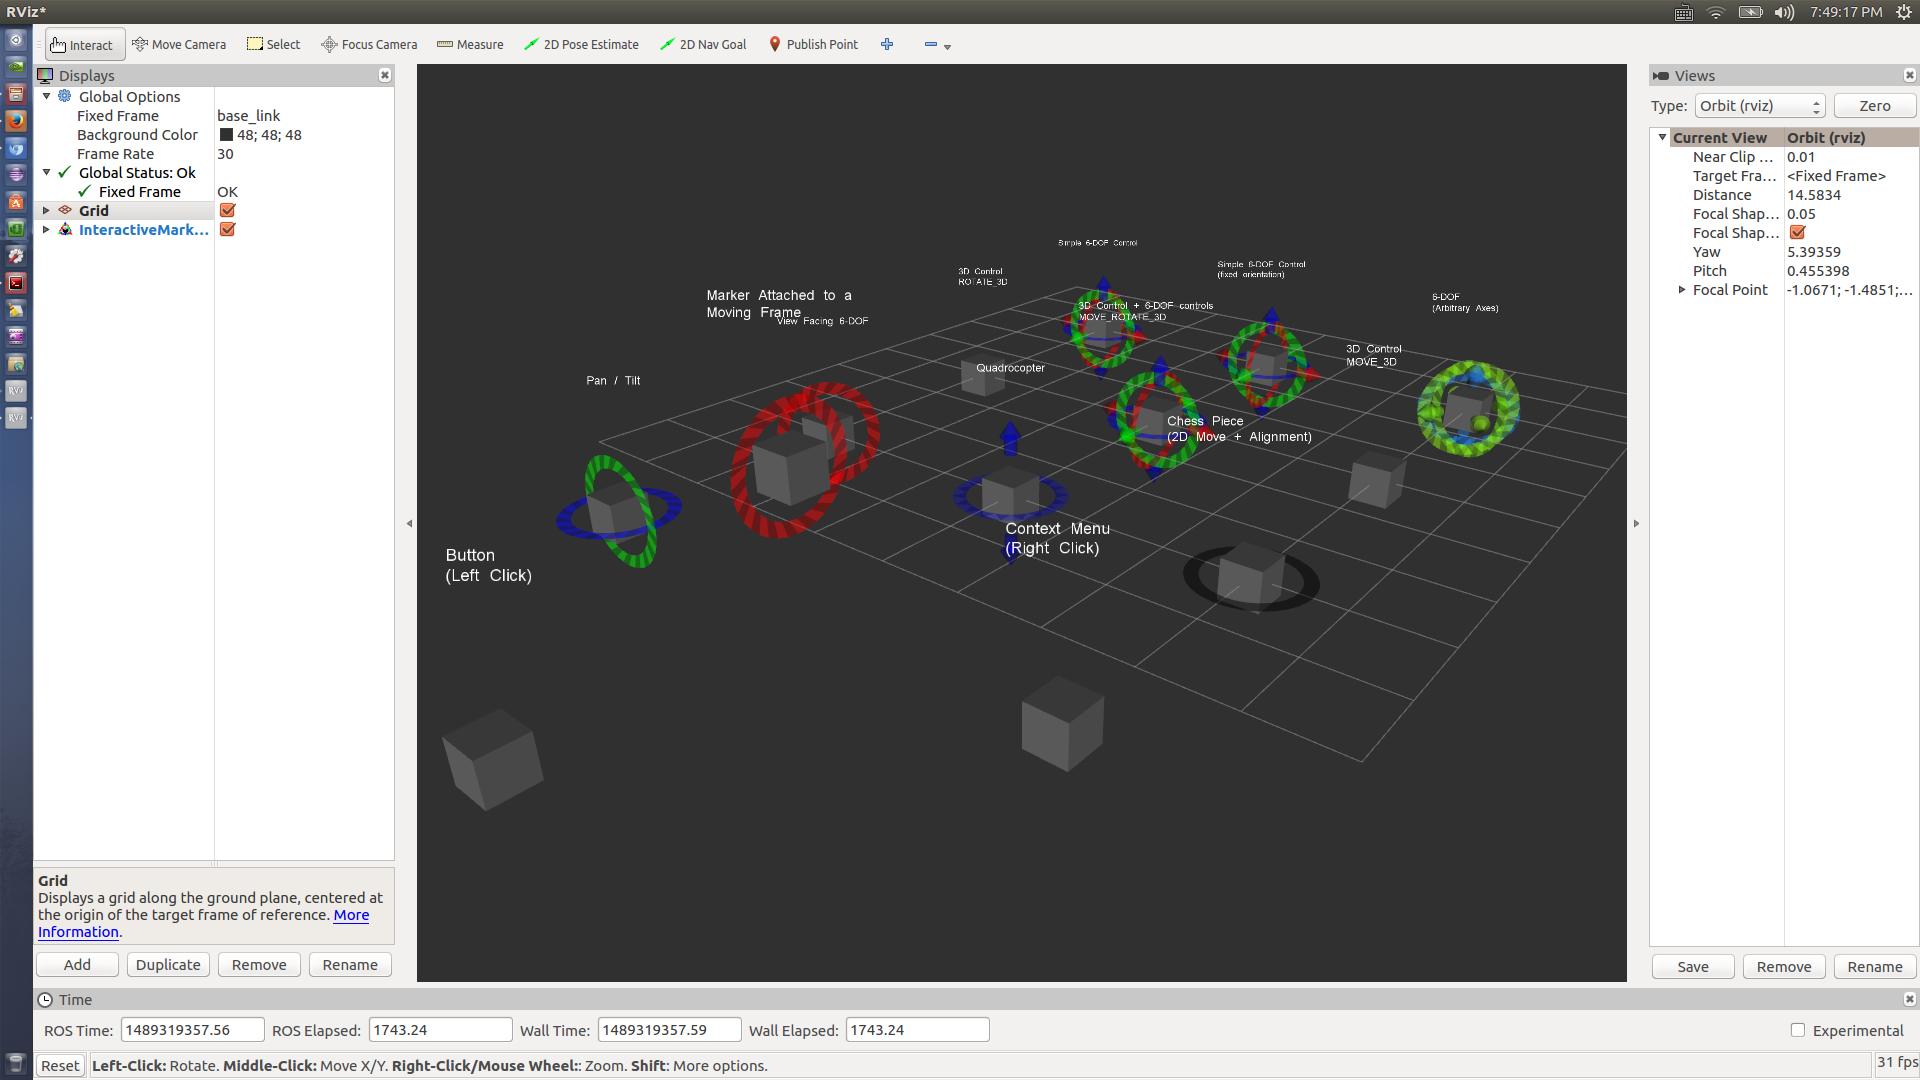
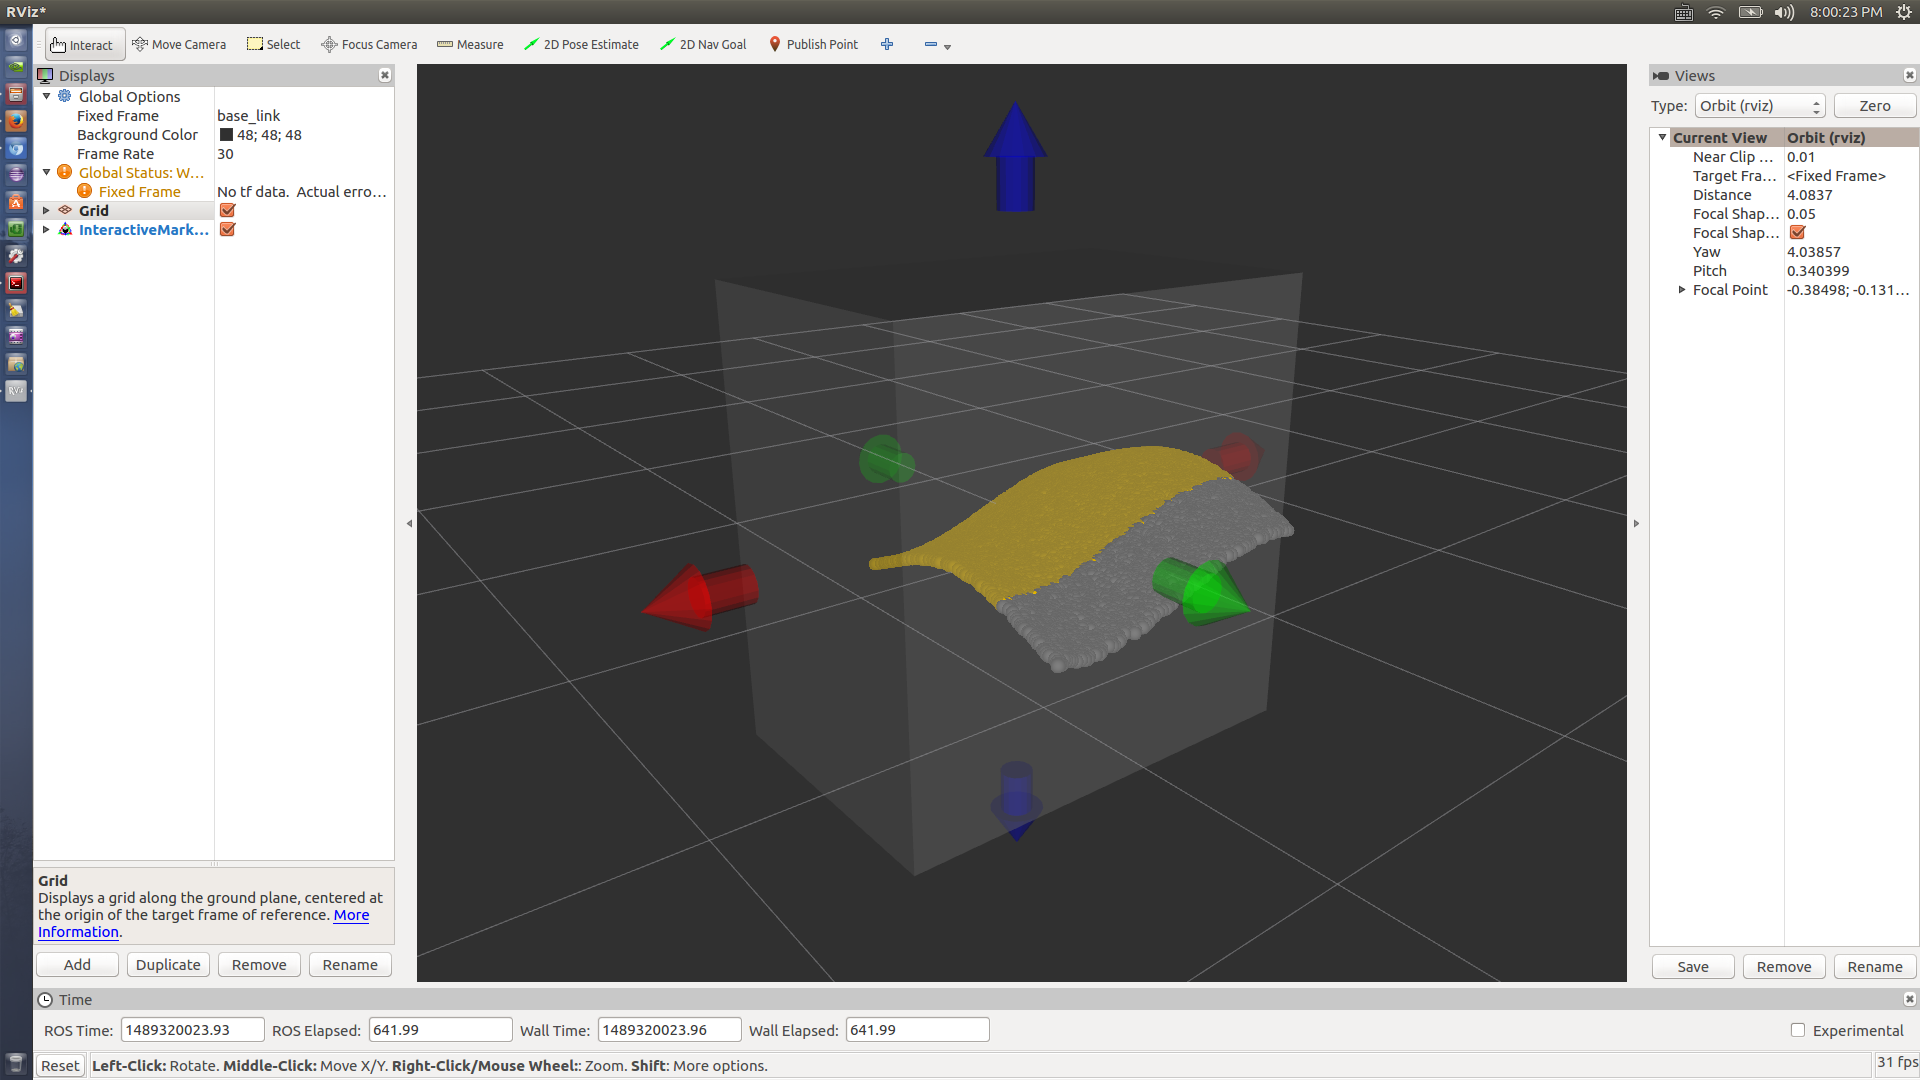
$ rosrun interactive_marker_tutorials basic_controls
$ rosrun interactive_marker_tutorials menu
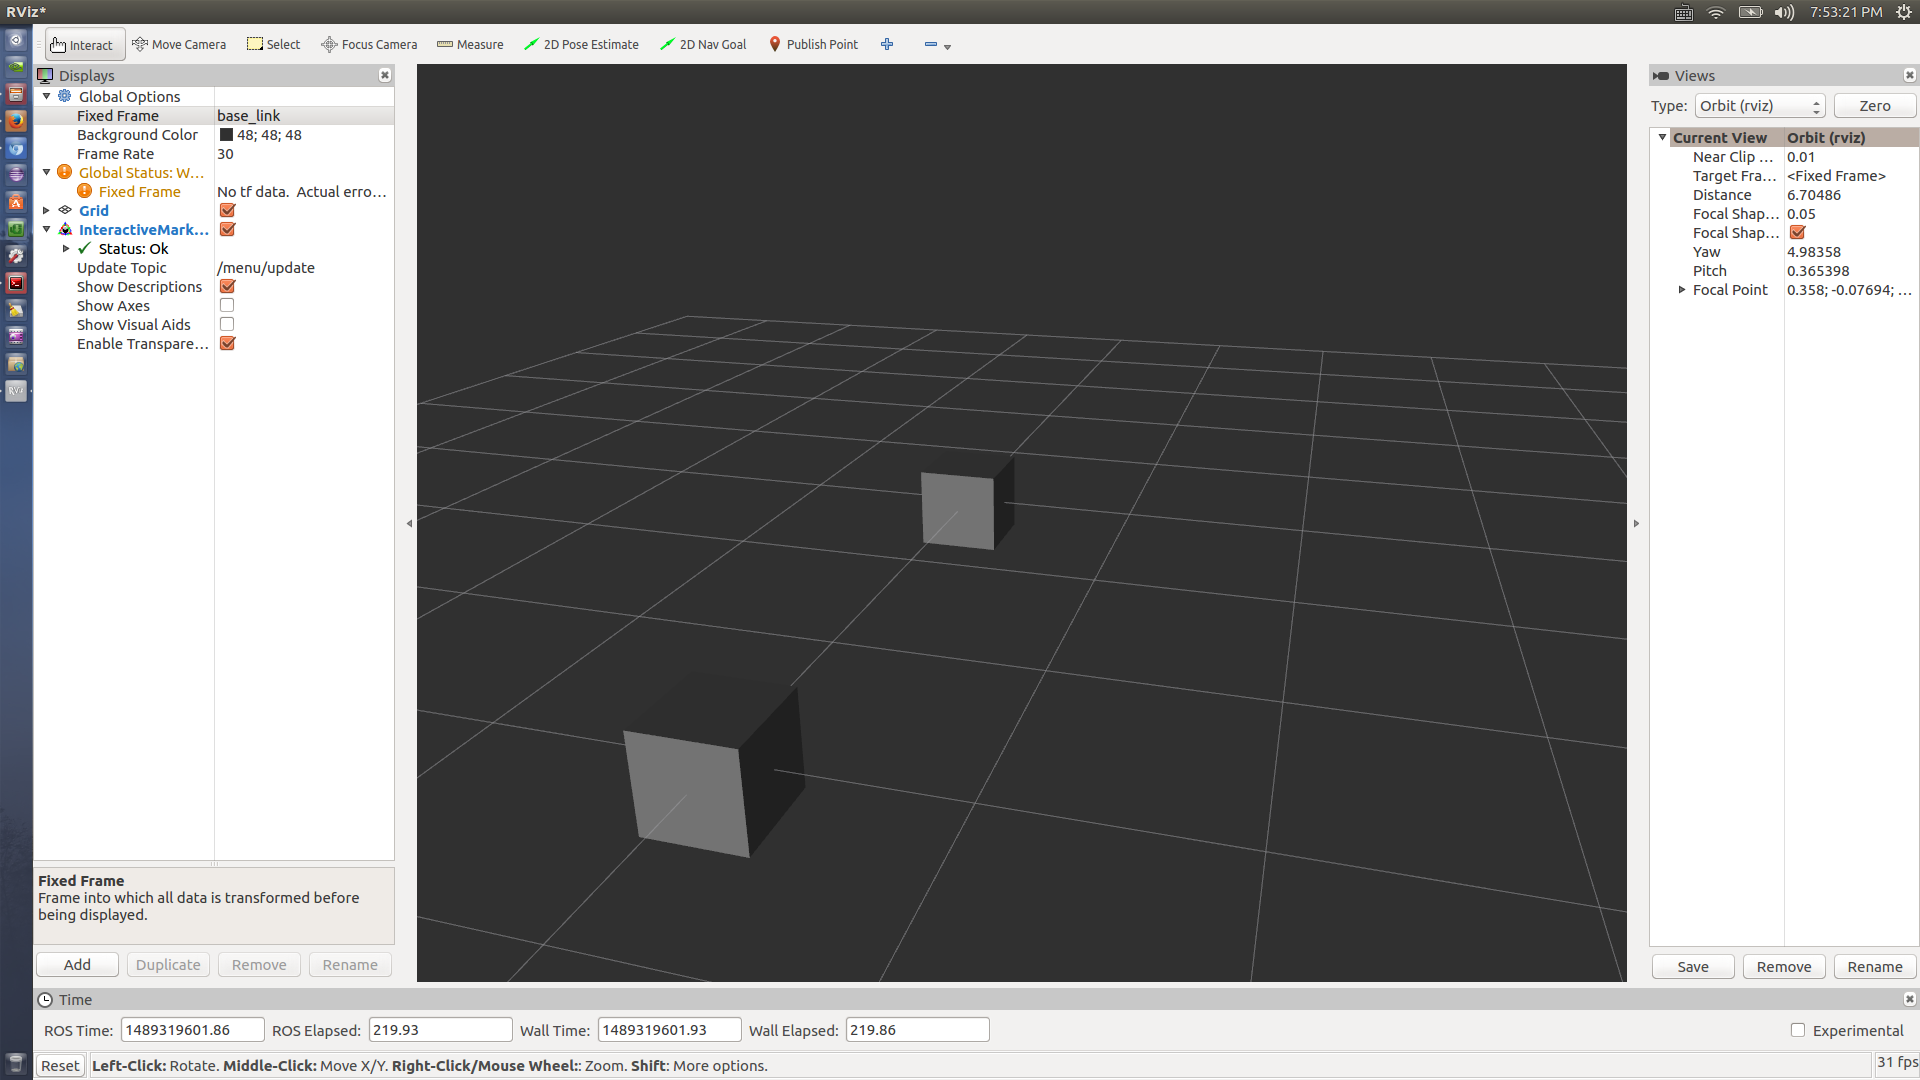
点击box会出现目录选项。
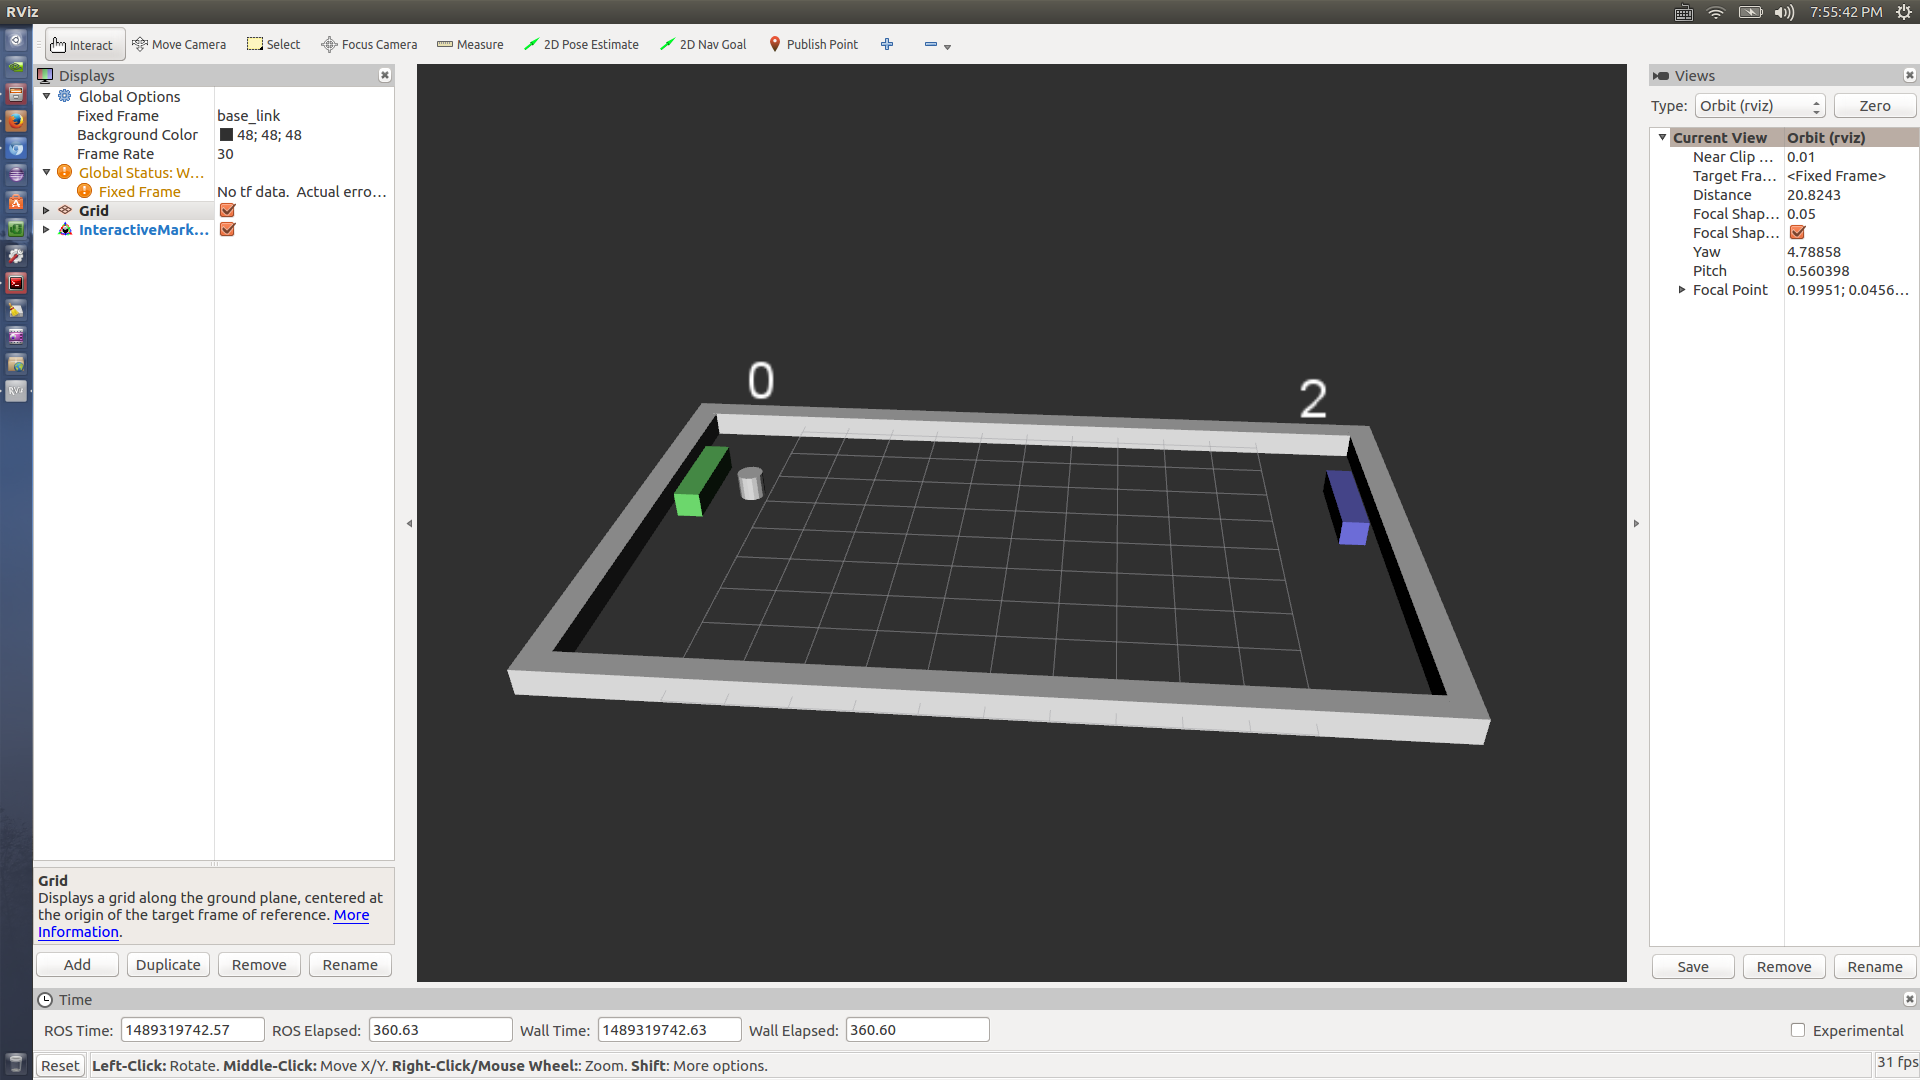
$ rosrun interactive_marker_tutorials pong
$ rosrun interactive_marker_tutorials cube
$ rosrun interactive_marker_tutorials selection
$ rosrun interactive_marker_tutorials point_cloud
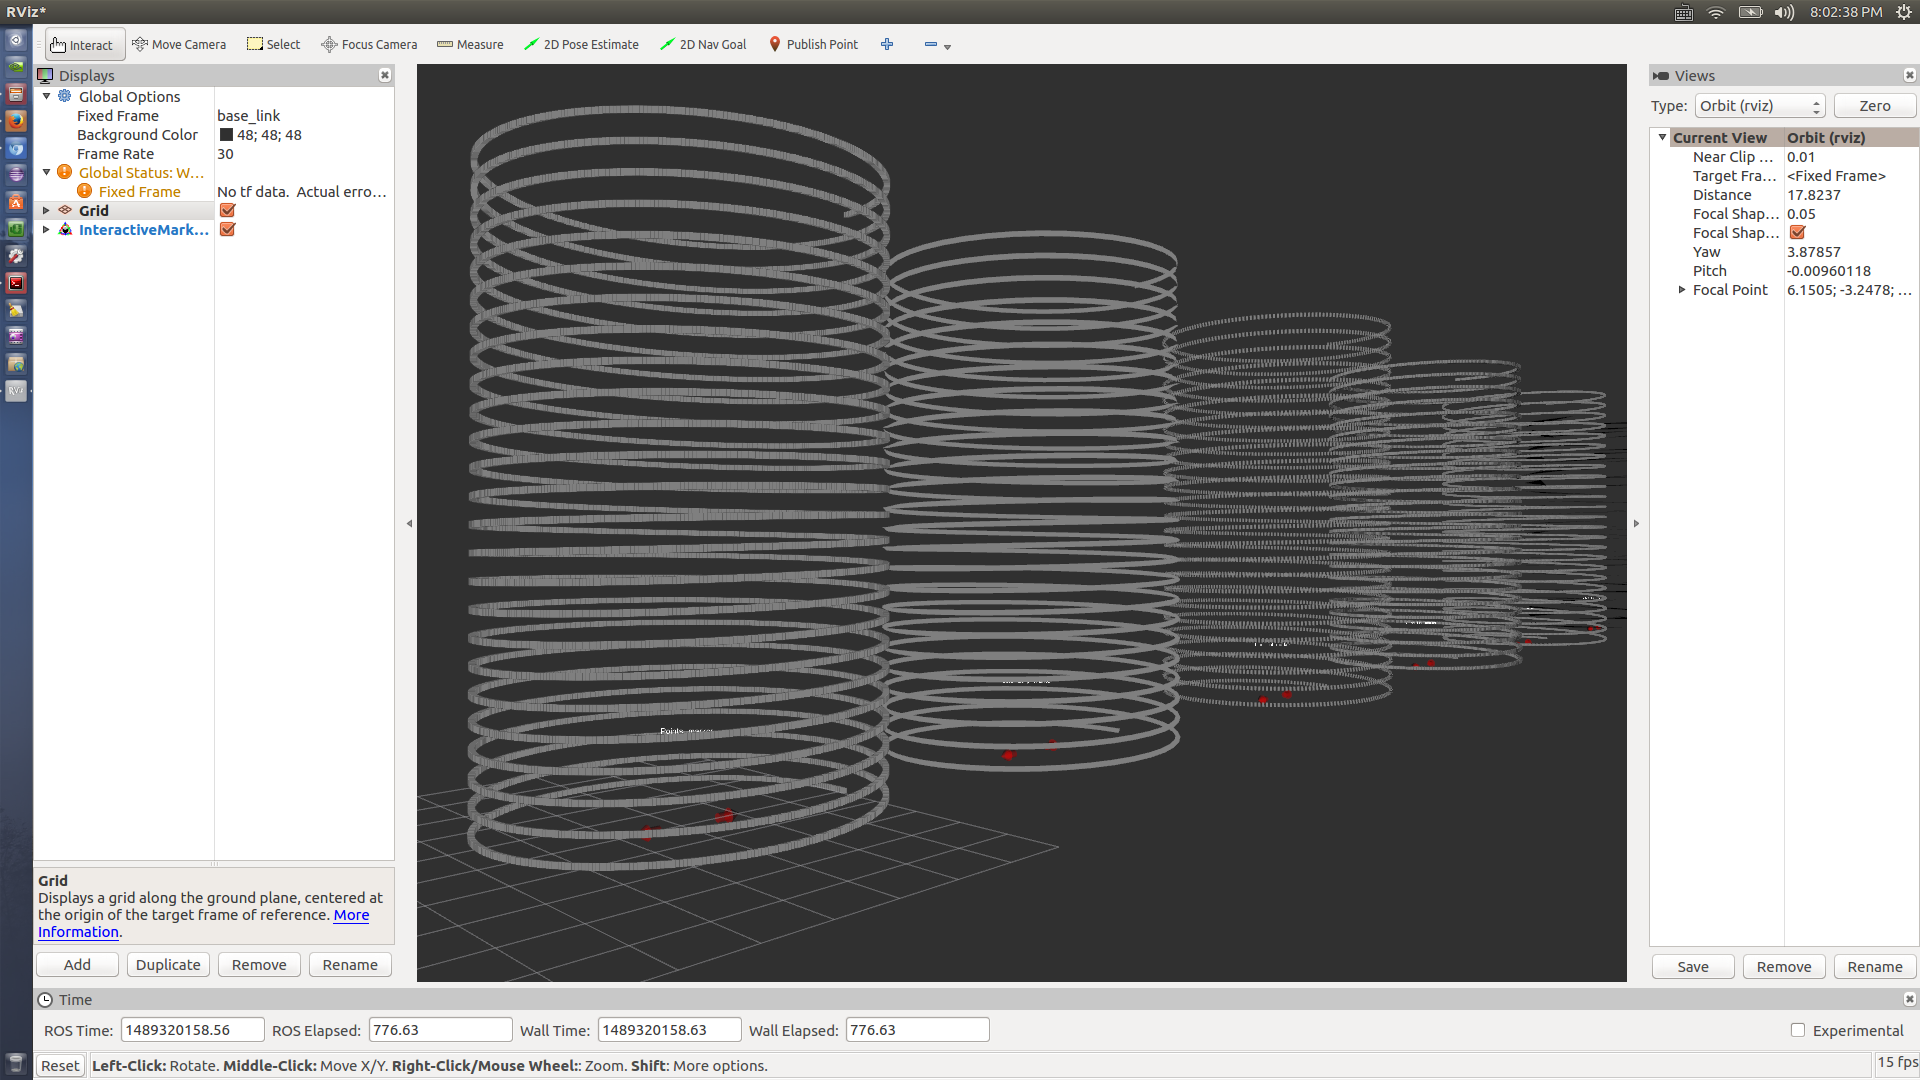
欲了解具体实现,请参考源码~
----
3 插件
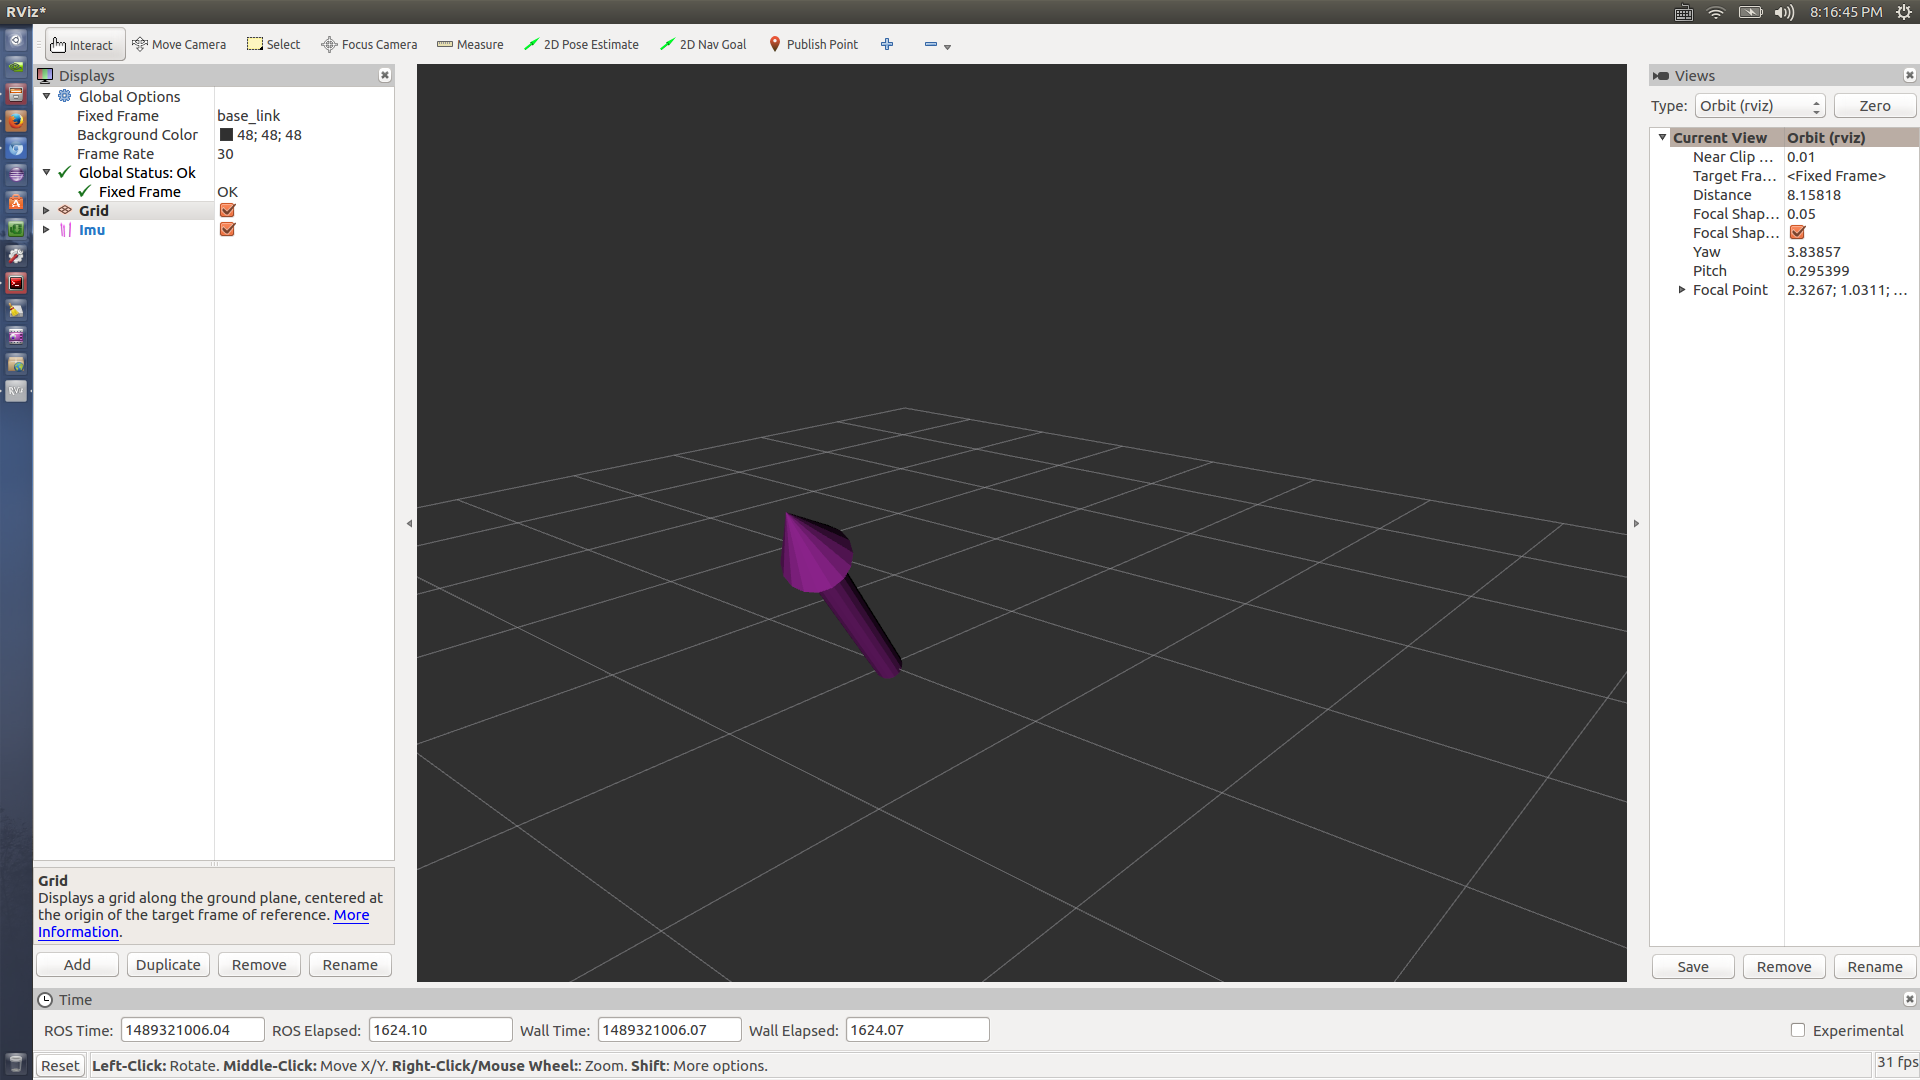
$ rosrun rviz_plugin_tutorials send_test_msgs.py
----
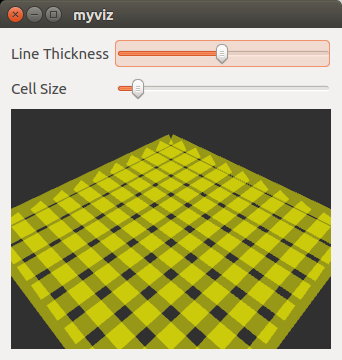
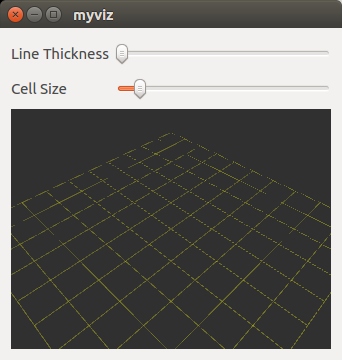
4 librviz
$ rosrun librviz_tutorial myviz
----
补充:
1 http://wiki.ros.org/rviz/Tutorials
----
数学补充:
四元数说明:http://blog.csdn.net/candycat1992/article/details/41254799
欧拉角到四元数:
给定一个欧拉旋转(X, Y, Z)(即分别绕x轴、y轴和z轴旋转X、Y、Z度),则对应的四元数为:
x = sin(Y/2)sin(Z/2)cos(X/2)+cos(Y/2)cos(Z/2)sin(X/2)
y = sin(Y/2)cos(Z/2)cos(X/2)+cos(Y/2)sin(Z/2)sin(X/2)
z = cos(Y/2)sin(Z/2)cos(X/2)-sin(Y/2)cos(Z/2)sin(X/2)
w = cos(Y/2)cos(Z/2)cos(X/2)-sin(Y/2)sin(Z/2)sin(X/2)
q = ((x, y, z), w)
它的证明过程可以依靠轴角到四元数的公式进行推导。
结合程序说明:
locations['Goal'] = Pose(Point(1.4, 0.2, 0.000), Quaternion(0.000, 0.000, 0.7, 0.7))
locations['Home'] = Pose(Point(0.0, 0.0, 0.000), Quaternion(0.000, 0.000, 0.0, 1.0))
如果Home为起点,那么Goal为Home前1.4m 左0.2米 并左转90度


 499
499

 被折叠的 条评论
为什么被折叠?
被折叠的 条评论
为什么被折叠?
 到【灌水乐园】发言


