


 本文详细介绍了IsaacSim的GUI操作,包括物体的创建、变换(移动、旋转、缩放)、视角调整,以及如何通过Python进行独立控制。此外,还涵盖了环境光照、舞台管理和基本快捷键等内容。
2024年6月更新: Isaac Sim当前已经更新到4.0.0大版本,有了不少新的内容,因此笔者制作了最新的Isaac Sim整套入门教程,欢迎大家跳转到新的入门教程链接。
Isaac Sim 基本使用
版权信息
Copyright 2023 Herman Ye@Auromix. All rights reserved.

This course and all of its associated content, including but not limited to text,
images, videos, and any other materials, are protected by copyright law.
The author holds all rights to this course and its contents.

Any unauthorized use, reproduction, distribution, or modification of this course
or its contents is strictly prohibited and may result in legal action.
This includes, but is not limited to:
Copying or distributing course materials without express written permission.
Reposting, sharing, or distributing course content on any platform without proper attribution and permission.
Creating derivative works based on this course without permission.
Permissions and Inquiries

If you wish to use or reproduce any part of this course for purposes other than personal learning,
please contact the author to request permission.

The course content is provided for educational purposes, and the author makes no warranties or representations
regarding the accuracy, completeness, or suitability of the course content for any specific purpose.
The author shall not be held liable for any damages, losses,
or other consequences resulting from the use or misuse of this course.

Please be aware that this course may contain materials or images obtained from third-party sources.
The author and course creator diligently endeavor to ensure that these materials
are used in full compliance with copyright and fair use regulations.
If you have concerns about any specific content in this regard,
please contact the author for clarification or resolution.

By enrolling in this course, you agree to abide by the terms and conditions outlined in this copyright notice.
学习目标
- 熟悉Isaac Sim GUI
- 熟悉Isaac Sim GUI的基本使用
- 了解Isaac的Python独立使用
难度级别
| 初级 | 中级 | 高级 |
|---|---|---|
| √ |
预计耗时
40 mins
学习前提
| 对象 | 类型 | 状态 |
|---|---|---|
| Ubuntu22.04操作系统 | 软件 | 已确认 |
| Isaac Sim | 软件 | 已配置 |
| Isaac Sim基本概念 | 知识 | 已了解 |
Isaac Sim GUI的基本使用
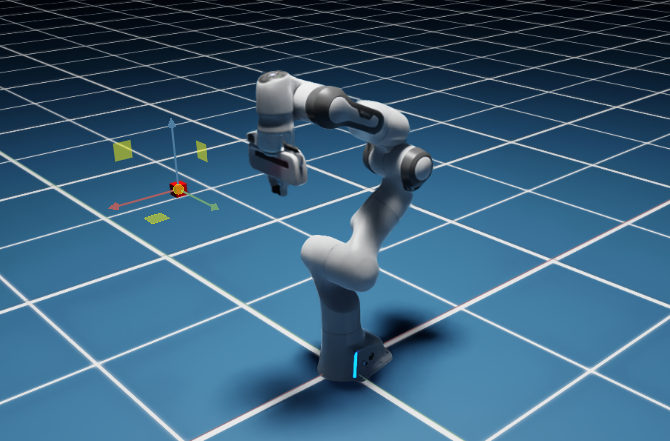
此处以一个简单的实操案例来介绍IsaacSim的界面和基本使用

图片来源:Isaac Sim Interface
调整物体
1.创建一个立方体
依次选择Create->Shape->Cube来创建一个基本的立方体

2.变换这个立方体(拖拽方式)
移动(MOVE)
鼠标点击物体,按下W可以切换到移动模式(分为Global/Local模式,再次按下W可切换)
通过鼠标拖拽物体上的三根轴,可以沿着轴所在的直线移动物体
通过鼠标拖拽物体上的红、绿、蓝三个小方格,可以使得物体在平面上移动
通过鼠标拖拽物体上中心原点,可以在三维空间中移动物体

旋转(ROTATE)
鼠标点击物体,按下E可以切换到旋转模式(分为Global/Local模式,再次按下E可切换)
通过鼠标拖拽物体上红、绿、蓝线,使得物体绕对应的轴旋转
通过鼠标拖拽物体上的灰色球体部分,使得物体旋转
通过鼠标拖拽物体上的外层蓝色圆环,使得物体绕当前视野相机点与物体所在空间点连线的轴旋转

在Isaac Sim中 旋转角度的正负规则为:
人的视野面向轴的方向,逆时针为正,顺时针为负
如图所示,红线为X轴指向,人站在X轴所指向的位置,
此时绕X轴逆时针旋转立方体,x的rotation值为正。

缩放(SCALE)
鼠标点击物体,按下R可以切换到缩放模式
通过鼠标拖拽物体上的三根轴,可以沿着轴所在的直线缩放物体
通过鼠标拖拽物体上的红、绿、蓝三个小方格,可以使得物体在构成对应平面的两根轴上等比例缩放
通过鼠标拖拽物体上中心原点,可以在三维空间中等比例整体缩放物体

3.变换这个立方体(属性方式)
通过拖拽来变换物体有时候无法达到精确的要求,因此通常也会采用属性的变换方法。
在Isaac Sim的右下角有Transform面板,其中Translate、Orient、Scale可以分别调整物体的平移、旋转、缩放。

值得一提的是,通过左右拖拽属性值,也可以像拖拽方式一样去修改属性值。

通过双击属性,可以手动输入调整属性的值

通过点击Orient可以切换ROTATION的表示方式为四元数

通过点击属性后面的小方块,可以将属性值恢复为默认值

调整视角
1. 创建一个球体
依次选择Create->Shape->Sphere来创建一个基本的球体

通过刚才学习的属性调整的办法,将球体放置在[0,2,0]位置

通过选中物体并按下F(Focus)来将相机居中对准所选的物体

通过按下鼠标左键+Alt来绕球旋转调整视野
通过按下鼠标右键+Alt来缩放视野
通过按下鼠标中键来进行平移视野

在不选中任何目标时按下F将会缩放整个场景

管理舞台(Stage)
Stage是一个基于树的Isaac Sim GUI组件,可以让用户清晰地管理舞台(Stage)上的演员(Actors),它位于Isaac Sim窗口的右上角。
Omniverse Stage窗口允许您查看当前 USD 场景中的所有资产。USD Stage是从根 USD 文件派生的场景图的 USD 抽象表示,包括它所引用/叠加的所有文件。舞台以分层(父/子)的方式列出,提供便捷的访问,并通常用于导航大型场景。
相关链接:Isaac Sim Stage

在Isaac Sim中,原始体"Prim" 可以被理解为primitive,简而言之,“Prim” 在 USD 中是用来组织场景数据的基本单元,"Prim"可以包含其他 “Prim” 和属性,用于构建场景的层次结构和存储数据。最简单的说法就是:“仿真器中的基本对象”
A Prim is the primary container object in USD: prims can contain (and
order) other prims, creating a “namespace hierarchy” on a Stage, and
prims can also contain (and order) properties that hold meaningful
data. Prims, along with their associated, computed indices, are the
only persistent scenegraph objects that a Stage retains in memory, and
the API for interacting with prims is provided by the UsdPrim class.
从图中可以看到,在World作为defaultPrim下有在之前的案例中创建的Sphere和Cube。
1.创建一个Xform
依次选择Create->Xform来创建一个基本的Xform,这个Xform默认是在World(defaultPrim)下。
在通用场景描述 (USD) 的上下文中,“Xform” 是一种特殊的 “prim”,它用于表示物体的变换信息,用于控制场景中物体的位置、旋转和缩放。
Xform是 transform的缩写,代表一个变换矩阵,用于表示场景中对象的变换。
Xform提供了一种分层组织和构建场景的方法,支持变换的继承。
The Xform (short for “transform”) is a fundamental concept in USD
(Universal Scene Description), which is the underlying technology used
by Omniverse Kit. An Xform is a type of USD prim that represents a
transformation matrix. It can be used to control the position,
rotation, and scale of objects in a scene.

2.构造铰接式物体( articulated objects)
Articulated objects是指那些由多个互相连接的部分(如关节或链节)组成的物体。这些关节或链节允许对象在其内部构建中进行运动和变形。Articulated objects常常用于机器人。
在Stage里将Cube拖到刚才新添加的Xform里,这个Cube将作为Xform的Child,随后将Xform拖动到Sphere,这个Xform将作为Sphere的Child。同理,对于机器人而言,机械臂不同的关节在Isaac Sim里也是类似的关系。

提示: 在2023.1.0版本中在通过Xform构建不同prim父子关系时出现该问题,该问题在旧版本中不存在,等待官方修复。如有疑惑可查看相关issue。

3.感受铰接式关系
- 拖拽立方体并观察立方体的Transform
当Sphere->Xform->Cube铰接在一起时,Cube的Transform将是相对于它的父对象的局部变换,如下图所示,Cube在相对于父对象的[-2,1,0]处,Cube的父对象是Xform,而Xform的父对象是Sphere。

- 拖拽Sphere
拖拽Sphere将会发现,当Sphere移动时,Cube也跟着移动了,这是因为Sphere是Xform的父对象,而Xform是Cube的父对象,Cube将继承来自父对象树的变换属性。
因此,在Isaac Sim中,假设有一台铰接关系的六轴机械臂,当拖动机械臂底座(base_link)时,整台机械臂也会被拖着做相同的运动,这是因为机械臂底座(base_link)通常是机械臂的根坐标系所在,它是机械臂这个个体的最高级父对象。

4.感受环境
除了world中的各个单位,在Stage舞台里还有和World平级的Environment,可以看到一个defaultLight,它提供了环境的基本光源

- 拖转相机视角
拖拽相机视角,可以发现这个光在世界的头部,默认的环境光照增强了仿真的真实感,同时也提供了基本的照明。

- 将
defaultLight设为不可视
尝试在Stage里将defaultLight设置为不可见状态,查看关闭后的状态。


- 感受环境默认平行光照
按下鼠标中键将相机视野不断拉远,可以发现默认环境光是平行光(Directional Light),其中一个原因是太阳光是平行光,主要原因是为了在没有明确定义的光源时,确保场景中的对象仍然可见。

- 改变环境里的默认光照
点击Stage里的defaultLight,调整defaultLight的Transform,你会发现这是一个方向可以调整的光源,在这里Translate和Scale也是可调的,但调节这两个属性没有意义,因为平行光通常只需要考虑Orient。

Transform只是Property的一种,在Property里继续往下寻找,找到Light,随意修改光的属性,比如此处修改了Color。

此时可以看到,照在物体上的默认光照,不再是白色平行光。

调整窗口
如果对于Isaac Sim UI上的各类窗口需要调节,就按照符合直觉的边缘拖拽、吸附、或者是在Windows里去指定需要展示的窗口

基本快捷键
对于基本的快捷键,需要掌握如下,可以使得Isaac Sim的使用更加流畅:
| 类型 | 键位 | 效果 |
|---|---|---|
| 基本操作 | 鼠标左键 | 选中 |
| 基本操作 | ESC | 取消选中 |
| 视野操作 | 鼠标左键点击目标+F | 聚焦于目标物体 |
| 视野操作 | 不选中目标+F | 聚焦于整个场景 |
| 视野操作 | 鼠标左键+Alt | 调整视野 |
| 视野操作 | 鼠标右键+Alt | 缩放视野 |
| 视野操作 | 鼠标中键 | 平移视野 |
| 视野操作 | 鼠标右键+W | 镜头向前移动 |
| 视野操作 | 鼠标右键+S | 镜头向后移动 |
| 视野操作 | 鼠标右键+A | 镜头向左移动 |
| 视野操作 | 鼠标右键+D | 镜头向右移动 |
使用Python进行独立操作
在此前介绍的工作流程中,Isaac Sim除了GUI,还可以用独立的Python程序启动NVIDIA Omniverse Isaac Sim,手动进行渲染和物理模拟的步进操作,以确保步进仅在执行一组命令后才发生。以下是一个Franka机械臂的拖动Python独立案例。
设置环境变量
首先,确保已设置工作站Isaac Sim包的环境变量。工作站包的根文件夹通常位于~/.local/share/ov/pkg/isaac_sim-2023.1.0-hotfix.1。
# Set environment variable for isaac package quick visit
echo "ISAAC SIM ENV VISIT SETTINGS"
echo "export isaacrepo=~/.local/share/ov/pkg/isaac_sim-2023.1.0-hotfix.1" >> ~/.bashrc
# Check environment variable
source ~/.bashrc
echo $isaacrepo
运行示例演示
接下来运行示例演示,尝试通过拖动TargetCube方块来移动目标,而Franka机械臂会跟随目标移动。
# Go to isaac sim package directory
cd $isaacrepo
# Run demo
./python.sh standalone_examples/api/omni.isaac.franka/follow_target_with_rmpflow.py
这个示例演示使用Isaac Sim包自带的python脚本来运行对应的示例代码。
通过图形界面中的交互方式,实时控制Franka机械臂跟随目标物体的运动。
此处附上Nvidia的官方示例代码,但并不详细解释代码的内容,这将在之后的课程中涉及。
# Copyright (c) 2021-2023, NVIDIA CORPORATION. All rights reserved.
#
# NVIDIA CORPORATION and its licensors retain all intellectual property
# and proprietary rights in and to this software, related documentation
# and any modifications thereto. Any use, reproduction, disclosure or
# distribution of this software and related documentation without an express
# license agreement from NVIDIA CORPORATION is strictly prohibited.
#
from omni.isaac.kit import SimulationApp

simulation_app = SimulationApp({"headless": False})

from omni.isaac.core import World
from omni.isaac.franka.controllers.rmpflow_controller import RMPFlowController
from omni.isaac.franka.tasks import FollowTarget

my_world = World(stage_units_in_meters=1.0)
my_task = FollowTarget(name="follow_target_task")
my_world.add_task(my_task)
my_world.reset()
task_params = my_world.get_task("follow_target_task").get_params()
franka_name = task_params["robot_name"]["value"]
target_name = task_params["target_name"]["value"]
my_franka = my_world.scene.get_object(franka_name)
my_controller = RMPFlowController(name="target_follower_controller", robot_articulation=my_franka)
articulation_controller = my_franka.get_articulation_controller()
while simulation_app.is_running():
    my_world.step(render=True)
    if my_world.is_playing():
        if my_world.current_time_step_index == 0:
            my_world.reset()
            my_controller.reset()
        observations = my_world.get_observations()
        actions = my_controller.forward(
            target_end_effector_position=observations[target_name]["position"],
            target_end_effector_orientation=observations[target_name]["orientation"],
        )
        articulation_controller.apply_action(actions)

simulation_app.close()
相关资料
如果需要了解更多的界面操作,可以参考Isaac sim user interface。


 5604
5604

 被折叠的 条评论
为什么被折叠?
被折叠的 条评论
为什么被折叠?
 到【灌水乐园】发言


